










Porch Swing DIY: Build Your Perfect Outdoor Retreat from Scratch
Introduction: Why a DIY Porch Swing Is Worth Every Effort
There is something timeless and deeply satisfying about a porch swing. It conjures images of lazy summer afternoons, the gentle creak of wood, a glass of lemonade in hand, and the unhurried pace of a life well lived. A porch swing is not merely a piece of outdoor furniture — it is an invitation to slow down, breathe, and connect with the people you love. Building one yourself adds an extra layer of meaning that no store-bought product can replicate.
A DIY porch swing project is surprisingly accessible for woodworkers of all experience levels. Whether you are a seasoned carpenter with a fully equipped workshop or a weekend hobbyist armed with basic tools, the process is straightforward when broken into manageable steps. The materials are widely available at most home improvement stores, the cost is significantly lower than purchasing a ready-made swing, and the result is a custom piece tailored exactly to your porch dimensions and personal style.
Beyond the practical advantages, building your own porch swing offers a deeply rewarding creative experience. You choose the wood species, the finish, the dimensions, and the hardware. You decide whether your swing will have a rustic farmhouse character, a sleek modern profile, or a classic cottage charm. This guide will walk you through every stage of the process, from planning and material selection all the way through finishing and hanging, so you can step back and admire a beautiful swing that you built with your own hands.
What to Expect from This Guide
This comprehensive guide is designed to give you everything you need to complete a sturdy, comfortable, and beautiful porch swing from start to finish. We will cover material selection in depth, provide a complete tools list, walk through the cutting and assembly process step by step, discuss finishing options to protect your swing from the elements, and explain exactly how to hang it safely so it supports weight reliably for years to come.
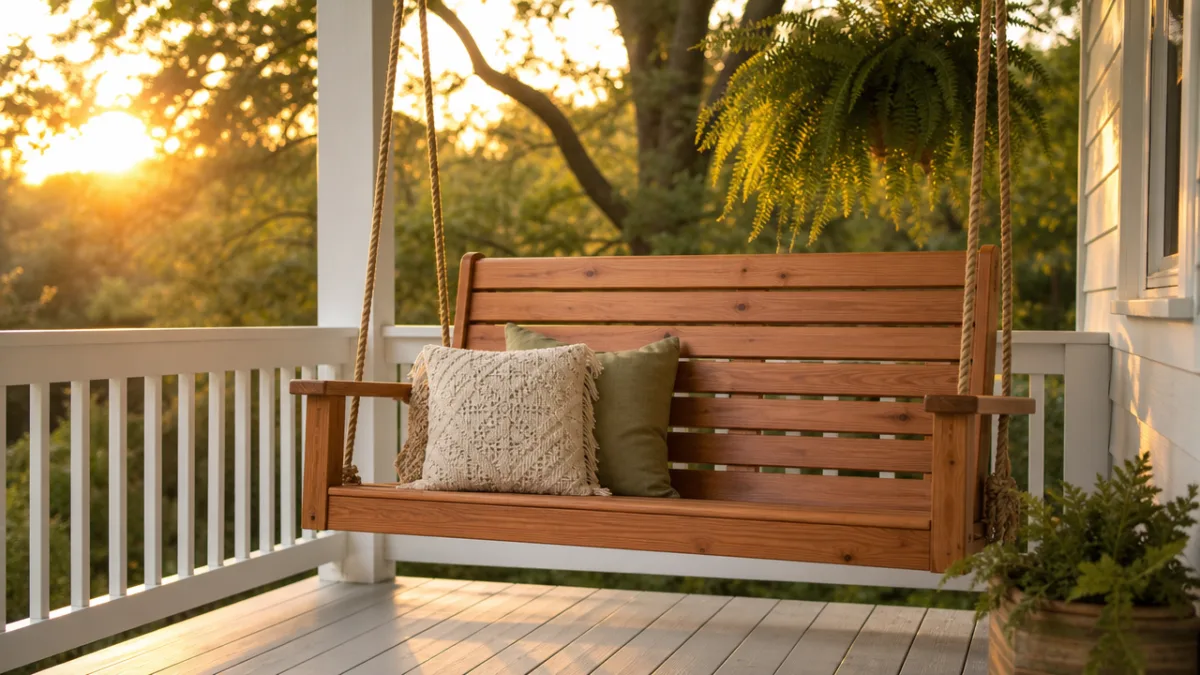
The design featured here is a classic flat-back porch swing approximately 48 to 52 inches wide, sized comfortably for two adults. It features evenly spaced seat slats, angled back slats for ergonomic comfort, sturdy armrests, and a simple but elegant overall silhouette. You can scale the dimensions up or down to fit your specific porch, and the same construction techniques apply regardless of size adjustments you choose to make.
Materials and Tools: Setting Yourself Up for Success
Choosing the right lumber is the single most important decision you will make for this project. Because a porch swing lives outdoors and endures rain, humidity, UV exposure, and temperature swings throughout the seasons, you need a wood species that handles moisture well and resists rot naturally. The top choices are cedar, redwood, and pressure-treated pine. Cedar is the most popular option among DIY builders because it is lightweight, naturally rot-resistant, easy to work with, takes paint and stain beautifully, and is available at virtually every lumber yard across North America.
For a standard 48-inch two-person swing, you will need the following lumber. A good lumber list keeps your shopping trip efficient and prevents frustrating mid-project runs back to the store. The list below is based on using 1×4 and 2×4 cedar boards, which strike the ideal balance between strength and weight for a hanging swing application.
- Four pieces of 2×4 cedar, 8 feet long (for the seat frame, back frame, and armrest supports)
- Eight pieces of 1×4 cedar, 4 feet long (for seat slats and back slats)
- Two pieces of 2×6 cedar, 4 feet long (for the front and rear seat supports)
- One piece of 1×6 cedar, 4 feet long (for the top back rail)
- Exterior-grade 2.5-inch deck screws, at least 150 count
- Eye bolts rated for at least 500 lbs each, four total
- Galvanized swing chain or braided rope rated for outdoor use and 600-lb load capacity
- Wood glue rated for exterior applications
Regarding tools, you do not need an elaborate workshop to complete this project successfully. A circular saw or miter saw handles all your cuts cleanly and accurately. A power drill with assorted bits drives screws efficiently and makes pilot holes to prevent wood splitting. A sander — either a random orbital model or a belt sander — smooths surfaces before finishing. A tape measure, carpenter’s square, clamps, and a level round out the essential toolkit. If you have access to a pocket-hole jig, it will strengthen your joinery considerably and give the finished piece a cleaner, more professional appearance.
Optional Upgrades and Customizations
While the basic material list above produces a beautiful and functional swing, there are several optional additions that can elevate the finished product significantly. Outdoor cushions in a weather-resistant fabric like Sunbrella transform the comfort level dramatically and make long swinging sessions genuinely luxurious. A cup holder attachment built into one armrest is a small but deeply appreciated detail that adds everyday functionality to an already enjoyable piece of furniture.
For hardware, consider upgrading from basic chain to decorative black-powder-coated swing chain, which adds a farmhouse or industrial aesthetic touch that looks especially striking against natural cedar. Alternatively, thick nautical rope in natural manila or synthetic hemp creates a coastal or rustic look and is incredibly strong when properly knotted. Stainless steel hardware is worth the small additional cost in coastal environments where salt air accelerates corrosion of standard galvanized fittings.
Cutting and Preparing Your Lumber
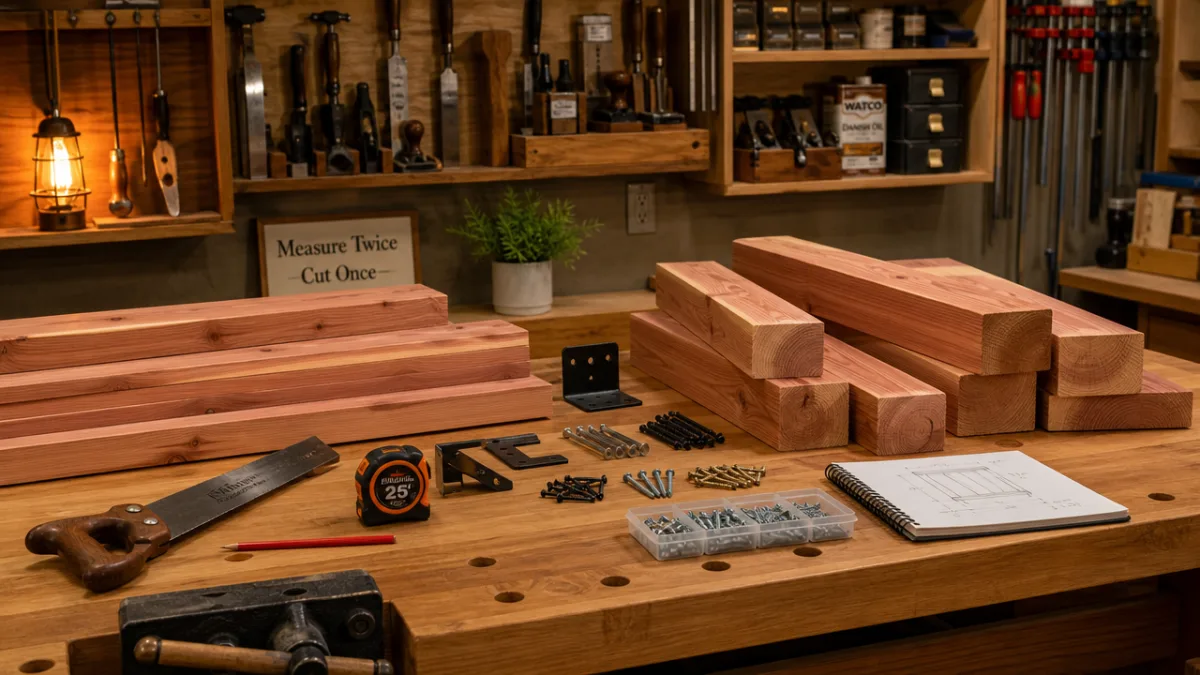
Before any sawing begins, take time to plan your cuts carefully on paper and mark each board clearly with a pencil. Good preparation at this stage saves lumber, prevents costly mistakes, and makes the assembly phase go smoothly and quickly. Lay all your boards out in your workspace and inspect each one for knots, cracks, warping, or other defects. Minor knots in cedar are largely cosmetic and acceptable, but avoid boards with large through-knots in structural locations like the seat frame sides or armrest supports where strength matters most.
The seat frame is the structural backbone of your swing, so cut these pieces with care and precision. Cut your two main side rails from 2×4 stock at 20 inches long each. These will form the sides of the seat box that supports your weight. Cut your front and rear seat supports from 2×6 stock at 48 inches long. The extra width of the 2×6 provides a broad, stable bearing surface for the seat slats and contributes meaningfully to the overall rigidity of the frame. Use a miter saw for these cuts whenever possible, as a clean 90-degree cut on every piece ensures tight-fitting joints throughout assembly.
The back frame requires a slightly different approach because ergonomically comfortable porch swings feature a back that angles slightly rearward rather than sitting perfectly vertical. An angle of approximately 5 to 8 degrees from vertical is ideal — enough to make you feel cradled and relaxed without tipping you backward uncomfortably. To achieve this, cut the two back upright supports from 2×4 stock with a 7-degree angle at the top end. This is a simple angled cut that any miter saw can handle with a quick bevel adjustment. Cut these uprights to 24 inches measured along the long face.
Sanding for a Smooth, Professional Finish
Once all your pieces are cut, sand every board before assembly rather than after. Sanding individual flat boards is dramatically easier than sanding the assembled swing, where tight corners and narrow gaps between slats make thorough sanding nearly impossible. Begin with 80-grit sandpaper to remove any mill marks, rough spots, or saw blade marks from the cut edges. Follow with 120-grit to refine the surface further, and finish with 150 or 180-grit for a silky-smooth result that takes stain or paint evenly and beautifully.
Pay particular attention to the edges and end grain of every board. Rounding over sharp edges very slightly — either with a router and a small roundover bit, or simply by hand-sanding the corners — gives the finished swing a refined, intentional look that distinguishes handcrafted work from rough DIY builds. It also makes the swing far more comfortable to grip and lean against, eliminating any risk of splinters catching skin or clothing during use.
Assembly: Putting It All Together
Assembly goes most smoothly when you work in a logical sequence: build the seat frame first, add the back frame, attach the slats, then add the armrests last. Start by attaching the front and rear 2×6 supports between the two 2×4 side rails using exterior wood glue and 2.5-inch deck screws. Drill pilot holes before driving every screw to prevent cedar from splitting — this is especially important near the ends of boards where splitting pressure is highest. Clamp each joint while the glue sets if possible, even if you are also using screws, for the strongest possible connection.
With the seat box frame assembled and square — check by measuring diagonally corner to corner in both directions; equal measurements confirm a perfect square — begin attaching the seat slats. Space the 1×4 seat slats evenly across the frame with a consistent gap of approximately half an inch between each board. This spacing allows water to drain freely rather than pooling, which is critical for long-term wood health in an outdoor environment. A simple spacer cut from scrap wood ensures consistent gaps across all slats without measuring each one individually.
Attach the back frame uprights to the rear of the seat frame side rails, maintaining your chosen back angle consistently on both sides. A bevel gauge or a simple angle guide cut from scrap ensures both uprights sit at exactly the same angle, which is essential for a back that feels balanced and comfortable rather than twisted or uneven. Once the uprights are securely attached, install the back slats working from bottom to top, again using consistent spacing blocks. Finish the back by attaching the wide 1×6 top rail across the tops of both uprights, which caps the back beautifully and adds rigidity to the entire back frame structure.
Installing the Armrests
The armrests are among the most visible and tactile elements of the finished swing, so take extra time to shape and finish them nicely. Cut your armrests from 2×6 stock at approximately 20 inches long and round the front outer corner generously using a jigsaw or bandsaw, then smooth the curve with sandpaper. A nicely rounded armrest corner looks elegant and feels comfortable to rest your arm on — small design details like this elevate the overall quality perception of your finished piece considerably.
Support each armrest from below with a vertical 2×4 post cut to the appropriate height so the armrest sits at a comfortable height above the seat surface, typically 7 to 9 inches depending on your preference. Attach the armrest support post to the outer face of the seat frame side rail and to the back upright using screws driven from multiple directions for maximum rigidity. Then secure the armrest to the top of the support post and to the top of the back upright with two screws at each connection point, again drilling pilot holes first to prevent splitting.

Finishing: Protecting and Beautifying Your Swing
The finish you apply to your porch swing plays an enormous role in both its appearance and its longevity. An unfinished cedar swing will weather to an attractive silvery-gray over time if you appreciate that aesthetic, but it will also dry out, crack, and become more susceptible to moisture damage without some form of protective treatment. For most builders, applying a finish is well worth the relatively modest additional time and cost it requires, especially given the effort already invested in building the piece.
Exterior wood stain is the most popular finishing choice for cedar porch furniture for good reason. A semi-transparent oil-based exterior stain penetrates the wood fibers rather than sitting on top as a film, which means it won’t peel or flake as the wood expands and contracts with seasonal temperature changes. It enhances the natural grain and warm tone of cedar while providing meaningful UV protection and water resistance. Apply two coats with a brush or foam roller, allowing full drying time between coats as specified by the manufacturer. Wipe away any drips or runs before they dry for a clean result.
Exterior paint is an excellent alternative if you prefer a specific color to complement your home’s palette. A solid exterior acrylic latex paint in a semi-gloss or satin sheen provides excellent weather protection and is easy to clean. The key to a durable painted finish on outdoor wood is proper surface preparation: sand thoroughly, apply an exterior-grade primer coat, allow it to cure fully, sand lightly again with 220-grit, then apply two topcoats of your chosen paint color. Rushing this process by skipping the primer or insufficient drying time between coats is the most common cause of premature paint failure on outdoor furniture.
Reapplication and Long-Term Maintenance
Even the best exterior finish requires periodic reapplication to maintain its protective properties over the years. Plan to inspect your swing each spring and assess the finish condition. If water no longer beads on the surface but instead soaks in immediately, or if you notice fading, cracking, or areas of bare wood, it is time to clean the surface and apply a fresh coat of stain or paint. This annual or biannual maintenance routine takes only a couple of hours and dramatically extends the life of both the finish and the underlying wood.
Storing swing cushions indoors during winter months or during extended rainy periods prevents mildew growth and keeps them looking fresh season after season. A simple breathable canvas storage bag works well for this purpose. For the swing itself, bringing it indoors during harsh winter conditions is ideal when storage space allows, but a well-finished swing of quality cedar construction can absolutely handle year-round outdoor exposure in most climates with proper maintenance.
Hanging Your Porch Swing Safely and Correctly
Hanging a porch swing safely is arguably the most critical phase of the entire project, because an improperly installed swing that fails under load can cause serious injury. The swing must be anchored into the structural framing of your porch ceiling — specifically into solid ceiling joists — not simply into the ceiling drywall or porch decking boards. Before purchasing any hanging hardware, spend time locating your porch ceiling joists using a stud finder, then verify their location by driving a small test nail to confirm solid wood beneath the ceiling surface.
Use screw-in eye bolts with a minimum diameter of 3/8 inch and a rated load capacity well above the maximum expected load. A good rule of thumb is to select hardware rated for at least three times your anticipated maximum load. For a swing that might hold two adults plus dynamic swinging forces, that means selecting eye bolts rated for at least 800 to 1000 pounds each. Drill a pilot hole slightly smaller than the shank diameter of your eye bolt, apply a small amount of wood glue or thread-locking compound to the threads, then screw the eye bolt in by hand or with a bar through the eye for leverage, driving it in fully until the eye sits flush against the ceiling.
Position the front and rear hanging points so the swing hangs level when occupied, with the seat pitched very slightly rearward — approximately 1 to 2 inches lower at the back than the front. This gentle backward pitch is the ergonomic sweet spot that makes a porch swing feel relaxing and secure rather than like you might slide forward off the seat. Connect your chains or ropes from the ceiling eye bolts down to the eye bolts installed at the four corners of your swing, adjusting length until you achieve your desired hanging height above the porch floor, typically 17 to 19 inches at the front seat edge for comfortable mounting.
Final Safety Check Before Your First Swing
Before you sit down and enjoy your new swing, perform a thorough safety check of every connection point in the system. Tug firmly on each chain or rope segment, inspect each eye bolt connection at both the ceiling and the swing frame, and verify that all swing frame screws are tight and that no joints show any sign of movement or instability. Load the swing gradually rather than jumping onto it for the first time — sit down carefully, shift your weight around, bounce gently, and confirm everything feels solid and secure before relaxing fully into it.
It is also wise to re-check all hardware connections after the first few weeks of use, as wood can compress slightly under load and eye bolt threads can back out marginally during initial settling. A quick once-over with a wrench and visual inspection each spring as you bring your cushions back out for the season will keep everything tight, safe, and reliable for many years of enjoyment. A well-built, properly maintained DIY porch swing routinely lasts 15 to 20 years or more, making it one of the best investments of time and effort in any outdoor living space.
Conclusion: Enjoy the Fruits of Your Labor
Completing a porch swing from raw lumber to a finished, hanging piece of outdoor furniture is one of the most satisfying DIY accomplishments a woodworker of any skill level can achieve. The project is manageable in scope, typically completable over two to three weekends, yet the finished result is something substantial, beautiful, and genuinely useful that you will enjoy every single day of the warm-weather season. Few home improvements deliver such a high ratio of enjoyment to effort and cost.
The skills you develop and reinforce while building a porch swing — accurate measuring and cutting, clean joinery, proper wood finishing, and safe hardware installation — translate directly to dozens of other woodworking and home improvement projects. Building this swing may well be the beginning of a more ambitious woodworking journey, leading to other outdoor furniture pieces, interior projects, or even structural work around your home. Every project you complete builds confidence, competence, and a more fully equipped workshop.
Most importantly, the swing you build becomes part of your home’s story. It becomes the place where you drink your morning coffee watching the neighborhood wake up, where you read novels on summer afternoons, where conversations stretch long into warm evenings. Years from now, the fact that you built it yourself — that you selected the wood, cut each board, drove each screw, and hung it with your own hands — will make every moment spent on it that much richer. So gather your materials, clear your workspace, and start building the porch retreat you deserve.








What do you think?
It is nice to know your opinion. Leave a comment.