










Quick and Easy Mesh Pouch Free Crochet Pattern: Your Complete Guide
Introduction to the Mesh Pouch Crochet Pattern
Crochet is one of those crafts that just keeps giving — whether you’ve been at it for years or you’re still figuring out which end of the hook to hold, there’s always a project that feels perfectly suited to where you are. And honestly? The mesh pouch might be one of the best starter-meets-satisfying projects out there. It’s open and airy, it looks way more impressive than the effort involved, and you’ll actually use the thing when you’re done.
What makes a mesh pouch so approachable is that the pattern is built around a simple, repeating stitch that you’ll have memorized before you’re even halfway through. No complex charts, no tricky stitch sequences. Just a satisfying rhythm that produces that signature net-like look. Beginners get to finish something they’re genuinely proud of, and more experienced crocheters get a quick, low-effort project for an afternoon when they just want to make something without thinking too hard.
And the best part? This pattern is completely free. Good, well-explained crochet patterns can cost real money, so finding one that’s detailed and actually useful without any price tag feels like stumbling onto something special. Whether you’re working with a tight craft budget, looking for quick gift ideas, or just expanding your go-to pattern library, this mesh pouch delivers — and all it costs you is yarn and time.
Materials and Tools You Will Need
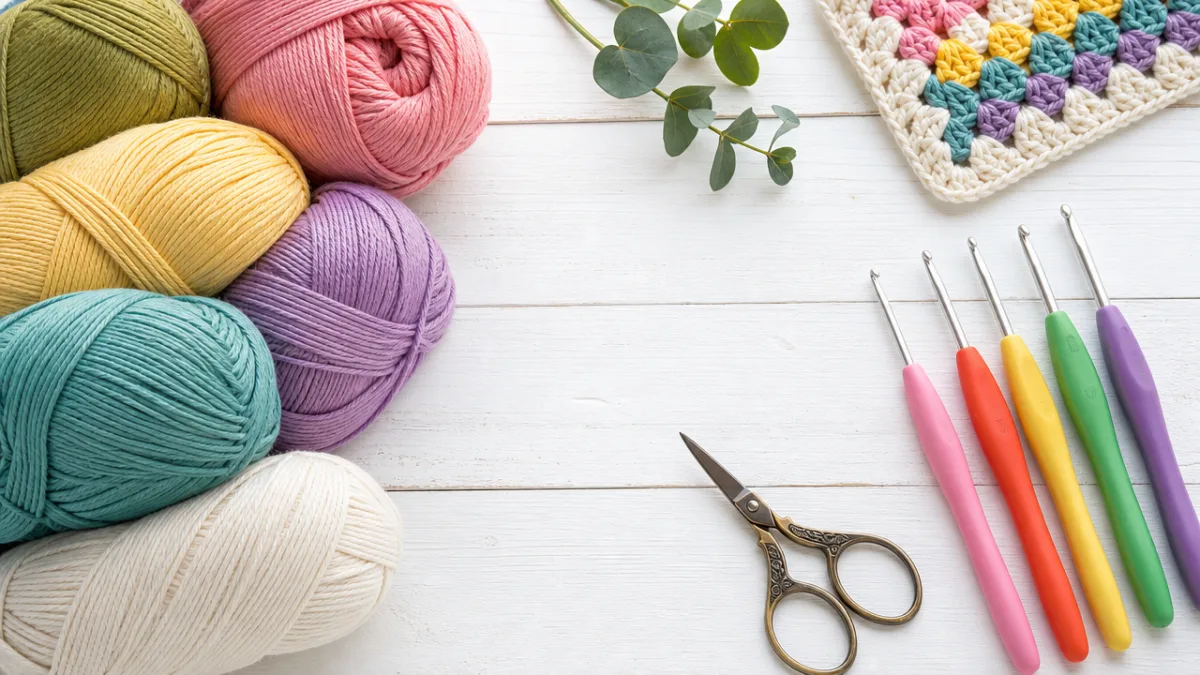
Before you start any crochet project, getting your materials sorted makes the whole process so much smoother. The good news here is that the supply list for this pouch is short. You’ll need yarn — and cotton is really the sweet spot for this kind of project. It holds its shape, washes without a fuss, and has just enough structure to keep the mesh looking crisp rather than droopy.
Yarn weight matters more than you might expect. A light worsted or DK weight cotton tends to hit the right balance between durability and that open, delicate look you’re going for. That said, this pattern is wonderfully adaptable — grab something bulkier if you want a sturdier bag, or go with fine thread if you’re aiming for something tiny and lace-like. The pattern scales naturally with whatever weight you choose, no complicated math required.
For tools, you’ll want a hook that suits your yarn — usually a 4mm or 4.5mm for light worsted cotton, but always check your yarn label and do a quick swatch if sizing matters to you. Beyond that, grab a yarn needle for weaving in ends, scissors, and a stitch marker if you plan to work in the round (trust me, it helps). You’ll also want something for the drawstring — ribbon, a length of coordinating yarn, whatever feels right for the look you’re going for.
- Light worsted or DK weight cotton yarn (approximately 100–150 yards depending on desired size)
- Crochet hook in a size appropriate for your yarn (typically 4mm–4.5mm)
- Yarn needle for finishing and weaving in ends
- Sharp scissors
- Stitch marker (optional but helpful for working in the round)
- Ribbon or coordinating yarn for a drawstring closure
Understanding the Mesh Stitch Foundation
The mesh stitch is really what this whole pouch is about, so it’s worth taking a moment to understand how it actually works — not just so you can follow the pattern, but so you can troubleshoot if something feels off and tweak things to suit your own style. The basic idea is simple: you alternate chain spaces with single or double crochet stitches. Those chain spaces create the holes, the crochet stitches hold everything together, and together they produce that beautiful, netted fabric the pouch is known for.
If you’re fairly new to crochet, here’s some reassuring news — the mesh stitch is actually pretty forgiving. Because the gaps are supposed to be there, small inconsistencies in your tension are far less noticeable than they would be in something like a solid single crochet fabric. Your tension can shift a little from row to row and the finished piece will still look intentional and lovely. That’s a big part of why this pattern gets recommended so often for people who are still building confidence and consistency.
You can work the mesh stitch either flat in rows or in the round — both work well and which you choose really comes down to personal preference. Working in the round gives you a seamless tube for the pouch body, which looks clean and professional and skips the seaming step entirely. Working flat and then seaming the sides is perfectly valid too, and might feel more comfortable if you’re still getting used to joined rounds. This guide covers both approaches so you can go with whatever feels right for you.
Step-by-Step Pattern Instructions
Start by making your foundation chain. For a pouch roughly 5 inches wide, chain 30 — and try to keep it on the looser side. A tight foundation chain makes that first row of stitches much harder to work into and can cause the bottom edge of your pouch to pucker and pull. If you’re working in the round, join the chain into a ring with a slip stitch, making sure it isn’t twisted before you close it up. If you’re working flat, just turn and head straight into your first row.
For the mesh pattern itself: chain 3 (this acts as your first double crochet), skip one stitch, double crochet into the next, then repeat chain 1, skip 1, double crochet all the way across. When working flat, chain 3 and turn at the end of each row. When working in the round, join each round to the top of your starting chain-3 with a slip stitch and begin the next round the same way. Keep going until the pouch is as tall as you want it — somewhere between 10 and 15 rows usually gets you to a nice 4 to 5 inch height for a small pouch.
When you’ve reached your desired height, don’t fasten off yet. You’ll want to add a drawstring channel at the top. Work one round of single crochet around the opening, then a row of chain-2 eyelets: chain 2, skip one stitch, single crochet into the next, all the way around. Finish with one more round of single crochet to keep the eyelets stable. This channel is what gives the pouch its neat, finished look — and it’s what your drawstring will thread through to actually close the bag.
- Create a foundation chain of 30 stitches (adjust for desired width).
- Join into a ring or begin working flat, depending on your preferred construction method.
- Work the mesh pattern: chain 3, skip 1, double crochet, chain 1, repeat across.
- Continue the mesh pattern for 10–15 rounds or rows to reach desired height.
- Create the drawstring channel with a row of eyelets near the top edge.
- Finish with a stabilizing round of single crochet around the top opening.
- Fasten off and weave in all ends securely with your yarn needle.
- Thread ribbon or yarn through the eyelets to create the drawstring closure.
Once the body and drawstring channel are done, fasten off and weave in your ends with the yarn needle — run them through at least several stitches in different directions so they stay put through use and washing. Trim any remaining tails close to the fabric. Then thread your drawstring through the eyelets: satin ribbon, a twisted yarn cord, even simple kitchen twine all look great. Pull both ends to the same side, tie them together, and you’re done.
Customization Ideas and Creative Variations
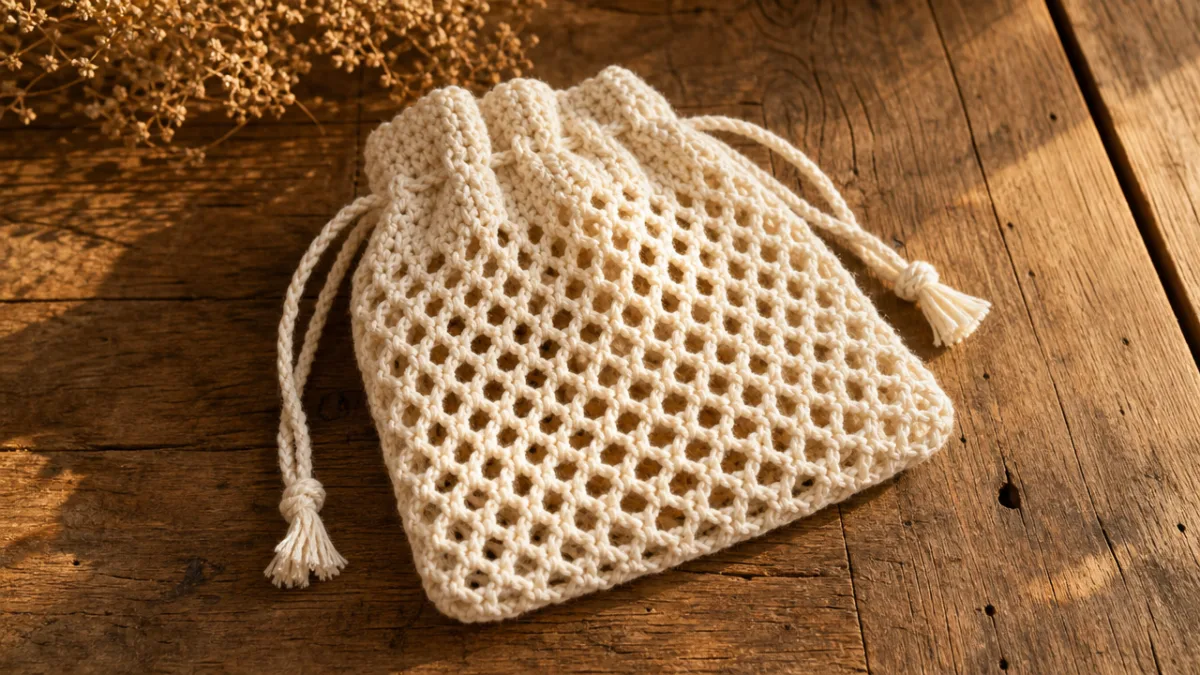
The basic pattern is really just a starting point. Once you’ve got the structure down, there’s so much room to make it your own. The most obvious place to start is color — even a simple color swap completely changes the feel of the finished pouch, and the open mesh structure means that light plays through the holes in a way that makes solid-colored yarn look almost variegated. Small touches, big impact.
You can also scale the size up or down pretty dramatically without changing anything fundamental. A longer chain and more rows will get you something big enough to use as a market bag for produce or library books. A shorter chain and fewer rows gives you a tiny, delicate pouch — perfect for jewelry, earbuds, or lip balm. You can even open up the mesh holes by adding an extra chain stitch in each space or by sizing up your hook, which creates a more dramatic, drapey look. Just keep in mind that bigger holes are better suited to bulkier contents that won’t slip right through.
Decorative additions are another fun avenue. Crochet a small flower or leaf and stitch it onto the front for a sweet botanical touch. Add a row of beads along the bottom edge for something a little more bohemian. Use a contrasting color for the drawstring channel rows to create a bold accent stripe that highlights the structure of the design. Because each pouch works up so quickly, you can afford to experiment — if one version doesn’t quite land, you haven’t lost much time at all.
- Experiment with gradient or hand-dyed yarn for a multicolor effect that develops as you crochet.
- Try jute or hemp twine for an eco-friendly, rustic market bag version.
- Add a crochet flower or leaf appliqué for a whimsical decorative touch.
- Use a contrasting color for the drawstring channel rows to create a bold striped accent.
- Line the pouch with fabric for a more structured bag that conceals the contents.
- Crochet the base as a flat circle and seam it to the body for a rounded bag bottom.
Practical Uses and Gift Ideas for Your Mesh Pouch
These pouches aren’t just cute — they’re genuinely handy in everyday life. The open mesh construction is actually ideal for things that need a bit of airflow, like soaps, bath bombs, or shampoo bars. A mesh pouch is one of the most popular plastic-free alternatives for bathroom storage precisely because it lets bar soap dry out properly between uses instead of sitting in a puddle. Practical, pretty, and eco-friendly all at once.
Scale things up a bit and you’ve got a great reusable produce bag. A slightly larger version in sturdy cotton or linen can easily hold apples, citrus, garlic, or loose herbs at the farmer’s market or grocery store — no plastic bags needed. This kind of use has made crocheted mesh bags a favorite in zero-waste communities, and a handmade set of produce pouches makes a genuinely thoughtful gift for anyone trying to cut down on single-use plastic.
Speaking of gifts — these pouches are incredibly giftable on their own too. Fill a small one with bath salts or loose-leaf tea for a lovely self-care gift. Tuck a skein of yarn and a hook into a slightly bigger one for a fellow crafter. Use them in place of gift bags for small jewelry, candles, or boutique items at birthdays, holidays, or weddings. And because they work up so quickly, you can easily make a whole coordinating set in different sizes — that’s the kind of handmade gift that people actually keep and use, long after any store-bought option would have been forgotten.

Tips for Success and Troubleshooting Common Issues
Even with a forgiving pattern like this one, a few snags tend to come up — especially if you’re newer to crochet or working with a yarn you haven’t used before. The most common one is a foundation chain that’s too tight, which makes the bottom edge stiffer and narrower than the rest of the pouch. An easy fix: use a hook one size larger than your project hook just for that foundation chain, then switch back. It takes about five extra seconds and makes a noticeable difference in how the finished piece looks and feels.
Drifting stitch counts are another thing to watch for. In a mesh pattern, if you accidentally add or skip a stitch, the columns of double crochets start to wander out of alignment over the next few rows and the fabric can look uneven or slightly twisted. The simplest solution is to count your stitches at the end of each row or round until the pattern feels completely automatic — which usually happens faster than you’d expect. A stitch marker at the start of each round helps a lot too, since you’ll immediately notice if something’s off when you come back around to it.
Tension is worth paying attention to as well, though there’s no single “right” tension for this project — it really depends on what you’re making the pouch for. Tighter tension means smaller holes and a stiffer fabric, which works well for produce bags that need to hold their shape. Looser tension gives you bigger holes and a softer drape, which is lovely for decorative or gift pouches. If your tension is all over the place within a single project, try slowing down a little and keeping your hook movement steady and consistent through each chain space.
Finally, don’t rush the finishing. The gap between a nice crochet project and a really polished one is almost always in the details — specifically in how well the ends are woven in and whether you blocked the finished piece. Weave each end through at least four or five stitches in multiple directions so it won’t work loose over time. And then block it: just dampen the pouch, pin it to shape, and let it dry flat. With cotton yarn especially, blocking is transformative. What comes off the hook looking a little rumpled and uneven will dry into something crisp, smooth, and genuinely beautiful — the kind of finish that makes people ask where you bought it.








What do you think?
It is nice to know your opinion. Leave a comment.