










Easy DIY Plant Stand: Transform Your Space with Handcrafted Greenery Displays
Why Every Plant Lover Needs a DIY Plant Stand
There’s something genuinely satisfying about building your own plant stand from scratch. You get total creative control over how it turns out, and you can make something that actually fits your space, matches your style, and works for the specific plants you’re growing. Store-bought stands are fine, but they rarely land exactly where you want them, and the style options are pretty limited — they’re not designed with your home in mind, after all.
The cost savings are a real bonus too. With some basic lumber, a handful of hardware pieces, and finishing supplies, you can put together something that would easily run two or three times the price at a furniture or garden store. A lot of the gorgeous DIY plant stands you see all over Pinterest cost under thirty dollars to make — and they look like they came straight out of a professionally styled home.
Then there’s the part nobody really talks about enough: the pride of actually making it yourself. When a guest notices your plant display and asks where you got it, there’s nothing quite like saying “I built that.” That feeling is worth something, on top of having your plants looking beautifully elevated and arranged. Fair warning though — once you finish your first stand, you’ll probably already be sketching out the next one.
Choosing the Right Materials for Your Plant Stand
Your material choice will shape everything about the finished stand — how durable it is, how it looks, and how much work the build takes. Wood is the go-to for most people, beginners and experienced DIYers alike, because it’s easy to cut, sand, stain, and make your own. Pine is the budget-friendly option you’ll find at any hardware store; cedar naturally fights off moisture and bugs; and plywood is a great pick if you’re going for a more geometric or flat-paneled look.
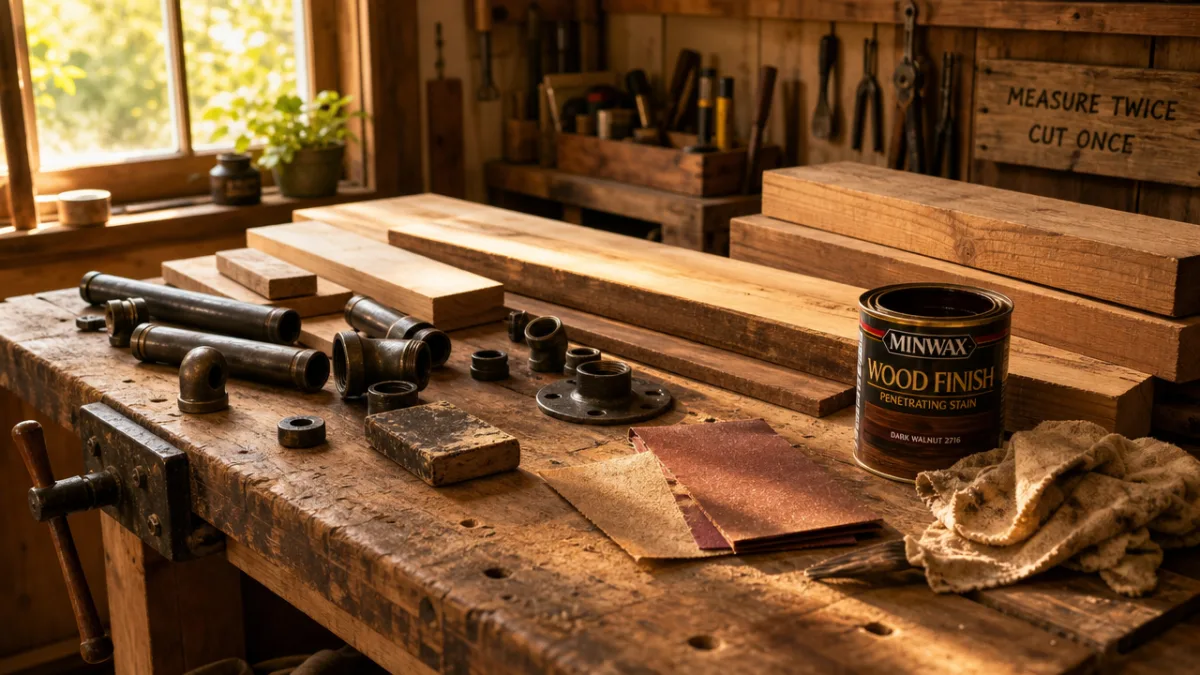
If you’re drawn to an industrial or modern farmhouse vibe, try pairing wood with black iron pipe fittings. You can find them at most hardware stores, and they thread together without any welding. The combination of warm wood grain against matte black metal has become one of the most popular trends in DIY furniture right now, and the result looks way more expensive than it is. The pipes also add structural strength that a purely wooden build sometimes lacks.
For outdoor stands, material selection really matters. Pressure-treated lumber, teak, or powder-coated metal will hold up against rain, humidity, and temperature swings much better than plain untreated pine. If your stand is going on a porch, patio, or balcony, seal the wood well with an exterior-grade varnish or waterproof paint. Skip that step and you could end up with warping, splitting, and rot before the season’s even over — which is a frustrating way to end an otherwise great project.
Common Material Options at a Glance
- Pine lumber: Affordable, easy to work with, ideal for indoor stands and beginner projects.
- Cedar: Naturally moisture-resistant, slightly more expensive, great for humid environments or outdoor use.
- Plywood: Excellent for flat-pack or geometric designs, very stable and smooth for painting.
- Black iron pipe: Adds an industrial aesthetic, very durable, no welding required for basic builds.
- Teak or hardwood: Premium option with beautiful grain patterns, extremely durable, higher cost.
Essential Tools You Will Need
A lot of people assume you need a fully kitted-out workshop to tackle a woodworking project. You really don’t. A basic plant stand calls for just a few tools — most of which you probably already own or can pick up cheaply at any hardware store. The real essentials are a tape measure, a pencil for marking your cuts, a saw, sandpaper in a few different grits, and a drill for pilot holes and driving screws.
For cutting, a miter saw speeds things up and gives you cleaner results, but a regular handsaw works perfectly well for straight cuts in dimensional lumber. If you need angled cuts, a miter box is an inexpensive little accessory that guides a handsaw at common angles without needing a power tool at all. And if you’d rather skip cutting entirely, many hardware stores will cut your lumber to length for you for a small fee — a great option if you don’t own a saw or just don’t want to deal with it.
Don’t sleep on your finishing tools either. A good brush makes a noticeable difference in how the final coat looks. Foam rollers do a nice job on flat surfaces, while natural bristle brushes are the better choice for oil-based stains. One small tool worth having on hand is a tack cloth — it’s basically a sticky cheesecloth you use to wipe away dust right before you apply your finish. It sounds like a minor detail, but it’s the difference between a clean, professional-looking coat and one full of little bumps and specks.
Basic Tool Checklist
- Tape measure and pencil
- Saw (hand saw or miter saw)
- Power drill and drill bits
- Sandpaper (80, 120, and 220 grit)
- Clamps for holding pieces together during assembly
- Wood glue for reinforced joints
- Paintbrush or foam applicator
- Safety glasses and work gloves
Step-by-Step Instructions for a Classic Tiered Plant Stand
The tiered plant stand is one of the most popular DIY designs out there, and for good reason — it makes great use of vertical space without taking up much floor area. Two or three shelves at different heights let you mix plants of different sizes in a way that actually looks intentional and interesting. It’s a versatile piece too; it works just as well tucked into a living room corner as it does on a covered porch or in a bright bathroom where trailing plants can spill beautifully down from the upper tiers.
Start by cutting your lumber to size. For a three-tiered stand that’s roughly four feet tall, you’ll need four full-length legs, three shelf boards in graduated widths, and a handful of shorter cross braces to keep the legs stable. Once everything is cut, sand all your surfaces starting with 80-grit to knock off rough spots and mill marks, then work up to 120-grit and finish with 220-grit for a smooth, paint-ready surface. Sanding is the step beginners tend to rush, but it genuinely makes a huge difference in how polished the finished piece looks.
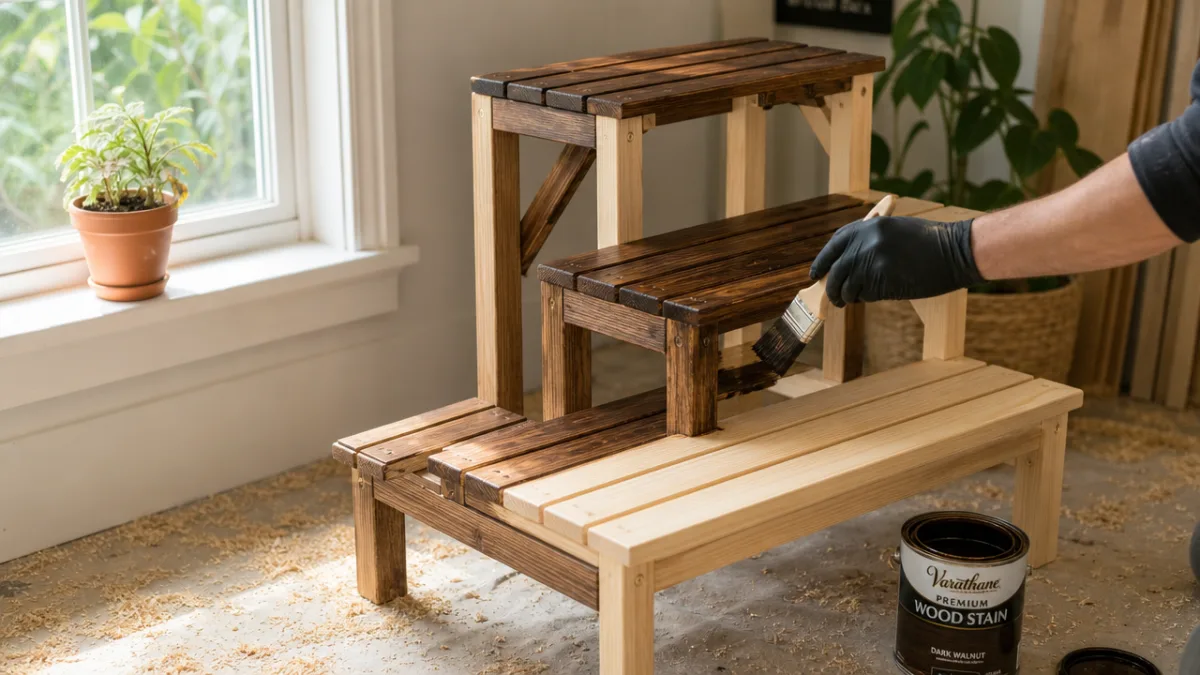
For assembly, start by attaching the cross braces between the legs to create two matching side frames. Use both wood glue and screws at every joint — glue adds a lot of strength to the connection. Once both side frames have dried, join them together with the shelf boards and check for square as you go, either with a carpenter’s square or by measuring diagonally corner to corner. If those diagonal measurements match, you’re square. Finish everything off with thin, even coats of your chosen stain or paint, giving each coat plenty of time to dry before you add the next one.
Detailed Cut List for a Standard Three-Tier Stand
- Legs: 4 pieces at 48 inches long, 1.5 x 1.5 inch square dowel or 2×2 lumber
- Top shelf: 1 piece at 10 x 10 inches, 3/4 inch thick board
- Middle shelf: 1 piece at 12 x 12 inches, 3/4 inch thick board
- Bottom shelf: 1 piece at 14 x 14 inches, 3/4 inch thick board
- Cross braces: 8 pieces at 8 inches long, 1×2 lumber
Finishing and Styling Your Plant Stand
The finishing stage is honestly where the magic happens, and you’ve got a lot of options to play with. A natural wood stain brings out the grain and warmth of the wood while offering some protection against moisture. Warm walnut, golden oak, and cool gray tones are all popular choices for plant stands and tend to pair well with most home styles. If you’d rather paint it, chalk paint has become a go-to for DIY furniture — it needs almost no surface prep, sticks to most materials, and gives you that beautiful matte finish that distresses nicely if you’re going for a vintage feel.
Once the finish is dry, don’t forget about protective feet on the bottom of the legs. Felt pads keep hardwood floors scratch-free, while rubber feet add grip on smooth surfaces and prevent the stand from sliding around. If the stand is going outside or in a bathroom, rubber bumpers are the smarter choice over felt — felt absorbs water and can get moldy. These small additions are easy to overlook, but they do real work in protecting both your stand and your floors over time.
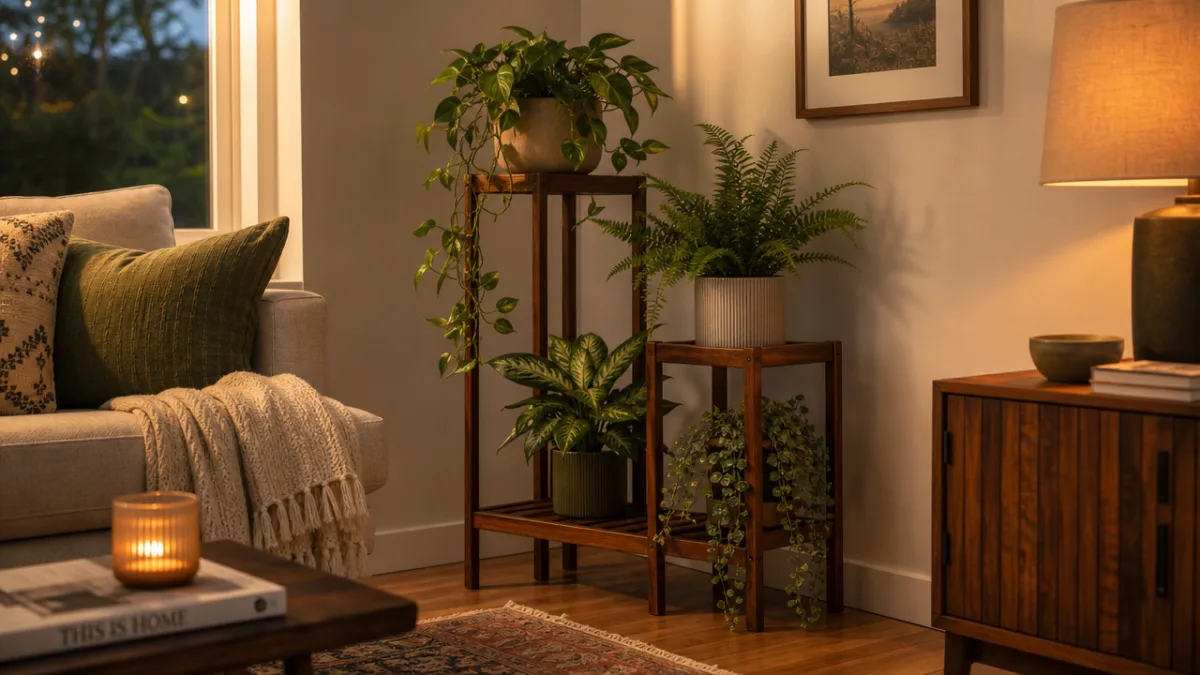
Styling is arguably the most fun part of the whole project. Put some thought into which plants go where, because mixing textures, leaf shapes, and heights is what makes a plant display look truly curated rather than just… plants on a shelf. Trailing varieties like pothos or string of pearls are perfect for upper tiers where they can drape down dramatically. Upright plants like snake plants or small palms anchor the lower tiers nicely. Combining foliage plants with flowering ones, or mixing ceramic pots with woven baskets, adds layers of texture and personality to the whole thing.
Creative Variations and Customization Ideas
Once you’ve got the basic tiered stand under your belt, a whole range of variations opens up. The ladder plant stand is a popular alternative — it uses a simple A-frame or leaning ladder structure to hold shelves at staggered heights. These are especially at home in bohemian or Scandinavian-inspired spaces because of their clean, open look. Since a ladder stand leans against a wall, it’s also a smart option when floor space is tight.
If mid-century modern is more your thing, try building a tapered-leg stand inspired by the iconic furniture designs of the 1950s and 60s. The legs angle outward toward the bottom, giving the piece that characteristic splayed stance that immediately reads as retro and cool. Getting the angles right takes a little extra care during cutting and assembly, but the visual payoff is really worth it. Paint it in mustard yellow, forest green, or terracotta and you’ve got something that looks straight out of a vintage interior.
Macramé and rope elements can take things in a totally different direction. Instead of solid wooden shelves, you can suspend dowels or circular platforms using knotted rope attached to a central upright post. The possibilities are endless — different knot patterns, rope thicknesses, and bead accents let you make it completely your own. These boho-style designs are also lightweight and easy on floors, which makes them a great pick for renters who want a beautiful plant display without anything too heavy or permanent.
Popular Plant Stand Style Variations
- Ladder stand: Leans against a wall, minimal materials, modern or rustic finish options.
- Mid-century tapered leg: Angled legs, bold colors, retro aesthetic that suits vintage interiors.
- Macramé hanging stand: Boho style, lightweight, ideal for renters and smaller spaces.
- Crate stack stand: Wooden crates stacked and secured at angles, very easy for beginners.
- Pipe and wood industrial stand: Black iron pipe legs with wooden shelves, modern farmhouse appeal.
- Corner stand: Triangular shelves designed to fit snugly into room corners, maximizes unused space.
Maintenance, Care, and Long-Term Enjoyment
A well-built plant stand can easily last for years with very little upkeep, but a few simple habits go a long way toward keeping it looking great. Wipe the shelves down periodically with a dry or lightly damp cloth to clear away dust, soil, and any water that drips from your pots. Even well-sealed wood can develop surface staining if water is left sitting on it for too long. The single most effective thing you can do to protect your stand is simply to use saucers under all your pots.
Every year or two — more often if the stand lives outside — give it a light sanding and a fresh coat of protective finish. UV exposure gradually breaks down exterior finishes over time, even good quality ones. A quick scuff with 220-grit sandpaper and a thin new coat of exterior polyurethane or teak oil only takes an hour or two, but it can seriously extend the life of your stand. While you’re at it, check all the joints and connections and tighten any screws that have worked loose with seasonal wood movement.
On the fun side of maintenance — keep things feeling fresh by rotating your plants with the seasons. Spring and summer are perfect for lush trailing varieties and flowering plants that lean into the energy of the growing season. Come autumn and winter, shift to more structural plants like cacti, succulents, and dark-leafed varieties that hold their own against cozier interior palettes of deep greens, burnt oranges, and warm creams. Swapping in a few seasonal accents — a small pumpkin in fall, a cluster of pine cones in winter — keeps the whole display feeling thoughtful and alive. It’s a small thing, but it ensures your handmade plant stand stays one of the most noticed spots in your home all year long.








What do you think?
It is nice to know your opinion. Leave a comment.