










Easy DIY Cracked Baseboard Repair: A Complete Guide to Restoring Your Home’s Trim
Understanding Baseboard Damage: Why Cracks Happen and What They Mean
Baseboards are one of those architectural details that most homeowners take for granted until something goes wrong. These trim pieces run along the bottom of your interior walls, covering the gap between the drywall and the floor while also providing a finished, polished look to any room. Over time, however, even the most carefully installed baseboards are subject to cracking, splitting, and general wear that can make your home look neglected and dated. Understanding why this damage occurs is the first step toward fixing it effectively and preventing it from happening again in the future.
The most common cause of baseboard cracking is the natural expansion and contraction of wood as humidity and temperature levels change throughout the seasons. In winter, heating systems dry out the air, causing wood to shrink and pull away from adjacent surfaces. In summer, increased humidity causes the wood to expand. This constant movement creates stress at joints, corners, and along the length of the trim, eventually leading to visible cracks and gaps. Homes in climates with dramatic seasonal changes are particularly susceptible to this type of damage, and even MDF baseboards can warp or crack under these conditions.
Physical impact is another major culprit behind cracked baseboards. Vacuum cleaners, furniture legs, toys, and foot traffic all take a toll on these vulnerable strips of trim over the years. A single hard knock can cause a hairline crack that gradually widens as the wood continues to move. Additionally, settling of the home’s foundation can create stress throughout the structure, including in the baseboards. Settlement cracks often appear in specific areas of the home and may be accompanied by similar cracking in the walls or ceiling, which is worth noting as a potential indicator of larger structural issues that may need professional attention.
Paint failure can also mimic or worsen baseboard damage. When old caulk dries out and shrinks, it pulls away from the wall and the baseboard surface, creating gaps that look like cracks. Multiple layers of old paint can crack and peel, exposing the raw material underneath and giving the impression that the baseboard itself is damaged when the problem is really just at the surface. Before diving into any repair project, it is worth taking time to assess exactly what kind of damage you are dealing with, as the approach you take will differ significantly depending on the root cause and the severity of the problem.
Tools and Materials You Will Need Before You Start
Gathering everything you need before beginning a repair project is one of the most important habits any DIYer can develop. There is nothing more frustrating than getting halfway through a job only to discover that you are missing a critical supply. For baseboard crack repair, the good news is that most of the materials are inexpensive and readily available at any home improvement store. Having the right tools also makes the work go faster and produces a more professional-looking result that you can feel genuinely proud of when the job is done.
For most crack repairs, you will need a tube of paintable latex caulk or wood filler, depending on the nature and location of the crack. Latex caulk is ideal for gaps between the baseboard and the wall or floor, where movement will continue to occur, because it retains flexibility after drying. Wood filler or spackling compound, on the other hand, is better suited for cracks within the baseboard itself where flexibility is less important and a hard, sandable surface is the priority. You will also need a caulk gun if you are working with a tube caulk, and a putty knife or flexible spreader for applying wood filler.
Sandpaper in a range of grits, typically 80-grit for initial smoothing and 120 to 220-grit for finishing, is essential for achieving a smooth, paint-ready surface. A damp cloth or sponge is useful for smoothing caulk before it dries and for cleaning up any excess material. You will also want painter’s tape to protect the wall and floor from accidental smears, a small paintbrush for touch-up work, and the appropriate paint to match your existing baseboards. If the paint on your baseboards is particularly old or you are not sure of the exact color, take a chip to your local paint store for a professional color match before you begin.
- Paintable latex caulk – for gaps between baseboard and wall or floor surfaces
- Wood filler or spackling compound – for cracks within the baseboard material itself
- Caulk gun – for applying caulk smoothly and evenly with good control
- Putty knife – for applying and smoothing wood filler into cracks
- Sandpaper (80, 120, and 220-grit) – for smoothing filled areas before painting
- Painter’s tape – to protect walls and floors during the repair and painting process
- Small paintbrush and matching paint – for touch-up work after repairs have fully cured
- Damp cloth or sponge – for smoothing caulk and cleaning up excess material

Step-by-Step Guide to Repairing Cracks in Your Baseboards
The actual repair process is straightforward, but taking your time at each stage is what separates a professional-looking result from one that is obviously amateur. Begin by thoroughly cleaning the area you plan to repair. Use a damp cloth to wipe away any dust, grease, or debris from the surface of the baseboard and the surrounding wall. If there is old caulk in the crack or gap, use a utility knife or caulk removal tool to scrape it out completely. Applying new caulk or filler over old, dried-out material is one of the most common DIY mistakes and almost always leads to premature failure of the repair.
Once the surface is clean and dry, apply painter’s tape along the wall above the baseboard and along the floor below it. This step might feel unnecessary, but it will save you considerable time during cleanup and ensure clean, sharp lines in your finished repair. Cut the tape carefully at corners and follow the existing trim lines as closely as possible. If you are working in a room with carpet, tuck the tape slightly under the edge of the carpet to protect the fibers from paint and filler. Taking these few extra minutes of preparation will result in a noticeably cleaner finished product.
For cracks within the body of the baseboard, apply wood filler using a putty knife, pressing the material firmly into the crack and slightly overfilling it. This overfilling is intentional because most fillers shrink slightly as they dry, and you want to end up with a surface that is level with or very slightly above the surrounding material rather than below it. Allow the filler to dry completely according to the manufacturer’s instructions, which typically ranges from 30 minutes to a few hours depending on the depth of the crack and the ambient humidity in the room. Rushing this step is a common mistake that leads to unsatisfactory results.
Once the filler has dried, sand it smooth using 80-grit sandpaper for initial leveling, then finish with 120 or 220-grit for a smooth surface. Wipe away all sanding dust with a tack cloth or slightly damp rag before moving on to painting. For gaps along the wall or floor, apply a smooth bead of paintable latex caulk, then immediately smooth it with a damp finger or sponge for a clean, professional finish. Remove the painter’s tape while the caulk is still slightly wet to avoid pulling up any dried edges. Allow everything to cure fully before applying paint, and use a small brush for precision work in tight areas.
Tips for a Flawless, Professional Finish
Achieving a truly seamless repair that blends invisibly with your existing baseboards requires attention to detail beyond just filling and sanding. One of the most important factors is the quality of your paint application. Even if the filler and caulk work is perfect, a poorly applied coat of paint will reveal every imperfection beneath. Use a high-quality trim paint in the appropriate finish, typically semi-gloss or gloss for baseboards, as these finishes are durable, easy to clean, and reflect light in a way that makes the trim look sharp and intentional. Apply paint in thin, even coats rather than one thick coat to avoid drips and brush marks.
Feathering your paint beyond the immediate repair area is a technique that professional painters use to make touch-ups invisible. Rather than painting only the spot you repaired, extend your brush strokes a few inches in each direction to blend the new paint with the old. If the existing paint has yellowed significantly over the years, you may find that a touch-up patch looks noticeably brighter than the surrounding trim. In this case, it may be worth painting the entire length of baseboard in that room for a consistent look. This is more work, but the result will be far more satisfying than a patch that stands out every time you walk into the room.
Texture matching is another subtlety that can make or break a repair. If your baseboards have a slightly textured or grainy surface from the original paint application, a smooth patch of new filler will look different even after painting. You can replicate slight texture by dabbing the wet paint with a sponge or using a brush with a stippling motion before it dries. Conversely, if the existing surface is very smooth, sand your repair area thoroughly and ensure your filler is perfectly level before painting. These small adjustments require a bit of extra attention but elevate the quality of your DIY work to a genuinely professional standard.
- Always prime fresh wood filler before painting to prevent the paint from soaking in unevenly and creating dull spots.
- Use a angled sash brush for painting baseboards, as the angled bristles give you better control near the floor and wall edges.
- Work in good lighting by using a work light or flashlight held at a low angle to reveal surface imperfections before you paint.
- Let each coat dry fully before assessing whether a second coat is needed, as wet paint always looks more opaque than dry paint.
- Step back and evaluate the repair from a normal standing distance, not just from up close, to see how it will look in daily use.
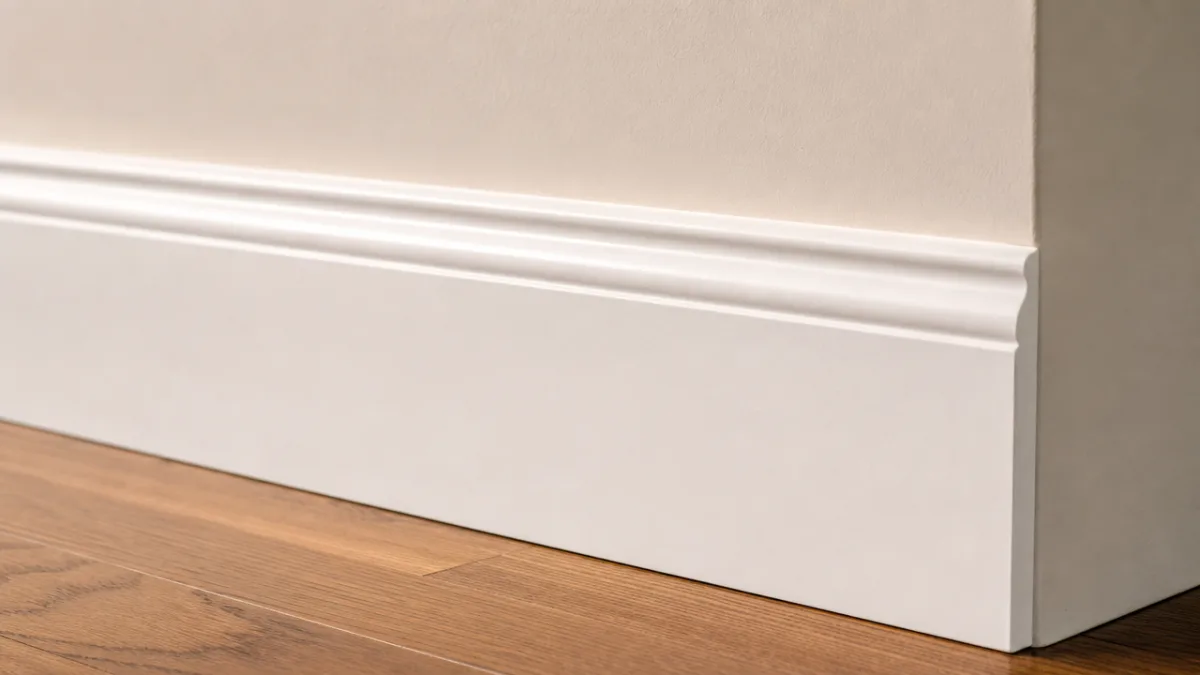
When to Replace Instead of Repair: Knowing Your Limits
Not every damaged baseboard is a good candidate for repair, and knowing when to replace a section entirely rather than attempting to patch it can save you significant time and frustration. If the baseboard is severely warped, bowing away from the wall along its entire length, no amount of caulk or filler will produce a lasting or visually satisfying result. Similarly, if the material has been damaged by water and shows signs of rot, mold, or significant swelling, replacing it is the only responsible course of action. Rotted wood filler will continue to deteriorate beneath any repair you make, and mold can spread to adjacent materials if left unaddressed.
Heavily damaged sections with multiple large cracks, deep gouges, or areas where chunks of material are missing altogether are also better candidates for replacement. While it is technically possible to fill and paint over extensive damage, the finished product will rarely look as clean as new trim, and the amount of time and materials spent on a complex repair may actually exceed the cost of buying and installing a new baseboard section. Modern baseboards, particularly MDF versions, are remarkably inexpensive, and many home improvement stores sell them in standard lengths that can be cut to fit your specific measurements with nothing more than a miter saw and a steady hand.
Replacing a short section of baseboard is well within the skill level of most DIYers. The process involves carefully prying away the damaged section using a pry bar and a scrap of wood to protect the wall, cutting the new piece to the correct length with clean 45-degree miter cuts at the ends, nailing it in place with a finish nailer or hammer and finishing nails, and filling the nail holes and seams with caulk before painting. If you are replacing only a portion of a run, try to make your cuts at an inconspicuous location, such as behind a door or in a corner, to minimize the visibility of any slight color or texture differences between old and new trim.
For anyone dealing with significant baseboard damage throughout an entire room or home, this is an excellent opportunity to upgrade to a more attractive profile or a more durable material. Many older homes have relatively plain, thin baseboards that can be replaced with taller, more detailed trim for a dramatic improvement in the overall look of the space. This kind of project does require a bit more planning and investment, but the transformation it creates is one of the most cost-effective ways to elevate the perceived quality and value of your home’s interior without undertaking a full renovation.
Preventing Future Baseboard Damage: Long-Term Maintenance Strategies
The best repair is the one you never have to make, and with a few simple maintenance habits, you can dramatically extend the life of your baseboards and reduce the frequency and severity of future cracking. The single most effective preventive measure is maintaining consistent humidity levels inside your home throughout the year. A whole-house humidifier connected to your HVAC system is the most convenient option, but portable units in high-traffic rooms can also make a meaningful difference. Keeping indoor humidity between 35 and 55 percent year-round will reduce the seasonal wood movement that is the primary driver of cracking in trim work.
Regular inspection and early intervention is another key strategy for preventing minor issues from becoming major problems. Make a habit of walking through your home each spring and fall to inspect all your trim work, including baseboards, door casings, and window trim. Look for hairline cracks, gaps forming at the wall or floor, and any areas where paint appears to be cracking or bubbling. Catching these small issues early and addressing them with a quick application of caulk or touch-up paint takes only a few minutes but prevents the kind of progressive deterioration that leads to more extensive repairs down the road. Think of it as routine maintenance in the same category as changing the batteries in your smoke detectors or servicing your furnace filter.
Protecting your baseboards from physical impact is also worth considering, particularly in high-traffic areas like hallways, mudrooms, and children’s rooms. Furniture bumpers placed on the legs of heavy pieces can prevent the incidental knocks that cause dents and cracks over time. Being mindful when vacuuming, using the edge tool rather than the main head near trim work, goes a long way toward preserving the finish. In areas where your baseboards take consistent abuse, applying an extra coat of a harder, more impact-resistant paint can provide meaningful additional protection without any change to the appearance of the trim.
Finally, ensuring that your baseboards were properly installed in the first place is foundational to their longevity. Trim that is nailed securely to the wall studs and bottom plate is far less likely to warp or pull away than trim that is only minimally fastened. If you notice sections of baseboard that feel loose or wobbly when pressed, re-securing them with finish nails and fresh caulk before the problem worsens is a quick fix that prevents a cascade of future damage. Good installation practices, combined with the preventive maintenance habits described here, will keep your baseboards looking fresh and professional for many years to come.








What do you think?
It is nice to know your opinion. Leave a comment.