










DIY Storage Cube Bar Cart: How to Build a Stylish and Functional Home Bar on a Budget
Transforming a simple storage cube into a fully functioning bar cart is one of the most satisfying DIY projects a home decorator can undertake. Whether you’re working with a small apartment, a cramped living room, or simply trying to make the most of underutilized space, a storage cube bar cart offers the perfect blend of practicality and style. This project requires minimal tools, a modest budget, and a few weekend hours — yet the result looks polished enough to impress even the most design-savvy guests at your next gathering.
The beauty of this DIY approach is its adaptability. Unlike purchased bar carts that come in fixed dimensions and finishes, a storage cube bar cart can be tailored to your exact needs. You choose the color, the hardware, the number of shelves, and the accessories. You decide whether it leans rustic, modern, glam, or industrial. That level of customization is rarely possible when shopping retail, and it almost always comes at a fraction of the cost of a purpose-built piece of furniture.
Why a Storage Cube Bar Cart Makes Sense for Modern Homes
The demand for dual-purpose furniture has grown significantly in recent years, driven by smaller living spaces and a cultural shift toward intentional, clutter-free design. A storage cube bar cart answers this demand directly. It functions as a drinks station when entertaining and doubles as a display shelf or organizational unit when it’s just a Tuesday night at home. This kind of versatile furniture is especially valuable in studio apartments, open-plan living areas, and any space where square footage is genuinely precious.
Beyond the spatial efficiency argument, there’s also a compelling aesthetic case. A well-styled bar cart signals a certain sophistication — the sense that its owner has curated their space with purpose and personality. When you build your own from a storage cube, you’re not just saving money; you’re creating a conversation piece. Guests will inevitably ask where you found such a unique piece, and there’s genuine pleasure in saying you built it yourself from something as humble as a flat-pack storage unit.
Cost is another major factor. Commercial bar carts range from around fifty dollars for flimsy wire designs to several hundred dollars for solid wood or brass-accented options. A DIY storage cube bar cart can be assembled for as little as twenty to forty dollars if you already have basic hardware supplies on hand, or up to around eighty dollars if you’re purchasing everything new. That price point makes this project accessible to renters, students, and anyone decorating on a genuine budget without wanting their space to look like it.
Finally, the project is deeply beginner-friendly. You don’t need a workshop, a full set of power tools, or prior carpentry experience. Most of the construction involves drilling a few holes, attaching casters, and styling the finished unit. If you can follow basic instructions and handle a screwdriver, you can build this bar cart successfully on your very first attempt.
Materials and Tools You Will Need
Before you begin, gathering your materials thoughtfully will save you time and extra trips to the hardware store. The core of this project is a storage cube unit — the kind sold at major retailers like IKEA, Target, or Amazon. These typically come in square or rectangular formats with one or more open compartments. A two-cube or four-cube unit works especially well because it provides enough surface area for bottles and glassware while leaving internal space for wine storage, cocktail accessories, or even a small ice bucket.
You will also need a set of locking caster wheels, which are arguably the most important upgrade that transforms the cube from a static shelf into a true cart. Look for casters rated to hold at least fifty pounds, and choose locking versions so the cart stays in place when you’re using it. Swivel casters on all four corners give you the best maneuverability. Most hardware stores carry casters in a range of finishes — black, chrome, antique brass, and matte gold are all popular choices that pair beautifully with different cabinet finishes.
For hardware and accessories, consider adding a small towel bar or brass rail along one side of the unit. This detail alone elevates the piece dramatically, giving it the look of a proper bar cart rather than a repurposed shelf. You’ll also want wood screws appropriate for the thickness of your cube’s material, a drill with a bit set, a level, sandpaper if you’re planning to paint or stain, and any decorative knobs or pulls if the cube has doors or drawers. Optional but highly recommended: peel-and-stick wallpaper or contact paper to line the interior of the cube, adding a pop of pattern or color that shows through when the cart is styled.
- Storage cube unit (2-cube or 4-cube configuration recommended)
- Four locking swivel caster wheels with mounting hardware
- Wood screws, appropriate length and gauge for your cube material
- Drill and drill bit set
- Level and measuring tape
- Decorative hardware: towel bar, knobs, or pulls
- Paint, stain, or contact paper for customization
- Sandpaper (if painting or staining)
- Primer (if painting a laminate surface)
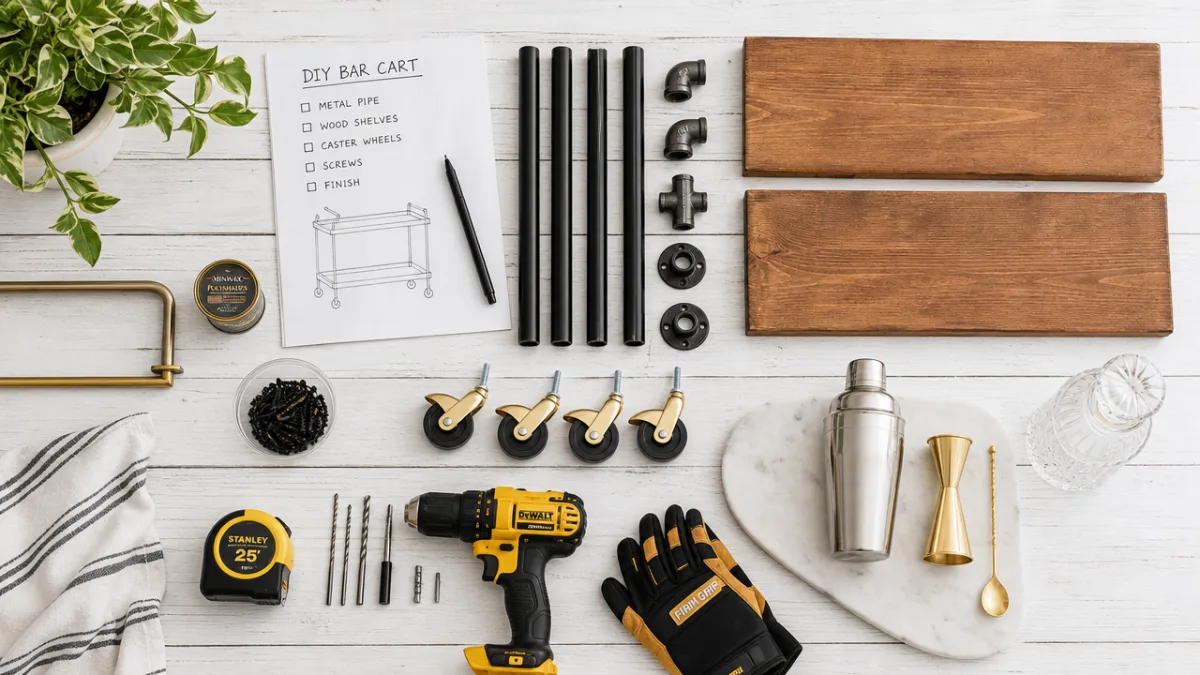
Step-by-Step Build Instructions
Begin by assembling your storage cube unit according to the manufacturer’s instructions, but stop before completing the final assembly if there are back panels or top caps involved. This gives you easier access for drilling and customizing the interior. Lay the assembled unit on its back on a clean, padded surface — an old blanket or yoga mat works well to protect both the floor and the cube’s finish during construction. Take a moment to plan your caster placement, marking the four corners of the base with a pencil and a ruler to ensure perfectly even spacing.
Attach the caster wheels by drilling pilot holes at your marked points and securing each caster plate with wood screws. Pilot holes are especially important if you’re working with particleboard or MDF, which are the most common materials in flat-pack storage cubes. Without pilot holes, driving screws directly into these materials can cause splitting or cracking that weakens the joint significantly. Once all four casters are attached, carefully flip the unit upright and test that it rolls smoothly and sits level. Engage the locking mechanism on all four casters and verify the unit doesn’t wobble or shift.
Next, install your towel bar or side rail. This is typically mounted along one of the shorter sides of the cube, positioned roughly in the lower third of the panel. The exact height is a matter of preference — some people like the bar positioned so that towels or bar tools hang near the bottom, while others prefer it centered for a more decorative effect. Attach the bar using the included hardware or with small bolts and washers passed through pre-drilled holes. Make sure everything is level using your bubble level, as even a slight tilt will be very noticeable on a horizontal rail.
If you’re painting or finishing the cube, this step should actually happen before the hardware installation. Sand any glossy laminate surfaces lightly with 120-grit sandpaper, wipe clean, and apply a bonding primer. Once the primer is dry, apply two to three thin coats of your chosen paint, allowing each coat to dry fully before the next. Chalk paint is an especially popular choice for this project because it adheres well to smooth surfaces without priming, dries quickly, and gives a velvety matte finish that photographs beautifully. After painting, apply your interior contact paper and then proceed with hardware installation as a final step.
Styling Your Bar Cart Like a Pro
Once the structure is complete, the styling phase is where your bar cart truly comes alive. A well-styled bar cart follows the same principles as any good vignette in interior design: you want a mix of heights, a variety of textures, and a clear focal point. Start with your tallest items — typically spirit bottles — and arrange them at the back of the top surface. Vary the heights within this grouping by using a small riser, a book, or even an inverted glass to elevate one or two bottles above the others.
Glassware is the next layer of your styling. Coupes, highballs, wine glasses, and lowball tumblers each bring their own silhouette to the composition. Rather than displaying every glass you own, choose two or three types that you use most often and group them in clusters of two or three. A stack of two or three cocktail glasses has far more visual impact than a single glass standing alone. If your storage cube has an interior compartment, this is a perfect spot to store additional glassware or less visually attractive items like cocktail shakers and bottle openers, keeping the exterior surface looking curated rather than cluttered.
Small decorative elements add personality and prevent the cart from feeling purely utilitarian. A small succulent or trailing pothos in a simple ceramic pot brings organic texture. A linen cocktail napkin folded neatly over the towel bar adds softness. A small tray corrals loose items like stirrers, straws, and jiggers into a contained, intentional display rather than a scattered pile. A candle or two placed near the back completes the ambiance — choose one with a low, wide vessel so it doesn’t tip over if the cart is moved.
Color coordination throughout the styling makes the entire display feel cohesive and deliberate. You don’t need to match everything exactly, but choosing a loose palette of two or three colors and keeping your accessories within that range will create a much more polished look. Black and gold is a classic combination that always photographs well. White, natural wood tones, and a single accent color like dusty blue or terracotta work beautifully for a more casual, eclectic aesthetic. Even your spirit bottle labels can be considered when styling — certain brands have notoriously beautiful packaging that contributes meaningfully to the overall look.

Customization Ideas and Creative Variations
One of the most exciting things about this project is that no two storage cube bar carts need to look alike. The base structure provides a neutral canvas, and from there the customization possibilities are genuinely extensive. A mid-century modern version might feature a walnut-stained cube with tapered legs instead of casters, brass hardware, and a curated selection of amber whiskey bottles and geometric glassware. A Scandi-inspired take might use a white-painted cube, simple black hardware, minimal styling, and a single sprig of eucalyptus as the sole decorative element.
For those who want maximum functionality, consider a four-cube configuration oriented horizontally, giving you two cubbies on the bottom for wine bottle storage and a wide, flat top surface for mixing drinks. Individual wine bottle slots can be created using inexpensive dowel rods cut to length and inserted at angles within the lower compartments. This hybrid wine rack and bar cart combination is especially useful for those who entertain frequently and want everything they need in one unified, mobile unit.
Pegboard is another creative material that can be incorporated into this build. Cutting a piece of pegboard to fit the back panel of the cube and painting it a complementary color creates an instant organizing system for hanging tools, hooks, and accessories. Pegboard bar cart interiors have become something of a trend on Pinterest and home décor blogs precisely because they combine the satisfying grid pattern of pegboard with the accessibility of a hanging organization system — you can see everything at a glance and reach it without digging.
- Glam version: gold metallic paint, mirrored contact paper lining, crystal glassware, and faux fur accents
- Industrial version: dark grey or black paint, pipe-style towel bar, Edison bulb string lights draped across the top
- Boho version: natural wood stain, macramé hanging on the side, terracotta pots, wicker coasters
- Minimalist version: all-white paint, clean hardware, single botanical print propped against the back
- Maximalist version: bold wallpaper lining, mixed metallic hardware, abundant layering of bottles, plants, and art objects
Maintenance, Durability, and Long-Term Care
A storage cube bar cart made from flat-pack materials requires some thoughtful maintenance to ensure it holds up well over time, particularly given that it will likely bear the weight of glass bottles, decanters, and heavy bar tools. The most important preventive measure is to check your caster attachments periodically — every few months is a reasonable interval — and retighten any screws that have begun to work loose. The rolling motion of a cart places consistent stress on the caster mounting points, and particleboard in particular can be prone to slow loosening if the screws are not occasionally reinforced.
Protecting the surface of your bar cart from moisture is equally important. Spills are inevitable in a bar context, and water damage can cause laminate to bubble, wood to warp, and paint to peel if left unaddressed. Applying a clear topcoat sealer over any painted surfaces is a worthwhile investment that adds significant durability and makes cleanup much easier. For raw wood surfaces, a food-safe beeswax paste or furniture oil both protects the wood and deepens its natural tone beautifully. Always place a small tray or coaster arrangement on the top surface to catch condensation from cold glasses.
The contact paper or wallpaper lining inside the cube compartments can be refreshed easily when it begins to look worn or when you simply want a new look. Peeling off the old paper, wiping the interior clean, and applying a fresh sheet takes under an hour and gives the entire cart a renewed feeling. This is also an opportunity to update the color palette of your styling if your tastes or your room’s décor have evolved. In this way, the storage cube bar cart is not a static piece of furniture but a living element of your home that can grow and change alongside your style.
If you ever decide to repurpose the cube entirely — perhaps your living situation changes or you no longer want a bar cart — removing the casters and hardware is straightforward, and the cube can return to life as a bookshelf, a media unit, a nightstand, or a children’s toy organizer. This reversibility is one of the most compelling arguments for this type of DIY project: the investment of time and materials never truly becomes obsolete because the underlying structure is endlessly adaptable to new functions and new contexts.
Budget Breakdown and Where to Find the Best Materials
Understanding the true cost of this project before you begin shopping helps you make smarter decisions about where to splurge and where to save. The storage cube itself is typically the single largest expense. IKEA’s KALLAX series is arguably the most popular choice for this project because of its clean lines, wide range of sizes, and affordable price point — a basic two-cube unit retails for around twenty to thirty dollars. Target’s Room Essentials line offers similar options, and Amazon carries numerous off-brand alternatives that can be even less expensive, though quality can vary significantly between sellers.
Caster wheels are worth spending a little more on to get a quality set that rolls smoothly and locks reliably. Budget casters from discount stores can feel flimsy and may not swivel properly, which quickly becomes frustrating when you’re trying to reposition the cart. Mid-range caster sets from hardware stores like Home Depot or Lowe’s, or from specialty suppliers online, typically run fifteen to twenty-five dollars for a set of four and offer noticeably better performance and longevity. If you want a specific finish like antique brass or matte black, specialty hardware retailers and Etsy shops often carry more decorative options.
The most budget-conscious approach to this project is to shop secondhand for both the cube and the accessories. Thrift stores, Facebook Marketplace, and local buy-nothing groups frequently have storage cube units available for free or just a few dollars. Even a cube that looks worn or outdated can be completely transformed with a coat of chalk paint and new hardware — in fact, some of the most beautiful bar cart transformations found on Pinterest started with the most unpromising-looking thrifted units imaginable. Spray paint found on clearance, contact paper remnants, and hardware pulled from other furniture pieces can all contribute to a genuinely zero-waste build.
- Storage cube unit: $0 (thrifted) to $35 (new)
- Caster wheels (set of 4): $15–$25
- Towel bar or side rail: $8–$20
- Paint or chalk paint: $10–$20 per quart
- Contact paper for lining: $5–$15
- Decorative knobs or pulls: $5–$15
- Screws, drill bits, sandpaper: $5–$10 (if not already owned)
- Total estimated range: $20–$130
Styling accessories — glassware, trays, small plants, candles, and cocktail tools — represent an additional investment but one that you likely already have in part or can acquire gradually over time. The structural build itself is the first step, and the styling can evolve organically as you find pieces that feel right. Many of the most beautifully styled bar carts photographed for Pinterest and home décor accounts are assembled from a combination of thrifted glassware, items already owned, and a few intentional new purchases rather than a single coordinated shopping trip. This incremental approach to styling is not only more budget-friendly but often leads to a more personal, layered result than buying everything at once.








What do you think?
It is nice to know your opinion. Leave a comment.