










How to Prune Lilac Bushes Like a Pro
Understanding Why Pruning Lilac Bushes Matters
Lilac bushes are among the most beloved flowering shrubs in temperate gardens, celebrated for their intoxicating fragrance and stunning clusters of purple, pink, white, or magenta blooms. However, without regular and thoughtful pruning, these vigorous growers can quickly become overgrown, woody, and far less productive than they should be. Understanding why pruning is essential is the first step toward maintaining a lilac that rewards you with abundant blooms season after season.
When left unpruned for several years, lilac bushes tend to develop a dense thicket of old, woody stems that shade out the younger, more productive growth beneath them. This competition for light and resources means fewer flowers, reduced fragrance, and a generally scraggly appearance that detracts from the garden’s overall beauty. Regular pruning redirects the plant’s energy toward healthy new growth and ensures that sunlight can penetrate deep into the shrub’s canopy.
Beyond aesthetics, pruning also plays a critical role in the overall health of your lilac. Removing dead, diseased, or crossing branches improves air circulation within the shrub, which dramatically reduces the risk of fungal diseases like powdery mildew — a common complaint among lilac growers. A well-pruned lilac is not only more beautiful but also more resilient, living longer and performing better than one that has been neglected over time.
Knowing the Right Time to Prune Your Lilac
Timing is arguably the single most important factor in successful lilac pruning, and getting it wrong can mean sacrificing an entire season’s worth of blooms. Lilacs set their flower buds in late summer on the new growth produced during the current growing season. This means that pruning at the wrong time of year — particularly in late summer or fall — will remove next year’s flower buds before they ever have a chance to open.
The ideal window for pruning lilacs is immediately after they finish blooming in spring, typically in late April, May, or early June depending on your climate and the specific variety you are growing. At this point, the flowers have faded and the plant is actively pushing out new growth that will eventually bear next year’s buds. Pruning during this narrow window allows the shrub to spend the entire growing season recovering and setting new flower buds without interruption.
If you have an extremely overgrown or neglected lilac, you may choose to do more aggressive renewal pruning in late winter or very early spring before growth begins. While this approach will sacrifice one season of blooms, it can be necessary to restore a severely overcrowded shrub to a manageable and healthy structure. In most cases, however, patience and timing are the gardener’s greatest tools, and sticking to the post-bloom window will keep your lilac flowering reliably every single year.

Essential Tools and Preparation for the Job
Before you make a single cut, assembling the right tools and preparing properly will make the entire pruning process safer, more efficient, and better for the plant. Using dull, dirty, or inappropriate tools can cause unnecessary damage to the lilac’s tissues, create ragged wounds that are slow to heal, and potentially introduce disease pathogens into otherwise healthy wood. Investing in quality pruning equipment pays dividends not just for your lilacs but for every woody plant in your garden.
For most pruning tasks on a lilac bush, you will rely on a core set of tools. Here is what every home gardener should have on hand before beginning:
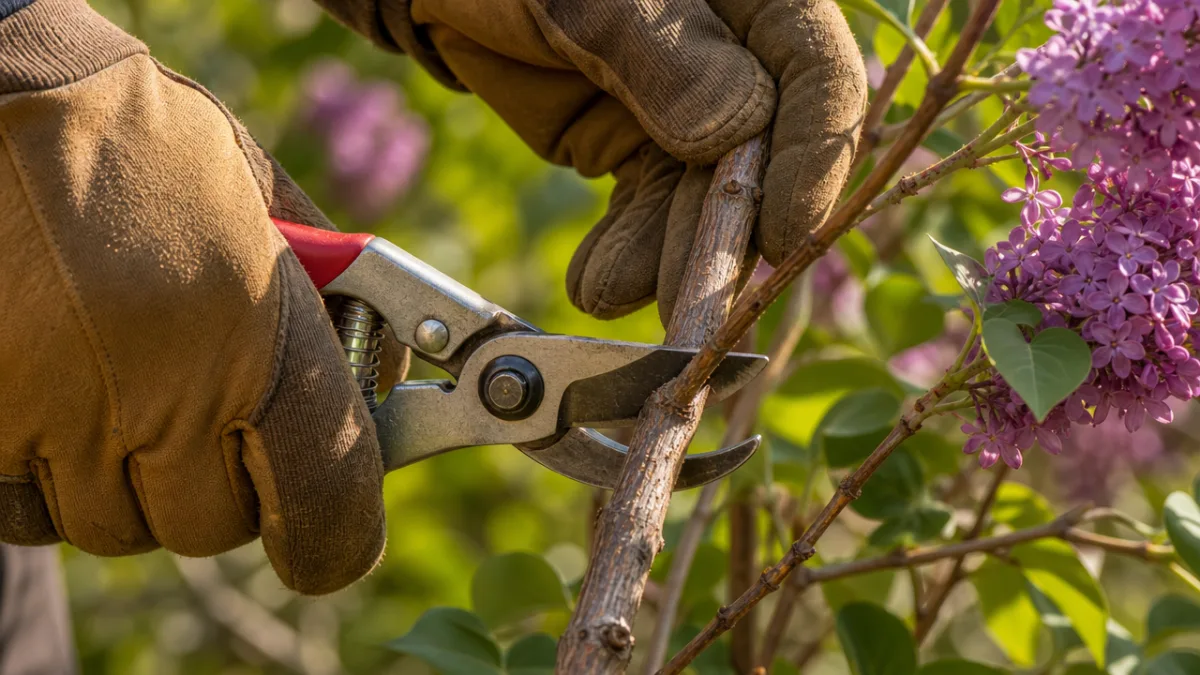
- Bypass hand pruners: Ideal for cuts on stems up to about three-quarters of an inch in diameter. Bypass pruners make clean, precise cuts that heal quickly and are far superior to anvil-style pruners for this type of work.
- Loppers: Long-handled loppers give you the leverage needed to cut through older, thicker stems that are one to two inches in diameter without straining your hands or wrists.
- Pruning saw: For the heaviest, oldest canes — those that may be two inches or more in diameter — a sharp pruning saw is the safest and most effective option.
- Rubbing alcohol or diluted bleach solution: Used to sterilize your blades between cuts, especially when removing diseased wood, to prevent spreading pathogens from one part of the plant to another.
- Sturdy gloves and safety glasses: Protecting your hands and eyes from sharp stems and debris is non-negotiable, especially when working inside a dense, mature shrub.
Once your tools are assembled and sterilized, take a few minutes to walk around the entire shrub and assess its structure before making any cuts. Look for dead or diseased canes, crossed branches that rub against one another, suckers growing up from the base, and any stems that are significantly older and woodier than the rest. Creating a mental map of what needs to come out before you begin will help you work more deliberately and avoid accidentally removing healthy growth you intended to keep.
Step-by-Step Pruning Techniques for Every Situation
With your tools ready and your assessment complete, it is time to get to work. Effective lilac pruning is typically divided into two broad categories: routine maintenance pruning, which is done annually to keep a healthy bush in good shape, and renewal or rejuvenation pruning, which is a more dramatic intervention reserved for shrubs that have become severely overgrown. Understanding which approach your lilac needs will guide every decision you make.
For routine maintenance pruning on a relatively healthy bush, begin by removing all spent flower heads, cutting just above the first pair of leaves below the flower cluster. Next, remove any dead, damaged, or diseased wood, cutting back to healthy tissue or all the way to the ground if the entire cane is compromised. Then look for crossing or rubbing branches and remove the weaker or less well-positioned of the two. Finally, thin out some of the older, thicker canes — ideally removing no more than one-third of the total cane count in any single year — to make room for vigorous new growth from the base.
For a heavily overgrown lilac, a staged three-year rejuvenation approach is often the most effective strategy. In year one, remove roughly one-third of the oldest, thickest canes all the way to the ground. In year two, remove another third of the remaining old canes. By year three, you can remove the final batch of old wood, by which time the shrub will have produced a wealth of vigorous new growth to replace everything you have taken out. This gradual approach is far less stressful to the plant than cutting everything back all at once and allows you to enjoy at least some blooms throughout the renovation process.
- Step 1 — Remove spent blooms: Cut faded flower clusters just above the uppermost set of healthy leaves to prevent seed production and encourage new lateral growth.
- Step 2 — Eliminate dead and diseased wood: Work from the outside of the shrub inward, removing any canes that are clearly dead, broken, or showing signs of disease such as discoloration, cankers, or unusual lesions.
- Step 3 — Address crossed and rubbing branches: Identify pairs of branches that cross and rub, and remove the one that is less favorably positioned, cutting it cleanly back to its point of origin.
- Step 4 — Thin old canes: Select the thickest, oldest, and least productive canes and cut them to the ground, opening up the center of the shrub to light and air.
- Step 5 — Remove suckers selectively: Lilacs produce root suckers prolifically; remove most of them at ground level, but you may allow a few well-positioned ones to develop into replacement canes for a multi-stemmed shrub.
Throughout the entire process, stand back frequently to assess your progress from a distance. It is easy to get carried away when you are deep inside a shrub and lose perspective on the overall shape you are trying to achieve. Aim for an open, vase-like structure with canes that are evenly spaced and oriented outward from the center, which will maximize both light penetration and air circulation within the plant.
Managing Suckers and Controlling Spread
One of the most characteristic — and occasionally frustrating — habits of lilac bushes is their tendency to produce abundant suckers from the base and from the root system spreading outward from the main plant. These suckers, if left unchecked, can turn a single well-shaped shrub into a sprawling thicket within just a few years, encroaching on nearby plants, pathways, and lawn areas. Learning to manage suckers effectively is an essential part of keeping your lilac tidy and within its intended boundaries.
The approach you take to sucker management depends significantly on whether your lilac is growing on its own roots or is grafted onto a different rootstock, which is common in many commercially produced plants. If your lilac is grafted, suckers arising from below the graft union will actually belong to the rootstock species rather than the named variety you planted, and allowing them to grow will eventually result in the inferior rootstock overtaking the desirable grafted top. In this situation, all suckers should be removed consistently and promptly throughout the growing season.
If your lilac is growing on its own roots — which is the case for many heritage and species lilacs — suckers can actually be a valuable resource. You can selectively allow a few well-positioned suckers to develop into new canes, using them to replace aging main stems as part of your long-term renewal strategy. Alternatively, suckers with a portion of attached root can be carefully dug and transplanted to create new plants, a wonderfully cost-effective way to expand your lilac collection or share plants with friends and neighbors. Remove unwanted suckers by cutting or pulling them as close to their point of origin as possible, rather than simply cutting at ground level, which encourages them to resprout even more vigorously.
Common Pruning Mistakes and How to Avoid Them
Even well-intentioned gardeners make mistakes when pruning lilacs, and some of these errors can have consequences that affect the plant for years. The most common mistake by far is pruning at the wrong time of year. Many gardeners instinctively reach for their pruners in late summer or fall when they are doing general garden cleanup, not realizing that next year’s flower buds are already set and will be lost with every cut they make. If your lilac consistently fails to bloom despite appearing healthy, late pruning is almost always the culprit.
Another frequent error is over-pruning in a single session. While it can be tempting to remove as much old wood as possible all at once to speed up the rejuvenation process, cutting away more than one-third of the plant’s total mass in a single year places enormous stress on the shrub. This can trigger an excessive, weakly attached regrowth response, weaken the root system, and leave the plant vulnerable to disease and environmental stressors. Patience and a measured, multi-year approach will always produce a healthier, more floriferous outcome than a dramatic single-session overhaul.
Failing to sterilize pruning tools between cuts is a subtle but potentially costly mistake, particularly in gardens where fungal or bacterial diseases are present. A single unsterilized cut on a diseased cane can spread pathogens to every subsequent cut you make, effectively distributing the infection throughout the plant. Make it a non-negotiable habit to wipe blades with rubbing alcohol or a diluted bleach solution — approximately one part bleach to nine parts water — between each and every cut, and especially when transitioning from diseased to healthy wood. This small discipline can make the difference between a thriving shrub and one in chronic decline.
Finally, many gardeners make the mistake of treating lilac pruning as a one-time correction rather than an annual practice. A lilac that receives thoughtful, consistent pruning each year after blooming will be exponentially easier to manage than one that is ignored for five or ten years and then requires drastic intervention. Building lilac pruning into your regular spring gardening routine — perhaps as a satisfying ritual that marks the transition from spring’s peak blooms into early summer — ensures that the task never becomes overwhelming and that your shrubs always look their very best.

Post-Pruning Care to Support Recovery and Future Blooms
Pruning is a form of controlled stress, and giving your lilac the support it needs to recover quickly will maximize both the health of the plant and the quality of next year’s floral display. The steps you take in the days and weeks following a pruning session are just as important as the pruning itself, particularly after more aggressive rejuvenation work that removes significant portions of the shrub’s structure.
Watering is one of the most important elements of post-pruning care. If rainfall is scarce in the weeks following your pruning session, provide supplemental irrigation to help the plant push out the new growth it needs to replenish what was removed. Deep, infrequent watering — allowing the soil to dry somewhat between sessions — encourages roots to grow deeply and makes for a more drought-resilient plant over time. Avoid frequent shallow watering, which promotes surface rooting and increases the plant’s vulnerability to drought stress.
Fertilizing can also support recovery, but it should be approached with some care. A balanced, slow-release fertilizer applied in early spring before growth begins, or a light application of compost worked into the soil around the base of the shrub, will provide the nutrients needed for healthy regrowth without overstimulating excessive, soft vegetative growth at the expense of flower bud development. Avoid high-nitrogen fertilizers in late summer, as these encourage leafy growth rather than the hardening of wood and flower bud set that the plant needs to perform well the following spring.
Mulching around the base of your lilac with two to three inches of organic material — such as shredded bark, wood chips, or composted leaves — offers multiple benefits in the post-pruning period and throughout the year. Mulch conserves soil moisture, moderates soil temperature extremes, suppresses competing weeds, and gradually breaks down to improve soil structure and fertility. Keep mulch pulled back a few inches from the main stems to prevent moisture accumulation against the bark, which can create conditions favorable to rot and disease. With the right post-pruning care in place, your lilac will reward your efforts with a stunning, fragrant display that makes every moment of work thoroughly worthwhile.








What do you think?
It is nice to know your opinion. Leave a comment.