










What Is a DIY Wood Slice Accent Wall?
A DIY wood slice accent wall is one of the most striking and accessible ways to bring natural texture and rustic farmhouse charm into your home. The concept is simple: individual cross-sections of logs or branches, also known as wood slices or wood rounds, are mounted directly onto a wall to create a layered, organic mosaic. The result is a feature wall that feels both handcrafted and deeply connected to the natural world, giving any room an immediate sense of warmth and character that no paint color or wallpaper can replicate.
Unlike many home improvement projects that require specialized skills or expensive contractors, this particular accent wall idea is well within reach for the average DIY enthusiast. You do not need carpentry experience or a workshop full of power tools. With patience, a good adhesive or basic fasteners, and a collection of wood slices in varying sizes, you can transform a bland wall into a stunning focal point over a weekend. The materials are often inexpensive, especially if you source your wood slices locally or cut them yourself from fallen branches.
The aesthetic appeal of a wood slice accent wall extends well beyond the farmhouse style it is most closely associated with. These walls work beautifully in bohemian interiors, Scandinavian-inspired spaces, mountain cabin retreats, and even modern eclectic rooms where organic elements are used to soften harder edges. The natural variation in grain patterns, bark textures, and wood tones means that no two walls will ever look exactly alike, making your finished project a truly one-of-a-kind piece of interior art.
Understanding the Style and Its Origins
The rustic farmhouse aesthetic draws its inspiration from the working farms and rural homesteads of earlier centuries, where natural materials were used out of necessity and practicality rather than purely for decoration. Wood was everywhere: on floors, ceilings, walls, and furniture. Over time, that utilitarian relationship with natural materials evolved into a full-blown design movement that now influences millions of homes around the world. The wood slice accent wall is a modern interpretation of this tradition, bringing raw, unprocessed nature directly into the domestic interior.
Pinterest and Instagram have played enormous roles in popularizing this particular project, with thousands of homeowners sharing their finished walls and inspiring others to try the technique. What makes this trend especially enduring is its versatility. A wall made of lighter, unstained birch slices can feel airy and contemporary, while darker walnut or oak rounds give a moodier, more dramatic effect. The same basic technique can yield wildly different results depending on the wood species, finish, and arrangement you choose.
Materials and Tools You Will Need
Before you begin cutting or gluing anything, it is essential to gather all your materials and understand what each one contributes to the final result. The star of the show is, of course, the wood slices themselves. You can purchase these pre-cut from craft stores, online marketplaces like Etsy or Amazon, or specialty wood suppliers. Alternatively, if you have access to fallen trees or branches, you can cut your own using a chainsaw or a miter saw, which gives you complete control over thickness and diameter. Aim for slices that are between half an inch and one and a half inches thick for the best balance of weight and visual impact.
In addition to the wood slices, you will need a strong construction adhesive such as Liquid Nails or a comparable brand, along with finishing nails or screws for added security on heavier pieces. A level, a measuring tape, and a pencil are indispensable for planning your layout. Sandpaper in various grits will help smooth any rough edges on the slices, and a wood sealant or clear polyurethane will protect the finished wall from moisture and dust. If you plan to stain some of the slices for visual contrast, have your chosen wood stain and brushes on hand before you begin.
Safety equipment should never be overlooked in any DIY project. If you are cutting your own wood slices, wear safety glasses, hearing protection, and gloves. When applying adhesives and sealants, ensure the room is well ventilated to avoid inhaling fumes. Keep a drop cloth on the floor beneath your workspace to protect flooring from adhesive drips and sawdust. Having a sturdy step stool or ladder will also make reaching the upper portions of your wall much easier and safer throughout the installation process.
- Wood slices or rounds in various diameters (4 inches to 14 inches work well for most walls)
- Construction adhesive such as Liquid Nails or Gorilla Construction Adhesive
- Finishing nails and a hammer or brad nailer for additional support
- Sandpaper in 80-grit and 220-grit for smoothing edges and surfaces
- Clear polyurethane or wood sealant to protect and finish the slices
- Wood stain in one or more colors if you want tonal variation
- Level, tape measure, and chalk line for layout planning
- Drop cloth, safety glasses, and work gloves
Preparing Your Wood Slices
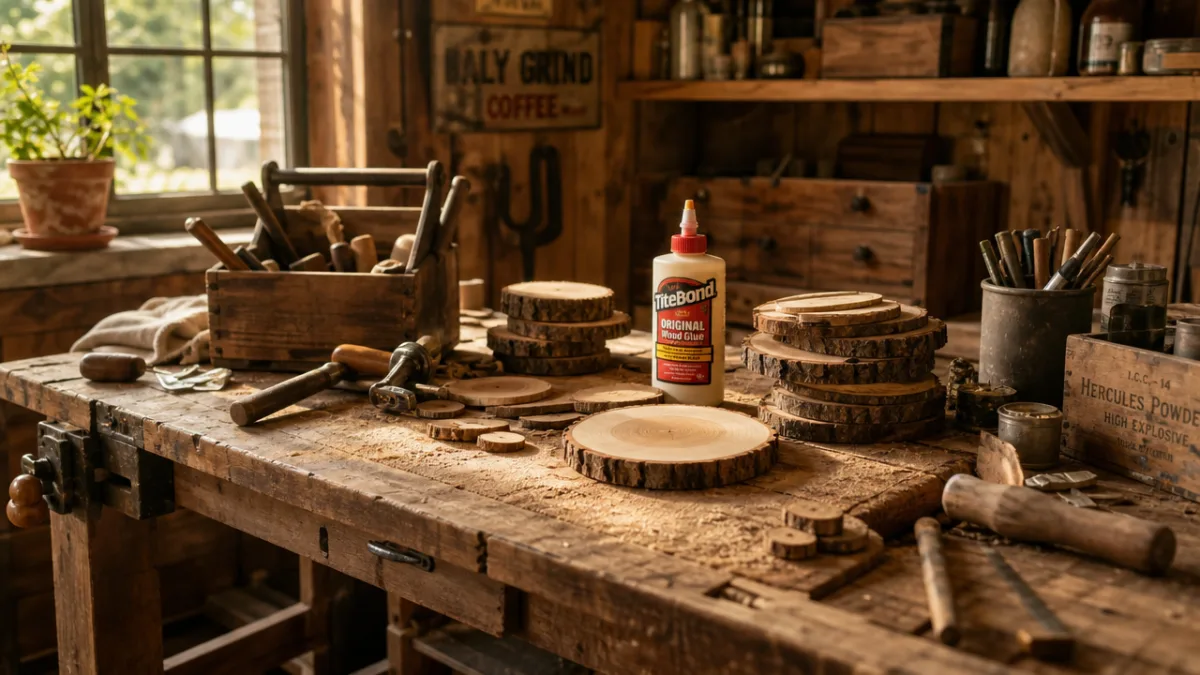
Preparation is arguably the most important phase of this entire project, and skipping steps here will show in the final result. If your wood slices are freshly cut, they must be dried thoroughly before use. Green or wet wood will shrink and crack as it dries, and if it is already mounted to your wall when this happens, the results can be disappointing. Air drying is the most natural method: store your slices in a warm, well-ventilated area for several weeks to several months depending on thickness. You can speed the process slightly by placing them in an oven at a very low temperature, but be careful not to rush this phase.
Once your slices are dry, inspect each one carefully. Some will have natural cracks, also called checks, radiating outward from the center. These are completely normal and many people find them beautiful, as they add to the organic, handcrafted look of the finished wall. However, if a slice has deep structural cracks that make it feel fragile or likely to break during handling, set it aside. Sand each slice with 80-grit sandpaper to remove any rough spots, splinters, or loose bark, then follow up with 220-grit for a smoother finish. If you want to remove the bark entirely for a cleaner look, do so now using a chisel or a stiff wire brush.
This is also the stage where you will apply any stain or color treatment. If you want a uniform natural look, you can skip staining entirely and simply apply a clear sealant. For a more dynamic, layered appearance, consider staining one-third of your slices in a medium walnut tone, leaving another third in their natural state, and staining the remaining third in a lighter, whitewashed finish. This three-tone approach creates visual depth and dimension in the finished wall that a single-tone arrangement simply cannot achieve. Apply your chosen stain according to the manufacturer’s directions and allow it to dry completely before sealing.
Sealing and Finishing Before Installation
Sealing your wood slices before mounting them is a step that pays dividends for years to come. A good quality clear polyurethane or water-based wood sealant protects the slices from humidity, dust accumulation, and the occasional bump or scrape. Apply at least two coats, allowing each coat to dry fully before adding the next. For the front face of each slice, a satin or matte finish tends to look more natural and organic than a high-gloss sheen, though personal preference should ultimately guide your choice.
Do not neglect the edges and backs of the slices either. Sealing the entire surface of each piece helps prevent warping and moisture absorption once the slices are on the wall. Pay particular attention to the end grain, which is the circular face of the slice, as this part of the wood is especially porous and prone to absorbing moisture unevenly. Two to three coats on the end grain face will give you the best protection. Once all your slices are sanded, stained if desired, and sealed, lay them out on the floor or a large flat surface to begin planning your arrangement before committing to the wall.
Planning Your Layout and Installing the Wall
Layout planning is where this project transforms from a collection of individual pieces into a cohesive design, and it deserves careful thought and patience. Lay all of your prepared wood slices out on the floor in front of the wall you intend to cover. Experiment with different arrangements: alternating large and small rounds, grouping similar colors together, or deliberately randomizing everything for a more organic feel. Step back frequently to view the arrangement from a distance, since the way a layout reads up close is often very different from how it appears from across the room.
A useful technique is to photograph your floor layout before you begin mounting anything. This gives you a reference image to work from as you transfer the design to the vertical surface of the wall. Start your installation from the bottom center of the wall and work outward and upward. This approach gives you the most control over the overall composition and helps ensure that your largest, most visually dominant pieces are positioned where they will have the greatest impact. Use your level frequently to keep rows reasonably aligned, though perfect geometric precision is neither necessary nor desirable in a rustic installation like this one.
Apply construction adhesive to the back of each slice in an S-pattern or zigzag pattern for maximum coverage, then press the slice firmly against the wall and hold it for thirty to sixty seconds. For larger or heavier slices, supplement the adhesive with one or two finishing nails driven discreetly through the wood into the wall stud behind it. Work methodically across your wall, fitting pieces together like a puzzle and filling gaps with smaller slices. Do not be afraid to leave some irregular spaces: they add to the natural, artisanal quality of the finished piece and allow the wall behind to breathe visually.

Dealing With Gaps and Edges
One of the questions most commonly asked by first-time builders of wood slice walls is how to handle the inevitable gaps between pieces and the edges where the installation meets adjacent walls, ceilings, or trim. The good news is that gaps are part of the charm. Unlike tile or shiplap, which strive for seamless uniformity, a wood slice wall embraces the irregular, imperfect quality of natural materials. Small gaps between slices can be left open or filled with a neutral caulk in a color that matches your wall paint for a cleaner look.
At the perimeter of your installation, you have several attractive options. You can install a simple wood trim or molding to frame the wall cleanly, which gives the finished project a more polished, intentional appearance. Alternatively, you can allow the installation to taper and fade naturally at the edges, with smaller slices filling in the border area and creating an organic, irregular boundary. This latter approach tends to look especially beautiful on large accent walls where the feature is meant to feel as though it grew organically from within the room itself.
Styling and Decorating Around Your New Accent Wall
Once your wood slice accent wall is complete and fully cured, the real fun begins: styling the rest of the room to complement your new focal point. The natural tones and textures of the wood slices pair beautifully with a warm, neutral color palette elsewhere in the room. Think creamy whites, warm taupes, soft grays, and earthy terracottas on surrounding walls and in your soft furnishings. These colors allow the wood wall to remain the visual anchor of the space without competing elements pulling the eye in too many directions.
Furniture choices matter enormously when decorating around a feature wall this texturally rich. Upholstered pieces in linen, cotton, or burlap feel at home alongside the organic wood surfaces. Leather, particularly aged or distressed leather, is another excellent companion material that echoes the rustic sensibility without duplicating the wood-heavy quality of the feature wall itself. Avoid overly sleek, glossy, or industrial furniture that might feel tonally out of place next to the warmth and softness of the natural wood rounds.
Lighting is perhaps the single most transformative element you can use to enhance a wood slice accent wall after installation. Wall-mounted sconces positioned to cast a warm, raking light across the surface will emphasize the texture and depth of the individual slices in a dramatic and beautiful way. A simple string of warm Edison bulbs hung in front of or along the wall can create an incredibly cozy atmosphere, particularly in an entryway or bedroom setting. Floor lamps and table lamps with warm-toned bulbs positioned nearby will contribute to the same effect during evening hours.
Accessorizing and Adding Personal Touches
A wood slice accent wall is a wonderful backdrop for carefully chosen decorative accessories that reinforce the farmhouse or rustic aesthetic. Consider hanging a few simple items directly on or in front of the wall: a woven macramé piece, an antique mirror with a distressed frame, or a few small floating shelves made from reclaimed wood. These additions layer additional texture and dimension onto what is already a very rich visual surface without overwhelming it or cluttering the composition.
Plants are another natural companion to a wood slice wall. The lush green of a trailing pothos, a fiddle leaf fig, or a collection of succulents positioned on a nearby shelf or the floor in front of the wall bridges the gap between the interior design and the outdoor, natural world that inspired the project in the first place. Terracotta pots, woven baskets, and raw ceramic vessels all complement the wood tones beautifully and keep the overall aesthetic cohesive and intentional.
Finally, do not underestimate the power of textiles in pulling the room together. A chunky knit throw draped over a nearby sofa, a jute or wool area rug on the floor beneath the wall, and linen cushions in warm, natural tones will all help create a sense of layered comfort and coziness that is the hallmark of truly successful farmhouse design. The wood slice accent wall sets the tone for the entire space, and with thoughtful styling choices in every other corner of the room, the result will be a home interior that feels grounded, warm, and beautifully, authentically you.
Maintenance, Longevity, and Troubleshooting
A well-constructed wood slice accent wall is remarkably durable and low-maintenance when the preparation and installation steps have been followed carefully. The polyurethane sealant protects the surface from dust and most incidental moisture, meaning routine maintenance is as simple as a gentle wipe with a dry or very slightly damp cloth when needed. Avoid using harsh chemical cleaners or abrasive materials on the wall, as these can strip the sealant and damage the surface of the wood beneath. Once a year, inspect the wall for any slices that may have shifted slightly or begun to peel away from the adhesive, and reattach them promptly using the same construction adhesive used in the original installation.
One common issue that can arise over time is cracking or checking in the wood slices, particularly in rooms where temperature or humidity fluctuates significantly. This is a natural characteristic of wood and is not necessarily a sign of a problem with your installation. In fact, many homeowners find that new cracks and variations that develop over time add to the living, evolving quality of the wall. If you find the cracking aesthetically undesirable, you can fill small cracks with a color-matched wood filler and touch up the sealant in the affected area to restore a cleaner appearance.
Should you ever decide to remove the wood slice wall, perhaps when moving to a new home or undertaking a full room renovation, be prepared for a moderately labor-intensive process. Construction adhesive forms a very strong bond, and removing the slices will likely pull away some of the existing wall surface with them. Plan for wall repair and repainting after removal, and use a heat gun or adhesive remover product to soften the remaining adhesive residue before patching. Despite this, the beauty, uniqueness, and conversation-starting impact of a wood slice accent wall make it an investment in your living space that most homeowners consider entirely worthwhile.
- Inspect the wall annually for loose or shifting slices and reattach as needed using construction adhesive.
- Dust the surface monthly with a soft, dry cloth or a low-suction vacuum brush attachment.
- Reapply a thin coat of polyurethane sealant every three to five years to maintain protection and sheen.
- Address any new cracks in individual slices with color-matched wood filler as soon as they appear.
- In high-humidity rooms such as kitchens, consider using a dehumidifier to reduce moisture-related wood movement.
- Avoid hanging heavy items directly on the wood slices themselves, as this can put stress on the adhesive bond.








What do you think?
It is nice to know your opinion. Leave a comment.