










Introduction to DIY Small Flower Bouquet Templates
Creating a small flower bouquet from scratch is one of the most rewarding and accessible crafting projects you can take on, whether you are a seasoned DIY enthusiast or a complete beginner. A bouquet template gives you a reliable framework to work within, helping you arrange flowers in a way that looks intentional, balanced, and beautiful without requiring years of floral design experience. Templates remove the guesswork and allow you to focus on the creative joy of choosing blooms, colors, and textures that speak to your personal style.
Small bouquets have a particular charm that larger arrangements sometimes lack. They are intimate, delicate, and versatile enough to suit almost any occasion, from a casual gift to a friend to a carefully styled wedding bridesmaid accessory. Because of their compact size, they are also far more forgiving to assemble. A small bouquet template helps you understand the proportions and layering techniques that make even a modest handful of flowers look like it was arranged by a professional florist.
Throughout this guide, you will learn everything you need to know about using and creating a DIY small flower bouquet template. We will cover the materials you need, the step-by-step construction process, tips for choosing the right flowers, and ideas for personalizing your finished bouquet. By the end, you will have the confidence to create stunning small bouquets for any occasion using a repeatable, reliable template method that you can return to again and again.
Why Templates Make Bouquet-Making Easier
Templates work by giving you a visual and structural reference before you ever pick up a single stem. Rather than holding flowers in your hand and hoping things look right, a template lets you plan your arrangement on paper or using a digital tool, mapping out which flowers go where and in what quantity. This planning stage saves time, reduces flower waste, and gives you a much clearer sense of how your final bouquet will look before you have committed to any cuts or bindings.
For beginners especially, templates provide a confidence boost that makes the entire process feel more manageable. When you know you have a plan, the pressure of creating something beautiful from scratch is significantly reduced. Templates also make it easier to recreate a bouquet you love, since you can refer back to the same structure and simply swap out flower varieties or colors to suit a new occasion or season.
Materials You Will Need for Your DIY Bouquet
Before diving into the actual construction of your small flower bouquet, it is important to gather all the necessary materials so that the process flows smoothly from start to finish. Having everything within reach means you will not lose momentum or risk leaving freshly cut stems sitting out while you search for scissors. The basic material list for a small bouquet template project is refreshingly simple and inexpensive, making this a very accessible craft for all budgets.
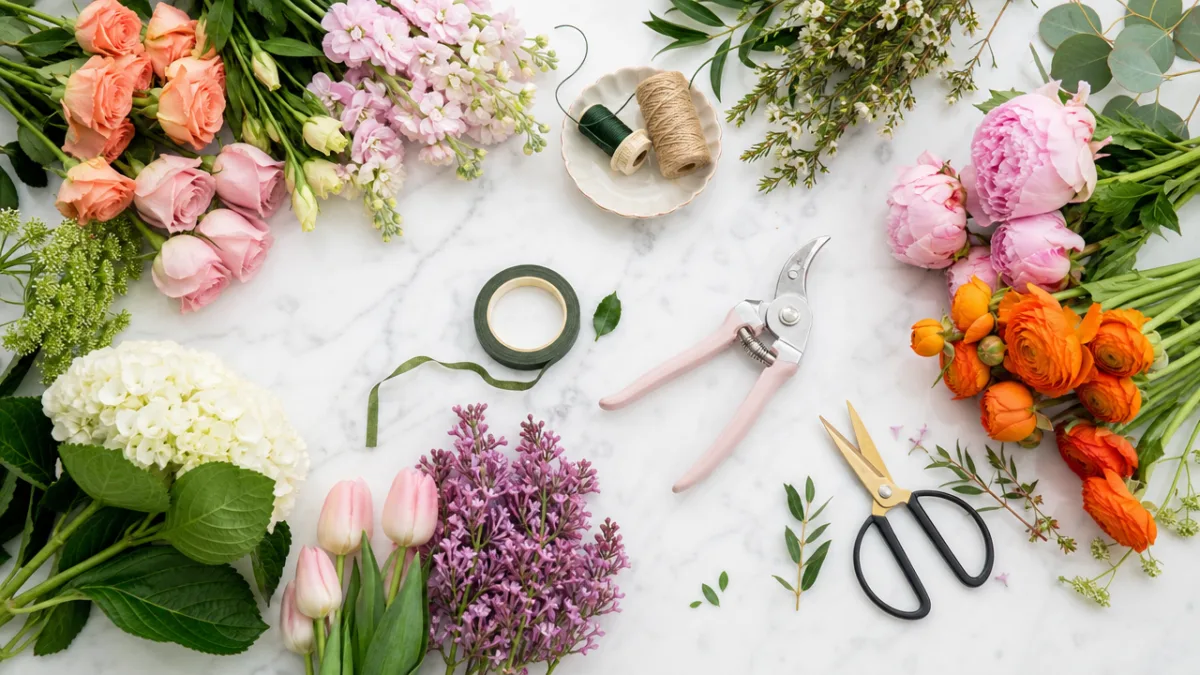
Your primary materials will include fresh or artificial flowers depending on your preference, floral tape, a sharp pair of floral scissors or garden shears, ribbon or twine for binding, a small rubber band to initially secure the stems, and of course your printed or hand-drawn bouquet template. If you are working with fresh flowers, you will also want a bucket of clean water to keep your stems hydrated throughout the assembly process. A clean, flat work surface with good lighting will make arranging much easier and help you see your colors and proportions clearly.
Optional but highly recommended materials include floral wire for adding structure to more delicate stems, leaf strippers to quickly remove unwanted foliage from lower stem sections, a ruler or measuring tape to keep your bouquet handle at a consistent length, and small decorative elements such as sprigs of eucalyptus, baby’s breath, or decorative berries to fill in gaps and add texture. Pearl-tipped pins and decorative brooches can also be incorporated into the binding for a more polished, finished look that elevates the bouquet from simple to sophisticated.
Choosing the Right Flowers for a Small Bouquet
The flower selection process is where your personality and creativity truly come into play. For a small bouquet template, you generally want to choose one or two focal flowers, which are your largest and most visually striking blooms such as roses, peonies, or ranunculus. These anchor the arrangement and draw the eye. Around these focal blooms, you will layer secondary flowers of medium size such as spray roses, lisianthus, or dahlias, which add volume and complexity without competing with your focal points.
Filler flowers and greenery are the third essential layer of a well-constructed small bouquet. Flowers like baby’s breath, wax flowers, and chamomile add airiness and delicacy, while foliage such as eucalyptus, ferns, or ruscus provides a natural backdrop that makes your blooms pop. The rule of thumb is to aim for contrast in both size and texture, pairing smooth petals with feathery foliage or bold shapes with soft, wispy fillers to create visual interest throughout the arrangement.
Color theory also plays an important role in flower selection. Monochromatic bouquets using varying shades of a single color feel elegant and cohesive. Complementary color pairings such as purple and yellow or pink and green feel vibrant and energetic. Analogous color schemes using colors that sit next to each other on the color wheel, like coral, peach, and soft yellow, feel warm and harmonious. Your template should include a color note section where you plan your palette before purchasing or cutting any flowers, saving you time and ensuring a cohesive result.
How to Create and Use Your Bouquet Template
Creating your bouquet template begins with a simple circle drawn on paper, representing the final diameter of your finished bouquet when viewed from above. For a small bouquet, this circle is typically between four and six inches in diameter. Inside this circle, you will sketch the placement of your focal flowers first, usually positioning them slightly off-center or in a loose triangular arrangement to create a natural, organic feel rather than a rigid, symmetrical one. Mark these positions with a simple dot or a rough petal sketch.
Next, fill in the spaces around your focal flowers with your secondary blooms. These should nestle naturally between and slightly below the focal flowers in the final three-dimensional arrangement, but on your flat template you can represent them as slightly smaller circles clustered around the primary marks. Finally, indicate where your filler flowers and greenery will go by sketching small dots or leaf symbols around the outer edges and in any remaining gaps. Number each type of flower on your template and create a corresponding legend that tells you exactly how many stems of each variety you will need.
Once your template is complete, you are ready to begin assembly. Lay your template flat on your work surface and begin pulling together the stems you have prepared. Hold your first focal flower in your non-dominant hand, then begin adding stems one by one, rotating the bouquet slightly with each addition to ensure even distribution around the central bloom. Use your template as a reference, glancing at it frequently to check that your proportions and placement are staying true to your original plan. The entire assembly process for a small bouquet typically takes between fifteen and thirty minutes once you have your materials ready.
Step-by-Step Assembly Instructions
The following steps will walk you through assembling your small flower bouquet using your template as a guide. Working methodically ensures a polished result and helps you stay organized even when handling many different stem types at once. Keep your template visible throughout the process and do not hesitate to pause and compare your in-progress bouquet to your sketch before adding each new layer of blooms.
- Strip the lower leaves from all stems, leaving only the top third of each stem with foliage. This keeps the handle area clean and prevents bacteria growth in water arrangements.
- Hold your first focal flower at the center of your non-dominant hand at your desired bouquet height, typically around eight to ten inches of total length for a small bouquet.
- Add your secondary focal flowers one at a time, placing them slightly lower and angled outward to create a domed, rounded profile when viewed from the side.
- Begin tucking in your filler blooms between the focal and secondary flowers, working in a spiral pattern around the central stem cluster as you rotate the bouquet slowly in your hand.
- Add greenery around the outer edges, allowing some leaves to extend slightly beyond the flower heads to frame the arrangement naturally.
- Secure the stems with a rubber band placed at your grip point, then wrap firmly with floral tape stretching it as you wrap to activate its adhesive properties.
- Trim the stems to a uniform length using one clean diagonal cut, which increases the surface area for water uptake in fresh arrangements.
- Finish by wrapping the handle with ribbon or twine, securing with a pin or a neat bow at the base of the flower heads.
After assembly, place your fresh bouquet immediately into clean water if it is not being presented right away. Mist the blooms lightly with a water spray bottle to keep petals looking fresh and vibrant. If you are preparing the bouquet a day in advance, store it in a cool location away from direct sunlight and ethylene-producing fruits like bananas and apples, which accelerate the aging of cut flowers significantly.

Personalizing Your Small Flower Bouquet
One of the greatest advantages of working from a DIY template is that it gives you a reliable structure within which you can endlessly personalize your creation. Once you have mastered the basic template format, you can begin experimenting with different flower varieties, seasonal blooms, and unexpected color combinations that reflect the unique personality of whoever will be receiving the bouquet. Personalization transforms a lovely but generic arrangement into something that feels truly thoughtful and memorable.
Consider incorporating flowers that hold specific meaning for the recipient or the occasion. Lavender conveys calm and devotion, sunflowers express adoration and loyalty, white daisies suggest innocence and new beginnings, and red roses remain the timeless symbol of deep love and passion. Researching the language of flowers, sometimes called floriography, adds a meaningful hidden layer to your bouquet that transforms it from a visual gift into an emotional one. You can include a small card with your bouquet that explains the significance of each bloom you chose.
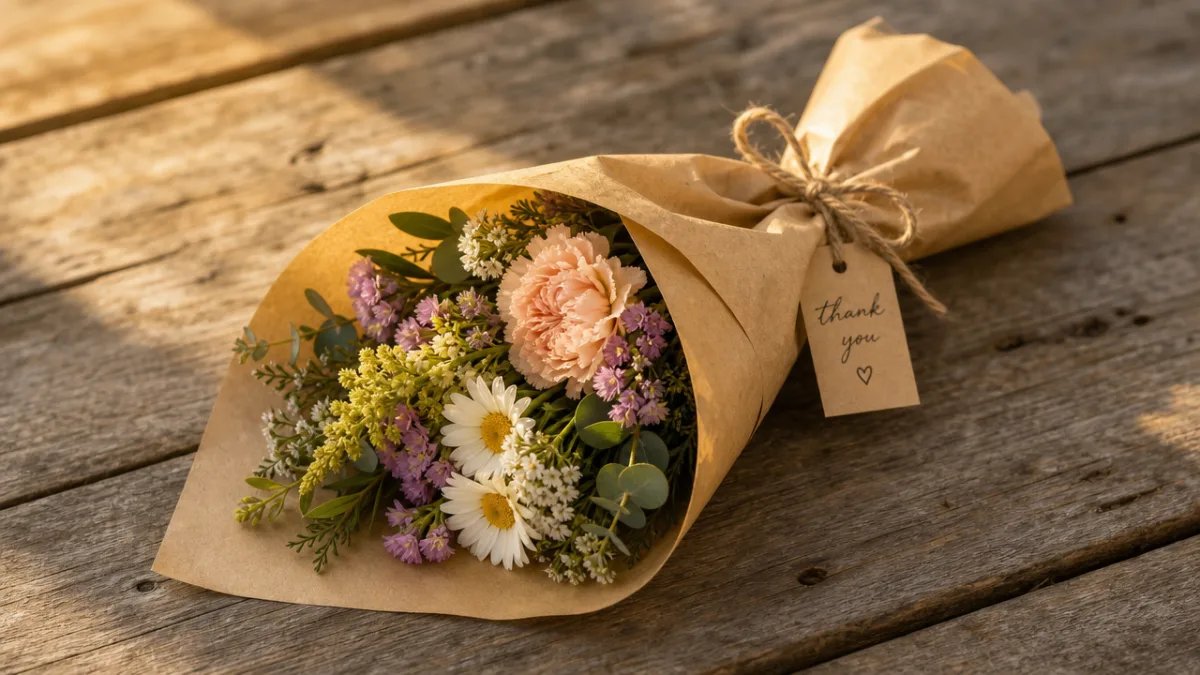
Beyond flower choice, personalization can extend to the wrapping and binding elements of your bouquet. Rustic twine and kraft paper wrapping suits a countryside or bohemian aesthetic beautifully. Satin ribbon in the recipient’s favorite color adds a polished, celebratory feel. Lace-wrapped handles evoke vintage romance, while modern minimalist presentations might feature a single wide ribbon in a neutral tone with no bow at all. You can also tuck in small personal tokens like a vintage brooch, a charm, a sprig of the recipient’s birth flower, or even a handwritten note folded and pinned into the ribbon for a truly one-of-a-kind finishing touch.
Seasonal Adaptations for Your Bouquet Template
Your small flower bouquet template is not limited to any single season or flower availability. One of its most powerful features is its adaptability. In spring, your template might call for tulips, hyacinths, and cherry blossom sprigs in pastel pinks and whites. In summer, sunflowers, zinnias, and black-eyed Susans bring warmth and vivid color. Autumn calls for dahlias, marigolds, dried grasses, and deep burgundy blooms that echo the richness of the season. Winter bouquets can incorporate holly, white anemones, amaryllis, and silvery eucalyptus for a crisp, elegant look.
Working with seasonal blooms is also significantly more economical than trying to source out-of-season flowers, which are often expensive and may not be at their freshest. Local farmers markets and florist wholesalers are excellent sources for seasonal stems, and growing your own cutting garden gives you the ultimate control over what varieties are available to you throughout the year. Adapting your template seasonally also keeps the craft exciting, giving you a fresh creative challenge every few months as the growing calendar turns and new blooms become available.
Tips for Gifting and Presenting Your Bouquet
A beautifully assembled small bouquet deserves equally thoughtful presentation when it comes time to give it as a gift. The way you wrap and present your bouquet contributes enormously to the overall impression it makes, especially when the bouquet is small and its impact relies on visual precision and care rather than sheer size. Taking ten or fifteen extra minutes to wrap your bouquet elegantly signals to the recipient that the gift was made with real intention and attention to detail.
One of the most versatile wrapping approaches is the cone wrap, in which a square of wrapping paper is rolled diagonally into a cone shape and the bouquet is nestled inside with the flower heads peeking above the edge and the stems protruding through the bottom. This technique suits both casual and formal presentations and works beautifully with kraft paper, floral tissue, colored cellophane, or even fabric remnants. Secure the cone with a piece of tape or twine at the midpoint of the stems and finish with a ribbon bow at the same point for a clean, cohesive look.
For extra freshness during transport, particularly if the bouquet needs to travel for more than thirty minutes before being placed in water, wrap a small piece of damp paper towel around the cut ends of the stems and then cover this with a piece of plastic wrap or a small resealable bag secured with a rubber band. This temporary moisture reservoir keeps the stems hydrated without requiring you to carry a full vase of water. The recipient can simply unwrap the stems and place the bouquet in water as soon as they arrive home, and the blooms will look just as fresh as when they left your hands.
Sharing Your Bouquet Creations Online
Once you have completed your first small bouquet using your DIY template, you will inevitably want to share the results with others, and social media platforms like Pinterest, Instagram, and TikTok are ideal venues for showcasing floral crafts. Photography is key to making your bouquet shine online. Natural light is your best friend when photographing flowers. Position your bouquet near a window with soft, diffused daylight rather than harsh direct sunlight, which can wash out delicate petal colors and create unflattering shadows. A simple, uncluttered background allows the bouquet to remain the clear focal point of the image.
Consider creating a series of progress photos as you assemble your bouquet, capturing the template sketching stage, the individual stem preparation, the mid-assembly process, and the finished result. Step-by-step documentation like this performs extremely well on Pinterest in particular, as it provides value to viewers who want to recreate your project and are looking for clear visual guidance at each stage. Tagging your posts with relevant search terms like DIY bouquet, small flower arrangement, floral template, and handmade flowers will help your content reach a wider audience of craft enthusiasts who share your passion for working with flowers.
Engaging with the broader floral DIY community online can be enormously inspiring and motivating as you develop your skills. Following other bouquet makers, participating in creative challenges, and commenting thoughtfully on others’ work builds a network of support and ideas that will continuously fuel your own creativity. Many experienced floral designers are generous with their knowledge online, sharing tips, tutorials, and template variations that can help you refine your own approach and expand your repertoire well beyond the basic small bouquet format covered in this guide.








What do you think?
It is nice to know your opinion. Leave a comment.