










DIY Paper Spinner Kids Obsess Over All Summer Long
What Is a Paper Spinner and Why Kids Absolutely Love Them
Paper spinners are one of those rare crafts that manage to be both incredibly simple to make and endlessly entertaining once they’re done. At their core, a paper spinner is a small, flat disc made from folded or layered paper, threaded with string or yarn, that spins rapidly when you pull the string taut. The spinning motion creates mesmerizing visual effects, especially when you add colors and patterns to the disc — making it one of the most rewarding DIY projects a child can complete in under thirty minutes.
What makes paper spinners so universally appealing to kids is the combination of creativity and physical play. Unlike many crafts that end up sitting on a shelf after they’re made, a paper spinner is immediately interactive. Children can experiment with different designs, test how fast they can make it spin, and even compete with siblings or friends to see whose spinner lasts the longest or spins the fastest. That instant feedback loop — make it, play with it, improve it — is exactly what keeps kids coming back to this activity again and again throughout the summer months.
There’s also something quietly educational happening beneath all the fun. Paper spinners introduce kids to basic principles of physics, including centrifugal force, momentum, and the way colors blend when objects move at high speed. A red and blue spinner, for instance, may appear purple when spinning quickly — a discovery that can spark conversations about color theory and optics. Parents and educators love that the learning happens organically, without any formal instruction required. The child is simply playing, and the science is just along for the ride.
Materials You’ll Need to Get Started
One of the greatest advantages of making paper spinners is that the supply list is refreshingly short and inexpensive. You likely already have most of what you need somewhere in your home. The core materials are simple: sturdy cardstock or thick paper, a hole punch or sharp pencil, string or yarn, scissors, and coloring supplies like markers, colored pencils, or crayons. If you want to elevate the project, watercolor paints, metallic markers, or stickers can add a wonderful extra layer of visual interest to the finished spinner.
Choosing the right paper is arguably the most important material decision you’ll make. Regular printer paper works in a pinch, but it tends to bend and lose its shape fairly quickly during play. Cardstock is the gold standard for paper spinners because it’s thick enough to hold its circular shape under the stress of repeated spinning. Old cereal boxes, manila folders, or even thick greeting card envelopes are excellent free alternatives that give your spinner the durability it needs to survive an entire summer of enthusiastic play.
For the string, a length of about 24 to 30 inches works well for most children. Cotton twine, yarn, embroidery floss, or even standard kitchen string are all excellent choices. Avoid very stretchy materials like elastic cord, as the elasticity interferes with the pull-and-release motion that makes the spinner rotate. Some families like to keep a dedicated spinner-making kit in a shoebox or small bin so kids can grab it independently whenever inspiration strikes — a simple setup that encourages creativity without requiring adult supervision for every session.
- Cardstock or thick paper (at least 65 lb weight recommended)
- Scissors or a craft circle cutter for clean, round shapes
- A hole punch or sharp pencil to create two center holes
- 24 to 30 inches of string, twine, or yarn per spinner
- Markers, colored pencils, watercolors, or crayons for decorating
- Optional: stickers, glitter glue, metallic pens, or washi tape for extra flair

Step-by-Step Instructions for Making Your Paper Spinner
Start by cutting your cardstock into a circle. A diameter of about three to four inches is the sweet spot — large enough to decorate easily, but small enough to spin with good speed. You can trace around a jar lid, a small cup, or a compass to get a clean circle. If your circles aren’t perfectly round, don’t worry too much. Slight imperfections rarely affect the spinner’s performance in any meaningful way, and kids quickly learn that the handmade look is part of the charm.
Once your circle is cut, use a hole punch or the tip of a sharp pencil to make two holes in the center of the disc, positioned roughly half an inch apart from each other. These holes need to be close to the actual center of the circle for the spinner to rotate evenly. If the holes are placed too far off-center, the spinner will wobble rather than spin cleanly. A quick way to find the center is to lightly fold the circle in half twice, creating a small crease at the middle point — then unfold and punch your holes right at that intersection.
Thread your string through both holes so that the disc sits in the middle of the string length, with equal amounts of string on each side. Tie the two ends of the string together to form a closed loop. Now hold one end of the loop in each hand, with the spinner disc hanging in the middle. Begin swinging the disc in a circular motion to wind the string up — about 20 to 30 rotations is ideal for beginners. Once the string is wound, pull both hands apart gently and watch the spinner whirl. Release tension slightly as it unwinds, then pull again to keep it going. With a little practice, kids can keep their spinner going for impressively long stretches.
- Cut a circle approximately 3 to 4 inches in diameter from cardstock.
- Find and mark the center of the circle using the fold-and-crease method.
- Punch two small holes about half an inch apart at the center point.
- Decorate both sides of the disc with your chosen colors and patterns.
- Thread a 24 to 30 inch length of string through both holes evenly.
- Tie the two string ends together to create a closed loop.
- Wind the string by swinging the disc in circular loops 20 to 30 times.
- Pull both ends outward to start spinning, then pulse to maintain momentum.
Creative Design Ideas That Make Spinners Even More Magical
The decoration stage is where paper spinners truly come alive, and it’s the part most kids look forward to most. The key design insight that transforms a simple spinner into something magical is understanding how colors and patterns blend when the disc is in motion. Bold, contrasting colors like yellow and violet, or red and green, produce striking visual blends when spinning. Concentric circles, pie-slice wedges of alternating colors, and spiral patterns are all classic choices that look spectacular in motion and are simple enough for even young children to execute confidently.
For older kids and teenagers, more sophisticated design approaches open up a world of visual experimentation. Optical illusion patterns — such as black and white spirals, checkerboard rings, or radial sunburst designs — create genuinely dizzying effects when the spinner is moving at full speed. Some kids enjoy researching Benham’s disc, a classic optical illusion that produces the perception of faint colors from a purely black and white spinning pattern. Encouraging this kind of curiosity turns a simple summer craft into a genuine exploration of how the human eye and brain process visual information.
Don’t overlook the back side of the disc. Many kids only decorate one face and leave the other blank, but decorating both sides adds another layer of visual interest because the rapid spinning blends both sides into a single merged image. Try making one side mostly warm tones — reds, oranges, yellows — and the other side cool tones — blues, greens, purples — and observe how the two palettes interact in motion. Themed designs are also enormously popular: galaxy spinners with dark backgrounds and flecks of white and gold, rainbow spinners in clean spectrum order, or seasonal designs like fireworks for summer celebrations all make for extra-special finished projects.
Pattern Ideas to Try
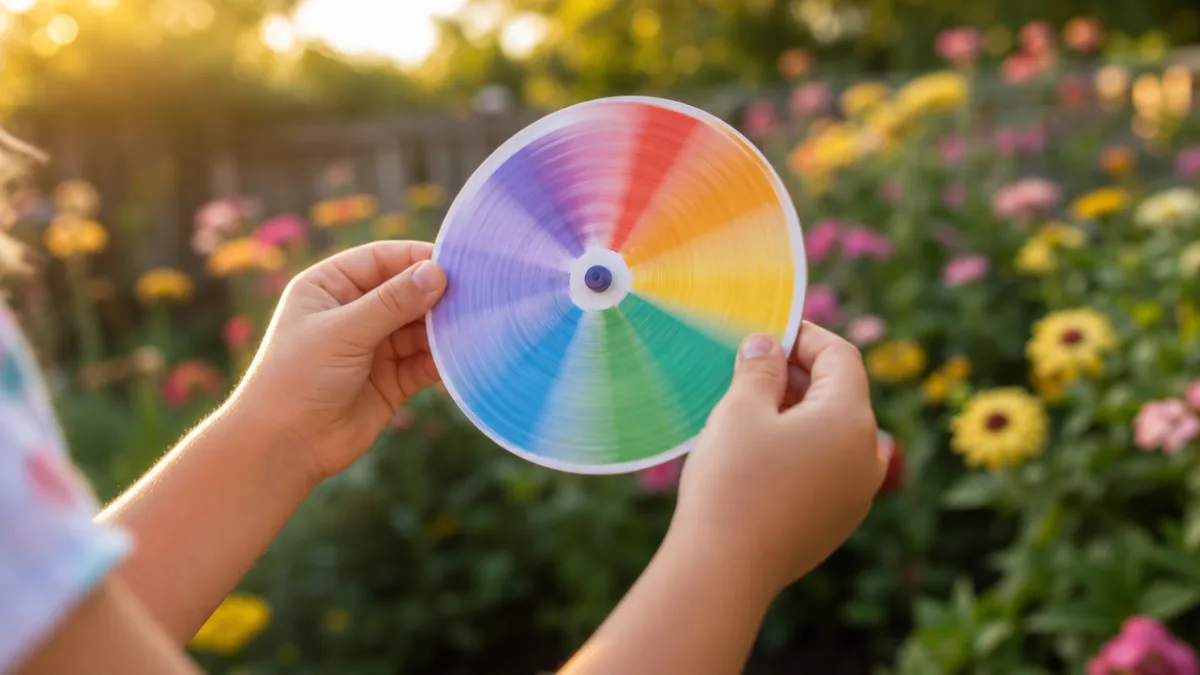
If you’re looking for inspiration, a few pattern families tend to produce the most visually rewarding results. Radial designs — those that extend outward from the center like spokes on a wheel — are particularly effective because the spinning motion naturally emphasizes that outward direction. Dividing the circle into equal pie slices and alternating two contrasting colors is the simplest radial approach, and it almost always produces a satisfying blending effect. From there, you can add complexity by subdividing the slices, adding rings, or layering multiple colors in each section.
Abstract and free-form designs deserve equal celebration alongside structured patterns. Young children especially tend to produce wonderfully expressive designs when given complete freedom to draw whatever they like on the disc. Scribbled rainbows, dots, zigzags, and swooping lines all transform into something unexpected and beautiful in motion. There’s genuine joy in the surprise of seeing your seemingly chaotic design become a unified swirling image the moment you start pulling the string. This element of discovery is one of the most powerful things about paper spinners as a creative tool for children.
Themed Spinner Collections
A wonderful extension activity is encouraging kids to create a themed collection of spinners over the course of the summer. A “color study” collection might involve making one spinner for each color family, observing how different combinations behave in motion. A “seasons” collection could capture the visual identity of each season through palette and pattern choices. Collections give the craft a longer arc of engagement, transforming a single afternoon activity into a weeks-long creative project that grows more meaningful as more spinners are added.
Gifting handmade spinners is another lovely tradition to establish. A carefully decorated spinner tucked into an envelope with a short note makes an unexpectedly charming gift for grandparents, friends, or classmates. The recipient gets both a piece of art and an interactive toy, and the child gift-giver experiences the satisfaction of making something that brings someone else genuine delight. Encourage kids to think about the recipient’s favorite colors or interests when designing a spinner intended as a gift — it adds a thoughtful, personal dimension to what might otherwise feel like a simple craft project.
Tips for Troubleshooting and Improving Your Spinner
Even the most enthusiastic young spinner makers will occasionally run into frustrating problems, and knowing how to troubleshoot those issues quickly keeps the fun from stalling out. The most common issue is a spinner that wobbles or refuses to spin smoothly. This almost always comes down to hole placement. If the two holes aren’t centered accurately, or if they’re too far apart, the disc will spin unevenly. The fix is straightforward: make a new disc and take extra care finding the true center before punching. A small cross made with a light pencil mark can help guide more accurate hole placement.
Another common frustration is a spinner that slows down too quickly and won’t maintain its momentum. This usually indicates one of two problems: either the disc is too heavy for the string being used, or the string has too much friction and isn’t sliding freely through the holes. Switching to a lighter, slicker string — like smooth nylon twine or waxed cotton — can make a noticeable difference. Alternatively, slightly enlarging the holes so the string moves more freely often solves the problem without any other changes. It can also help to lightly pinch and smooth out any kinks in the string before winding.
For kids who want to push their spinners to the next level, a few advanced modifications are worth exploring. Double-disc spinners — two circles glued back-to-back with complementary designs — have more visual depth and spin with a satisfying weight. Larger discs in the five to six inch range spin more slowly but produce more dramatic color blending effects, while smaller one-and-a-half to two inch discs spin extremely fast and produce crisp, tight blends. Experimenting with disc size is a fantastic way to introduce the concept of variables in a scientific experiment — change one thing, observe the result, and draw a conclusion.
Turning Paper Spinners Into a Full Summer Activity
Paper spinners have a wonderful way of anchoring a longer summer of creative play when approached with intention. One idea that works beautifully for families and summer camps alike is hosting a Paper Spinner Workshop day — a dedicated morning or afternoon where everyone makes, decorates, and tests their spinners together. Setting up a simple “science station” where kids can observe their spinners’ color blending effects under different lighting conditions, or a “speed testing” area where they time how long their spinners keep going, adds structure and shared purpose to what might otherwise be a brief solitary activity.
Spinner challenges are another excellent way to extend the activity’s life across multiple days or even weeks. Challenges can be design-based — make a spinner that looks like it has five colors but actually only uses two — or performance-based, like seeing who can keep their spinner going for the longest continuous spin. You can introduce a new challenge every few days, giving kids a fresh creative problem to solve with the same simple materials. Posting challenge results on a family bulletin board or refrigerator creates a low-key sense of ongoing engagement and accomplishment that builds over the summer.
Finally, consider documenting the spinner-making journey with photos or a simple scrapbook. Photographing each spinner flat, then in motion with a slightly slower shutter speed to capture the blur of spinning, creates a beautiful visual record of the summer’s creativity. Kids love looking back through the progression of their designs and noticing how their skills and ideas developed over time. A completed spinner collection, documented and displayed, becomes something more than a craft — it becomes a tangible record of a summer spent making, experimenting, and playing, and that kind of memory is worth preserving carefully.

Why Paper Spinners Deserve a Permanent Spot in Your Summer Routine
In an era of screens and structured activities, there is something genuinely countercultural about a craft as simple and tactile as the paper spinner. It requires no batteries, no downloads, no instructions beyond the first time someone shows you how. Once a child knows how to make one, they can make dozens independently, sharing the knowledge with friends and cousins the way children have always passed along the best games and toys — through direct, enthusiastic demonstration. That oral and hands-on transmission of craft knowledge is something worth nurturing deliberately, especially during the wide-open days of summer when there’s time to actually slow down and share.
The paper spinner also models something important for children to witness: the idea that extraordinary fun can come from very ordinary materials. A circle of cardstock and a piece of string produce genuine delight and genuine science. That lesson — that creativity and curiosity are the real engines of entertainment, not sophisticated equipment or expensive products — is one that will serve children well long after the summer ends. Parents who make spinners alongside their kids, laughing when theirs wobbles or celebrating when the color blend is unexpectedly beautiful, reinforce that lesson in the most powerful way possible: by embodying it themselves.
So gather your cardstock, dig out the markers, and cut a length of string. The paper spinner is waiting to be made, and summer is exactly the right time to make it. Whether your child ends up making three spinners or thirty, the hours spent cutting, decorating, troubleshooting, and spinning will add up to something genuinely valuable — not just a pile of handmade toys, but a summer punctuated by the particular satisfaction that comes from making something yourself and discovering, with your own hands, how delightful the world can be when you’re paying close attention to it.








What do you think?
It is nice to know your opinion. Leave a comment.