










Crafting Tip: How to Tie a Glass Jar for Hanging
The Timeless Charm of Hanging Glass Jar Crafts
Few DIY projects capture the warmth and whimsy of handmade décor quite like a hanging glass jar. Whether you fill it with fairy lights, fresh wildflowers, a pillar candle, or a trailing succulent, a glass jar suspended by rope or twine instantly transforms any ordinary space into something magical. These simple yet stunning pieces have graced porches, wedding venues, garden parties, and rustic kitchen shelves for decades, and their popularity shows no sign of fading. The reason is simple: the combination of transparent glass, natural fiber, and soft ambient light creates an aesthetic that feels simultaneously humble and elegant.
What makes this craft especially appealing is its accessibility. You do not need a dedicated craft room, expensive tools, or years of artistic experience to produce something genuinely beautiful. A few mason jars rescued from the recycling bin, a length of jute or cotton rope from the hardware store, and a basic understanding of a knot or two are all that stand between you and a finished piece worth displaying. This guide will walk you through everything you need to know, from choosing the right jar to selecting the best knot, finishing your creation safely, and styling it in your home or garden.
Beyond aesthetics, hanging jar crafts are an exercise in resourcefulness and sustainability. Glass jars are everywhere — pasta sauce comes in them, jam comes in them, candles come in them — and most of us discard them without a second thought. By learning to tie and hang a jar properly, you give that vessel an entirely new purpose, extending its life and reducing waste. There is real satisfaction in transforming something destined for the landfill into a focal point that guests notice and admire. That sense of creative reuse is part of what makes this craft so deeply rewarding.
Choosing the Right Jar and Gathering Your Materials
The success of any hanging jar project begins with selecting the correct vessel. Not all glass jars are created equal when it comes to hanging safely and looking beautiful. Mason jars — particularly the classic Ball or Kerr wide-mouth varieties — are ideal because their necks are uniform, their glass is thick enough to hold light without distorting it unpleasantly, and they come in a wide range of sizes from half-pint to half-gallon. Vintage pickle jars, apothecary bottles with pronounced shoulders, and old inkwell-style jars all work wonderfully too, though they each require slightly different knotting approaches to remain stable.
When gathering your materials, pay careful attention to your choice of cordage. Jute twine is the most forgiving option for beginners: it is inexpensive, widely available, easy to knot, and its warm, earthy tone pairs beautifully with glass. Natural cotton macramé cord gives a softer, more polished look and is especially lovely for wedding or nursery installations. Hemp rope has excellent strength and a pleasingly rustic texture. Nylon paracord, while extremely strong, has a synthetic sheen that can look out of place in organic or bohemian settings, though it excels in outdoor applications where moisture resistance matters.
Beyond the jar and the cord, you will want to have a few additional supplies on hand before you begin. A ruler or tape measure ensures your cord lengths are consistent, which is particularly important if you plan to make a cluster of hanging jars at different heights. A pair of sharp scissors or craft snips will give you clean cuts that prevent fraying. A lighter or clear nail polish can be used to seal the cut ends of synthetic cords. Optional embellishments — beads, dried florals, small shells, ribbons — can be set aside and added at the finishing stage.
- Standard wide-mouth mason jars (pint or quart size) — most versatile for beginners
- Jute twine (3–5 mm thickness) — affordable and easy to knot
- Natural cotton macramé cord — ideal for refined or celebratory settings
- Hemp rope — excellent durability for outdoor or long-term installations
- Ruler, scissors, and a lighter for finishing cord ends
- Optional: wooden beads, dried lavender, ribbon, or small shells for decoration

Understanding Basic Knots for Jar Hanging
The knot is the most critical element of any hanging jar project. A poorly tied knot is not merely an aesthetic problem — it is a safety concern, because a slipping knot can send a glass jar crashing to the floor, shattering glass and scattering whatever was inside across your space. Fortunately, the world of decorative knotwork is not as intimidating as it might seem. You do not need to be a sailor or a macramé master to tie a jar securely. A small handful of fundamental knots will serve you across virtually every hanging jar variation you might want to attempt.
The most important knot to master first is the lark’s head knot, also known as the cow hitch. This knot is used to attach your cord to a branch, dowel, curtain rod, or ring that forms the top anchor of your hanging piece. Fold a length of cord in half, lay the looped end over your anchor point from front to back, and pull both loose ends through the loop. Pull firmly and the knot cinches itself securely. It is fast, reliable, and easy to undo if you need to reposition your design. Once you have your cord attached at the top, the real work of cradling the jar begins.
The square knot is the workhorse of jar-cradling. To tie a square knot, take the left cord over the right, wrap it under and through, then take what is now the right cord over the left, wrap it under and through, and pull both ends simultaneously. The result is a flat, symmetrical knot that sits neatly and holds tension evenly. Rows of square knots spaced at regular intervals create the net-like cradle that wraps around the body of the jar and distributes its weight safely. A helpful mnemonic for remembering the direction: “right over left, then left over right” — reverse both steps and you get a granny knot, which slips far more easily and should be avoided for structural purposes.
The Half Hitch and Spiral Variations
Once you are comfortable with the square knot, the half hitch opens up a world of beautiful decorative variations. A single half hitch is simply looping one working cord over and through a second cord in one direction. Repeated half hitches in the same direction create a spiral or “twist” effect that winds elegantly around the body of the jar, giving your piece a more organic, handcrafted appearance. Alternating half hitches — one to the left, one to the right — produce a flat, herringbone-style braid that lies smoothly against the glass and gives a cleaner, more geometric look.
The gathering knot, sometimes called a wrap knot, is essential when you want to bring multiple strands together into a single bundle — at the top of a hanging, for example, or just below the mouth of the jar where the cords converge before spreading out into a cradle. To tie a gathering knot, hold all your cords parallel in one hand, take a separate short length of cord, and wrap it tightly around the bundle a set number of times (usually five to eight wraps looks cleanest). Thread the end of the wrapping cord through the loop at the base and pull the tail at the top to lock everything in place. Trim the excess tails close to the knot for a tidy finish.
Spending an afternoon practicing these four fundamental knots — lark’s head, square knot, half hitch, and gathering knot — before you begin your actual project is time very well invested. Use scrap cord on a wooden dowel propped between two chairs, and simply practice tying and untying until each knot feels instinctive. Muscle memory matters enormously in knotwork: when your hands know what to do without your eyes guiding every movement, the quality and consistency of your finished piece improves dramatically. Keep a printed or bookmarked knot reference nearby for the first few projects and you will be surprised how quickly the techniques become second nature.
Step-by-Step: Tying a Simple Knotted Jar Hanger
With your materials gathered and your knots practiced, it is time to create your first hanging jar. The method described here produces a classic four-strand cradle that suits any standard wide-mouth pint mason jar and can be completed comfortably in under an hour. Begin by cutting four lengths of jute twine, each approximately 120 centimetres long — this gives you enough working length for the cradle while accounting for the cord consumed by the knots. If you prefer a longer hanging length, add the extra length to each piece before you cut. Gather all four strands and align their midpoints, then fold the bundle in half so you have eight working strands of roughly 60 centimetres each descending from a central loop at the top.
Secure the central loop with a gathering knot, wrapping a separate 20-centimetre piece of twine around the bundle six times and cinching it tight. This forms the neat hanging loop at the crown of your piece. Now separate the eight strands into four pairs. Working with each pair in turn, tie a square knot approximately 10 centimetres below the gathering knot. You now have four square knots arranged in a circle. Drop down another 10 centimetres and, working with alternating pairs — that is, the right strand from one pair and the left strand from the adjacent pair — tie a second round of four square knots. This offset pattern begins to form the net-like web that will cradle your jar.
Continue alternating rounds of square knots, spacing each round approximately 5 to 8 centimetres apart, until your cradle is long enough to cup the base of the jar. Slide the jar gently into the cradle from above to test the fit — it should sit snugly with the neck of the jar extending above the uppermost knots and the base resting comfortably in the net below. If the jar slides through, your spacing is too wide; simply undo the last round and retie with tighter spacing. Once the fit is correct, gather all eight strands below the base of the jar and tie a large, firm overhand knot or gathering knot to close the cradle and secure the jar in place. Trim any uneven tails and fray or leave them loose as a decorative tassel.
- Cut four strands of twine at 120 cm each and fold at the midpoint to create eight working strands.
- Secure the top loop with a gathering knot using a separate short length of twine.
- Divide into four pairs and tie a square knot 10 cm below the top in each pair.
- Alternate pairs and tie a second round of square knots 10 cm lower.
- Continue alternating rounds every 5–8 cm until the cradle is the correct depth for your jar.
- Test the fit with the jar, adjusting spacing as needed.
- Gather all strands below the jar’s base and tie a closing knot to secure.
- Trim tails evenly or leave them as a decorative fringe.

Decorating and Filling Your Hanging Jar
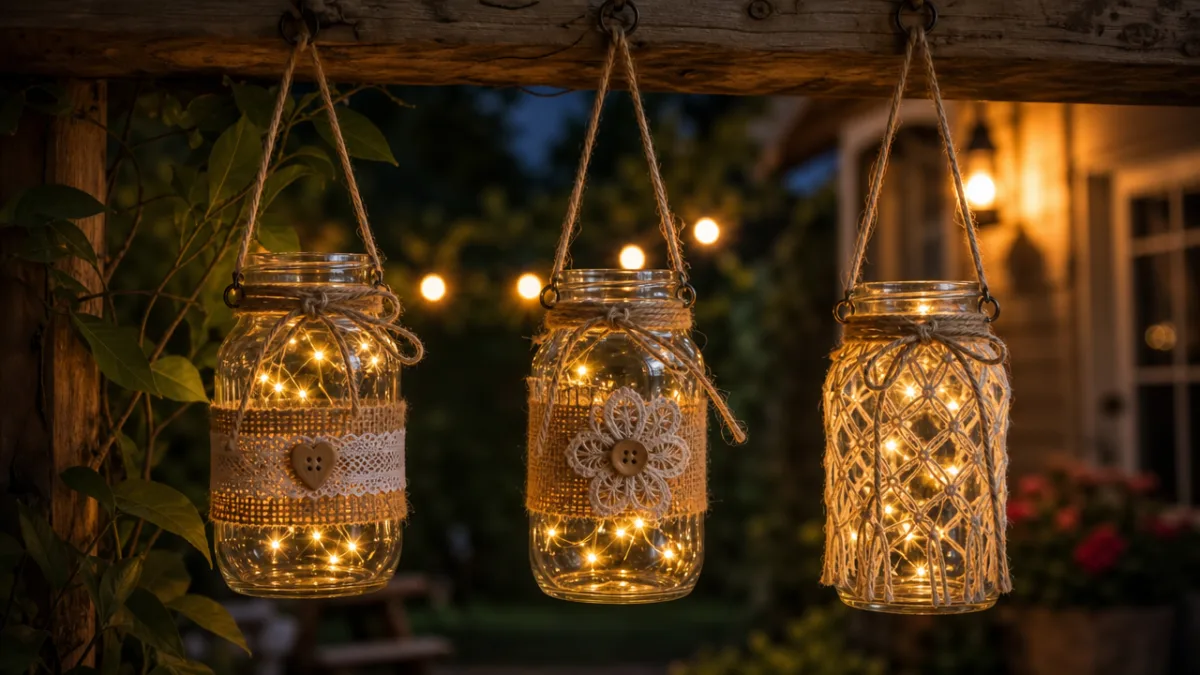
Once your jar is securely tied and hanging safely, the real creative fun begins: deciding what to put inside and how to style the exterior. The filling you choose dramatically changes the character of the piece. A cluster of warm fairy lights coiled inside a hanging mason jar creates a lantern effect that is simply breathtaking after dark, casting soft golden light and throwing delicate shadows across surrounding walls and foliage. Use battery-operated LED string lights with the battery pack tucked discreetly behind the jar, and you avoid the hazard of running power cords through a knotted hanger.
Fresh flowers are another perennially popular choice. Fill the jar about two-thirds full with clean water and arrange a loose posy of wildflowers, garden blooms, or supermarket stems inside. Hanging flower jars work particularly well as wedding aisle decorations, outdoor party centrepieces, or porch accents in summer. Change the water and refresh the flowers every two or three days to keep the arrangement looking vibrant. If fresh flowers feel too high-maintenance, dried florals — lavender, baby’s breath, dried orange slices, eucalyptus — require no water at all and retain their beauty for months.
Candles deserve a special mention because they are arguably the most dramatic filling option, though they also require the most caution. Pillar candles placed on a small disk of cork or a pebble inside the jar are stable and look stunning. Tea lights nestled in a small bed of sand or sea glass are even safer and easier to replace. Never leave a candle burning in a hanging jar unattended, and always ensure the jar is hanging absolutely level and still before lighting the flame. The enclosed glass amplifies heat, so use appropriately sized candles and check for any cracking in the glass before each use.
Exterior Embellishments and Finishing Touches
The knotted hanger itself can be decorated to complement the interior filling or the overall style of your space. Wooden beads threaded onto the cords between knot rows add a bohemian, handcrafted quality and come in dozens of finishes — raw wood, painted, stained, or carved. Small glass seed beads woven into the twine capture and scatter light in a way that feels almost jewel-like. Wrapping a length of thin copper or gold wire around the neck of the jar below the lowest knot adds a metallic accent that elevates a rustic piece into something more refined.
Ribbons, lace trim, and fabric strips can be tied in simple bows around the neck of the jar or woven through the upper rows of knots for a softer, more romantic look. Natural elements — sprigs of dried rosemary, a few dried rosebuds, a sprig of eucalyptus tucked into the knotwork — bring fragrance and texture to the piece and connect it visually to the garden or wilderness outside. For a coastal theme, small shells, driftwood fragments, or loops of seagrass woven into the cord create an immediate sense of the ocean.
Before considering your project finished, always perform a final safety check. Hold the hanging loop firmly and gently tug the jar downward with your other hand, applying more pressure than the jar’s eventual weight plus its filling will exert. If the cradle holds without slipping, your knots are sound. Check the hanging point — whether it is a ceiling hook, a curtain rod, a tree branch, or a wooden beam — and ensure it is rated to support the weight comfortably. A filled jar of water and flowers can weigh more than 500 grams, and a cluster of three or four jars may approach two kilograms or more in total.
Displaying Your Hanging Jars: Ideas for Every Space
A single hanging jar is lovely; a curated grouping of them is transformative. Consider suspending three jars at different heights from a length of driftwood or a weathered wooden dowel to create a hanging installation that has genuine visual weight and presence. Varying the jar sizes — a quart, a pint, and a half-pint — within a single grouping adds rhythm and interest without requiring any additional skill. Painting the jars in chalk paint, frosting them with glass etching cream, or wrapping them in strips of natural burlap before tying introduces even more textural variety.
Outdoors, hanging jars come into their own. Suspend a line of them from the fence posts around a garden terrace, from the eaves of a porch, or from the low branches of a fruit tree to create an enchanting outdoor atmosphere that works for everyday enjoyment and special occasions alike. Fill outdoor jars with citronella oil and a floating wick to keep mosquitoes at bay during summer evenings while still providing warm, flattering light. In colder months, battery-operated LED lights allow you to keep the jars up year-round without the fire risk of real flames in winter winds.
Indoors, hanging jars work in almost any room. In a kitchen, a trio of small jars filled with fresh herbs — rosemary, thyme, basil — hanging near a sunny window creates a functional and fragrant herb garden that takes up no counter space whatsoever. In a bedroom, a single large jar filled with fairy lights hung from a ceiling hook or a decorative curtain rod bracket casts a soft, dreamy glow perfect for winding down before sleep. In a bathroom, a small jar of dried lavender or eucalyptus sprigs hung near the shower brings a spa-like quality to a mundane daily routine.
Seasonal Variations and Gifting Ideas
One of the most appealing aspects of the hanging jar craft is how easily it adapts to the seasons. In autumn, fill jars with preserved maple leaves, dried berries, or miniature pinecones and tie the hanger in deep burgundy, burnt orange, or forest green cord. At Christmas, a frosted jar filled with silver and gold ornament balls or a sprig of holly and a red ribbon becomes an instant festive decoration that costs a fraction of what similar items sell for in stores. In spring, pastel cord, fresh-cut hyacinths, and a scattering of flower petals inside the jar celebrate the new season beautifully.
Handmade hanging jars also make exceptional gifts that are deeply personal without being prohibitively expensive. A jar filled with homemade jam or honey, tied with a bespoke knotted hanger in the recipient’s favourite colours and embellished with a handwritten tag, is the kind of thoughtful, handcrafted present that store-bought items simply cannot replicate. For a housewarming gift, present a complete hanging jar kit — the cord pre-cut and bundled, the jar included, and a small printed card with step-by-step knotting instructions — so the recipient can make the piece themselves and feel the satisfaction of the creative process.
Whether you are decorating your own home, preparing for a celebration, or searching for a meaningful handmade gift, the hanging glass jar craft rewards time and attention generously. Each jar you tie becomes a small lesson in patience, precision, and the quiet joy of working with your hands. The skills you develop — the knots, the eye for proportion, the instinct for what filling suits what setting — compound over time into a genuine craft practice that grows richer and more satisfying the longer you pursue it. Pick up a length of twine and a jar today, and discover for yourself why this timeless craft has endured for so long.








What do you think?
It is nice to know your opinion. Leave a comment.