










Bear Crochet Pattern: Your Complete Guide to Crafting an Adorable Handmade Bear
Introduction to Bear Crochet Patterns
Crocheting a bear is one of the most rewarding projects any fiber artist can undertake, whether you are a complete beginner picking up a hook for the first time or a seasoned crafter looking for a satisfying new challenge. Bear crochet patterns have remained consistently popular throughout the crafting world for decades, and it is easy to understand why. These charming little creatures make wonderful gifts for newborns, toddlers, and even adults who appreciate the warmth and personal touch of a handmade treasure. The end result is something truly special — a soft, huggable companion that carries with it the time, care, and creativity of the person who made it.
What makes bear crochet patterns particularly appealing is their incredible versatility. A single basic pattern can be customized in dozens of ways, from changing the color of the yarn to adding accessories like tiny scarves, bows, or miniature sweaters. You can create a classic brown teddy bear, a modern pastel-colored plush bear, or even a whimsical fantasy bear with rainbow ears and sparkly accents. The foundational techniques remain the same regardless of the aesthetic you choose, which means that once you have mastered the core structure of crocheting a bear, you have essentially unlocked an entire world of creative possibilities that can keep you busy for years to come.
Beyond their creative potential, bear crochet projects also offer a wonderful opportunity to practice and refine essential crochet skills. Working in the round, shaping amigurumi-style pieces, sewing components together cleanly, and embroidering facial features are all techniques that appear repeatedly across countless other crochet projects. By completing a bear, you are not just making one adorable toy — you are building a foundational skill set that will serve you well across your entire crochet journey. This guide will walk you through everything you need to know, from selecting your materials to finishing your bear with professional-looking details.
Why Bear Patterns Are Perfect for All Skill Levels
One of the most encouraging aspects of bear crochet patterns is that they genuinely can be adapted for crafters at every level of experience. Beginner-friendly versions typically use only the most basic stitches — chain stitches, single crochets, and slip stitches — assembled into simple circular shapes that are then stuffed and joined together. These beginner patterns are intentionally straightforward, focusing on getting the basic proportions right and producing a recognizable, lovable bear without overwhelming the new crafter with complex techniques. Many beginners complete their first bear in a single weekend and come away feeling genuinely proud and inspired to tackle more ambitious projects.
For intermediate and advanced crafters, bear patterns offer a wealth of additional complexity and detail. More sophisticated versions might include textured fur stitches that mimic the look and feel of real animal fur, articulated limbs that can be posed in different positions, intricate facial sculpting using wire armatures beneath the crochet exterior, and elaborate clothing or accessory patterns that accompany the main bear. Some advanced patterns even incorporate multiple colors of yarn in the same piece, requiring skills like color changing, tapestry crochet, or intarsia to achieve detailed designs directly in the fabric of the bear itself.
Materials and Tools You Will Need
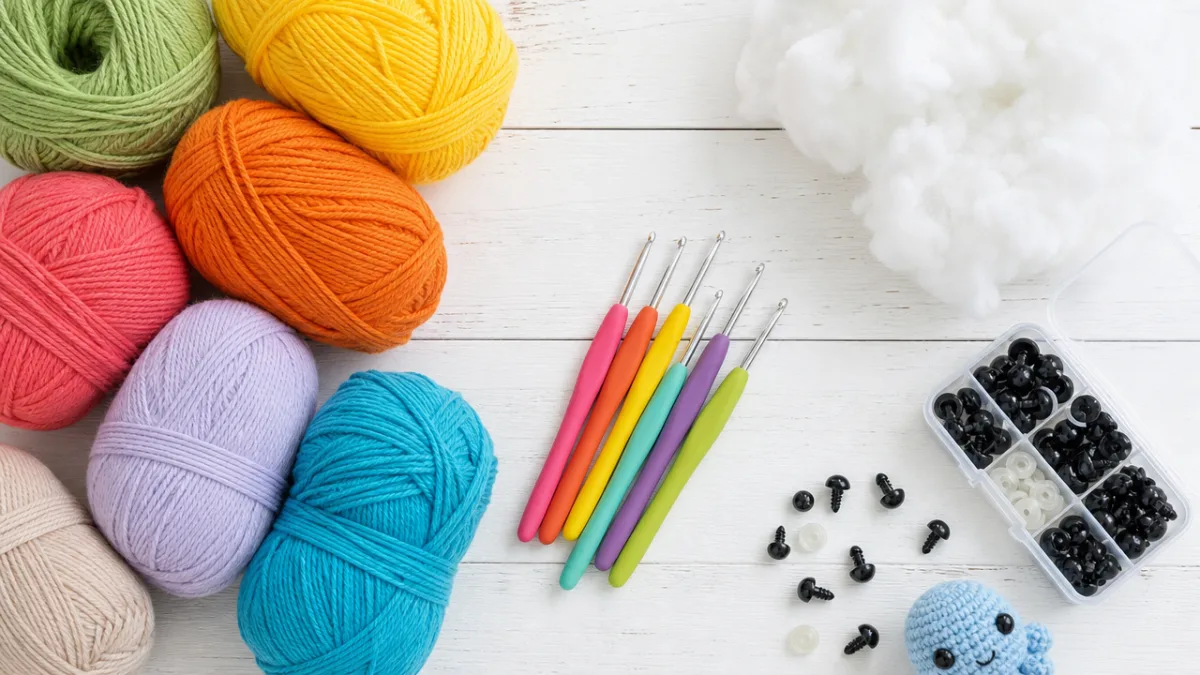
Selecting the right materials is arguably the most important step in any crochet project, and bear patterns are no exception. The type of yarn you choose will dramatically affect the look, feel, and durability of your finished bear. For most amigurumi-style bears, crafters typically recommend a smooth, tightly spun yarn in a worsted or DK weight, as these tend to produce neat, even stitches that show the structure of the piece clearly. Cotton yarn is a popular choice because it is easy to work with, holds its shape well, and is available in a wide range of colors. However, acrylic yarn is equally beloved for its softness, affordability, and extensive color selection.
Your hook size should be slightly smaller than what the yarn label recommends for standard projects. This technique, which experienced amigurumi makers swear by, creates a tighter fabric with smaller gaps between stitches, ensuring that the stuffing inside your bear does not peek through the exterior. For example, if your worsted weight yarn suggests a 5mm hook, you might choose to use a 4mm or even 3.5mm hook for your bear project. The resulting fabric will be firmer and more structured, which is exactly what you want when creating a stuffed toy that needs to hold its shape over many years of hugs and handling.
Beyond yarn and hooks, you will need several other supplies to complete your bear successfully. Polyfill stuffing — the fluffy synthetic filling used in pillows and stuffed animals — is essential for giving your bear its three-dimensional shape and soft, squeezable feel. Safety eyes come in many sizes and colors and are the most popular choice for giving bears an expressive, polished appearance. You will also need a yarn needle with a large eye for sewing pieces together and embroidering details, scissors for trimming yarn ends, and stitch markers to help you keep track of your rounds. Some crafters also use wire or cardboard armatures inside their bears for additional structure.
Choosing the Right Yarn for Your Bear
The yarn you select will have a profound impact on the personality of your finished bear. Soft, plush yarns like chenille or velvet yarn create bears with an irresistibly luxurious texture that feels wonderful against a child’s cheek, but these yarn types can be trickier to work with because the fuzzy fibers make it difficult to see your individual stitches clearly. This can lead to mistakes going unnoticed until the piece is nearly complete, which can be frustrating. Beginners are generally advised to start with a smooth, medium-weight yarn that allows them to see and count every stitch with ease, saving the more exotic yarn types for when they are more confident in their technique.
Color selection is another dimension of the yarn decision that deserves careful thought. Traditional bears are most often worked in shades of brown, tan, cream, or gold, but contemporary crochet culture enthusiastically embraces bears in every color imaginable. Dusty rose, sage green, slate blue, and warm terracotta are all popular choices in modern handmade toy communities, and pastel rainbow bears have become a genuine trend in recent years. If you are making the bear as a gift, consider the recipient’s favorite colors or the color scheme of the nursery or bedroom where the bear will live. A thoughtfully chosen color palette transforms a simple pattern into something that feels genuinely personal and special.
Understanding the Basic Crochet Stitches for Bears
Before diving into the pattern itself, it is worth taking a moment to review the fundamental stitches that form the backbone of virtually every bear crochet pattern. The magic ring, also called the magic circle or adjustable ring, is typically the starting point for crocheted bear parts worked in the round. This technique creates a tight, invisible starting point with no hole in the center, which is essential for amigurumi pieces that need a neat, professional appearance. If you have not yet mastered the magic ring, spending fifteen minutes practicing it before beginning your bear will save you significant frustration later in the project.
Single crochet is the most frequently used stitch in bear patterns, forming the dense, even fabric that gives amigurumi pieces their characteristic look and feel. Unlike more open stitches such as half double crochet or double crochet, the single crochet creates very little space between stitches, resulting in a solid, stuffing-concealing fabric. Increases — which involve working two single crochets into the same stitch — and decreases — which involve working two stitches together to reduce the stitch count — are used throughout the pattern to shape spherical and cylindrical body parts. Understanding when and how to make clean, invisible increases and decreases is the key skill that separates a lumpy, misshapen bear from a smooth, well-proportioned one.
Slip stitches are used to join rounds and to move the yarn to a new position without adding height to the work. They also appear when attaching limbs and other components to the main body of the bear. A whip stitch or mattress stitch, worked with your yarn needle rather than your hook, is used to sew the individual pieces together into the complete bear. Many crafters find the assembly stage to be simultaneously the most exciting and the most technically demanding part of making a bear, because the placement and angle of each component — ears, arms, legs, and muzzle — will determine the final personality and character of the finished animal.
Working in the Round: Tips and Tricks
Working in continuous rounds, rather than turning your work at the end of each row, is the defining characteristic of amigurumi crochet and the technique that creates those smooth, seamless shapes. Keeping track of where each round begins and ends can be genuinely tricky, especially as your piece grows larger and the rounds become longer. Using a stitch marker — a small removable clip or even just a piece of contrasting yarn looped through a stitch — to mark the first stitch of each round is not just a helpful tip; it is essentially mandatory for maintaining accuracy. Without a stitch marker, it is very easy to accidentally add or lose a stitch, which will cause your shape to distort in ways that become increasingly difficult to correct.
Tension consistency is another crucial factor when working in the round on amigurumi projects. If your tension varies significantly from stitch to stitch or round to round, the surface of your bear will look uneven and bumpy rather than smooth and polished. Many crafters find that tension naturally improves with practice and that their first few amigurumi pieces look noticeably rougher than later work. If tension consistency is a challenge for you, try experimenting with how you hold your yarn and hook, as different hand positions can lead to very different tension results. Some people also find that switching to a hook with an ergonomic grip reduces hand fatigue, which in turn leads to more consistent tension over longer crafting sessions.
Step-by-Step Bear Pattern Overview
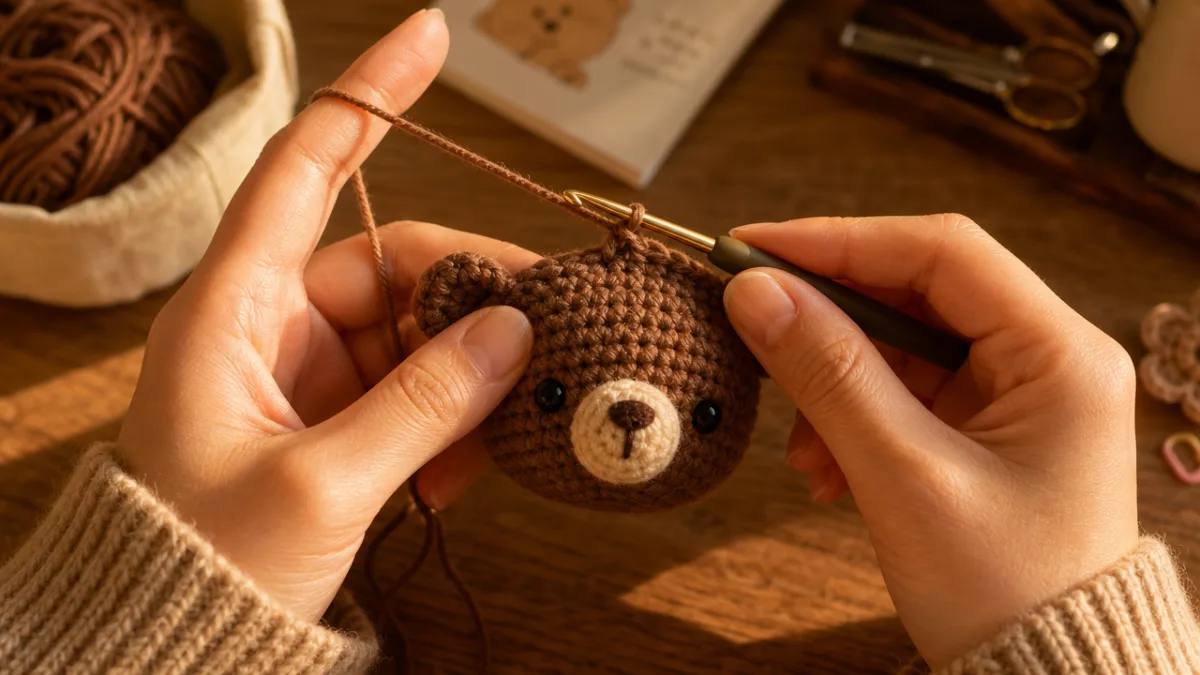
A standard bear crochet pattern typically involves creating six to eight separate pieces that are then stuffed and assembled: the head, the body, two arms, two legs, and two ears. Some patterns also include a separate muzzle piece, a tummy patch in a contrasting color, or a tail. The head is almost always the largest piece and is usually worked first, as it establishes the scale for all the other components. Starting with twelve single crochets in a magic ring, then increasing evenly in subsequent rounds, creates the classic spherical shape that gives a bear its round, endearing head.
The body is typically a slightly elongated sphere, created using a similar increase-then-decrease structure but worked over more rounds to create additional length. Arms and legs are usually simple cylinders — tubes worked in continuous rounds without increases or decreases along most of their length — that taper slightly at one end. Ears are among the smallest and simplest pieces, often requiring just a few rounds of increases to create a small, flat disk. The apparent simplicity of individual pieces is part of what makes bear patterns so approachable; each component on its own is very manageable, and the magic happens when they all come together during assembly.
Once all pieces are crocheted and stuffed to the appropriate firmness — the head should feel solidly stuffed, while the arms and legs can be a bit softer for more natural posability — the assembly process begins. Positioning the eyes before closing the head is essential, as safety eyes must be inserted through the fabric from the outside and locked in place with a backing washer on the inside before the stuffing makes this impossible. The nose and mouth are typically embroidered using black yarn or embroidery floss after assembly, using simple straight stitches or a Y-shaped design to create an expressive, characterful face. Taking time to carefully position facial features makes an enormous difference to the personality of the finished bear.
Customizing Your Bear Pattern
Once you have completed one bear using a standard pattern, you will likely find yourself eager to start experimenting with customizations that make each subsequent bear uniquely your own. One of the simplest and most effective customizations is changing the size of the bear by using different yarn weights and corresponding hook sizes. A chunky yarn worked on a large hook will produce a big, impressive bear that makes a dramatic gift, while fingering weight yarn and a tiny hook will create a miniature bear that fits in the palm of a hand and can be attached to a keychain or used as a doll accessory.
Adding clothing and accessories to your bear opens up an entirely separate world of mini-garment crochet that many crafters find completely addictive. A simple rectangle sewn into a tube becomes a tiny scarf; a small circular piece with a hole in the center becomes a hat; a few rows of textured stitches become a sweater. Many dedicated crochet bear enthusiasts maintain entire wardrobes of interchangeable outfits for their bears, and creating seasonal or themed collections — a bear in a pumpkin costume for autumn, a bear in a tiny Santa hat for winter — has become a beloved creative tradition in many crafting households and online communities.
Finishing Techniques and Adding Character
The finishing stage of your bear project is where the animal truly comes to life, and it deserves as much careful attention as any other part of the process. After all the pieces are assembled and all the safety eyes are secured, the most important finishing step is creating the bear’s facial expression. The embroidered nose and mouth have an outsized impact on the perceived personality of the finished toy; a nose stitched slightly asymmetrically can make a bear look cheeky and mischievous, while a perfectly centered, symmetrical face gives a more classic, serene appearance. Do not rush this step, and do not be afraid to unpick and redo the embroidery if your first attempt does not capture the expression you envisioned.
Weaving in yarn ends thoroughly and securely is an essential but often underappreciated part of finishing any crochet project, and it is especially important for toys that will be handled frequently by children. Every yarn tail should be woven in at least three or four times in different directions to ensure it will not work its way loose over time. Some crafters also add a small knot before weaving in the tail for extra security. Taking the time to finish your bear neatly on the inside — where no one will see it — is a mark of genuine craftsmanship and ensures that the toy will remain beautiful and safe for many years.
Giving your bear a gentle brush with a soft-bristled pet slicker brush after completion can dramatically transform its appearance, particularly if you have used a fuzzy or textured yarn. Brushing fluffs up the fibers and creates a soft, plush surface that looks and feels remarkably similar to real stuffed animal fur. Even bears made from smooth yarn benefit from a light brush, as it helps to even out any inconsistencies in the surface texture and gives the finished piece a more professional, store-quality appearance. This simple final step takes only a few minutes but makes a genuinely significant difference to how polished your bear looks.

Caring for Your Finished Bear
A handmade crochet bear, especially one destined to become a beloved companion for a child, needs to be made with care and washed with care too. Most acrylic and cotton yarns are machine washable on a gentle or delicate cycle, which makes cleaning straightforward for everyday use. However, it is always wise to check the care label on your specific yarn before washing, as some specialty fibers require hand washing or dry cleaning. Placing the bear inside a mesh laundry bag before putting it in the washing machine provides an extra layer of protection against snagging or distortion during the wash cycle.
Air drying your bear rather than putting it in the tumble dryer will help it maintain its shape and prevent any distortion that heat might cause, particularly if the bear contains safety eyes with plastic components that could warp under high heat. Reshape the bear gently while it is still damp, paying particular attention to the head and body, which can flatten slightly during washing. Once dry, a light brush will restore the softness of the yarn and make the bear look as good as new. With proper care, a well-made crochet bear can last for generations, becoming a treasured heirloom passed down through families as a tangible symbol of love and handmade heritage.
- Always check yarn care labels before washing your finished bear, as fiber content determines the safest cleaning method and ignoring this advice can result in irreversible damage to your work.
- Use a mesh laundry bag when machine washing to protect the bear from snagging on other items in the load and to prevent small parts like bows or attached accessories from catching on the drum.
- Reshape the bear while still damp after washing, gently molding the head, body, and limbs back into their original proportions before laying flat to dry completely.
- Store bears away from direct sunlight when not in use, as prolonged UV exposure can cause yarn colors to fade significantly over time, particularly with brightly colored or pastel yarns.
- Inspect the safety eyes and any sewn-on accessories periodically, especially on bears belonging to young children, to ensure all parts remain securely attached and there are no loose yarn ends that could pose a risk.
Sharing Your Bear with the World
Once you have completed your bear and stepped back to admire your handiwork, you may well find yourself wanting to share your creation with others — and the good news is that the modern crafting community offers more wonderful ways to do this than ever before. Social media platforms dedicated to handmade crafts and fiber arts are filled with passionate, supportive communities of fellow crocheters who genuinely love seeing finished projects, no matter the skill level of the maker. Photographing your bear in good natural light, styled simply against a neutral background or nestled in a cozy setting, will showcase your work beautifully and make it truly shine online.
If you find yourself making bears frequently, you might also consider selling your finished work or your patterns through online marketplaces dedicated to handmade goods and craft supplies. Many talented crocheters have built genuinely successful small businesses around their amigurumi creations, building loyal customer bases who return again and again for custom bears made in specific colors, sizes, or themes. Writing and selling your own bear pattern — even a beginner-friendly version of the one you developed through your own experimentation — can generate passive income while also contributing to the broader crafting community by giving other makers a new project to enjoy and learn from.
Perhaps most meaningfully of all, a handmade bear given as a gift carries an emotional weight that no store-bought toy can match. The recipient knows — or quickly comes to understand — that someone spent hours of their time, creativity, and care creating something specifically for them. Bears made as baby shower gifts, birthday presents, or simple gestures of affection have a way of being kept for decades, surviving house moves, growing-up years, and life transitions to remain as cherished reminders of the person who made them. In a world of mass-produced goods, a handmade crochet bear is a genuinely radical act of love, and that is perhaps the most beautiful thing about the craft.








What do you think?
It is nice to know your opinion. Leave a comment.