










DIY Newspaper Setup: Transform Your Space with Thrifty Creativity
There is something deeply satisfying about taking an everyday material most people toss in the recycling bin and turning it into something genuinely beautiful. Newspaper-based DIY projects have surged in popularity among home decorators, crafters, and budget-conscious creatives who want stunning results without spending a fortune. Whether you are covering a craft table, creating wall art, or lining shelves with a vintage aesthetic, newspaper setups offer endless possibilities that punch well above their humble origins.
The appeal of newspaper as a crafting and decorating material goes far beyond its zero cost. The texture, the print, the slightly yellowed tone of aged newsprint — all of these qualities carry a nostalgic, artisanal charm that expensive materials often fail to replicate. Designers and DIY enthusiasts alike have discovered that newspaper can serve as a foundation layer, a decorative surface finish, or even the primary medium for sculptural and three-dimensional creations that look professionally crafted.
This guide will walk you through everything you need to know about setting up your own newspaper DIY workspace and executing projects that yield genuinely impressive results. From gathering your supplies and preparing your surfaces to applying final finishes and styling your creations, you will find detailed, practical advice drawn from tried-and-true techniques that produce the kind of polished outcomes worth sharing and celebrating.
Gathering Your Materials and Preparing Your Workspace
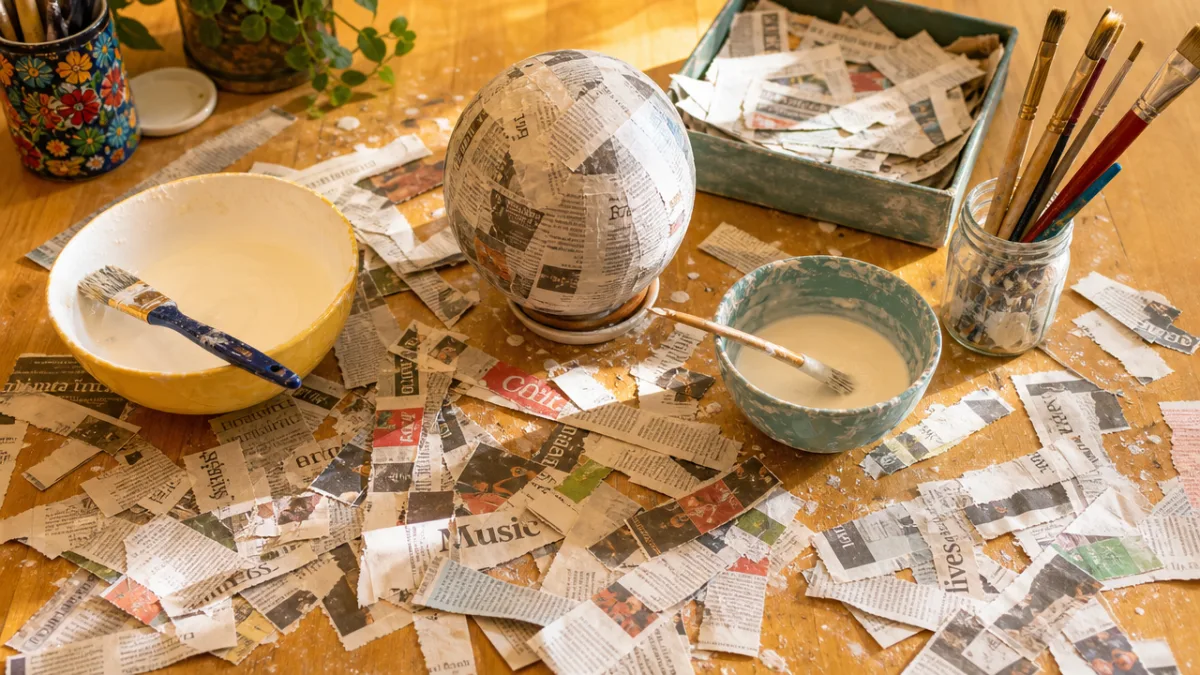
Before you cut a single sheet or mix your first batch of paste, taking the time to gather the right materials and organize your workspace will make the entire process smoother and more enjoyable. The core supply list for a newspaper DIY setup is refreshingly affordable. You will need a generous stack of newspapers — at least a week’s worth for most medium-sized projects — along with a flat, protected work surface, a set of brushes in varying widths, scissors, a craft knife with a cutting mat, and your chosen adhesive or paste.
Adhesive choice matters more than most beginners realize and can make or break the final result of your project. Classic decoupage medium such as Mod Podge remains the most popular option because it functions simultaneously as glue, sealant, and finish. However, a homemade paste made from equal parts white craft glue and water is equally effective for most applications and costs a fraction of the price. For papier-mâché projects, a mixture of flour, water, and a small amount of salt creates a firm, durable bond that dries hard and sands beautifully.
Workspace preparation deserves particular attention because newspaper ink can transfer onto surfaces and dried paste can be genuinely difficult to remove. Cover your entire work surface with a plastic sheet or additional layers of newspaper that you are willing to sacrifice. Have paper towels and a bowl of clean water nearby for quick cleanups. Good lighting is essential so you can see air bubbles forming beneath applied layers, and adequate ventilation matters if you plan to use spray sealants or spray paints in any finishing steps. Setting up once and setting up properly saves enormous frustration later.
Core Techniques Every Newspaper DIY Crafter Should Master
The decoupage method is perhaps the most universally applicable newspaper technique and forms the foundation of dozens of project types. To execute it well, tear rather than cut your newspaper pieces — torn edges blend seamlessly into one another, creating a smooth, layered surface with no visible borders. Apply a thin coat of your adhesive to the base surface first, then lay pieces of newspaper over it, smoothing from the center outward to eliminate bubbles and wrinkles. Brush another thin layer of adhesive directly over each piece as you go, building up layers gradually.
Papier-mâché opens up a completely different dimension of possibility, allowing you to build three-dimensional forms over armatures made from balloons, wire frames, cardboard structures, or existing objects. The key to strong papier-mâché is patience — each layer must dry completely before the next is applied, and three to five layers minimum are needed for structural integrity. Tear your newspaper into strips roughly one to two inches wide and work in a consistent direction for the first layer, then switch directions for subsequent layers to create a woven, cross-hatched strength pattern.
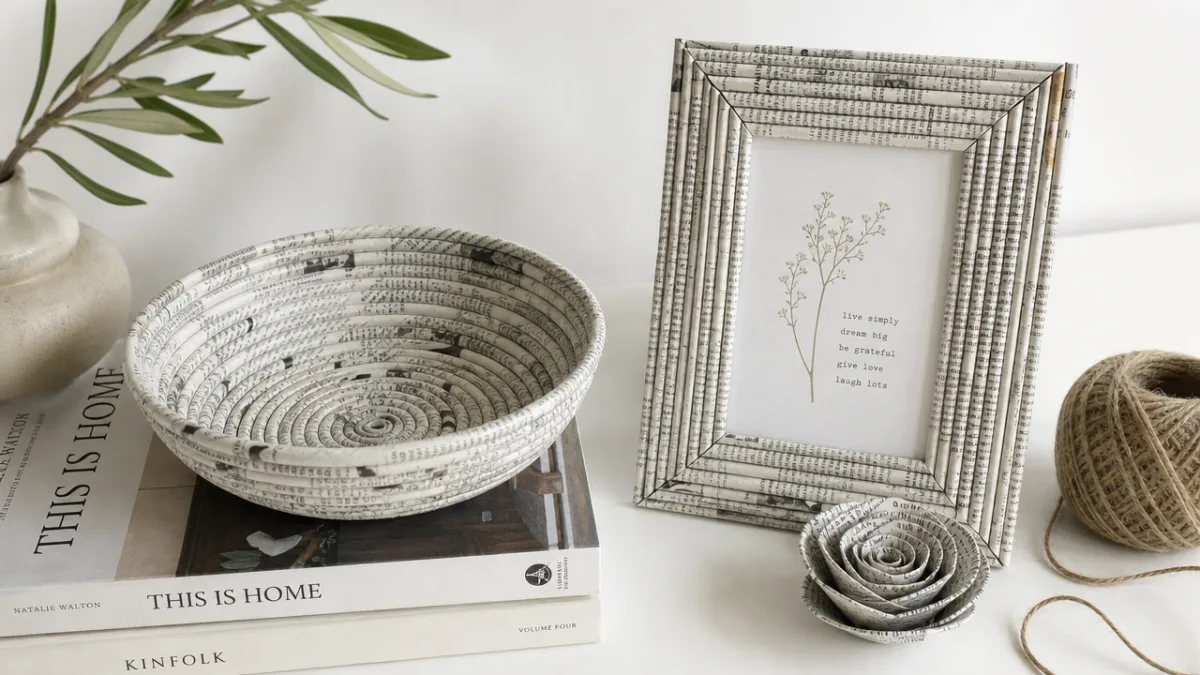
Newspaper rolling and weaving techniques have produced some of the most visually striking DIY results in recent years. By tightly rolling individual sheets of newspaper around a skewer or thin dowel, you create long, surprisingly rigid tubes that can be woven into baskets, coiled into bowls, or assembled into picture frames and wall hangings. The finished pieces often bear a striking resemblance to natural wicker or rattan when painted and sealed, at a cost that is essentially nothing. Mastering tight, even rolls is the skill that separates beginner attempts from truly professional-looking results.
Step-by-Step: Setting Up Your First Newspaper Project
Choosing your first project wisely sets the tone for your entire newspaper DIY journey. For beginners, a flat decoupage surface — a tray, a wooden box, a plain picture frame, or a terracotta pot — offers the ideal combination of achievability and visual impact. These projects introduce you to the core handling characteristics of wet newspaper without requiring structural complexity, and they yield finished pieces you will actually want to display or give as gifts, which provides the motivation to continue experimenting.
Once your surface is chosen and prepared, begin by sorting your newspaper intentionally. Pages heavy with text in interesting typefaces, pages with graphic black-and-white photography, pages with specific thematic content, and pages from different publication eras all create different aesthetic outcomes. Many crafters deliberately select pages featuring particular words, images, or layouts that carry personal meaning or suit the intended décor context of the finished piece. Spending twenty minutes sorting and selecting before you begin applying will noticeably elevate your results.
Apply your first layer with the goal of full coverage rather than perfection. Work in sections, keeping your paste application thin and even. As you build subsequent layers, begin paying closer attention to alignment, overlap patterns, and the placement of any feature pieces — a bold headline, a particularly striking photograph, or a striking section of typography. The final two layers should use smaller pieces applied with more deliberate attention to composition, as these will be the most visible in the finished piece. Finish with two to three coats of sealant, lightly sanding between coats if you desire an especially smooth surface.
Creative Applications and Project Ideas That Deliver Stunning Results
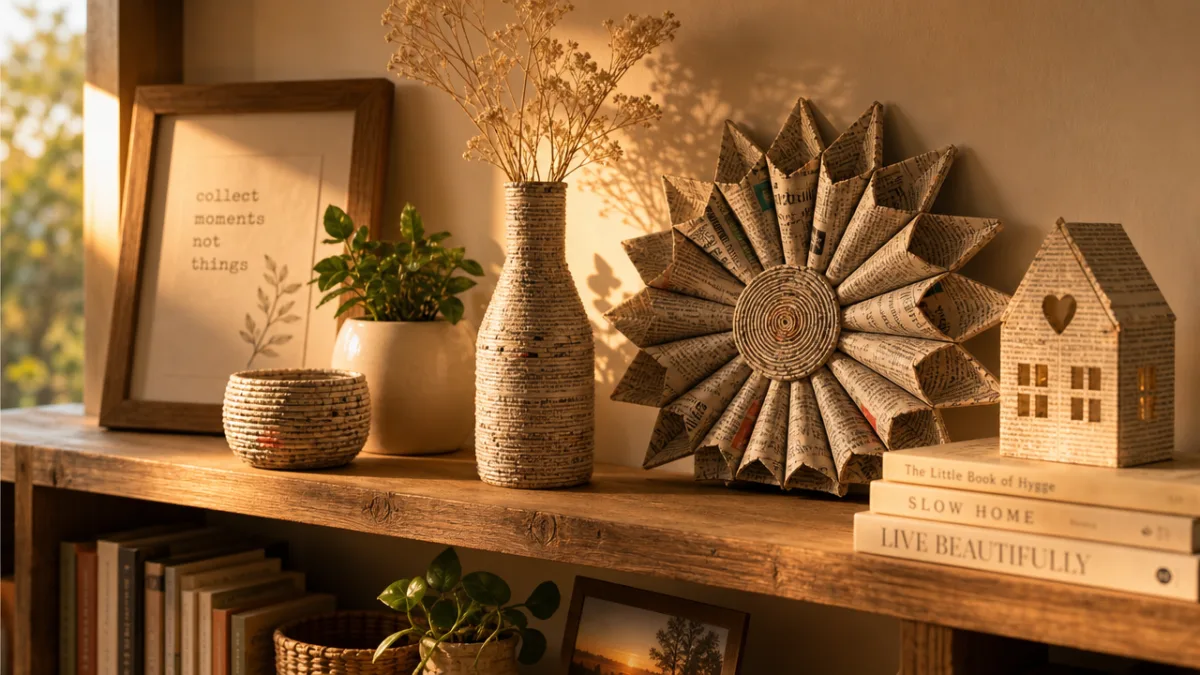
The range of projects achievable with a newspaper DIY setup is genuinely vast, spanning practical home accessories, wall art, gift wrapping, furniture upcycling, and even fashion accessories. Home accessories represent the most approachable starting point for most crafters. Newspaper-covered trays, decorative bowls, vase covers, and storage boxes all transform from ordinary to artful with a few layers of applied newsprint and a coat of sealant. These pieces work especially well in home offices, reading nooks, and living spaces designed around vintage or industrial aesthetic themes.
Wall art applications push the medium into truly dramatic territory. Large-scale newspaper collages, framed typographic panels, and layered mixed-media pieces that combine newspaper with paint, fabric, and other materials can become genuine focal points in a room. Some of the most striking examples involve applying newspaper as a background texture and then painting over it with diluted acrylic paint in a single color, which allows the type and images beneath to ghost through subtly, creating incredible depth and visual complexity that would be impossible to achieve with conventional paint alone.
Furniture upcycling with newspaper is perhaps the highest-impact application available to intermediate crafters. Covering drawer fronts, cabinet doors, tabletops, or accent chair panels with carefully selected and applied newspaper layers creates a completely transformed aesthetic at minimal cost. When properly sealed with a hard-wearing varnish or resin topcoat, newspaper-covered furniture surfaces are surprisingly durable and genuinely usable. The conversation these pieces generate when displayed in a home is consistently enthusiastic — most guests simply cannot believe the material used until they look very closely.
Beyond home décor, newspaper has found creative expression in fashion and accessories. Rolled newspaper jewelry — earrings, bangles, and statement necklaces — has a dedicated global following, particularly in African craft traditions where the technique has been elevated to genuine artisanal mastery. Newspaper gift wrap, complete with ribbon bows made from rolled strips, creates packaging that is arguably more visually interesting than commercial wrapping paper. Newspaper origami, plant pot covers, and even sculptural lampshades round out a creative landscape that continues to expand as more makers share their innovations online.
Finishing, Sealing, and Styling Your Newspaper Creations
The finishing stage is where many promising newspaper DIY projects either achieve their full potential or fall short of it, and the difference usually comes down to patience and the correct sealant choice. For decorative pieces that will not experience heavy handling or moisture exposure, a matte or gloss decoupage medium applied in two to three thin, even coats provides adequate protection while enhancing the visual depth of the newsprint layers beneath. Apply each coat in a single direction, allow it to dry completely, and apply the next coat in a perpendicular direction for maximum coverage and strength.
For pieces that will see regular use — trays, bowls, tabletops, and storage containers — a more durable topcoat is strongly recommended. Water-based polyurethane provides excellent protection against moisture and abrasion while remaining relatively non-yellowing over time. Epoxy resin poured over newspaper-covered surfaces creates a glass-smooth, highly durable finish that dramatically elevates the perceived quality of a piece and makes it genuinely competitive with commercially produced items in terms of both durability and appearance. The investment in proper finishing products is almost always worth making.
Color can be introduced at multiple stages of the finishing process to transform the aesthetic of newspaper projects dramatically. A wash of diluted black or dark brown paint applied over sealed newsprint and then partially wiped away creates an aged, antiqued effect that enhances the vintage quality of the material. Gold or copper metallic paint dry-brushed lightly across raised textures adds warmth and sophistication. Conversely, whitewashing newspaper-covered pieces with heavily diluted white paint creates a coastal, Scandinavian-inspired aesthetic that feels fresh and contemporary rather than nostalgic.
Understanding the Results and What Makes Newspaper DIY Worth the Effort
The results achievable through newspaper DIY setups consistently surprise first-time practitioners, who often begin the process with modest expectations and end it with pieces that genuinely exceed what they imagined possible. The combination of the material’s inherent visual character — its typography, its imagery, its texture — with thoughtful application and proper finishing produces objects that carry a unique aesthetic authenticity. No two newspaper DIY pieces are ever exactly alike, which gives each creation an intrinsic value that mass-produced items simply cannot offer regardless of their price point.
From a sustainability perspective, newspaper DIY projects represent one of the most genuinely eco-conscious crafting approaches available. Newspapers are already a recycled product, and using them as craft material extends their lifecycle before they reach the recycling stream again. The adhesives and sealants required are available in water-based, low-VOC formulations. The practice encourages repurposing existing objects rather than purchasing new ones, and it cultivates a creative mindset that naturally extends to other areas of domestic resourcefulness. In an era of thoughtful consumption, these qualities make newspaper crafting feel genuinely relevant and meaningful.
The community surrounding newspaper and paper crafting is warm, generous, and continuously innovative. Online platforms overflow with tutorials, project galleries, and troubleshooting communities where experienced makers readily share their knowledge with newcomers. Following along with other crafters’ processes reveals techniques and applications that would never occur to a solo practitioner working in isolation. The satisfaction of a completed piece — photographed beautifully, shared with appreciation, and displayed proudly in a lived-in space — creates a positive creative feedback loop that keeps makers returning to the material again and again, always finding new possibilities within its humble, familiar sheets.
Tips for Consistently Beautiful Results Every Time
Consistency in your results comes from developing good habits around a handful of key variables that even experienced crafters sometimes overlook. Paste consistency matters enormously — too thick and it creates lumps and uneven surfaces, too thin and it fails to bond properly or causes excessive wrinkling. The ideal working consistency for most applications is roughly that of heavy cream, and you should check and adjust your paste regularly throughout a session as it can thicken as water evaporates. Keeping a small spray bottle of water nearby to thin paste as needed takes thirty seconds and prevents hours of frustration.
The following practices consistently separate good results from great ones:
- Always tear rather than cut newspaper pieces for decoupage applications — the feathered torn edges blend invisibly, while cut edges create visible lines that detract from the finished surface.
- Work in thin layers rather than thick ones — thin layers dry faster, bond more securely, and build up to a smoother final surface than fewer thick applications.
- Keep a dry brush nearby to smooth freshly applied pieces — the dry brush grips the surface differently than a paste-laden brush and is far more effective at working out bubbles and wrinkles.
- Allow each layer to dry to the touch before adding the next — patience at this stage prevents the cloudy, wrinkled surfaces that result from trapping moisture between layers.
- Sand lightly between sealant coats using fine-grit sandpaper — this step makes a dramatic difference to the smoothness and professional appearance of the finished surface.
- Photograph your finished pieces in natural daylight — the texture and depth of newspaper surfaces photograph best in soft, diffused natural light that brings out all the detail without harsh shadows.
Troubleshooting common problems becomes much easier once you understand the material’s behavior. Wrinkling during application almost always indicates that too much paste was applied or that pieces were positioned while the underlying layer was still too wet. Peeling after drying typically signals insufficient sealant coats or a base surface that was not properly cleaned before application began. Yellowing over time, which can affect newspaper pieces exposed to direct sunlight, is best prevented by choosing a UV-resistant varnish as your final topcoat. Understanding these cause-and-effect relationships transforms occasional failures from discouraging setbacks into useful data points that improve your next attempt.
The most enduring lesson from any serious newspaper DIY practice is that the material rewards attentiveness and intentionality more than it rewards technical skill or expensive tools. A crafter who works slowly, observes carefully, and makes deliberate choices about material selection, layer building, and finishing will consistently outperform a faster worker who treats the process casually. The sparkle of truly excellent results — that quality captured so perfectly in the phrase “and the results ✨” — comes not from luck or talent but from the kind of focused, joyful attention that makes handmade things genuinely special.








What do you think?
It is nice to know your opinion. Leave a comment.