










“`html
DIY Floating Ladder Shelf: Build Your Own Stylish Wall-Mounted Storage
Floating ladder shelves have quietly taken over modern home design, and honestly, it’s not hard to see why. They open up a room, give you real display and storage space, and do it all without the heaviness of a traditional bookcase. And here’s the thing — whether you’ve been woodworking for years or you’re still figuring out which end of the drill to hold, building your own floating ladder shelf is a totally doable weekend project. The results look like something you’d find in a boutique furniture store, but for a fraction of the price.
Part of what makes the ladder shelf design so enduringly popular is just how adaptable it is. Lean one in a living room to show off books and plants, put it in a bathroom to wrangle towels and toiletries, or stick one in a home office to keep things from descending into chaos. That slight diagonal angle gives it a relaxed, almost organic quality that works surprisingly well across very different aesthetics — rustic farmhouse, sleek and modern, everything in between — depending on the wood and finish you go with.
This guide walks you through the whole process from start to finish: gathering materials, understanding the design, cutting and sanding, staining, and finally getting the piece securely on your wall. Along the way I’ve included tips from experienced DIY builders that’ll help you sidestep the most common mistakes and end up with something you’ll genuinely be proud of.
Understanding the Design and Planning Your Build
Before you make a single cut, it’s really worth taking some time to understand how a floating ladder shelf actually goes together. The basic anatomy is simple: two long angled side rails that give the piece its signature leaning silhouette, plus a series of horizontal shelves spanning between them. What makes the floating version different from a standard leaning ladder shelf is that it anchors directly into the wall studs rather than just resting against the baseboard. That anchoring is what makes it stable enough to hold real weight without any risk of it tipping forward.
First, figure out how big you want it. A typical floating ladder shelf for a living room or bedroom runs somewhere between 60 and 72 inches tall, with shelves between 24 and 36 inches wide. Most designs have three to five shelves, spaced about 12 to 14 inches apart — enough room for books, plants, and decorative items of various sizes. Sketch it all out on graph paper with your exact dimensions before you go buy lumber, because even small changes in width or height can shift how much material you need.
Also take a good look at the wall space you’re planning to use. Measure the height, check that you have enough horizontal room, and while you’re at it, run a stud finder over the area and mark where the studs are. You’ll need to anchor at least two of your shelf brackets into solid framing, so finding those studs now saves a lot of hassle later.
Gathering Materials and Tools
One of the best things about this project is how short the shopping list is. For lumber, most people go with pine or poplar for a budget-friendly build, or step up to oak or walnut if they want something richer and more substantial-looking. Pine is a great starting point — it’s easy to work with, takes stain really well, and you can find it at any home improvement store. You’ll need two long boards for your side rails and enough shorter pieces to cut your shelf planks. Bring your sketched dimensions to the lumber yard so you’re not guessing.
Beyond the wood, you’ll need some hardware and finishing supplies. Threaded metal rods or heavy-duty shelf brackets are the usual way to create the floating connection between the shelves and the wall. Pick up wood screws, wall anchors rated for your wall type, sandpaper in a range of grits (80 through 220 should cover you), wood filler for any knots or imperfections, and your finish of choice — whether that’s a penetrating stain, paint, or a clear polyurethane for a natural look.
Tool-wise, a miter saw or circular saw will give you the cleanest, most accurate cuts, though a hand saw works fine if you’re patient and careful. You’ll also want a power drill with several bit sizes, a level (non-negotiable if you want it to look good), a tape measure, a pencil, and clamps to hold pieces in place while you work. A sander or sanding block will save you a lot of time and give you a noticeably smoother finish than sanding by hand alone.

Cutting and Preparing the Wood
Now the fun part begins. Start with your two side rail pieces — the long diagonal uprights. Cut both to your planned height, and make absolutely sure they’re the same length. Even a small difference here will make your finished shelf look crooked on the wall, and that’s a headache you don’t want. Most floating ladder shelf designs also call for a slight angle cut at the bottom of each upright so the feet sit flat on the floor while the tops lean gently away from the wall, which is what gives it that characteristic silhouette.
Then cut your shelf planks to width. Keep them all the same length unless you’re going for a tapered look where the shelves get shorter as they go up. Once everything is cut, sand every piece thoroughly. Start with something coarser around 80 or 100 grit to knock off mill marks and rough spots, then work your way up through progressively finer grits until you finish with 220. At that point the wood should feel genuinely silky, and it’ll be ready to take stain or paint without blotching.
This is also when you want to deal with any knots, cracks, or holes. Fill them generously with wood filler, let it dry fully, and sand the filled spots flush with the rest of the surface. If you’re working with knotty pine, it’s a good idea to seal those knotty areas with a shellac-based primer before staining — knots have a habit of bleeding tannins through water-based finishes and creating dark, uneven splotches in your final color. Taking these prep steps seriously is honestly what separates a result that looks polished from one that just looks homemade.
Staining, Finishing, and Assembling the Shelf
Here’s a tip that experienced DIY builders swear by: finish your pieces before you assemble them. When everything is still flat and separate, you can easily reach all four sides of each board and get much more consistent coverage than you’d ever manage once it’s all joined together. Lay your cut and sanded pieces on a drop cloth somewhere well-ventilated, and apply your stain with a foam brush or a lint-free cloth, always working in the direction of the grain.
Let the stain sit for as long as the label says, then wipe away any excess with a clean rag before it gets tacky. If you want a deeper, richer color, add a second coat after the first has dried — overnight is usually the safest bet. Once you’re happy with the color, apply at least two coats of a clear protective finish like polyurethane, polycrylic, or furniture wax, with a light sand using 320-grit paper between coats. That protective layer is what lets the shelf hold up to daily life without showing wear too quickly.
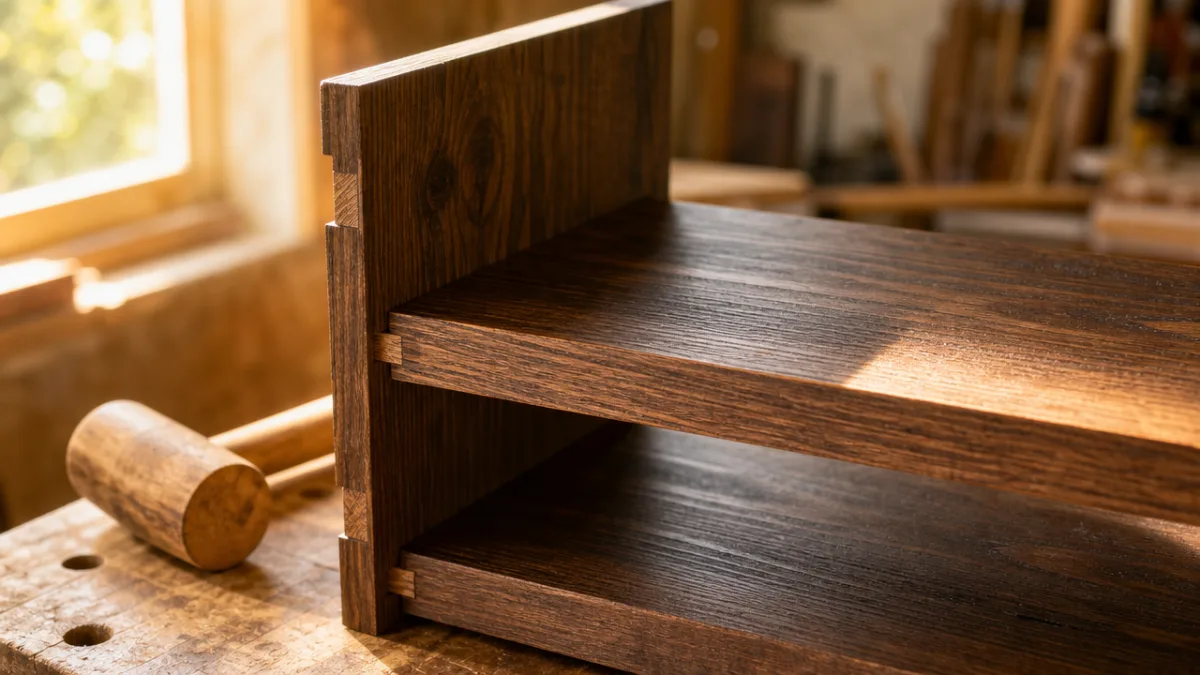
Assembly for a floating shelf works a bit differently than a standard leaning ladder. Instead of just gluing and screwing the shelves directly to the side rails, the floating design uses metal rods or concealed brackets that anchor into the wall later. Before you commit to anything permanent, do a complete dry-fit of all your pieces to make sure every joint is tight and every angle looks right. Clamp pieces in position before drilling pilot holes, and always make the pilots slightly narrower than your screws — especially near the ends of boards, where wood is most prone to splitting.
Mounting the Floating Ladder Shelf to the Wall
Mounting is the step that tends to make first-timers a little nervous, but if you take it methodically and use the right hardware, it’s really not as intimidating as it sounds. Go back to the stud locations you marked earlier and confirm them again with your stud finder. The whole structural case for a floating shelf rests on anchoring into solid framing, so it’s worth a quick double-check — especially if any time has passed since you made those marks or if they’ve smudged at all.
Hold your assembled shelf up against the wall in its intended spot and use your level to confirm it’s plumb and level before you mark any drilling locations. This is the step where having a second pair of hands really pays off — one person holds the shelf steady while the other steps back, checks the alignment, and marks the wall. Once your anchor points are marked, drill your pilot holes into the studs and drive in your wall bolts or lag screws. For any anchor points that fall between studs, use toggle bolts or heavy-duty drywall anchors rated for well above what you’re planning to put on the shelf.
With the wall hardware in place, hang the shelf onto the mounting points and do one final level check. Then give the whole thing a firm push and a light shake. A properly mounted floating shelf should feel completely solid — zero movement. If there’s any wobble at all, track down which anchor point needs attention before you call it done. Then step back and take a moment to appreciate what you built. That feeling when a handmade piece goes up on the wall and looks exactly like you imagined? That’s genuinely one of the best parts of DIY.
Styling Your New Floating Ladder Shelf
A shelf this well-built deserves some thoughtful styling to match. The secret to making a ladder shelf look intentional rather than cluttered is variety — mix heights, textures, and types of objects. Pair taller things like potted plants, CANDLEsticks, or stacked books with smaller pieces like framed photos, ceramic vessels, and little decorative boxes. And resist the urge to fill every inch of space — leaving breathing room between groupings is just as important as the objects themselves. Negative space is what makes a display feel curated instead of chaotic.
Think about visual weight as you move from shelf to shelf. Larger, heavier-looking items belong on the lower shelves, where they anchor the whole composition and keep the piece from feeling top-heavy. As you go higher, shift toward lighter, airier things — trailing plants, simple framed art prints, small sculptural objects with interesting shapes but not a lot of visual bulk. This natural gradient draws the eye upward in a way that feels easy and unhurried rather than jarring.
Don’t forget the practical side of things, either. A floating ladder shelf in a bathroom should hold stuff you actually reach for regularly — rolled towels, a small basket of toiletries, a candle or plant for a little atmosphere — not just pretty objects that sit there collecting dust. In a home office, labeled bins or decorative baskets on the lower shelves can corral supplies nicely, while the upper shelves are perfect for books and things that keep you motivated. When a shelf is both beautiful and genuinely useful, it really earns its place on the wall.

Maintenance, Care, and Variations to Try
Once your shelf is up and styled, keeping it in good shape doesn’t take much effort. Dust it regularly with a soft dry cloth or a microfiber duster to keep buildup from settling into the wood grain, which can make even a well-finished surface start to look dull over time. Skip the harsh chemical cleaners — if something spills, blot it up quickly with a barely damp cloth and dry the area right away. The protective finish you applied should handle most everyday accidents just fine, as long as it was applied properly and had enough time to cure before the shelf went into use.
Every few years, depending on how much wear your shelf sees and what kind of finish you used, it’s worth lightly sanding the surfaces and adding a fresh coat of your protective top coat to bring back that original luster. It only takes an hour or two and makes a real difference in how long the piece stays looking great. If you went with a wax finish instead of polyurethane, just buff in a fresh coat of furniture wax once a year and you’re set.
Once you’ve built one ladder shelf, you’ll almost certainly start dreaming up variations. Some popular ones: a double-sided freestanding version that stands on its own in the middle of a room, small hooks added to the underside of shelves for hanging mugs or jewelry, or a scaled-down tabletop version for a nightstand or bathroom counter. You might also try mixing wood species — darker walnut for the rails paired with lighter maple or ash for the shelves — for a two-tone effect that looks genuinely sophisticated without making the build much more complicated. The ladder shelf is a great beginner project precisely because it’s simple enough to pull off with confidence the first time, but open-ended enough to keep evolving as your skills and taste develop.
- Pine or poplar: Budget-friendly, widely available, and excellent for painted or lightly stained finishes suitable for farmhouse or cottage-style interiors.
- Oak: Durable and beautiful with a pronounced grain; takes dark stains exceptionally well and suits traditional or transitional design styles.
- Walnut: A premium choice with a naturally dark, rich tone that requires minimal staining; ideal for modern and mid-century inspired spaces.
- Reclaimed wood: Adds instant character and warmth with natural weathering and variation; pairs beautifully with industrial or rustic design schemes.
- Plywood with hardwood veneer: A cost-effective alternative that is dimensionally stable and works well for wider shelf spans that might sag in solid wood over time.
“`








What do you think?
It is nice to know your opinion. Leave a comment.