










Free Cute Frog Pattern for Handmade Toy Lovers: Your Complete Guide to Crafting an Adorable Amigurumi Frog
Introduction: Why Handmade Frog Toys Are Capturing Hearts Everywhere
There is something genuinely magical about holding a handmade toy that someone created with care, time, and intention. In a world increasingly dominated by mass-produced plastic playthings, the handmade toy movement has surged back into the spotlight, and at the center of this revival sits one of the most beloved characters in the crafting world: the humble, endearing frog. Cute frog patterns have become some of the most sought-after designs among knitters, crocheters, and sewists alike, offering crafters a fun project that results in a toy bursting with personality and charm.
Frog-themed amigurumi and soft toy patterns have an almost universal appeal that crosses age groups and skill levels. Whether you are a seasoned crafter looking for a satisfying weekend project or a beginner just discovering the joy of handmade toys, a cute frog pattern offers the perfect balance of accessibility and creative reward. The rounded body, wide expressive eyes, and little splayed legs make frogs one of those characters that translate beautifully from nature into soft, huggable form.
Beyond the aesthetic appeal, making a handmade frog toy carries meaningful emotional value. Crafters frequently report that the meditative rhythm of stitching helps reduce stress and anxiety, while the completed toy becomes a cherished keepsake or gift. Free patterns in particular open this world of creative joy to everyone, regardless of budget, making handmade crafting a truly inclusive hobby. This article will walk you through everything you need to know about finding, understanding, and using a free cute frog pattern to create your own perfect handmade companion.
Choosing the Right Materials for Your Frog Toy Project
The materials you choose will have an enormous impact on both the crafting experience and the finished toy. For crochet frog patterns, the most popular yarn choice is a medium-weight (worsted or DK weight) cotton or acrylic blend. Cotton yarns give the finished toy a satisfying firmness and are easy to wash, making them ideal for toys intended for young children. Acrylic yarns, on the other hand, tend to be softer and are available in a wider range of colors, including the vivid greens, teals, and lime shades that bring a frog to life.
When selecting your yarn color palette, consider going beyond a single shade of green. Many beloved frog patterns use a combination of a brighter green for the body and a softer, lighter green or cream for the belly. This two-tone approach gives the frog a more realistic and visually interesting look. You will also need small amounts of white and black yarn or safety eyes for the face, which is often the feature that transforms a simple round shape into a character full of personality. The size of your crochet hook should match your yarn weight; for worsted yarn, a 3.5mm to 4.5mm hook is typically recommended.
Beyond yarn and hooks, assembling the right toolkit before you begin will save you frustration mid-project. Essential supplies include a yarn needle for seaming and weaving in ends, stitch markers to keep track of your rounds, sharp scissors, and polyester fiberfill stuffing for giving your frog its satisfying plush shape. If you plan to give your frog to a child under three years of age, opt for embroidered eyes rather than plastic safety eyes as an added precaution. Having all your materials laid out and ready before you cast on your first stitch sets a calm, organized tone for the entire crafting experience.

Understanding Free Frog Patterns: Reading and Interpreting the Instructions
For anyone new to amigurumi or toy-making patterns, the abbreviations and terminology can feel like learning a new language. Most free crochet frog patterns are written using standard US crochet terminology, and understanding the most common abbreviations will allow you to approach any pattern with confidence. Terms like MR (magic ring), sc (single crochet), inc (increase), dec (invisible decrease), and sl st (slip stitch) appear in almost every amigurumi pattern you will encounter, and once these become second nature, the pattern itself opens up clearly before you.
Free patterns are typically structured in clearly labeled sections corresponding to each part of the frog: the head, body, legs, arms, and any additional features like eyelids or a wide smiling mouth. Working in continuous rounds rather than joined rounds is the standard approach for amigurumi, and using a stitch marker to track the beginning of each round is strongly recommended. As you grow more comfortable with the pattern structure, you will find that most frog bodies follow a similar logic: a magic ring, increases to build out a dome shape, straight rounds in the middle, and decreases to close. The legs and arms are often worked in tubes, sometimes with a slight flattening at the foot end to suggest the frog’s characteristic webbed toes.
One of the greatest advantages of free patterns shared through platforms like Pinterest is the community that surrounds them. Pattern creators often provide tutorial photos, video links, and comment sections where fellow crafters share tips, modifications, and troubleshooting advice. If you encounter a step that confuses you, a quick search for a video tutorial using the same terminology almost always reveals a clear visual demonstration. Embracing this community aspect transforms pattern-reading from a solitary puzzle into a collaborative, supportive learning experience that enriches your craft practice over time.
Step-by-Step Overview: Crocheting Your Cute Frog from Start to Finish
Beginning with the frog’s head is the most common approach in amigurumi construction, and for good reason: establishing the head early allows you to insert safety eyes at precisely the right moment before the opening becomes too small to work through comfortably. Start with a magic ring and work six single crochets into it, then pull the ring tight. From there, a series of increase rounds will expand your flat circle into the rounded dome that forms the top of the frog’s head. The characteristic wide, slightly bulging eyes of a frog are created by placing the safety eyes relatively high on the face, often with only a few rows of separation between them and the top of the head.
Once the head is complete and safety eyes are secured, the body is worked in a similar fashion, typically as a slightly larger oval or round shape. Depending on the pattern, the body and head may be worked as separate pieces and seamed together, or the body may be worked directly onto the head in one continuous piece. Both approaches have their merits; the two-piece method allows for easier stuffing and more precise shaping, while the continuous method reduces the number of seams for a smoother finished look. Stuff each section firmly but not so tightly that the stuffing distorts the shape or shows through the stitches.
The legs are often the most enjoyable part of the frog pattern to construct, as they are where the toy’s playful personality really begins to emerge. Front legs are typically short and slightly bent, while the back legs are longer with a flattened, wider section suggesting the powerful haunches and webbed feet that make frogs such distinctive creatures. After all pieces are worked and lightly pressed into shape, assembly is carried out using a yarn needle and the same yarn used for each piece. Positioning the legs slightly outward and downward before seaming gives the finished frog a natural, settled pose, as if it is comfortably sitting on a lily pad.
Finishing touches transform a well-constructed shape into a character with genuine charm. Embroidering a simple curved smile using black yarn or embroidery floss, adding tiny nostril dots, and optionally crafting a small crocheted red tongue peeking from the mouth are all popular embellishments found in cute frog patterns. Some crafters also add a row of surface slip stitches along the belly in a lighter color to suggest the frog’s characteristic pale underbelly. These small details require only a few extra minutes but make a remarkable difference to the overall expressiveness and appeal of the finished toy.

Customizing Your Frog: Creative Variations and Personal Touches
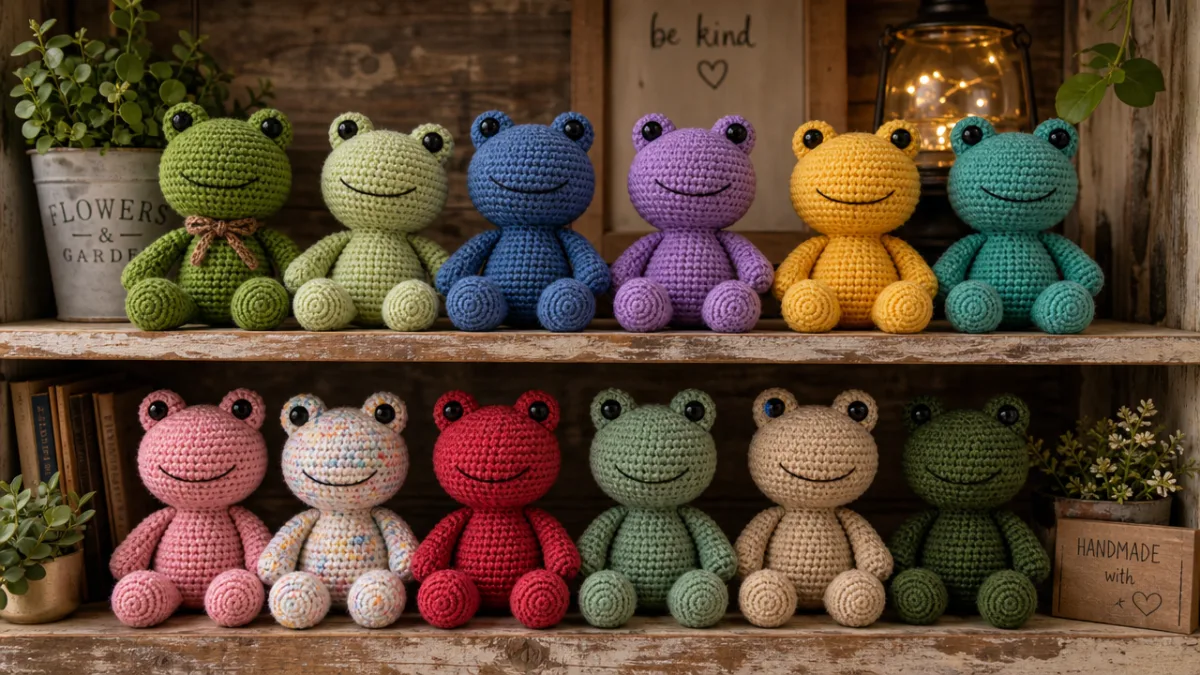
One of the greatest pleasures of working from a free base pattern is the freedom it gives you to customize and make the design entirely your own. Color is the most immediate avenue for personalization, and the range of possibilities is genuinely exciting. While classic green frogs are perennially popular, crafters have created stunning frogs in unexpected palettes including dusty rose, lavender, sunshine yellow, and even galaxy-inspired multicolors using variegated yarn. These imaginative color choices transform the frog from a realistic creature into a whimsical fantasy character that feels fresh and original.
Beyond color, you can modify the size of your frog dramatically by simply changing your yarn weight and hook size. Using bulky yarn and a large hook produces an oversized, pillow-like frog that makes an excellent decorative cushion or a cozy companion for older children. Conversely, using fine yarn or thread with a tiny hook allows you to create miniature frogs small enough to perch on a fingertip, perfect for keychains, bag charms, or decorative accents. The same basic pattern scales beautifully across sizes, requiring only minor adjustments to the number of rounds in the straight sections of the body and legs.
Accessories and clothing are another wonderfully creative dimension of frog toy customization. Many crafters delight in dressing their finished frogs in tiny crocheted or sewn outfits, from simple bow ties and flower crowns to elaborate princess dresses and miniature raincoats complete with hoods. A frog wearing a tiny chef’s hat, a graduation cap, or a little knitted sweater becomes a personalized gift that tells a specific story and reflects the personality of the recipient. These additions require only scraps of yarn and a little imaginative pattern modification, making them an accessible creative challenge even for intermediate crafters.
Sharing, Gifting, and Building Community Around Your Handmade Frog Creations
The handmade toy community thrives on sharing, and a finished frog toy is one of the most shareable, relatable creations a crafter can post online. Platforms like Pinterest, Instagram, and dedicated crafting forums are filled with makers proudly displaying their finished amigurumi frogs alongside the pattern credits, yarns used, and any modifications they made along the way. This culture of open, enthusiastic sharing benefits everyone: pattern creators gain visibility and recognition, fellow crafters gain inspiration and practical advice, and the broader community is enriched by a constantly expanding gallery of creative interpretations.
As a gift, a handmade frog toy carries a weight of meaning that no store-bought toy can replicate. Recipients instinctively understand that someone invested real time, skill, and care into making something specifically for them. Baby shower gifts, birthday presents for young children, comfort items for hospital stays, and memorial gifts for those who loved frogs in life are all occasions where a handmade frog toy becomes something deeply meaningful. Attaching a handwritten tag noting the materials used, the care instructions, and perhaps a small personal message elevates the gift further and ensures the recipient knows exactly what they have received.
If your passion for frog patterns grows beyond personal gifting, there is a thriving market for handmade toys through platforms like Etsy, local craft fairs, and school fundraisers. Selling handmade toys requires familiarity with toy safety regulations in your country, particularly regarding stuffing materials and eye attachments for items intended for young children. Many crafters who sell their work also invest in learning basic photography skills to showcase their frogs beautifully online, as well-lit, clear images make an enormous difference to the perceived value and desirability of handmade items in a crowded marketplace.
Building a practice around handmade toys, whether as a hobby or a small business, ultimately connects you to a rich tradition of craft that stretches back through generations. Every crafter who picks up a cute frog pattern and works it to completion joins a long lineage of makers who understood that creating something with your hands is one of the most fundamentally human and deeply satisfying activities available to us. The frog pattern itself may be free, but what you create with it, and the community you build around it, is genuinely priceless.
Tips for Success: Common Mistakes and How to Avoid Them
Even experienced crafters encounter challenges when working a new toy pattern, and understanding the most common pitfalls in advance can save considerable time and frustration. The single most frequent issue in amigurumi work is tension inconsistency. Working too loosely results in gaps between stitches through which the white fiberfill stuffing becomes visible, giving the finished toy an unpolished appearance. Working too tightly makes the stitches difficult to work into and can cause hand fatigue. The ideal tension for amigurumi is slightly tighter than you might use for a garment, creating a fabric dense enough to contain the stuffing completely.
Losing count of rounds and stitches is another extremely common challenge, particularly for beginners working in continuous rounds without a clear visual boundary between each round. Using a removable stitch marker at the beginning of each round is the single most effective solution to this problem. Moving the marker up with each new round takes only a second but saves enormous confusion later. Some crafters also prefer to count their stitches at the end of every round, particularly during increase and decrease sections where an error in stitch count will affect the final shape of the piece.
Assembly is the stage where many toy projects falter, even when the individual crocheted pieces are beautifully made. Positioning pieces symmetrically before committing to seaming is critical, and the easiest way to achieve this is to use pins to hold pieces in place while you step back and assess the overall composition. Photographing the pinned arrangement before seaming can reveal imbalances that are difficult to perceive when working close to the object. Seaming with the same yarn used for each piece, using a mattress stitch or whip stitch, and weaving in ends thoroughly on the inside of the toy all contribute to a professional, long-lasting finish that will survive years of loving play.
- Always use a stitch marker to track the beginning of each round, especially during increase and decrease sections.
- Work with slightly tighter tension than usual to prevent stuffing from showing through gaps in the stitches.
- Insert safety eyes before the opening becomes too small, typically while the head is about two-thirds closed.
- Pin all pieces in position and photograph before seaming to check for symmetry and overall balance.
- Stuff firmly but gradually, adding small amounts of fiberfill at a time to achieve an even, smooth result.
- Weave in all ends securely on the inside of the toy, trimming close but leaving just enough to prevent unraveling.
- Block or lightly steam finished pieces if the yarn allows, to even out any tension inconsistencies before assembly.
Patience is perhaps the most important quality a toy crafter can cultivate. Amigurumi frogs worked carefully and methodically, with attention to each step, consistently produce results that the crafter is proud to display and give. Rushing through a pattern in an attempt to reach the finish line quickly rarely produces satisfying results, while a patient, mindful approach to each round, each seam, and each finishing detail produces a toy that genuinely reflects the love and skill that went into making it. Allow yourself to enjoy the process as much as the product, and your handmade frog will be all the more special for it.








What do you think?
It is nice to know your opinion. Leave a comment.