










Create the Most Viral Halloween Table Centerpiece with This Easy & Budget-Friendly DIY! 🎃🕸️
Why a Halloween Table Centerpiece Can Transform Your Entire Celebration
When it comes to Halloween decorating, most people focus on the front porch, the windows, or the yard — but the table centerpiece is one of the most overlooked and most powerful elements of your entire seasonal display. A well-crafted centerpiece draws every guest’s eye the moment they enter the room, setting the tone for the evening and creating that irresistible, spine-tingling atmosphere that makes Halloween parties truly memorable. It becomes the visual anchor around which everything else in your space revolves, tying together your color palette, your theme, and your overall creative vision in one cohesive focal point.
What makes a Halloween centerpiece so uniquely impactful compared to other holiday decorations is its intimacy. Unlike a wreath on the door or a skeleton on the lawn, a table centerpiece sits at eye level, right in the heart of where people gather, eat, laugh, and share stories. Guests will be looking at it throughout the entire evening, so every detail matters — the texture of a gnarled branch, the flicker of candlelight through a carved pumpkin, the delicate drape of a spiderweb. These details create an immersive experience that no store-bought decoration can replicate.
Beyond the aesthetic payoff, DIY Halloween centerpieces have become enormously popular on social media platforms like Pinterest, TikTok, and Instagram because they represent something deeply personal and creative. People love sharing their handmade creations, and a genuinely stunning centerpiece can rack up thousands of saves and shares overnight. This is exactly why so many DIY crafters are investing just a little time and a modest budget into creating centerpieces that photograph beautifully, feel authentically spooky, and tell a visual story that resonates with viewers far beyond their own dining room table.
The Power of a Strong Visual Theme
Before you purchase a single supply or hot-glue a single element, the most important step is to decide on a cohesive visual theme for your centerpiece. The Halloween aesthetic is incredibly broad — it encompasses everything from whimsical and cartoonish to dark and gothic, from harvest-inspired autumnal warmth to icy supernatural dread. Choosing your theme early prevents you from buying conflicting supplies and ensures that every element you add reinforces the same mood. Think about whether you want your guests to feel charmed, startled, amused, or genuinely unsettled, and let that guide your creative choices.
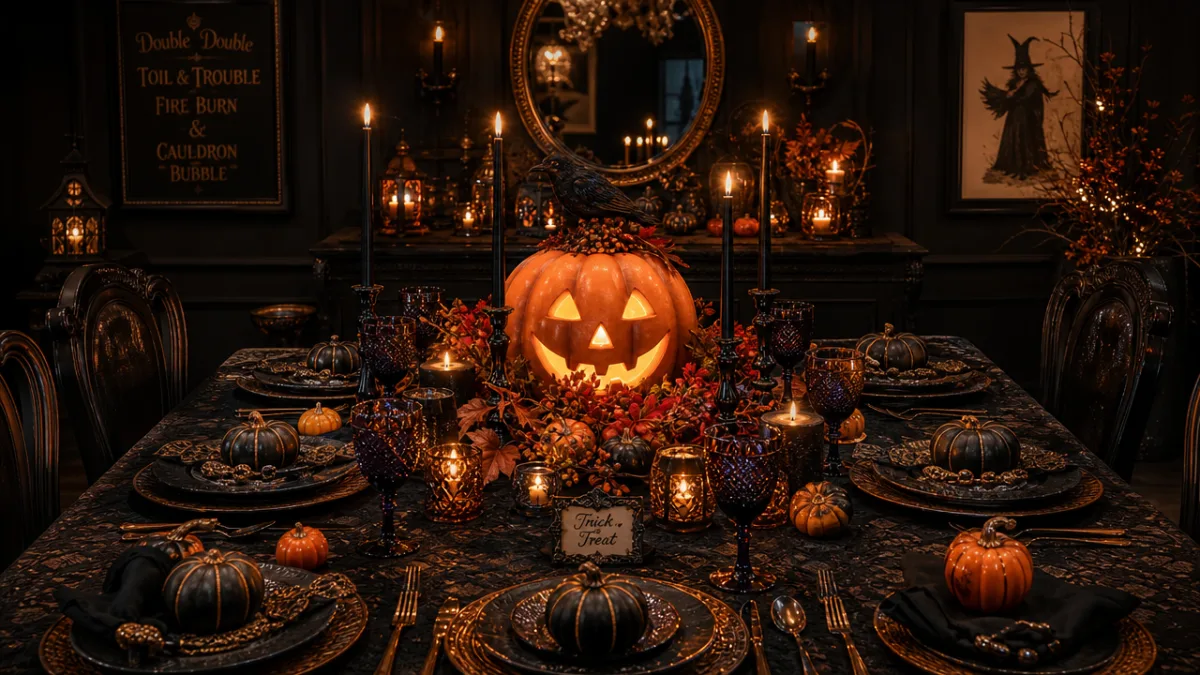
Some of the most viral Halloween centerpiece themes include the classic haunted apothecary look, which features dark glass bottles filled with mysterious liquids, aged labels, and clusters of black candles surrounded by skulls and dried herbs. Another perennially popular theme is the enchanted pumpkin patch, which layers real and faux gourds in a variety of sizes and textures alongside twisting vines, autumn leaves, and warm amber candlelight. Gothic elegance — featuring black lace, taper candles in candelabras, dark florals like black roses or deep burgundy dahlias, and ornate ravens — has also proven to be consistently shareable and visually striking.
The theme you choose should also reflect your personal style and the overall vibe of your home. A modern minimalist home might call for a sleek, monochromatic black-and-white arrangement with geometric shapes and sculptural elements rather than a maximalist explosion of orange and purple. A cozy farmhouse aesthetic might lean into the harvest side of Halloween with wooden crates, dried corn husks, rustic lanterns, and heirloom pumpkins in muted tones of cream, sage, and terracotta. Whatever you choose, committing fully to that vision is what transforms a collection of decorations into a genuinely compelling and photograph-worthy centerpiece.
Budget-Friendly Shopping Guide: Where to Find the Best Supplies
One of the most common misconceptions about creating a viral-worthy DIY Halloween centerpiece is that it requires a significant financial investment. In reality, some of the most stunning and widely shared centerpieces are built almost entirely from dollar store finds, thrift shop discoveries, and items foraged directly from nature. The secret lies not in the price of individual elements, but in how thoughtfully they are combined, layered, and styled. A five-dollar black candelabra from a discount store, when paired with thrifted glass bottles and a handful of real dried leaves, can look like a curated piece from an expensive home décor boutique.
Dollar Tree, the 99 Cents Only Store, and similar discount retailers typically stock an impressive selection of Halloween-specific items starting in early September, including plastic skulls, synthetic spiderwebs, battery-operated tea lights, faux ravens, small cauldrons, and an assortment of plastic pumpkins in various sizes. These items form an excellent structural foundation for your centerpiece. Supplement them with craft store finds — Hobby Lobby, Michaels, and Jo-Ann Fabrics regularly offer 40–50% off coupons that can dramatically reduce the cost of higher-quality elements like ribbon, floral picks, moss, or decorative lanterns.
Nature is perhaps the most budget-friendly supply source of all. A walk through a park or your own backyard in mid-October will yield an abundance of usable materials: fallen branches twisted into dramatic shapes, acorns and pinecones that add organic texture, dried grasses, seed pods, and an array of colorful fallen leaves. When spray-painted black or left in their natural autumn tones, these organic elements add an authenticity and texture that no manufactured product can replicate. Pairing these natural finds with a few well-chosen store-bought items is the formula that consistently produces the most organically beautiful and socially shareable centerpieces.
Essential Tools and Materials Checklist
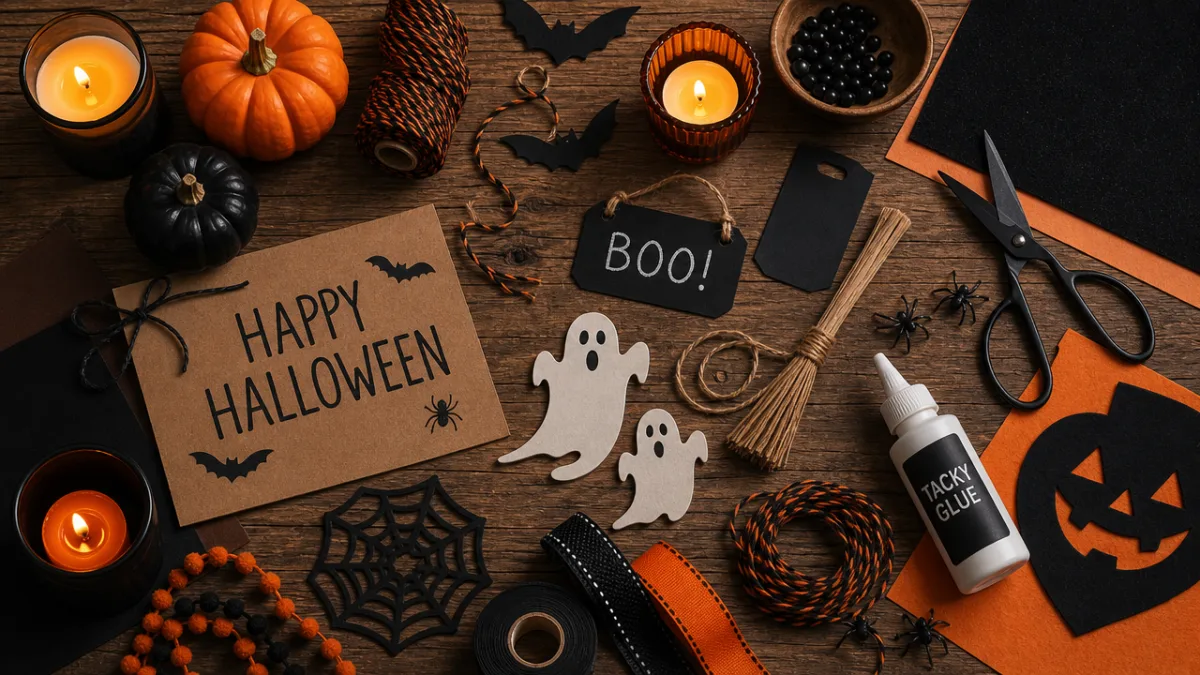
Having the right tools on hand before you begin assembling your centerpiece will save you significant time and frustration. A quality hot glue gun is absolutely non-negotiable — it is the backbone of virtually every DIY centerpiece project and allows you to secure elements quickly and effectively. You will also want a pair of sharp floral scissors or wire cutters for trimming branches and floral stems, a can of flat black spray paint for unifying mismatched elements, and a roll of floral wire for binding branches, securing elements to a base, and creating structure within your arrangement.
In terms of materials, consider building your shopping list around these core categories to ensure a well-rounded, layered result. For height and drama, you need tall elements like taper candles, twisted branches, or a tall lantern. For the middle layer, focus on medium-sized items like pumpkins, skulls, or a cluster of bottles. For ground-level texture, gather moss, dried leaves, tea lights in glass votives, and small scattered accents like acorns or plastic spiders. This three-tier approach — tall, medium, and low — is the structural secret behind virtually every professional-looking centerpiece arrangement.
Beyond the visual elements, don’t overlook the importance of your base or tray. A shallow wooden tray, a vintage mirror tile, a piece of weathered barn wood, or even a large round charger plate can serve as the foundation that contains and frames your entire arrangement. Having a defined base accomplishes two things: it keeps your centerpiece from looking like a random scatter of objects, and it makes it much easier to move the entire arrangement as a single unit when you need to clear the table. Thrift stores are excellent sources for wooden trays and decorative platters at very low prices.
Step-by-Step Assembly Instructions for Your Viral Halloween Centerpiece
Now that you have gathered your supplies and committed to your theme, it is time to begin the actual assembly process. Start by placing your base tray or platform on the table and stepping back to visualize the final arrangement before you glue anything permanently. This planning phase is crucial and often skipped by beginners, leading to lopsided or unbalanced results. Arrange your tallest elements first — your branches, candelabra, or tall lantern — positioning them slightly off-center rather than directly in the middle, as asymmetrical arrangements almost always photograph more naturally and dynamically than perfectly centered ones.
With your tall anchor elements in place, begin building your middle layer by clustering your medium-sized items around the base of the tall pieces. If you are using pumpkins, vary their sizes and tilt some at slight angles to create a more organic, gathered-from-the-garden feeling rather than a stiff, perfectly aligned look. Tuck skulls partially behind pumpkins so they appear to be peering out from behind. Stack bottles of different heights in groupings of two or three rather than spreading them evenly across the tray. The goal is controlled chaos — an arrangement that looks naturally assembled over time rather than mechanically constructed.
Once your middle layer feels right, begin filling in the ground level with your textural elements. Scatter dried moss across the base of the tray, filling gaps and hiding any visible mechanics like floral foam or wire. Place your tea light votives in the spaces between larger items, ensuring they have enough clearance to be lit safely during the event. Add your smallest accent pieces last — plastic spiders crawling up the side of a bottle, a few scattered acorns, tiny mushroom picks from the craft store, or a delicate strand of artificial cobweb draped across the entire arrangement. These finishing details are what elevate a good centerpiece to a great one.
Lighting: The Element That Makes Everything Magical
Lighting is, without question, the single most transformative element of any Halloween centerpiece, and it deserves far more attention than most DIY guides give it. The difference between a centerpiece that looks flat and unremarkable and one that looks genuinely atmospheric and magical is almost always the quality and character of its light sources. Warm amber candlelight, whether from real taper candles, pillar candles, or high-quality battery-operated LED alternatives, creates shadows, depth, and a flickering dynamism that no amount of additional decorations can compensate for.
For safety and practicality, particularly if you have children or pets in the home, battery-operated LED candles have become remarkably convincing in recent years. Many now feature realistic wax exteriors, remote controls, and timer functions that allow you to set them to switch on automatically at dusk. Look for options with a warm white or amber flame color rather than cool white, as the warm tones are dramatically more flattering to Halloween’s orange and black color palette and create a much more convincingly atmospheric glow. Scatter multiple votives at different heights throughout your arrangement to create a multi-layered lighting effect.
For an extra layer of drama that photographs exceptionally well, consider incorporating a small string of orange or warm white fairy lights woven through the base of your arrangement beneath the moss. These create a subtle, glowing underlight that makes the entire centerpiece appear to radiate a soft warmth from within. You can also place a small battery-operated LED spotlight — the kind designed for display shelving — just outside the frame of your tray, aimed upward through your branches, to cast dramatic upward shadows across the wall behind your centerpiece. This kind of theatrical lighting technique is what gives Pinterest-worthy photos their unmistakable depth and moodiness.

How to Style and Photograph Your Centerpiece for Maximum Shares
Once your centerpiece is assembled and lit, the next step toward viral success is capturing it in photographs that do justice to the time and creativity you have invested. Even the most stunning physical centerpiece can look disappointing in a poorly lit, hastily composed photograph — and conversely, a thoughtfully photographed centerpiece can look genuinely magazine-worthy even if it was assembled in under an hour from dollar store supplies. The principles of good composition, lighting, and styling apply to decorating photography just as much as they do to any other subject, and learning a few basic techniques will dramatically improve your results.
The single most important factor in photographing a table centerpiece is the background. A cluttered, busy background will compete with your centerpiece for the viewer’s attention and make the image feel chaotic rather than atmospheric. Before photographing, clear the area around your table of anything that doesn’t contribute to the Halloween mood. Dim the overhead room lighting and rely primarily on the candlelight within the centerpiece itself, supplemented if necessary by a warm-toned lamp positioned just out of frame. This creates the kind of moody, dramatic lighting that makes Halloween photography instantly recognizable and emotionally evocative.
When composing your shots, experiment with multiple angles rather than defaulting immediately to a straight-on photograph. A slightly elevated angle looking down into the arrangement at roughly 45 degrees often reveals the depth and layering of the centerpiece most effectively. A straight-on close-up focusing on a single compelling detail — a skull half-hidden in moss, a spider perched on the rim of a bottle, a candle flame reflected in a dark glass surface — can create an intimately eerie image that performs extremely well on Pinterest and Instagram. Take at least a dozen shots from different positions and distances before selecting your best options, and don’t overlook the power of slight post-processing to enhance warmth and contrast.
Optimizing Your Pinterest Post for Viral Reach
Creating a beautiful centerpiece and photographing it well are only part of the equation for achieving genuine viral reach on Pinterest. The platform has its own specific algorithmic preferences and user behavior patterns that, once understood, can significantly amplify how many people see and save your pin. Vertical images with an aspect ratio of approximately 2:3 perform best on Pinterest, as they take up more visual real estate in the feed and naturally draw the eye. If you have a horizontal or square photograph of your centerpiece, consider cropping it to a vertical format or creating a simple graphic overlay using Canva to extend the frame.
Your pin title and description are just as important as the image itself for discoverability. Use specific, searchable language that describes exactly what someone would type into the Pinterest search bar when looking for Halloween decorating inspiration. Phrases like “DIY Halloween centerpiece,” “budget Halloween table decor,” “easy Halloween tablescape,” and “Halloween party table ideas” are all high-traffic search terms that will help your pin surface in relevant results. Aim to include two to three of these phrases naturally within your description, along with some genuine personal detail about your creative process that makes the pin feel human and trustworthy rather than generic.
Timing your pin strategically also makes a meaningful difference in its initial performance. Halloween-related content on Pinterest typically begins gaining significant traction in late August and peaks in mid-October, so publishing your pin in early September gives it the maximum amount of time to accumulate saves and be redistributed across boards before the holiday itself. Pinning at peak user activity times — generally Tuesday through Thursday evenings between 8 and 11 PM in your target audience’s time zone — increases the likelihood that your pin will be seen, saved, and shared in those critical first hours after publication, which heavily influences how widely the platform subsequently distributes it.
Customization Ideas to Make Your Centerpiece Uniquely Yours
While the foundational assembly techniques described above will reliably produce a beautiful and shareable Halloween centerpiece, the most memorable and viral DIY projects are always those that include a genuinely unique personal touch that sets them apart from the hundreds of similar projects already circulating on social media. The good news is that personalization doesn’t require advanced crafting skills or expensive supplies — it requires only a willingness to incorporate elements that reflect your specific personality, household, or creative perspective. Even a small unexpected detail can be the element that makes a viewer stop scrolling and save your pin.
Consider incorporating personalized or handcrafted labels on any bottles or jars in your arrangement. Aged apothecary labels with mysterious ingredient names like “Eye of Newt Tincture,” “Widow’s Web Extract,” or “Essence of Midnight” can be printed at home on kraft paper or cardstock, lightly tea-stained for an aged appearance, and affixed with a dab of hot glue. Similarly, writing a short Halloween-themed poem or a “warning” message on a small piece of distressed paper and tucking it into the arrangement adds a narrative layer that invites viewers to lean in for a closer look — a classic engagement technique that consistently performs well on social platforms.
Thematic extensions of your centerpiece beyond the table itself can dramatically amplify its visual impact in photographs and in person. Consider trailing a strand of synthetic spiderweb from your centerpiece up the nearby wall, or positioning a pair of battery-operated glowing eyes in the darkened window behind the table. Scatter a few of your smaller accent elements — a spider here, a skull there — along the length of the table runner leading away from the centerpiece. These extensions create a sense that your Halloween world is spreading outward from the centerpiece, making it feel less like an isolated decoration and more like the heart of an immersive, fully realized Halloween environment that guests will be talking about long after the last piece of candy corn has been eaten.
Seasonal Longevity: Making Your Centerpiece Last All October
A well-constructed Halloween centerpiece should be able to remain on display throughout the entire month of October without deteriorating significantly in appearance, and with a few simple precautions during assembly, this is entirely achievable. If you are incorporating real organic elements like branches, pinecones, or dried leaves, a light coat of clear sealant spray will help preserve their appearance and prevent brittleness from drying out in a heated home. Real mini pumpkins and gourds can last several weeks indoors if they are kept away from direct sunlight and not punctured or carved, making them an excellent choice for a long-lasting centerpiece.
Battery-operated lighting elements should always be set up with fresh batteries at the beginning of the season, and for arrangements that will be displayed over several weeks, investing in rechargeable batteries with a smart charger will save both money and the inconvenience of frequently replacing them. Keep a small supply of replacement tea lights and spare batteries near your display area so that any depleted elements can be quickly refreshed before guests arrive. A centerpiece that is consistently well-maintained and fully lit every evening creates a cumulative effect on household members and visitors alike — it becomes an anticipated and beloved part of the seasonal ritual rather than just a static decoration.
At the end of the Halloween season, many elements of your centerpiece can be carefully disassembled, stored, and reused in subsequent years, significantly reducing the cost of future projects. Non-organic elements like glass bottles, plastic skulls, metal lanterns, fabric ribbon, and battery-operated lights can be wrapped in tissue paper and stored in clearly labeled bins for next October. This practice of building a personal Halloween decorating “library” over multiple years means that each season you have more high-quality elements to work with and less money to spend, ultimately enabling you to create increasingly elaborate and impressive centerpieces without exceeding a modest annual budget. The initial investment in quality reusable pieces truly pays for itself many times over.








What do you think?
It is nice to know your opinion. Leave a comment.