










Timber Frame Greenhouse Build: A Complete Guide to Crafting Your Own Garden Sanctuary
Introduction to Timber Frame Greenhouse Construction
Building a timber frame greenhouse is one of the most rewarding projects a gardener or homesteader can undertake. Unlike prefabricated structures that arrive flat-packed and anonymous, a timber frame greenhouse carries the character of the builder’s hands, the grain of locally sourced wood, and the satisfaction of craftsmanship that can last generations. The process combines traditional joinery techniques with practical growing space, resulting in a structure that is both beautiful and deeply functional in ways that metal-and-plastic alternatives simply cannot replicate.
The timber frame method itself is centuries old, originating in the building traditions of medieval Europe and East Asia, where craftsmen discovered that a skeleton of heavy, mortise-and-tenon joined timbers could support enormous loads while remaining flexible enough to shift slightly with ground movement and seasonal temperature change. Applying this ancient technique to greenhouse construction gives growers a structure that breathes naturally, regulates temperature more effectively than metal frames, and integrates visually into garden landscapes with an organic warmth that few other materials can match.
Whether you are an experienced builder looking to expand your skill set or a motivated beginner willing to invest time in learning, a timber frame greenhouse build is genuinely achievable on a reasonable budget and timeline. This guide walks you through every major phase of the project, from selecting your site and sourcing materials, through laying foundations, raising frames, and glazing, all the way to the finishing details that transform a shell into a productive, welcoming growing space year-round.
Site Selection and Planning Your Timber Frame Greenhouse
Choosing the right location for your greenhouse is arguably more important than any construction decision you will make. Solar orientation should be your first consideration: in the northern hemisphere, the long axis of the greenhouse ideally runs east to west, with the widest glazed face pointing south to capture maximum winter sunlight. Even a modest deviation of fifteen to twenty degrees from true south will have measurable effects on interior temperatures and light levels during the critical low-sun months when supplemental heating costs peak and plant growth depends most heavily on passive solar gain.
Beyond orientation, you need to evaluate wind exposure, drainage, and proximity to water and electricity. A site sheltered from prevailing winds by a fence, hedgerow, or outbuilding can dramatically reduce heat loss in winter without shading the structure, but you must ensure that shelter does not cast shadows across the glazing during growing hours. Ground drainage is equally critical: timber frames are durable, but constant moisture at the sill plate — the lowest horizontal timber resting on the foundation — accelerates decay even in pressure-treated or naturally rot-resistant species. A site that sheds water freely and dries quickly after rain will extend the life of your frame substantially.
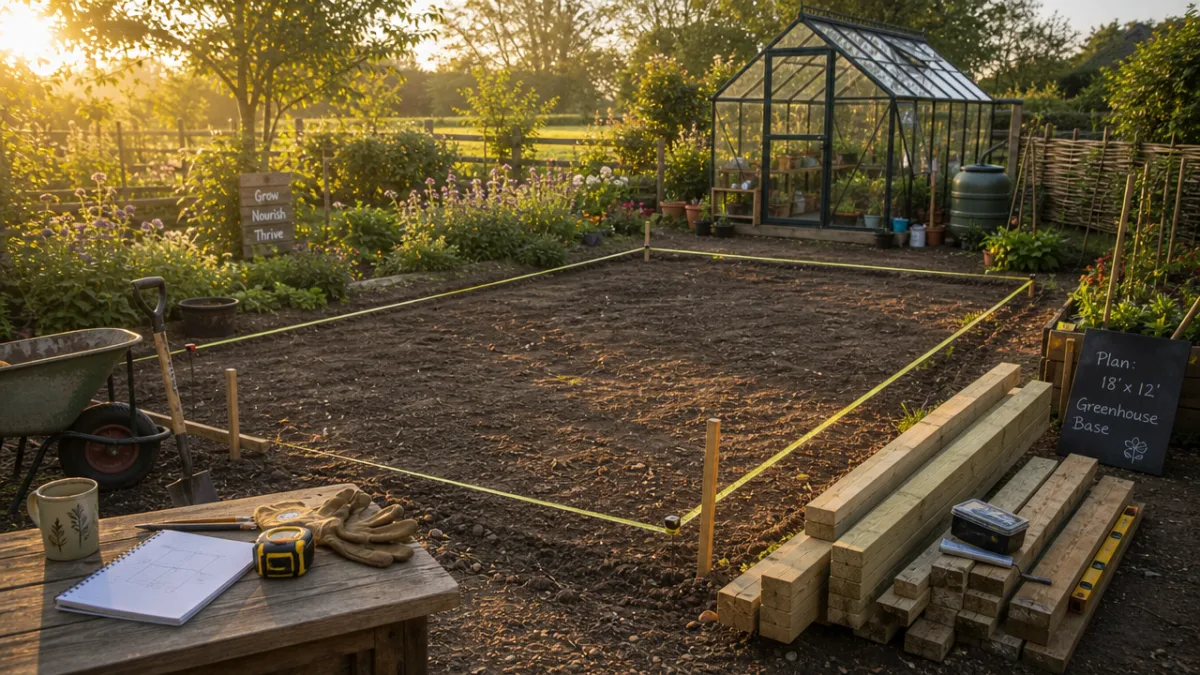
Once you have identified your ideal location, you need to produce a detailed plan before purchasing a single board. Sketch your footprint, decide on your interior height, and calculate your glazing area versus your roof pitch. A steeper roof pitch sheds snow more effectively and improves rainwater runoff, but it also increases your materials cost and structural complexity. Most timber frame greenhouse builders find that a roof pitch between four-in-twelve and six-in-twelve represents the best balance of performance, aesthetics, and buildability for a first project. Document your plan fully, including member dimensions, joint locations, and glazing panel sizes, before breaking ground.
Materials, Wood Selection, and Sourcing Your Timber
The choice of timber species is foundational to the success and longevity of your greenhouse. For the structural frame itself, Douglas fir is the most popular choice in North America because it combines high strength-to-weight ratio, good workability, and moderate natural resistance to decay. In the United Kingdom and much of Europe, oak remains the traditional choice for timber framing, prized for its exceptional durability and the way it hardens and tightens over time as it dries. For builders seeking a more economical option, southern yellow pine, properly dried and treated at the sill level, performs well and is widely available from commercial lumber yards.
Wherever possible, sourcing timber from local sawmills offers significant advantages over big-box lumber yards. Local mills can often supply green-sawn timber at substantially lower cost, and they can cut members to your exact specifications, which reduces waste and makes your joinery layout far more straightforward. Green timber — wood that has not yet been kiln or air dried — is easier to work with hand tools and traditional mortise-and-tenon joinery. Yes, it will continue to dry and may develop small checks or surface cracks after assembly, but a well-designed timber frame accommodates this movement without losing structural integrity. Ask your local sawmill about locally harvested species; you may discover that regional hardwoods offer excellent performance at prices that imported species cannot match.
Beyond the structural timber, your materials list for a timber frame greenhouse will include glazing material, fasteners, foundation supplies, and roofing components. For glazing, twin-wall or multi-wall polycarbonate panels offer the best combination of insulation value, light transmission, impact resistance, and affordability for most builders. Glass is heavier, more expensive, and more fragile, but provides superior clarity and a more traditional aesthetic. For the foundation, poured concrete piers or a continuous concrete perimeter wall are both appropriate; the choice depends on your local frost depth, soil conditions, and budget. Always use stainless steel or hot-dipped galvanized fasteners — ordinary zinc-plated hardware will rust rapidly in the moist greenhouse environment and can stain your timber with unsightly streaks.
Foundation Work and Laying the Sill Plates
A solid foundation is the element that separates a greenhouse that stands for decades from one that settles, shifts, and eventually fails. For most residential timber frame greenhouses in temperate climates, concrete piers poured below the local frost line at each corner and at intermediate points along the walls provide more than adequate support. The frost line depth varies enormously by geography: a few inches in maritime coastal climates, but four feet or more in northern continental regions. Check your local building code or consult your county extension office to confirm the required depth in your area before you start digging.
Once your piers or perimeter foundation has cured — typically a minimum of seven days for structural concrete — you can begin installing your sill plates. The sill plate is the first horizontal timber of your frame, and it sits directly on top of the foundation. Because this member is in close proximity to the ground and will experience intermittent moisture, it must be either naturally decay-resistant wood such as black locust, white oak heartwood, or western red cedar, or pressure-treated lumber rated for ground contact. Many timber framers install a layer of sill seal foam or a strip of EPDM rubber between the concrete and the timber to create a capillary break that prevents moisture from wicking upward into the wood.
Anchor bolts embedded in your concrete foundation hold the sill plates in place and transfer lateral loads — primarily wind — down into the ground rather than allowing the frame to slide on its base. Bolt spacing and diameter should be specified in your building plan; for a modest greenhouse, half-inch anchor bolts at roughly four-foot intervals are typical. After drilling your sill plates over the anchor bolts and setting them in place, check carefully for level in both directions. Shim any low spots with galvanized steel shim Stock before tightening your nuts; a level sill plate makes every subsequent step of the framing process dramatically easier and produces a finished structure that looks and performs as it should.
Cutting Joints and Raising the Timber Frame
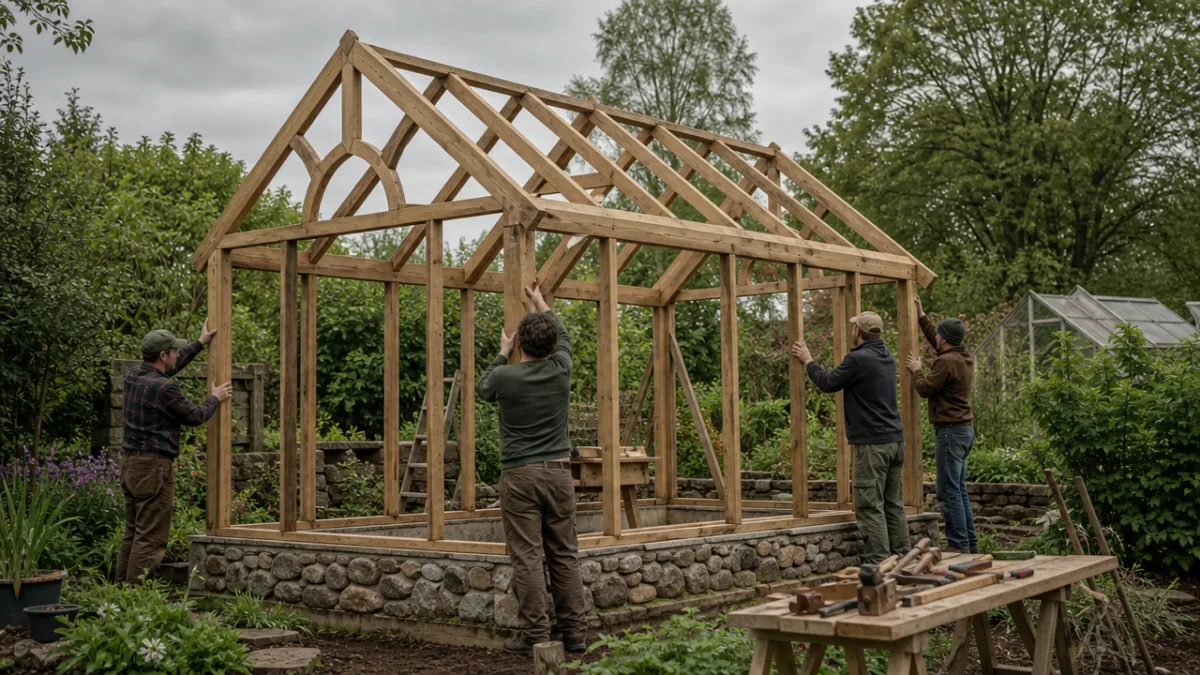
The mortise-and-tenon joint is the heart of traditional timber framing and the detail that gives a timber frame its structural integrity and distinctive character. In its simplest form, the joint consists of a rectangular projection — the tenon — cut on the end of one timber, which fits snugly into a rectangular cavity — the mortise — cut into a receiving member. When secured with a wooden peg driven through both members, this joint creates a connection that is strong in tension, compression, and shear, and that can be assembled and disassembled without tools if necessary. Cutting these joints accurately requires sharp chisels, a well-tuned saw, careful layout with a marking gauge and square, and patience — but the skill develops quickly with practice.
Before your raising day, all joints should be cut, test-fitted, and labeled clearly so that each member can be identified and placed without confusion during assembly. Timber frame raisings are traditionally social events, with neighbors and friends gathering to help lift and peg the heavy bents — the pre-assembled wall frames — into position. Plan your raising sequence carefully: typically, you will assemble bents flat on the ground, then lift them upright and brace them temporarily before connecting them with horizontal purlins and girts. Having a clear sequence, a designated lead builder who communicates each step, and enough helpers to manage the weight safely makes the raising process efficient and enjoyable rather than chaotic and dangerous.
As each bent rises and is braced plumb, connecting timbers lock the structure together into a rigid, three-dimensional frame. Drive your wooden pegs — traditionally white oak or black locust — firmly home with a wooden mallet, and watch your greenhouse take shape from flat lumber into a standing, three-dimensional structure in a matter of hours. There are few moments in any building project more satisfying than a timber frame raising: the smell of fresh-cut wood in the open air, the sound of mallets, the visible transformation of pile of timber into architecture. Take photographs at every stage — not only because you will want to share the process, but because the documentation will prove invaluable if you ever need to repair or expand the structure years down the road.
Glazing, Ventilation, and Finishing the Interior
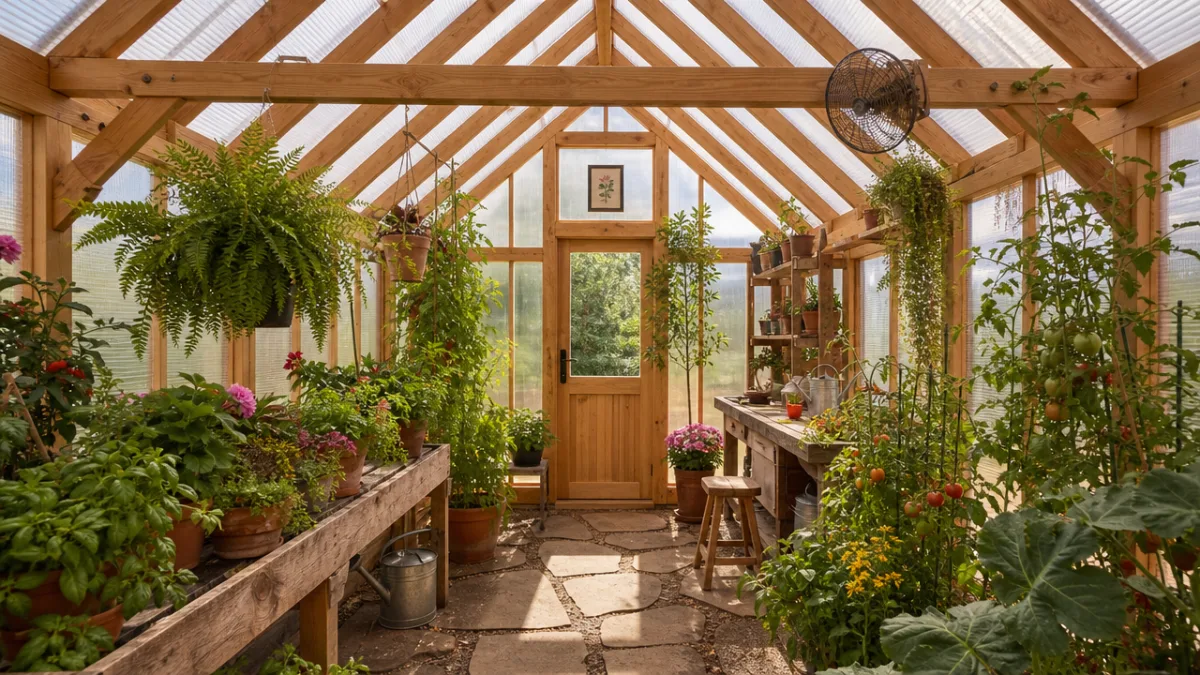
With the timber frame standing and pegged, your attention turns to enclosing the structure with glazing and ensuring adequate ventilation — two elements that together determine how well your greenhouse actually performs as a growing environment. Polycarbonate panels are installed in aluminum glazing channels or custom-routed grooves in your timber frame, with the channels running top and bottom and a closed tape sealing the upper edge of each panel to prevent moisture and insects from entering the flutes. Leave a small expansion gap at each side of the panel to accommodate thermal movement; polycarbonate expands and contracts significantly with temperature change, and panels installed too tightly will buckle or crack as temperatures fluctuate through the seasons.
Ventilation is one of the most commonly underestimated elements of greenhouse design, and inadequate airflow is responsible for a significant proportion of plant disease problems in amateur greenhouses. As a general rule, your total vent area — combining roof vents and side vents — should equal at least twenty percent of your floor area. Roof vents are especially important because hot air rises and must be able to escape freely on warm days; without them, interior temperatures can reach levels that damage or kill plants within an hour of sunrise on a clear summer day. Consider installing automatic vent openers that respond to temperature without requiring electricity — wax-cylinder actuators are inexpensive, reliable, and open vents progressively as temperature rises, providing passive climate control even when you are away from home.
Inside the finished greenhouse, your choices of flooring, staging, and irrigation infrastructure will shape how comfortable and productive the space is day to day. Gravel or crushed stone floors drain freely, suppress weeds, and can be leveled and relaid easily if needed. Wooden staging built from the same species as your frame creates a visually cohesive interior and provides adjustable growing levels to maximize your use of vertical space. For irrigation, a simple drip system fed from a rain barrel or tap on a timer reduces the labor of hand watering and delivers moisture directly to root zones, reducing leaf wetness and the fungal problems associated with overhead watering. With thoughtful planning of these finishing details, your timber frame greenhouse becomes not just a growing space but a genuine retreat — a warm, light-filled sanctuary that enriches your garden life in every season.
- Install roof vents at the ridge for maximum convective airflow and automatic openers for passive temperature regulation on unattended days.
- Use gravel or permeable paving for interior floors to ensure free drainage and prevent the buildup of standing water at your timber sill plates.
- Apply a penetrating oil finish to exposed interior timbers annually to slow moisture cycling and preserve the wood’s natural appearance over time.
- Include at least one water source inside the structure — a simple tap on a drop line saves enormous time compared to carrying watering cans from outside.
- Fit solid insulated panels rather than glazing on the north wall of the greenhouse to reduce heat loss with no corresponding loss of useful growing light.
Maintenance, Longevity, and the Joy of Building Your Own
A well-built timber frame greenhouse, maintained attentively, is genuinely a multi-generational structure. The oldest surviving timber frame buildings in England and Japan are measured in centuries, not decades, and while a greenhouse faces more challenging conditions than a house — high humidity, condensation, regular wetting and drying cycles — the same principles of good detailing apply. Keep wood away from standing water, ensure that condensation drains freely rather than pooling against joints, maintain your glazing seals so that water cannot track into the frame’s mortise-and-tenon connections, and refinish exposed exterior timber surfaces every few years with a quality penetrating oil or water-repellent preservative.
Annual maintenance checks at the start of each growing season should include inspection of the sill plates for any soft spots that might indicate early decay, examination of all glazing seals and channels for gaps that could allow water infiltration, cleaning of vent mechanisms and lubrication of hinges, and a general check of the foundation for any signs of movement or settlement. Catching small problems early — a hairline crack in a glazing channel seal, a slightly loose peg in a key joint, a section of sill plate that has begun to soften — prevents them from developing into costly repairs. Most issues in timber frame structures are slow-moving and entirely manageable if identified before they have progressed through multiple seasons of neglect.
Beyond the practical benefits of a productive growing space, there is something deeply meaningful about building your own timber frame greenhouse that no amount of rational analysis fully captures. You join a lineage of builders who have worked with wood and joint and peg for thousands of years, adapting ancient techniques to contemporary needs. Every time you step through the door of a structure you built with your own hands, you experience a satisfaction that prefabricated alternatives simply cannot provide. The plants you grow in that space, the seasons you spend in it, the friends and family who gather in its warmth on cold afternoons — all of it is given an extra dimension by the knowledge that you made this place, timber by timber, joint by joint, from the ground up. That is the deepest reason to build your own timber frame greenhouse, and it is reason enough.








What do you think?
It is nice to know your opinion. Leave a comment.