










The Best Way to Build an Arch Trellis: A Complete Guide for Garden Enthusiasts
Introduction to Arch Trellises and Why You Need One
An arch trellis is one of the most elegant and functional structures you can add to a garden. Whether you envision a romantic rose-covered entrance, a vine-draped walkway, or a dramatic focal point in your backyard, a well-built arch trellis transforms ordinary outdoor spaces into something truly memorable. These structures have been used in formal and cottage gardens for centuries, and their enduring popularity speaks to their versatility and visual impact. Building your own arch trellis is a deeply rewarding project that combines woodworking, garden design, and a bit of creative vision.
Beyond aesthetics, arch trellises serve a number of practical purposes in the garden. They create vertical growing space, which is especially valuable in smaller yards where horizontal real estate is limited. By training climbing plants upward, you allow better air circulation around foliage, which can reduce the risk of fungal diseases. The structure also provides support for heavy fruiting vines like cucumbers, squash, or even small melons, keeping produce clean and accessible. For gardeners who love to grow flowering climbers like clematis, wisteria, or climbing roses, a sturdy arch trellis is essentially non-negotiable.
Many gardeners assume that building an arch trellis requires advanced carpentry skills or expensive tools, but the reality is quite different. With the right materials, a clear plan, and a weekend afternoon, most DIY enthusiasts can complete a beautiful and durable arch trellis from scratch. This guide will walk you through every stage of the process, from selecting materials and planning your design to anchoring posts and training your first plants to climb. By the end, you will have the knowledge and confidence to create an arch trellis that enhances your garden for years to come.
Choosing the Right Materials for Your Arch Trellis
The material you choose for your arch trellis will determine its durability, appearance, and maintenance requirements. Wood remains the most popular choice among home gardeners because it is easy to work with, widely available, and blends naturally into almost any garden style. Cedar and redwood are particularly excellent options because they contain natural oils that resist rot, insects, and moisture without requiring chemical treatment. Pressure-treated pine is another cost-effective choice, though some gardeners prefer to avoid it in vegetable gardens due to concerns about chemical leaching into soil near edible plants.
Metal trellises, particularly those made from galvanized steel or powder-coated wrought iron, offer exceptional longevity and a more formal or industrial aesthetic. These structures can support significantly heavier loads than wood, making them ideal for vigorous climbing plants like wisteria or large climbing roses that can add considerable weight over time. While metal trellises generally cost more upfront than wooden ones, their lifespan often extends several decades with minimal maintenance. Wrought iron, in particular, adds a timeless elegance that suits cottage, formal English, and Mediterranean garden styles beautifully.
For gardeners on a tighter budget, bamboo and PVC pipe are both worth considering. Bamboo is a sustainable, lightweight, and surprisingly strong material that works well for lighter climbers like sweet peas, morning glories, or lightweight annuals. PVC pipe can be bent into smooth arch shapes using a heat gun and is resistant to rot and rust, though its plastic appearance may not suit every garden aesthetic. Whatever material you ultimately choose, prioritize thickness and structural integrity — a trellis that collapses under the weight of a mature vine is both frustrating and potentially damaging to the plants it was meant to support.
- Cedar or Redwood: Naturally rot-resistant, beautiful grain, ideal for traditional garden styles
- Pressure-Treated Pine: Affordable and durable, best suited for ornamental rather than edible gardens
- Galvanized Steel: Extremely strong, rust-resistant, suits modern or industrial garden designs
- Wrought Iron: Classic elegance, very durable, requires occasional repainting to prevent rust
- Bamboo: Eco-friendly, lightweight, best for lighter annual climbers
- PVC Pipe: Budget-friendly and flexible, lower aesthetic appeal but highly practical
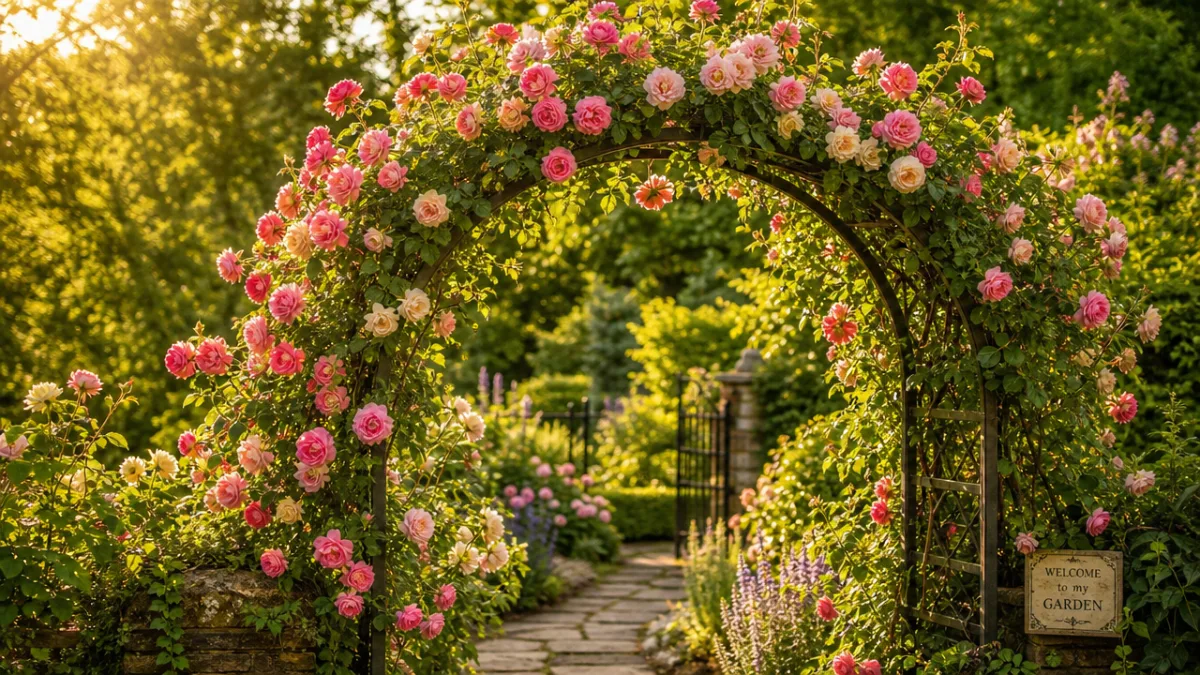
Planning Your Design and Measuring for Success
Before you purchase a single piece of lumber or drive the first stake, spending time on thoughtful planning will save you considerable effort and frustration later. The most important design decisions involve the size of the arch, its placement in the garden, and the style that best complements your existing landscape. Standard garden arch trellises typically stand between six and eight feet tall at the apex of the arch, which provides comfortable clearance for most adults while still creating a sense of enclosure and drama. The width should be at least four feet to allow two people to walk side by side, or to accommodate large, billowing plant growth on both sides without crowding the pathway beneath.
Placement is a decision that deserves careful consideration because a trellis is a semi-permanent or permanent structure. Consider how the arch will interact with existing paths, planting beds, fences, and sightlines. Ideally, the arch should frame a view, mark a transition between garden rooms, or serve as a destination point that draws the eye and feet toward it. Avoid placing a trellis where it will block natural light from nearby beds, or where it will be in the way of regular garden maintenance tasks like mowing or composting. Walk through your garden at different times of day to understand how light and shadow move before committing to a final location.
Once you have a clear location in mind, sketch out your design on paper. A simple scale drawing will help you visualize the finished structure and calculate the materials you will need. Measure the width of the path or area the arch will span, note the height you want to achieve, and decide whether you want a simple rounded arch, a pointed Gothic arch, or a flat-topped pergola-style structure. Determine how many cross-pieces or lattice panels you want to incorporate, as these add both structural support and surface area for climbing plants to grip. Write down all your measurements and keep this reference sheet with you when you visit the hardware store or lumber yard.
Consider the following dimensions as a starting baseline for a standard garden arch trellis:
- Overall height from ground to arch peak: 7 to 8 feet
- Post depth below ground: 18 to 24 inches for stability
- Interior width between posts: 4 to 5 feet
- Depth of arch (front to back): 18 to 24 inches for a tunnel effect
- Spacing between cross-pieces or lattice sections: 6 to 8 inches
Step-by-Step Construction Process
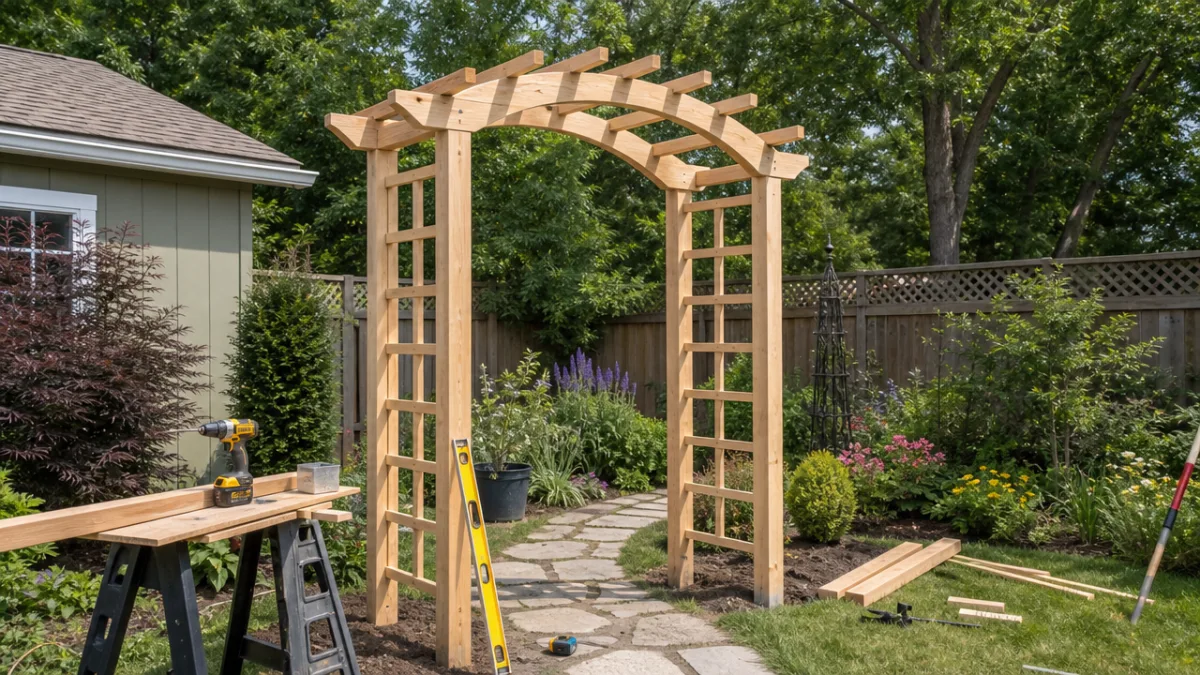
With your materials gathered and your design finalized, it is time to begin construction. Start by cutting your posts to the correct length, remembering to account for the portion that will be buried underground. For a finished height of seven feet above ground, your posts should be at least nine feet long to allow for eighteen to twenty-four inches of burial depth. Use a handsaw or circular saw to make clean, square cuts, and if you are working with untreated wood, apply a wood preservative or exterior wood sealer to the cut ends and any areas that will be in contact with soil to extend the life of your materials significantly.
Next, mark the exact placement of your post holes using stakes and string lines to ensure the posts will be perfectly aligned and squared. Digging the post holes is often the most physically demanding part of the project, so a rented post-hole digger or auger can be a worthwhile investment. The holes should be dug to the appropriate depth and slightly wider than the post diameter to allow for concrete or gravel fill. Setting posts in concrete provides the strongest and most permanent hold, while a gravel base allows for slightly easier removal if you ever want to relocate the structure. Mix your concrete according to package directions, pour it around the posts, and use a level to confirm the posts are perfectly plumb before the concrete sets.
Once your posts are securely anchored and the concrete has cured for at least twenty-four hours, you can begin constructing the arch itself. For a simple wooden arch, cut two curved pieces from wide boards using a jigsaw, creating mirror-image arcs that will connect across the tops of your posts. Sand the edges smooth and pre-drill any holes to prevent splitting. Attach the arch pieces to the tops of the posts using galvanized screws or bolts, which resist rust and hold up to outdoor conditions better than standard hardware. Add your cross-pieces, lattice panels, or horizontal rungs to the sides of the arch, spacing them evenly and securing each one with appropriate fasteners.
The final construction step involves finishing and weatherproofing your trellis. Apply two coats of exterior wood stain, paint, or sealant to all exposed surfaces, paying special attention to joints and end grain where moisture most easily penetrates. For a natural look, a clear wood sealer will enhance the grain while protecting the surface. If you prefer a painted finish, exterior-grade paint in white, black, or deep green are classic choices that suit most garden styles. Allow the finish to dry completely before proceeding to plant installation, and plan to reapply your chosen finish every two to three years to maintain protection and appearance.
Selecting and Training Climbing Plants
The plants you choose to grow on your arch trellis will ultimately define its character and seasonal interest. Annual climbers like sweet peas, morning glories, and black-eyed Susan vine are wonderful choices for gardeners who want maximum impact in a single season and the flexibility to try something new each year. These fast-growing plants can cover a new trellis completely within a few months of planting, providing colorful flowers and lush foliage from early summer right through to the first frost. They are also forgiving of imperfect conditions and relatively easy to grow from seed, making them an ideal starting point for gardening beginners.
Perennial climbers offer the significant advantage of returning year after year, growing larger and more impressive with each passing season. Climbing roses are perhaps the most beloved choice for an arch trellis, offering fragrant blooms in a dazzling range of colors and a classic romantic aesthetic that few other plants can match. Clematis is another outstanding option, with hundreds of cultivars offering flowers from early spring through late autumn in shades ranging from pure white to deep purple. Wisteria creates a truly spectacular display when in bloom, though it is an aggressive grower that requires consistent pruning to keep it from overwhelming the structure. Hardy kiwi and climbing hydrangea are excellent options for gardeners in colder climates who want both ornamental appeal and structural coverage.
Proper training from the very beginning will determine how well your climbers cover the trellis and how healthy they remain over time. As soon as new shoots begin to grow, gently guide them toward the trellis structure and loosely secure them using soft garden ties, twine, or specially designed plant clips. Avoid tying stems too tightly, as this can damage tender growth and restrict the flow of water and nutrients. Train stems to grow in a fan or spiral pattern rather than straight up, as horizontal or angled growth encourages more flowering shoots to develop. Check your ties regularly throughout the growing season and adjust them as stems thicken and growth progresses.
- Climbing Roses: Fragrant and romantic, best in full sun, require regular deadheading and annual pruning
- Clematis: Huge variety of flower colors and bloom times, works well paired with roses
- Wisteria: Stunning fragrant blooms but very vigorous, requires a particularly sturdy trellis
- Sweet Peas: Annual with beautiful fragrant flowers, perfect for a first-year display
- Morning Glory: Fast-growing annual, available in striking blue, purple, pink, and white
- Jasmine: Intensely fragrant, semi-evergreen in mild climates, excellent for warm garden areas
Maintenance, Repairs, and Long-Term Care
A well-constructed arch trellis requires relatively modest ongoing maintenance, but a small investment of time and attention each season will keep it looking beautiful and functioning properly for many years. At the start of each spring, inspect the entire structure carefully for signs of rot, insect damage, loose joints, or weakened fasteners. Pay particular attention to the base of the posts at ground level, which is the area most vulnerable to moisture damage and decay. Probe the wood with a screwdriver — if it penetrates easily, the wood may be rotting and the post may need to be reinforced or replaced before the structure becomes unsafe.
Wood trellises should be refinished every two to three years to maintain their weather resistance and appearance. The best time to do this is in early spring before your climbing plants put on significant new growth, making it easier to access all surfaces of the structure. Lightly sand any areas where the previous finish has flaked or worn, clean the surface to remove dirt, algae, and mildew, and apply a fresh coat of your chosen exterior finish. Metal trellises should be inspected annually for rust spots, which should be sanded back to bare metal, treated with a rust-inhibiting primer, and repainted to prevent further corrosion. Tighten any loose bolts or screws and replace any fasteners that have corroded beyond usefulness.
Managing the plants growing on your trellis is as important as maintaining the structure itself. Annual pruning of perennial climbers not only keeps them looking neat and manageable but also encourages vigorous new growth and abundant flowering. Most climbing roses benefit from pruning in late winter or early spring, while clematis pruning requirements vary depending on the cultivar group. Remove any dead, damaged, or diseased wood whenever you notice it throughout the growing season, and keep an eye out for pest infestations or signs of disease that could spread from the trellis plants to other nearby garden plants. Regularly check and retighten plant ties to prevent stems from being damaged by wind or their own increasing weight.
Over the long term, even the best-built wooden trellis will eventually show its age. Planning for this reality from the start means choosing the most durable materials available, using galvanized or stainless steel hardware throughout, and applying protective finishes consistently. If posts begin to fail at the base, it is sometimes possible to sister a new post alongside the old one and transfer the load, extending the life of the structure considerably without requiring a complete rebuild. With proper care, a quality cedar or redwood arch trellis can remain structurally sound and visually beautiful for fifteen to twenty years or more, providing a stunning garden feature that improves with every season as your climbing plants mature and fill in.
Creative Design Ideas and Inspiring Variations
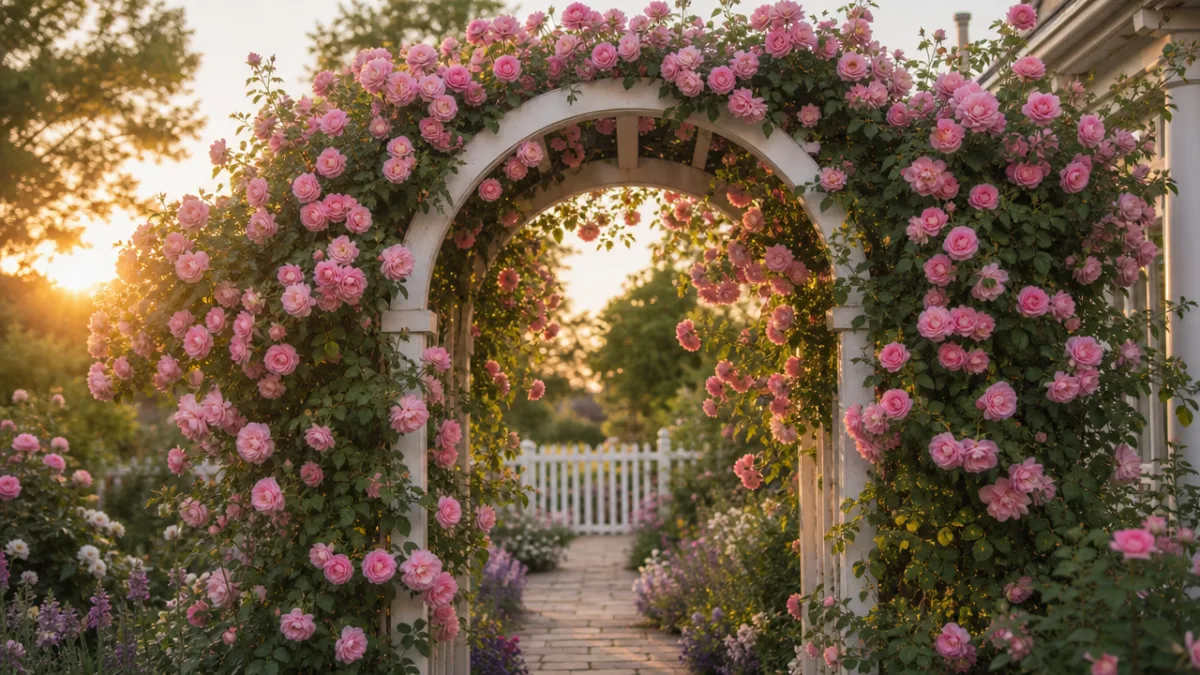
Once you have mastered the basics of building a standard arch trellis, a world of creative variations opens up to you. One of the most impactful design expansions is to connect multiple arches in a row to create a garden tunnel or pergola walkway. This creates a fully immersive green corridor through the garden that is especially magical when filled with fragrant climbers like roses or jasmine. Garden tunnels can be as short as two connected arches or as long as the garden allows, and they create a wonderful sense of journey and discovery within the landscape. Consider planting a different climber on each arch for a changing tapestry of color and texture from one end to the other.
You can also adapt the basic arch trellis design to serve as a living privacy screen or garden room divider. By building a series of arched panels connected along a straight line and planting them with evergreen climbers like climbing hydrangea or ivy, you create a green wall that provides year-round privacy without the visual heaviness of a solid fence. This approach works particularly well in urban gardens where privacy is valued but you do not want to feel boxed in by solid barriers. Adding a gate beneath the central arch transforms this screen into a proper garden room entrance with a sense of ceremony and arrival.
For a more decorative and artistic approach, consider incorporating decorative elements into your trellis design. Turned wooden posts, carved finials, scrollwork in wrought iron, or inset panels of decorative wire mesh can all elevate a simple arch into a genuine garden statement piece. You might also consider painting or staining your trellis in a bold or unexpected color — a deep cobalt blue, a rich terracotta, or a striking jet black can make an extraordinary visual impact against green foliage and colorful blooms. Do not be afraid to let your personal taste and garden vision guide you toward something that is truly your own rather than simply following the most conventional design path.
Whatever style, material, or planting combination you ultimately choose, the most important thing is to enjoy the process of creating and watching your arch trellis come to life over time. Gardens are living, evolving spaces, and the relationship between a well-made structure and the plants that grow over it is one of the most rewarding partnerships in all of horticulture. Your arch trellis will not only enhance the beauty and functionality of your garden today — it will become a beloved landmark in your outdoor space for many years to come, growing more beautiful with every passing season as the plants mature and the structure settles naturally into its surroundings.








What do you think?
It is nice to know your opinion. Leave a comment.