










Learn Exactly How to Lay a Gravel Path Like a Pro
Why Gravel Paths Are a Smart Choice for Your Garden
When it comes to garden landscaping, few options offer the combination of practicality, affordability, and visual appeal that a well-laid gravel path provides. Unlike concrete or paving slabs, gravel is a flexible material that adapts to almost any garden shape or style, from formal symmetrical layouts to winding naturalistic designs. It drains water efficiently, reduces puddles after rain, and requires far less initial investment than hard landscaping alternatives. For homeowners looking to add structure and definition to their outdoor spaces without breaking the budget, gravel is often the perfect starting point.
Beyond the cost savings, gravel paths bring an aesthetic warmth and texture that solid surfaces simply cannot replicate. The soft crunch underfoot, the way light catches the stones at different times of day, and the ease with which gravel complements planting beds all make it a favourite among garden designers. Whether you choose pea gravel for its smooth, rounded edges, angular crushed stone for a more formal look, or slate chippings for a contemporary feel, the range of colours and textures available means there is a gravel to suit every garden style and preference.
There is also an environmental argument in favour of gravel paths. Permeable surfaces allow rainwater to filter naturally back into the ground rather than running off into drainage systems, reducing the risk of localised flooding and supporting healthier soil ecosystems beneath. In an era where sustainable gardening practices are increasingly important, choosing gravel over impermeable materials is a responsible decision that benefits both your garden and the wider environment. Understanding these advantages sets you up with the right mindset before you even pick up a spade.
Planning Your Gravel Path: Measurements, Layout, and Design
Good planning is the foundation of every successful gravel path project, and skipping this stage is the most common reason amateur efforts fall short of professional results. Before purchasing a single bag of gravel, spend time walking your garden and visualising exactly where the path needs to go. Think about how it will be used — is it a decorative feature linking two garden areas, or a practical route between the back door and a shed? The function of the path will influence its width, which should typically be at least 60 centimetres for a single person and 120 centimetres or more if you want two people to walk side by side comfortably.
Once you have settled on the route, use string lines and pegs or a garden hose to mark out the edges clearly on the ground. This gives you a realistic visual guide before any digging begins and allows you to make adjustments without consequence. Pay particular attention to curves, as gravel paths can follow sweeping bends beautifully, but the edging materials you choose will need to be flexible enough to accommodate them. Mark the outer boundary first, then the inner, maintaining a consistent width throughout the entire length of the path.
Calculating how much gravel you will need is a straightforward but essential step. Measure the total length and width of your path in metres, multiply these together to get the surface area, then multiply by your intended depth — typically 50 millimetres or 5 centimetres for a well-functioning path. This gives you the volume in cubic metres. Most gravel suppliers sell by the tonne, and a rough guide is that one tonne of gravel covers approximately 10 to 12 square metres at a depth of 50 millimetres. Always order slightly more than your calculation suggests, as some material will inevitably be lost to spillage or slight variations in depth.
Tools and Materials You Will Need
Having the right tools assembled before you begin will make the entire process smoother and more efficient. The essential tools for laying a gravel path include a spade and fork for excavation, a wheelbarrow for moving soil and gravel, a rake for spreading and levelling the gravel evenly, a tamper or plate compactor for firming the base, a spirit level or long straight edge for checking gradients, and a measuring tape. For marking out the path, you will need string, wooden pegs, and a mallet. Safety equipment including gloves, sturdy boots, and eye protection should never be overlooked, especially when handling sharp edging materials.
In terms of materials, the shopping list goes beyond just gravel. You will need landscape fabric, also known as geotextile membrane, to suppress weed growth beneath the surface. This fabric allows water to pass through while blocking light from reaching weed seeds, significantly reducing the maintenance burden in future years. You will also need a suitable sub-base material — typically MOT Type 1 hardcore or compacted crushed stone — to create a stable foundation beneath the gravel. Without a proper sub-base, gravel paths can develop ruts and uneven surfaces quickly, particularly in areas of heavy use or soft ground.
Edging materials deserve careful consideration, as they play both a functional and decorative role. Edging holds the gravel in place and prevents it from migrating onto adjacent lawns or planting beds, which is one of the most frustrating maintenance issues with poorly installed paths. Common edging options include pressure-treated timber boards, steel or aluminium landscape edging, brick, natural stone, and log roll. Each has different aesthetic qualities and installation requirements, so choose one that suits both the visual character of your garden and your practical ability to install it correctly. Flexible plastic or metal edging is particularly useful for paths with curved sections.
Step-by-Step Guide to Laying Your Gravel Path
With your planning complete and materials assembled, the work begins with excavation. Using your marked-out string lines as a guide, dig out the path to a depth of approximately 100 to 150 millimetres. This depth accounts for the sub-base layer, the landscape fabric, and the finished gravel layer. Remove all vegetation, roots, and large stones from the excavated area, as these can cause the surface to become uneven over time. If you are working on heavy clay soil, which drains poorly, it is worth adding an extra layer of coarse grit or sharp sand to improve drainage before laying your sub-base material.
Once the excavation is complete, compact the bottom of the trench firmly using a tamper or hired plate compactor. This step is critical — loose, uncompacted soil beneath your path will settle and shift over time, leading to surface dips and an uneven finish. After compaction, pour in your sub-base material — MOT Type 1 hardcore is ideal — to a depth of around 50 to 75 millimetres. Spread it evenly with a rake and compact it thoroughly once more. Check for level across the width of the path and introduce a very slight crossfall of one or two degrees to direct rainwater away from the path’s centre toward the edges, preventing pooling.
Now install your chosen edging on both sides of the path, driving it firmly into the ground so it sits at or just above the intended finished surface level of your gravel. Secure timber edging with wooden stakes hammered in on the outside face, and ensure all edging runs in a continuous line without gaps through which gravel might escape. Once the edging is firmly in place, roll out your landscape fabric over the entire compacted sub-base, cutting it to fit neatly within the edging and overlapping any joins by at least 150 millimetres. Pin the fabric down at intervals using ground staples or pins to prevent it from shifting when you begin adding gravel.
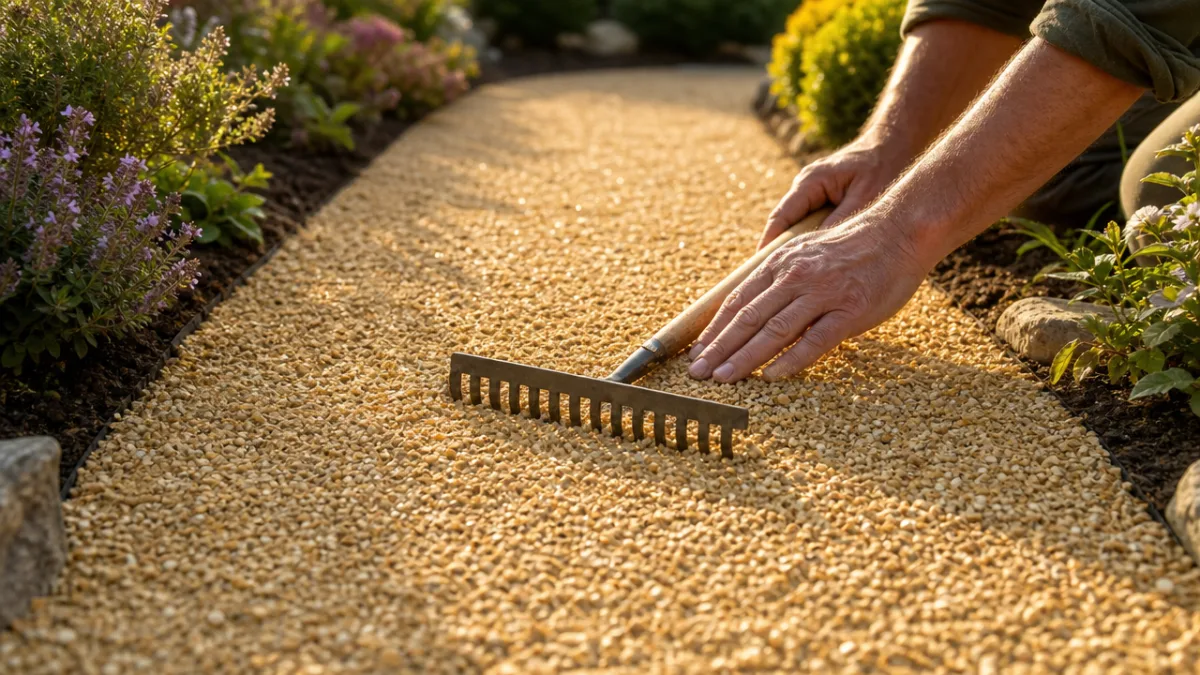
With the fabric secured, you are ready to pour in the gravel. Tip it carefully from the wheelbarrow in manageable loads, spreading each load evenly with the back of a rake before adding the next. Work from one end of the path to the other in a consistent motion, maintaining a depth of approximately 50 millimetres throughout. Use a long straight edge or spirit level to check for evenness regularly. Once all the gravel is laid, take a final rake across the entire surface to create a neat, uniform finish. For the most professional look, the finished surface should sit just below the top of the edging, so stones do not easily spill over.
Edging Options and Finishing Touches
The edging you choose can dramatically influence the overall character and perceived quality of your finished gravel path, so it is worth giving this element more thought than many first-time path layers do. Timber edging, typically made from pressure-treated softwood boards around 100 millimetres wide and 25 millimetres thick, is economical and easy to work with, bending gently for shallow curves and cutting cleanly for corners and joins. However, even pressure-treated wood will eventually deteriorate in ground contact, and you should anticipate replacing it after ten to fifteen years depending on conditions. It suits cottage gardens, vegetable plots, and informal settings particularly well.
Steel and aluminium landscape edging offer a cleaner, more contemporary aesthetic and will outlast timber considerably. These thin metal strips sit almost invisibly at ground level, creating a crisp line between the gravel and adjacent surfaces without drawing attention to themselves. They are especially effective in modern or minimalist garden schemes where clean edges and uncluttered lines are part of the design language. Flexible aluminium variants handle curves beautifully, and installation is quick once you understand how the ground stakes work. The initial cost is higher than timber, but the longevity and low maintenance make it worthwhile for paths in prominent positions.
Finishing touches can elevate a functional path into a genuine garden feature. Consider adding low-growing plants along the path edges — thyme, chamomile, and creeping Jenny all tolerate occasional foot traffic and will soften the transition between hard and soft surfaces. Solar-powered path lights pressed into the gravel on one or both sides add safety and atmosphere after dark, requiring no wiring and very little maintenance. If your path leads to a focal point such as a bench, sculpture, or gateway, ensure the path itself draws the eye toward that feature with confident, purposeful lines. These small design considerations separate a path that merely exists from one that genuinely enhances your garden.
Maintenance, Weed Control, and Long-Term Care
One of the most appealing qualities of a gravel path laid correctly is that it requires very little ongoing maintenance compared with alternatives like decking or block paving. The landscape fabric beneath does the heavy lifting in terms of weed suppression, but you should expect occasional weeds to appear on the surface, growing in organic matter such as fallen leaves that accumulates in the gravel over time. Dealing with these promptly — by hand pulling or with a targeted application of a path weedkiller — prevents them from establishing deep root systems that could eventually penetrate the fabric below.
Raking the gravel periodically keeps the surface looking smart and redistributes stones that have migrated or compacted unevenly in heavily used areas. A quick rake once a month during summer, when foot traffic and organic debris are at their highest, is usually sufficient to keep the path looking its best. Every few years you may notice that the gravel layer has thinned due to stones being tracked away on footwear or settling further into the sub-base. Topping up with a thin layer of fresh gravel — typically 20 to 25 millimetres — restores the depth and refreshes the appearance significantly without requiring any major work.
In autumn, fallen leaves can be a persistent nuisance on gravel paths, clogging the surface and providing the exact conditions that weeds love. A leaf blower on a low setting is one of the most efficient tools for clearing leaves from gravel without displacing the stones themselves. Alternatively, a spring-tined rake used with a light touch lifts leaves without digging too deeply into the gravel surface. Avoid using a stiff garden rake aggressively, as this tends to scatter stones and disturb the even surface you worked hard to create. With a small amount of seasonal attention, a well-laid gravel path will continue to look professional and perform excellently for many years.
If you notice sections of the path developing soft spots or sinking unevenly, this is usually a sign that the sub-base was not compacted sufficiently at the time of installation, or that ground movement has occurred beneath it. Addressing these areas promptly by removing the gravel, re-compacting the base, and refilling is far easier than leaving the problem to worsen. Keeping a small quantity of spare gravel from your original order stored in a dry place means you are always ready to make minor repairs that maintain the path’s integrity and appearance without needing to source matching materials later when the specific type you used may no longer be readily available.

Common Mistakes to Avoid When Laying a Gravel Path
Even with good intentions and careful preparation, certain mistakes appear repeatedly in amateur gravel path projects, and understanding them in advance is your best defence against making them yourself. The single most common error is failing to excavate deeply enough. Many first-time path layers remove only enough soil to accommodate the gravel layer, completely omitting the sub-base. Without this foundation, the path will shift, sink, and develop an uneven surface within a single season of use. Always account for a minimum of 50 to 75 millimetres of compacted sub-base material beneath your landscape fabric and gravel layers, regardless of how firm the existing ground appears.
Choosing the wrong gravel size is another frequently encountered problem. Gravel that is too fine, such as particles under 10 millimetres, tends to compact quickly, becomes muddy in wet conditions, and can be tracked indoors more easily. Gravel that is too large, over 20 millimetres, is uncomfortable to walk on and difficult to rake smooth. For most garden paths, a 10 to 14 millimetre gravel is the sweet spot — large enough to stay in place and drain well, small enough to feel comfortable and look neat. Angular stones bind together better than rounded ones and are generally preferable for surfaces that will receive regular foot traffic.
Neglecting to install proper edging — or installing it poorly — is perhaps the most visually obvious mistake, as gravel will inevitably migrate onto surrounding areas within weeks if it is not properly contained. Equally problematic is skipping the landscape fabric entirely or using a poor-quality membrane that degrades quickly. Some gardeners lay the fabric on top of the gravel rather than beneath it, which provides no weed suppression whatsoever. Always lay fabric directly onto your compacted sub-base before adding gravel, and choose a commercial-grade membrane rather than the lightest, cheapest option available. The difference in long-term performance is substantial and entirely worth the modest additional cost.
- Always excavate to the correct depth — typically 100 to 150 millimetres — to accommodate both the sub-base and gravel layers properly.
- Compact the sub-base thoroughly before laying landscape fabric; loose foundations lead to sunken, uneven surfaces.
- Install edging on both sides before adding gravel, ensuring it is firmly secured and runs in a continuous, uninterrupted line.
- Use commercial-grade landscape fabric laid beneath — never on top of — the gravel layer for effective weed suppression.
- Choose a gravel size between 10 and 14 millimetres for the best balance of comfort, stability, and visual appeal.
- Order slightly more gravel than your calculations suggest to allow for wastage, depth variations, and future top-ups.
- Introduce a slight crossfall across the path width to direct drainage away from the centre and prevent water pooling.
With these principles firmly in mind and a willingness to invest time in proper preparation, there is no reason why your gravel path cannot look and perform every bit as well as one laid by a professional landscaper. The techniques are not complex, the tools are widely available, and the materials are affordable. What separates a great result from a mediocre one is almost always the care taken at each stage of the process — from initial planning and excavation through to the final rake across a freshly laid surface. Take your time, follow each step methodically, and you will have a path that enhances your garden for many years to come.








What do you think?
It is nice to know your opinion. Leave a comment.