










Amigurumi Dinosaur: Your Complete Guide to the Free PDF Pattern
What Is Amigurumi and Why Dinosaurs Make the Perfect Project
Amigurumi is the beloved Japanese art of crocheting or knitting small, stuffed yarn creatures. The word itself combines the Japanese terms for “knitted” and “stuffed doll,” and the craft has exploded in popularity worldwide over the past two decades. From adorable bears and bunnies to fantastical mythical creatures, amigurumi offers crafters an endlessly creative outlet that results in charming, huggable companions. The technique is deceptively simple at its core, relying primarily on basic crochet stitches worked in continuous rounds to form three-dimensional shapes.
Dinosaurs, in particular, have become one of the most sought-after amigurumi patterns in the crafting community. Their iconic silhouettes — the long neck of a brachiosaurus, the tiny arms of a T-Rex, the plated back of a stegosaurus — translate beautifully into yarn form. Children and adults alike adore these prehistoric creatures, making dinosaur amigurumi perfect as gifts, nursery decorations, or personal keepsakes. There is something undeniably magical about transforming a skein of soft yarn into a tiny, round-bellied raptor that fits in the palm of your hand.
Free PDF patterns have made amigurumi more accessible than ever before. Rather than spending money on pattern books or paying for individual downloads, crafters can now find high-quality, tested patterns available at no cost. These PDFs typically include detailed stitch counts, written instructions, and sometimes even photo tutorials to guide makers through every step of construction. Whether you are a beginner picking up a crochet hook for the first time or an experienced maker looking for a quick weekend project, a free amigurumi dinosaur PDF pattern offers tremendous value and creative satisfaction.
Tools and Materials You Will Need Before You Begin
Before diving into your amigurumi dinosaur project, gathering the right supplies will make the entire process smoother and more enjoyable. The most important material is, of course, your yarn. For amigurumi, most crafters recommend a worsted weight or DK weight yarn in a tightly spun, smooth variety. Cotton yarn is a popular choice because it creates clean, defined stitches that make your finished dinosaur look polished and professional. Acrylic yarn also works beautifully and comes in a much wider range of colors, making it easy to find that perfect prehistoric green or whimsical pastel shade.
Your crochet hook size should be slightly smaller than what the yarn label recommends. This is an important amigurumi principle — using a tighter gauge prevents the stuffing from showing through the gaps between stitches. For worsted weight yarn, a 3.5mm or 4mm hook typically produces excellent results. You will also need polyester fiberfill stuffing to give your dinosaur its satisfying, squishy shape. Craft-grade polyester fiberfill is inexpensive and widely available, and using a generous amount ensures your finished creature holds its form without going flat over time.
Additional supplies you should have on hand include safety eyes in an appropriate size — typically between 6mm and 12mm depending on the scale of your dinosaur — a blunt-tipped yarn needle for sewing pieces together and weaving in ends, and stitch markers to help you track the beginning of each round. Scissors are obviously essential, and some crafters also appreciate having a row counter nearby to avoid losing their place in the pattern. Optional embellishments like embroidery floss for adding nostrils or a smile, felt for decorative spines, or wire armatures for poseable limbs can elevate your finished dinosaur from charming to truly extraordinary.
- Worsted or DK weight yarn in your chosen dinosaur colors
- Crochet hook (3.5mm–4.5mm recommended)
- Polyester fiberfill stuffing
- Safety eyes (6mm–12mm depending on pattern scale)
- Blunt yarn needle for assembly
- Stitch markers
- Scissors
- Optional: embroidery floss, felt scraps, wire armature
Color selection deserves special thought before you cast on your first stitch. Traditional dinosaur colors like forest green, olive, or earthy brown create a realistic look that many crafters love. However, amigurumi dinosaurs shine when given imaginative, unexpected color treatments — think lavender with yellow spots, deep teal with pink belly panels, or even a rainbow-striped brontosaurus. Since you are working from a free pattern, the color choices are entirely yours to make, and this creative freedom is one of the greatest joys of the craft.

Understanding the Basic Crochet Stitches Used in the Pattern
If you are new to amigurumi or even to crochet in general, understanding the foundational stitches used in most dinosaur patterns will build your confidence considerably before you begin. The magic ring, also called a magic circle or adjustable ring, is almost always the starting point for amigurumi pieces. This technique allows you to begin crocheting in the round without leaving a hole at the center of your work — essential for creating the seamless, rounded shapes that characterize amigurumi. Mastering the magic ring may take a few attempts, but once it clicks, you will use it constantly.
The single crochet stitch is the true workhorse of amigurumi construction. Nearly every element of your dinosaur — the body, head, legs, tail, and any decorative features — will be built primarily from single crochet stitches worked in continuous rounds. Single crochet creates a dense, sturdy fabric that is perfect for stuffed toys. You will also frequently encounter increases, which involve working two single crochet stitches into the same stitch to expand the circumference of your piece, and decreases, which join two stitches together to reduce circumference and begin closing shapes off.
The invisible decrease, sometimes abbreviated as invdec in patterns, is worth learning specifically for amigurumi work. Unlike a standard decrease, the invisible decrease creates a nearly seamless reduction that leaves no visible gap or bump on the surface of your work. For a polished-looking dinosaur with smooth, professional contours, the invisible decrease makes a significant difference. Most free PDF patterns will specify which type of decrease they use, and many include a brief tutorial or link to a video demonstration to help newer crafters execute this technique correctly.
Joining pieces together is arguably the most challenging skill in amigurumi construction, but it is also the step that brings your dinosaur to life. Most patterns instruct you to leave a long yarn tail when fastening off individual pieces, which you then use to whipstitch or mattress stitch the components onto the body. Some crafters prefer to use a separate length of yarn in a matching color for the joining process. Taking time to position each piece carefully — pinning limbs, ears, or spines in place with straight pins before sewing — ensures a balanced, symmetrical finished dinosaur that you will be proud to display or gift.
Step-by-Step Construction of Your Amigurumi Dinosaur
Most amigurumi dinosaur patterns follow a logical construction sequence that begins with the largest components and works toward the smallest details. Typically, you will start with the body, which forms the central mass of your dinosaur and determines the overall scale of all other pieces. The body is crocheted in the round, beginning with a small magic ring and increasing steadily until the piece reaches its widest circumference, then decreasing back down to close. Before fully closing the body, you will insert your safety eyes at the specified position and stuff the piece firmly with polyester fiberfill.
The head is usually the second major piece you will crochet, and for many dinosaur patterns it is actually the most expressive and lovable component. Attaching the safety eyes at the correct position is crucial — too high and your dinosaur looks startled, too low and the proportions feel off. Many patterns include precise stitch and round counts for eye placement, and it is worth taking a moment to insert the eyes temporarily with a straight pin before committing to their final position. The backing washers that lock safety eyes in place are permanent, so accurate placement before securing them is important.
Limbs, tails, and any decorative dorsal spines or frills are typically worked last as separate pieces and then sewn onto the assembled body. For a classic T-Rex amigurumi, the comically tiny front arms are a beloved design feature — small crocheted tubes, sometimes only a few rounds long, that perfectly capture the dinosaur’s famous proportions. A stegosaurus pattern will include a series of graduated triangular plates for the back, while a triceratops will require a carefully constructed frill and three distinct horns. Each of these details contributes to making your amigurumi instantly recognizable as its specific species.
- Crochet the body and stuff firmly before closing
- Crochet the head, insert safety eyes, and stuff before closing
- Attach the head to the body using a yarn needle
- Crochet all limbs and the tail separately
- Pin limbs in position on the body before sewing
- Sew all limbs and tail securely to the body
- Add any decorative details such as spines, horns, or frills
- Weave in all yarn ends and trim neatly
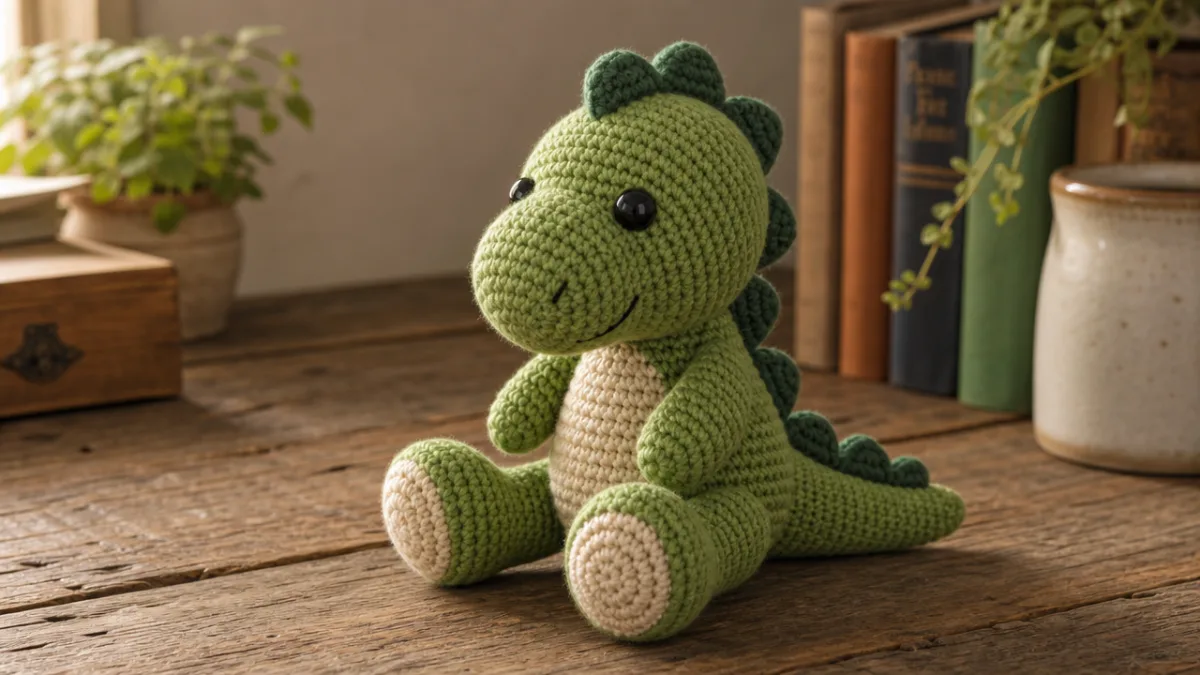
Finishing touches can transform a good amigurumi dinosaur into a truly great one. Using embroidery floss to add nostrils, a curved smile, or even tiny eyebrow details gives your dinosaur personality and character that safety eyes alone cannot provide. Some crafters add a felt tongue peeking from the mouth, or use a contrasting yarn color to crochet a textured belly panel that is sewn onto the front of the body before final assembly. These small embellishments require minimal extra time but deliver an outsized visual impact on the finished piece.
Tips for Beginners to Ensure a Successful Finished Dinosaur
If you are attempting amigurumi for the first time, a few strategic habits will dramatically improve your results and your overall experience. First and most importantly, always read through the entire pattern before picking up your hook. Amigurumi patterns sometimes include notes about construction order, special techniques, or material substitutions that are buried partway through the instructions. Understanding the full scope of the project before beginning prevents mid-project surprises and helps you plan your time and materials accurately.
Tension — how tightly or loosely you hold your yarn while crocheting — is one of the most important variables affecting your finished amigurumi. Most beginners crochet too loosely when starting out, which results in gaps between stitches through which the white stuffing becomes visible. If you notice this happening, try moving down one hook size. Alternatively, if your fabric feels stiff and your hook struggles to enter the stitches, try going up one hook size. Finding your personal sweet spot takes a little experimentation, but your gauge will naturally become more consistent as you practice and build muscle memory.
Stitch markers are non-negotiable for amigurumi success. Because you work in continuous rounds rather than joined rounds, losing track of where each round begins is extremely easy, especially during long stretches of even single crochet. A simple loop of contrasting yarn works just as well as a commercial stitch marker — slip it into the first stitch of each new round and move it up as you go. This small habit prevents the frustrating experience of reaching a count that does not match the pattern and having to laboriously count backward through multiple rounds to find where things went wrong.
Do not rush the stuffing process. Inadequate stuffing is one of the most common reasons amigurumi pieces look deflated or shapeless. Stuff each piece as firmly as you can without distorting the stitches or making the piece feel hard and rigid — you are aiming for a firm, huggable density. Add stuffing in small amounts as you work the decreasing rounds at the end of each piece rather than trying to add it all at once through the small closing hole. For tiny pieces like individual legs or arms, a chopstick or pencil tip can help push stuffing into hard-to-reach areas.
Creative Variations and Customization Ideas for Your Dinosaur Pattern
One of the greatest advantages of working from a free PDF pattern is the creative freedom it gives you to personalize and adapt the design. Once you have successfully completed the pattern as written and understand how each piece contributes to the whole, you are in an excellent position to begin experimenting. Changing the yarn weight, for example, has a dramatic effect on the finished size of your dinosaur. Using chunky or bulky yarn with an appropriately sized hook can produce an oversized dinosaur suitable as a statement pillow or a large gift, while fine fingering weight yarn creates a tiny, intricate creature perfect for a keychain or ornament.
Color blocking and striping techniques open up nearly infinite design possibilities within the same basic pattern. Alternating between two or more colors every few rounds creates a playful striped dinosaur, while switching colors at specific points in the pattern — perhaps a different color for the belly, feet, and inner arms — creates a more realistic two-tone look. Some crafters plan their color changes meticulously in advance by sketching out the design on paper, while others prefer a more spontaneous approach, switching colors whenever they feel inspired. Both methods can produce beautiful results.
Accessorizing your amigurumi dinosaur is a delightful way to add humor, personality, or a themed narrative to your creation. A tiny crocheted bow tie, a miniature birthday hat made from felt and wire, or a small crocheted scarf in the recipient’s favorite sports team colors transforms a simple dinosaur into a personalized gift with genuine emotional impact. Some crafters create entire amigurumi scenes or dioramas, surrounding their dinosaur with crocheted palm trees, prehistoric plants, and tiny companion creatures, all sourced from free patterns available across crafting websites and Pinterest boards.
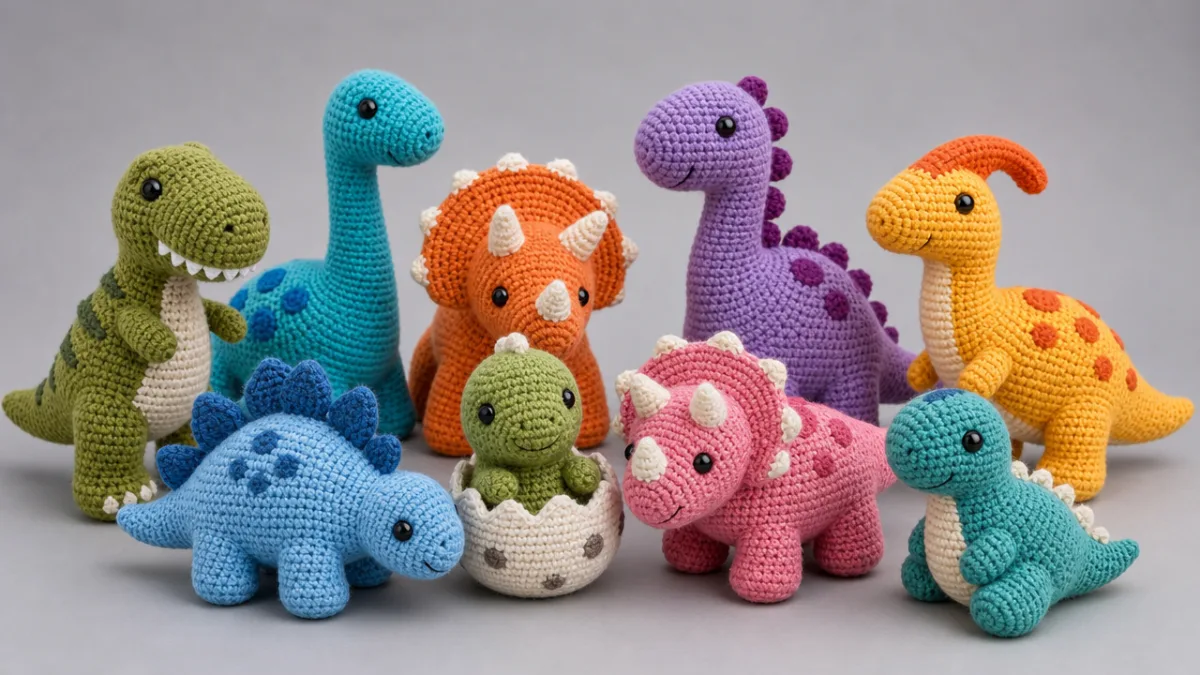
For crafters who have mastered the basic dinosaur pattern, exploring different species presents an exciting ongoing challenge. Once you understand the fundamental construction principles, you can attempt to adapt the pattern to create a long-necked brachiosaurus by extending the neck and reducing the head size, or a spiky ankylosaurus by adding a textured surface of individual crocheted spikes sewn across the back and tail. The paleontological diversity of actual dinosaurs — from tiny velociraptors to enormous titanosaurs, from crested hadrosaurs to three-horned ceratopsians — provides virtually unlimited inspiration for ambitious amigurumi makers.
Sharing Your Work and Finding Community Support
The amigurumi crafting community is one of the warmest and most welcoming corners of the internet, and sharing your finished dinosaur with fellow enthusiasts is a genuinely rewarding experience. Platforms like Pinterest, Instagram, Ravelry, and dedicated Facebook groups are filled with makers at every skill level who are eager to celebrate each other’s completed projects, troubleshoot problems, and share pattern recommendations. Posting a photo of your finished dinosaur — even if the proportions are slightly off or the stitches are uneven in places — invites encouragement and constructive feedback that helps you improve with every new project.
Ravelry, in particular, is an invaluable resource for amigurumi makers. This dedicated crafting platform allows users to create personal project pages where they document their yarn choices, hook sizes, modifications, and finished photos for every pattern they complete. Searching for a specific free dinosaur pattern on Ravelry often reveals dozens of project pages from other crafters who have made the same design, giving you a realistic preview of what to expect and inspiration for color choices and personalization. Many pattern designers also maintain their own Ravelry pages where they post updates, errata corrections, and responses to maker questions.
If you encounter a confusing section of your free PDF pattern — a stitch count that does not add up, an ambiguous construction instruction, or a technique you have never encountered before — reaching out to the pattern’s original designer is always a worthwhile first step. Most independent pattern designers are passionate crafters themselves who genuinely want your project to succeed, and many respond warmly to polite, specific questions. Alternatively, YouTube tutorial videos searching the specific stitch or technique in question can clarify almost any amigurumi challenge with visual, step-by-step guidance that text instructions alone cannot fully convey.
Ultimately, completing your first amigurumi dinosaur is just the beginning of what can become a deeply satisfying long-term hobby. The skills you develop — tension control, reading pattern notation, three-dimensional construction thinking, and precise finishing work — transfer directly to every subsequent amigurumi project you attempt. Many crafters find themselves building collections of dozens or even hundreds of tiny crocheted creatures over the years, returning again and again to the meditative rhythm of hook and yarn. Your free PDF dinosaur pattern is not just a single project; it is your entry point into a rich, creative, and wonderfully social craft tradition that has brought joy to millions of makers around the world.








What do you think?
It is nice to know your opinion. Leave a comment.