










Crochet Mesh Sweater Pattern: Your Complete Guide to the Gothic Grunge Fishnet Pullover
Introduction to the Crochet Mesh Sweater Trend
The crochet mesh sweater has become one of the most sought-after garments in alternative and mainstream fashion alike. Blending the handcrafted charm of traditional crochet with the edgy aesthetic of gothic and grunge subcultures, the fishnet pullover occupies a unique space in contemporary style. Whether you’re drawn to its moody, dramatic silhouette or simply love the tactile experience of working with open-weave stitches, this pattern offers something genuinely exciting for makers of all experience levels.
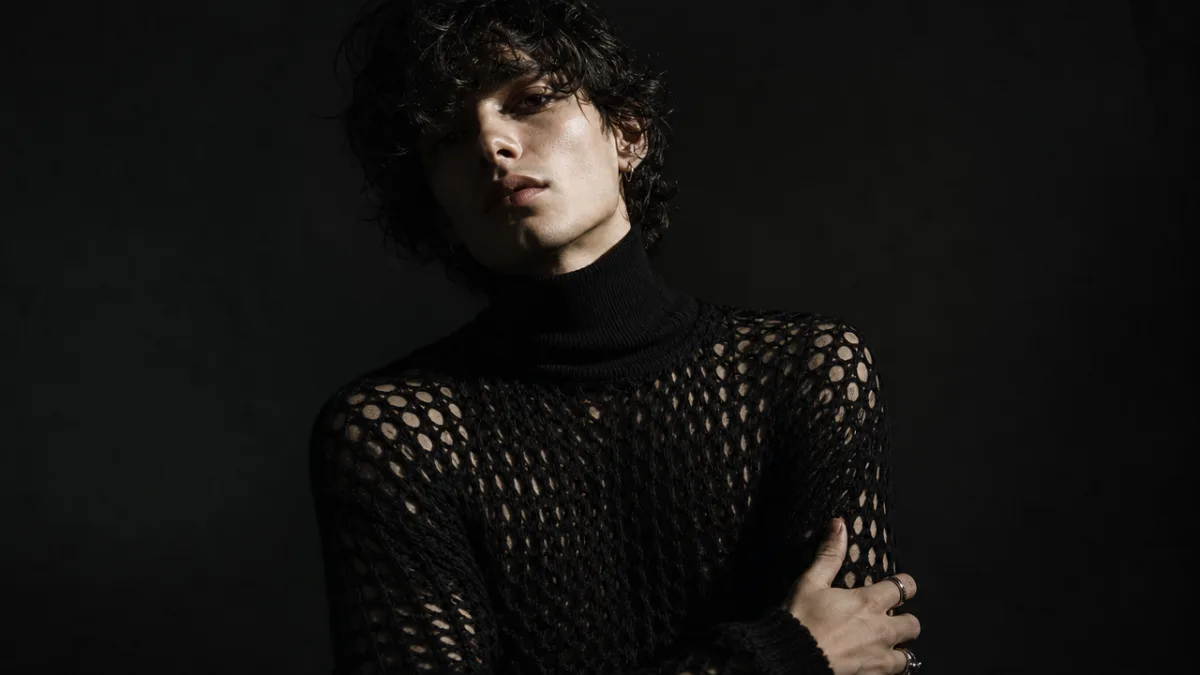
What makes this particular design so compelling is its versatility. A crochet mesh sweater can be styled over a fitted turtleneck for a layered, gothic look, worn with a slip dress for a more romantic grunge vibe, or draped over a bikini top for a boho beach aesthetic. The open fishnet construction means the garment breathes beautifully, making it wearable across seasons and climates. It’s the kind of piece that earns a permanent place in your wardrobe rather than sitting untouched in a drawer.
Perhaps the most exciting element of a made-to-measure PDF pattern is the freedom it gives you. Unlike mass-produced garments, a custom crochet pullover can be tailored precisely to your body measurements, ensuring a flattering fit regardless of your shape or size. This guide will walk you through everything you need to know — from understanding mesh and fishnet stitches to finishing your sweater with professional-looking edges — so you can create a piece you’ll be proud to wear and show off.
Understanding Mesh and Fishnet Crochet Stitches
Before diving into a crochet mesh sweater project, it helps to understand the foundational stitches that create that signature open, net-like fabric. Mesh crochet is built on a simple formula: chains and spaces that form a grid-like pattern across the work. The most basic mesh stitch alternates a single or double crochet with a chain space, creating an evenly spaced lattice. Fishnet crochet takes this a step further by using longer chain lengths and offset placements, producing a more dramatic diamond or hexagonal grid that closely resembles actual fishing nets or hosiery.
For beginners, the good news is that these stitches are among the most forgiving in all of crochet. Because the pattern is inherently open and the fabric is meant to have gaps, minor tension inconsistencies are far less noticeable than they would be in a dense fabric like single crochet. The rhythm of chain, skip, stitch, chain, skip, stitch becomes almost meditative once you get going, and most crafters find they pick up speed quickly. Working in rows or rounds, your fabric will grow surprisingly fast despite the delicate look of the finished piece.
It’s worth spending time swatching before beginning your sweater. A swatch is a small test square, typically four inches by four inches, that lets you check your gauge — the number of stitches and rows per inch — against the pattern’s requirements. Because mesh fabrics are so airy, even small gauge differences can significantly affect the final measurements of your sweater. Use your swatch to adjust your hook size up or down until your gauge matches the pattern, and you’ll save yourself hours of frustration later on. A slightly larger hook opens up the mesh; a smaller hook tightens it.
Materials and Tools You Will Need
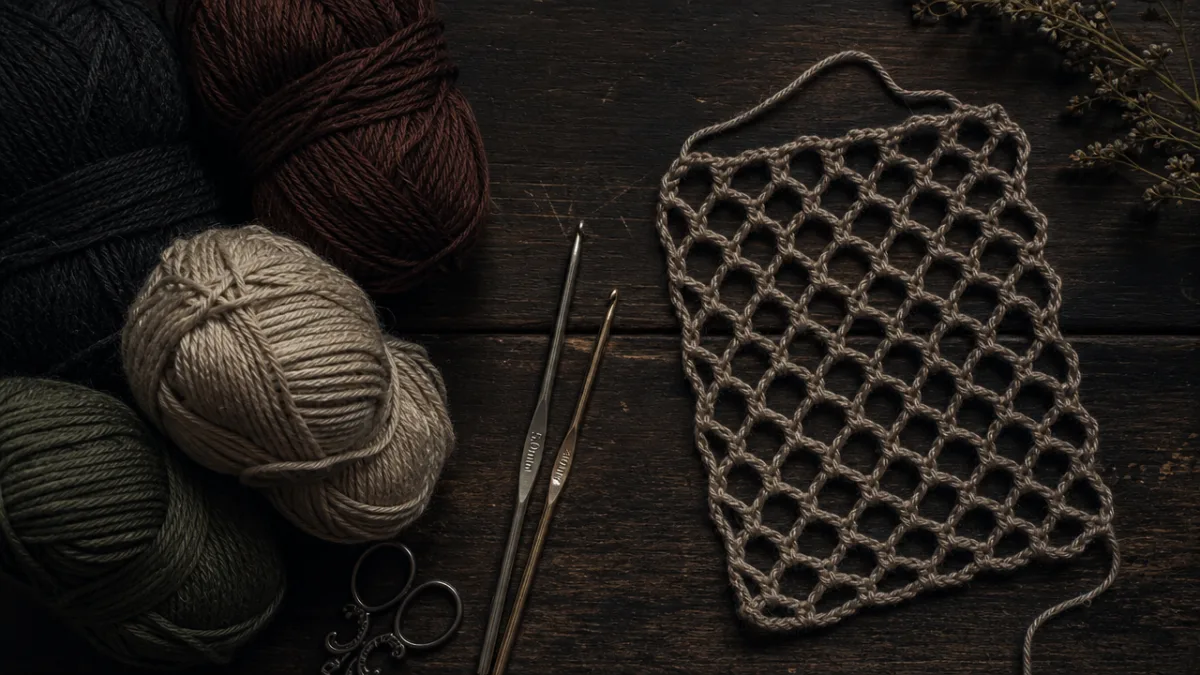
Choosing the right yarn is one of the most important decisions you’ll make for this project. For a gothic or grunge aesthetic, many makers reach for yarn in deep, saturated colors: jet black, burgundy, forest green, or midnight navy. However, the fishnet mesh sweater also looks stunning in neutral tones like cream, charcoal, or warm taupe, particularly if you plan to layer it over colorful pieces. When it comes to fiber content, a smooth, light-to-medium weight yarn works best because it lets the stitch definition shine through without weighing the airy fabric down.
Cotton and cotton-blend yarns are popular choices for mesh sweaters because they hold their shape well, wash easily, and drape beautifully. Acrylic yarns are a budget-friendly alternative that come in an enormous range of colors, though they may stretch more over time. For a truly luxurious result, consider a lightweight wool blend or a bamboo-cotton mix, both of which offer gorgeous sheen and excellent stitch definition. Avoid chunky or fuzzy yarns for your first mesh project, as they obscure the open pattern that gives the fishnet its character.
Beyond yarn, you’ll want to gather a few essential tools before casting on. Here is a checklist to get you started:
- Crochet hook in the size recommended by your pattern (commonly 4mm to 5.5mm for fingering to DK weight yarn)
- Tape measure for taking body measurements and checking gauge
- Stitch markers to flag key points in your pattern
- Scissors and a yarn needle for weaving in ends
- Blocking mats and pins for finishing your garment
- A printed or digital copy of your PDF pattern, ideally with written notes space
- Row counter app or physical tally counter to track your progress
Having everything laid out before you begin creates a more enjoyable crafting experience and reduces the chance of interruptions mid-project. Many crocheters also find it helpful to keep a small notebook nearby to jot down any modifications they make as they work, especially for a made-to-measure pattern where custom adjustments are part of the process. Good preparation transforms an intimidating project into a genuinely pleasurable creative experience.
Taking Your Measurements for a Made-to-Measure Fit
One of the greatest advantages of working from a made-to-measure crochet pattern is the ability to customize every dimension of your sweater to suit your unique body. Unlike standard sizing that assumes specific proportions, a made-to-measure approach starts with your actual measurements and builds the pattern around them. This is especially valuable for a close-fitting garment like a mesh pullover, where a difference of even an inch or two in the bust, waist, or hip can dramatically affect the drape and comfort of the finished piece.
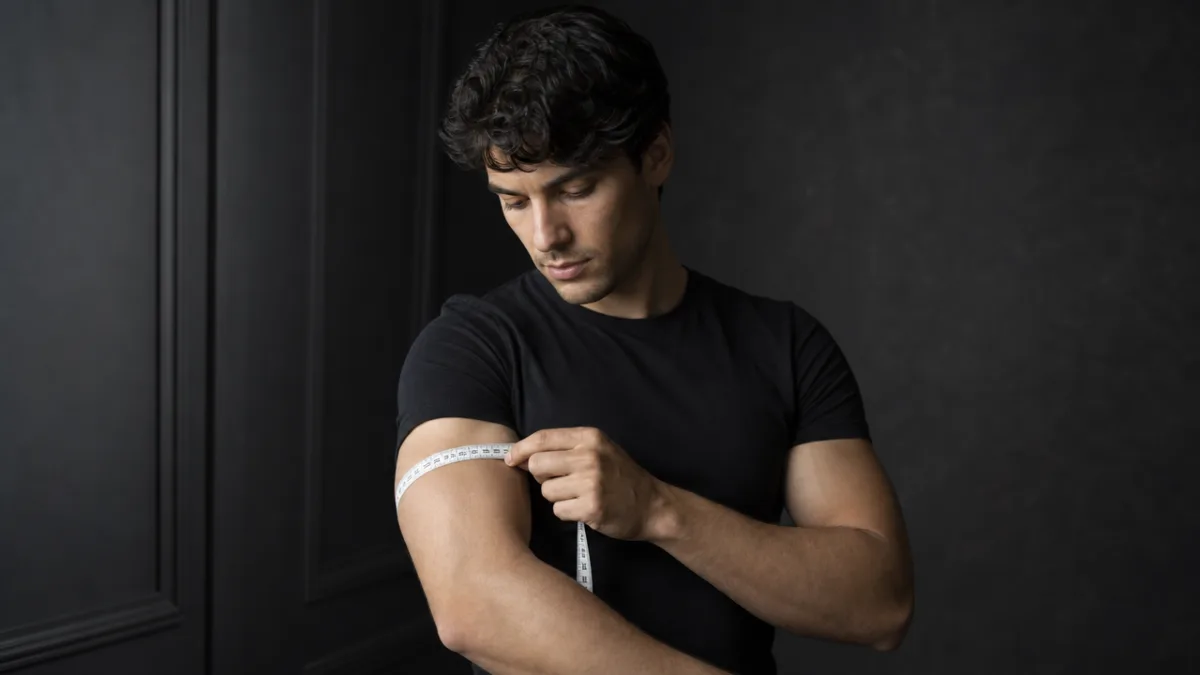
To measure accurately, use a soft tape measure and wear fitted clothing or measure against bare skin. Stand naturally rather than holding your breath or pulling yourself in. The key measurements you’ll need for a pullover sweater typically include: bust circumference (measured at the fullest point of the chest), waist circumference (at the narrowest point of your torso), hip circumference (at the widest point), desired sweater length from shoulder to hem, sleeve length from underarm to wrist, and upper arm circumference. It also helps to measure your shoulder width across the back from one shoulder seam to the other.
When you have all your measurements, compare them to the pattern’s schematic and ease guidelines. Ease refers to the extra inches added beyond your body measurements to allow for comfortable movement. Mesh sweaters are often designed with negative ease — meaning they’re sized slightly smaller than your measurements — because the stretchy, open fabric will expand to fit. Your pattern PDF will specify how much ease is built in or recommend how to adjust for your preferred fit, whether that’s a snug, body-con silhouette or a looser, oversized drape.
Here is a simple reference table of the measurements you should gather before beginning:
- Bust circumference — measured at the fullest point
- Waist circumference — at the natural waist
- Hip circumference — at the widest point
- Center back neck to hem — for total length
- Sleeve length — from underarm to wrist
- Upper arm circumference — at the bicep
- Wrist circumference — for cuff shaping
- Shoulder width — across upper back
Step-by-Step Construction of the Mesh Pullover
Most crochet mesh sweater patterns are constructed in one of three ways: worked flat in pieces and seamed together, worked in the round from the bottom up, or worked top-down in the round without seams. Flat construction is generally the most beginner-friendly approach, as it allows you to lay each piece out flat for easy measuring and blocking before assembly. The back panel, front panel, and two sleeves are worked separately, then joined at the shoulders and sides using a slip stitch or mattress stitch seam that can be made nearly invisible on the finished garment.
For the mesh or fishnet pattern itself, you’ll be working a repeated sequence of stitches across each row. A common fishnet sequence might read: chain 5, skip 2 stitches, single crochet in the next stitch, and repeat across. On the return row, you’ll work into the chain spaces from the previous row, creating that characteristic diamond grid. The beauty of this structure is that increasing or decreasing the number of stitches in your chain sequence adjusts the size of your mesh diamonds, letting you create anything from a fine, delicate lace to a bold, chunky net depending on your aesthetic preference.
Shaping the sweater — creating the neckline curve, armhole openings, and any waist tapering — is accomplished by strategically increasing or decreasing stitches at specific intervals. Your PDF pattern will provide detailed row-by-row instructions for all shaping sections. Because the mesh grid needs to remain consistent throughout, shaping rows require a little more attention than the plain mesh rows, but the pattern will guide you through each one. It’s a good idea to use stitch markers to flag your shaping points so you don’t lose track, especially when working on the front panel where the neckline dip begins.
Sleeves are typically worked from the cuff upward, starting with a tighter stitch pattern or ribbing at the wrist for structure, then transitioning into the open mesh pattern as you work up the arm. Increases are worked at regular intervals along the sleeve to accommodate the wider upper arm. Once all four pieces are blocked and dry, assembly is straightforward: sew the shoulder seams first, then set in the sleeves, and finally close the side and sleeve seams in one continuous seam from cuff to hem if desired. The result is a clean, well-structured pullover that looks professionally made.
Finishing Techniques and Styling Your Gothic Grunge Pullover
Finishing is the stage that separates a good handmade garment from a great one, and for a crochet mesh sweater, blocking is the single most transformative finishing step. Wet blocking involves soaking your completed sweater in cool water, gently pressing out the excess moisture in a clean towel, then laying the piece flat on blocking mats and pinning it to your exact desired dimensions. As the fabric dries, the stitches relax and even out, the mesh opens up beautifully, and the sweater takes on a polished, professional appearance that’s difficult to achieve without this step.
Edges deserve special attention on a mesh sweater. The raw edges of a fishnet fabric can look unfinished and may roll or stretch unevenly with wear. Working a simple border around the neckline, cuffs, and hem gives the garment a clean, intentional look. A single crochet border is the most minimal option; a picot edge adds a delicate, decorative finish; while a reverse single crochet (also called a crab stitch) creates a firm, rope-like border with a distinctly structured appearance that suits the gothic aesthetic particularly well. Your pattern may specify an edge treatment, but feel free to experiment if you’d like a different look.
Weaving in your yarn ends is the final technical step before wearing. With a yarn needle, thread each tail through several nearby stitches on the wrong side of the fabric, pulling it through in different directions to secure it. For a mesh fabric with its open structure, it’s important to weave ends through solid stitches rather than chain spaces wherever possible. Once all ends are secured, give your sweater one final light steam press if needed, and it’s ready to wear.
Styling a crochet mesh pullover opens up a world of creative possibilities. Here are some ways to wear your finished sweater:
- Layer over a long-sleeve black turtleneck and pair with wide-leg trousers for a sleek gothic look
- Wear with a satin slip dress and platform boots for a classic 90s grunge revival outfit
- Style over a bandeau top and high-waisted jeans for a more casual, everyday aesthetic
- Combine with a leather midi skirt and chunky belt for an edgy, fashion-forward ensemble
- Throw over a swimsuit as a coverup for a boho beach look with unexpected edge
- Layer under a leather or denim jacket as a textural statement piece visible at the hem and cuffs
Tips for Beginners and Troubleshooting Common Issues
If you’re approaching this project as a relative beginner to garment crochet, a few strategies will make the process significantly smoother. First, resist the temptation to skip the swatch. It genuinely is the most important single step you can take before committing hours of work to your sweater. Second, read your entire PDF pattern through at least once before picking up your hook. Understanding the overall structure of the construction helps you anticipate what’s coming, recognize when a row is a setup for a shaping section, and avoid surprises mid-project. A quick read-through takes fifteen minutes and can save hours of confusion.
Tension inconsistency is the most common challenge beginners face with mesh crochet. If you find your chain spaces are uneven — some looser, some tighter — try to consciously relax your grip on both the hook and the yarn. Many beginners hold tension in their hands and fingers without realizing it, particularly when concentrating hard on a new stitch. Taking regular breaks of five to ten minutes reduces hand fatigue significantly and tends to produce more even tension across a long work session. If inconsistency persists, try a hook one size larger and see if the extra ease helps your rhythm.
Counting stitches and chain spaces at the end of every row is a habit worth developing early. In mesh crochet, a missed stitch or an extra chain can throw off the entire grid, and errors that seem minor in the moment can compound visibly over several rows. If your stitch count comes up wrong, it’s almost always faster to rip back the problematic row and redo it than to try to compensate over the following rows. Most experienced crocheters will tell you that the ability to calmly frog (rip out) and redo is one of the most valuable skills in the craft, not a sign of failure but simply part of the process.
Finally, don’t hesitate to reach out to the pattern designer if you encounter instructions you don’t understand. Most independent designers who sell PDF patterns are active in their online communities and genuinely want their customers to succeed. Many also provide access to a support email, a Ravelry forum thread, or a social media group where buyers share progress photos, ask questions, and troubleshoot together. These communities are warm, welcoming spaces where experienced crafters are almost always happy to help beginners work through challenges. Your crochet mesh sweater is absolutely within reach, and the finished result — a one-of-a-kind, made-to-measure garment that you created with your own hands — will be more than worth every stitch.








What do you think?
It is nice to know your opinion. Leave a comment.