










How to Make DIY Hanging Solar Lights: A Complete Step-by-Step Guide
Introduction to DIY Hanging Solar Lights
There is something genuinely magical about a backyard or patio that glows softly after the sun goes down. Hanging solar lights have become one of the most popular outdoor décor trends in recent years, and for very good reason. They combine sustainability, affordability, and visual beauty in a single project that almost anyone can tackle over a weekend. Whether you are decorating a pergola, a garden pathway, or a balcony railing, handmade solar lights add a personal, crafted touch that store-bought options simply cannot replicate.
DIY hanging solar lights are also an excellent choice for the environmentally conscious homeowner. Because they are powered entirely by the sun, they produce zero electricity costs and leave no carbon footprint during operation. Modern solar panels, even the small ones used in garden lights, are efficient enough to store sufficient energy during a full day of sunlight to keep your lights glowing for six to ten hours through the night. That means you enjoy beautiful ambient lighting without ever touching a switch or paying a single cent on your utility bill.
This guide will walk you through everything you need to know to create your own stunning set of hanging solar lights from scratch. From gathering materials and understanding the basic components to final assembly and creative display ideas, we have covered every step in clear, practical detail. Even if you have never attempted a craft or DIY project before, you will find this process approachable, rewarding, and genuinely fun. By the end, you will have a set of beautiful lights that are uniquely yours and ready to transform any outdoor space.
Materials and Tools You Will Need
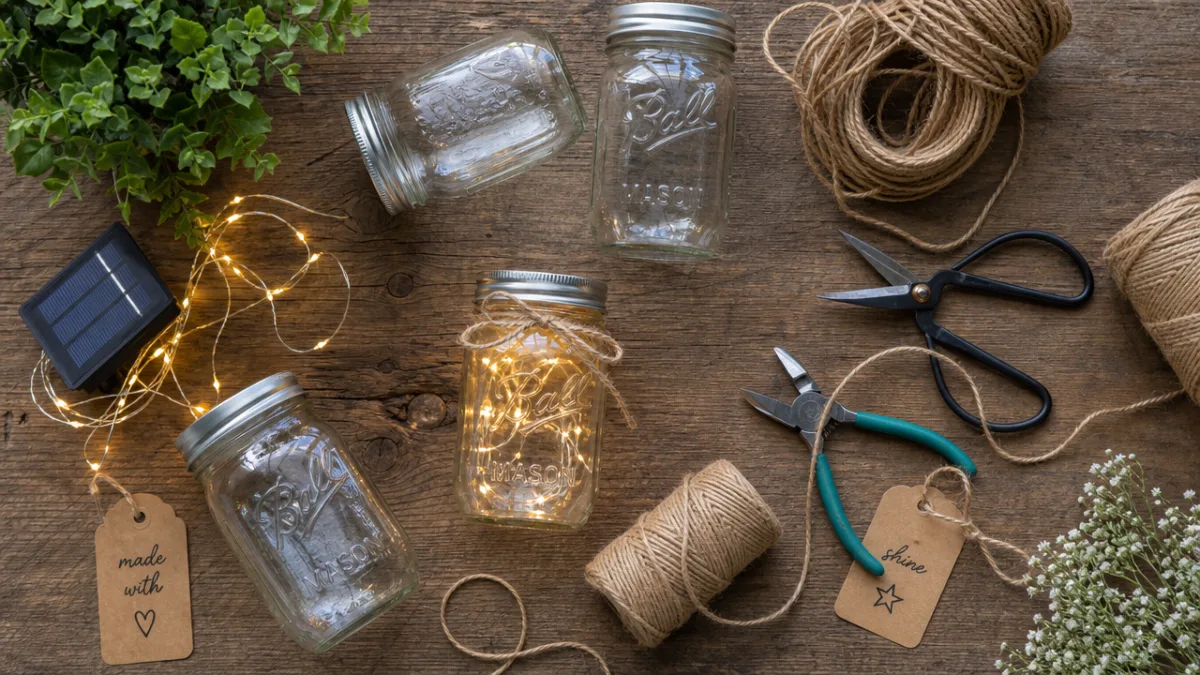
Before diving into the construction process, it is essential to gather all the right materials. Having everything on hand before you begin saves time and prevents the frustration of stopping mid-project to run to the hardware store. The core components you need are solar-powered LED string lights or individual solar stake lights, glass jars or lantern-style containers, sturdy wire or twine for hanging, and any decorative elements you want to add such as stones, sand, shells, or ribbon. These items are widely available at hardware stores, craft shops, and online retailers, often at very low cost.
The solar components are the heart of the project. You can repurpose the solar panels and LED units from inexpensive garden stake lights, which typically cost just a few dollars each. Alternatively, you can purchase solar-powered fairy light strands, which come with a small panel attached and are designed to be woven through decorative arrangements. For containers, mason jars are the most popular choice due to their classic look, but you can also use wine bottles, lantern frames, geometric terrariums, or even repurposed tin cans for a more industrial aesthetic.
For tools, you will need a few basic items that most households already own. A sturdy pair of scissors or wire cutters, a hot glue gun with glue sticks, a drill with a small drill bit if you plan to run wires through jar lids, and sandpaper for smoothing any rough edges are the essentials. If you plan to hang your lights from a structure, you will also need small hooks, carabiners, or ceiling cup hooks designed for outdoor use. Always choose rust-resistant hardware if your lights will be exposed to rain or humidity, as this will greatly extend their lifespan.
- Solar stake lights or solar fairy light strands
- Glass mason jars, wine bottles, or decorative lantern frames
- Sturdy outdoor wire, jute twine, or galvanized rope
- Hot glue gun and glue sticks
- Drill with small drill bit
- Rust-resistant hanging hooks or cup hooks
- Decorative fillers such as pebbles, sand, sea glass, or dried flowers
- Wire cutters and sandpaper
Understanding How Solar Lights Work
To build your DIY solar lights confidently, it helps to understand the basic science behind how they function. Every solar light system relies on a photovoltaic cell, commonly called a solar panel, which converts sunlight into direct current electricity. This electricity is stored in a small rechargeable battery, typically a nickel-metal hydride or lithium-ion cell, throughout the day. When ambient light levels drop at dusk, a photoresistor within the circuit detects the change and automatically activates the LED bulbs, drawing on the stored energy to power the light through the night.
The efficiency of your solar lights depends heavily on how much direct sunlight the panel receives during the day. South-facing placements in the northern hemisphere, or north-facing in the southern hemisphere, generally receive the most consistent sun exposure throughout the year. For a hanging installation, this means thoughtfully positioning the solar panel component so it is not blocked by shade from trees, roof overhangs, or other structures. Many solar string lights have a separate panel on a short lead cable, which gives you the flexibility to position the panel in full sun while the light decorations hang in a shaded or sheltered location.
It is also important to understand the battery capacity of the units you are working with. Larger solar panels collect more energy and can charge bigger batteries, which translates to longer run times at night. Inexpensive garden stake lights typically run for four to six hours, while higher-quality solar string lights can run for eight to twelve hours on a full charge. If you live in a region with shorter winter days or frequent overcast weather, choosing lights with higher-capacity batteries will ensure consistent performance year-round. Knowing these details helps you make smarter purchasing decisions before you ever start building.
Step-by-Step Assembly Instructions
Begin by preparing your containers. If you are using glass jars, clean them thoroughly inside and out so they are free of any residue or moisture. If you want to add decorative fillers, now is the time to place them at the bottom of the jar. A thin layer of sand creates a beach-inspired look, while small river pebbles give a more natural, earthy feel. Sea glass, dried lavender, pine cones, or colored glass beads all work beautifully as well. Keep the fillers to the bottom third of the jar so the light has plenty of room to illuminate upward and outward through the glass.
Next, prepare the solar light component. If you are using a solar stake light, carefully disassemble it by removing the stake from the unit and extracting the LED module, which is typically attached to the lid or top cap. Using your drill, create a small hole in the center of your mason jar lid just large enough to feed the wire or module through. Thread the LED and its wiring through the hole from the outside, and use a small amount of hot glue around the entry point to secure it firmly and create a weatherproof seal. The solar panel itself should sit on top of the lid, facing upward to catch sunlight.
Once the solar module is secured to the lid, screw the lid back onto the jar. At this point, you should have a self-contained solar light unit. To create the hanging mechanism, cut a length of jute twine, wire, or galvanized rope long enough to hang the jar at your desired height plus an extra twelve to fifteen inches for tying. Wrap the twine tightly around the neck of the jar just below the lid rim, making several tight loops before tying a secure knot. From this wrapped section, bring two equal lengths of twine upward and tie them together at the top to form a loop for hanging. Test the strength of your knot by gently lifting the jar before mounting it.
- Clean and dry your glass containers completely
- Add decorative fillers to the bottom third of the jar
- Drill a small hole in the jar lid for the LED module wire
- Thread the LED unit through the hole and secure with hot glue
- Attach the solar panel on top of the lid, facing upward
- Screw the prepared lid onto the jar
- Wrap and tie twine or wire around the jar neck to create a hanging loop
- Test the hanging strength before mounting
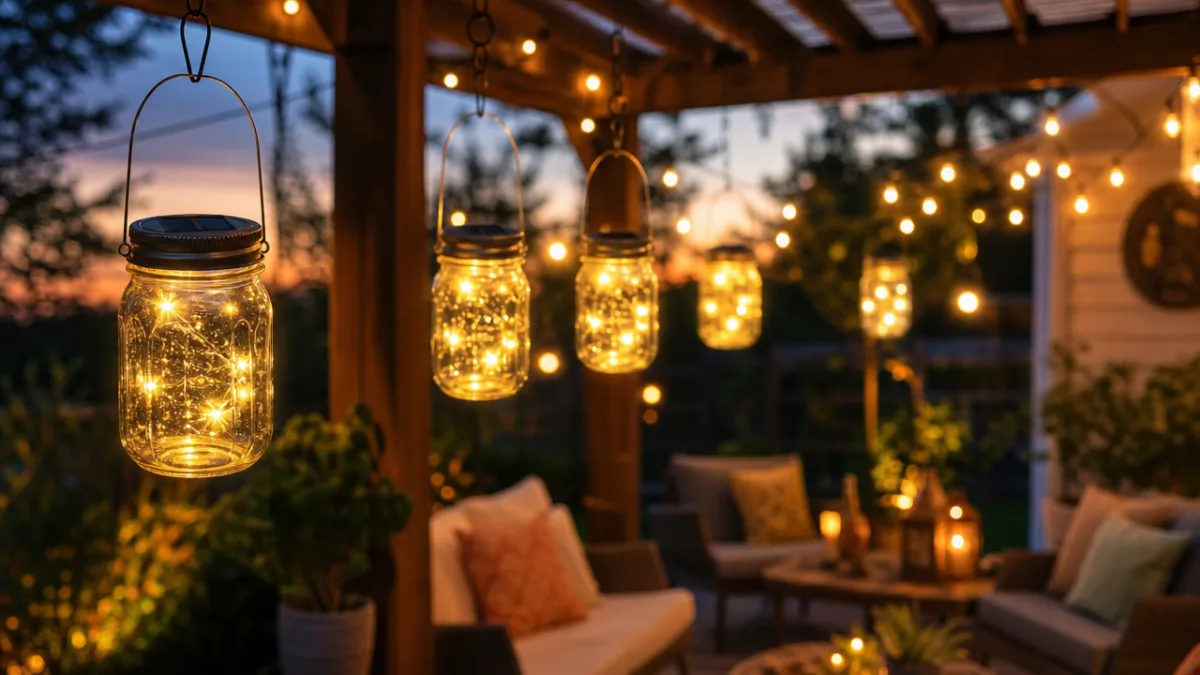
For installations involving multiple jars, you can create a beautiful cascading or clustered display by attaching several jars to a single horizontal piece of driftwood, a metal pipe, or a decorative branch. Simply tie each jar at a slightly different cord length to create visual variety and depth. Space them close enough together to create a warm, cohesive glow but with enough separation that each jar remains clearly visible as an individual element. This cluster approach works especially well over outdoor dining tables, porch swings, or garden seating areas where you want both light and a strong decorative statement.

Creative Variations and Design Ideas
One of the greatest joys of making DIY hanging solar lights is that the basic design is endlessly customizable. The same core technique can produce dramatically different results depending on the container you choose, the fillers you use, and the way you choose to display the finished lights. For a romantic, garden-party aesthetic, consider wrapping the outside of your jar with delicate lace trim or twisting trailing artificial ivy around the hanging cord. Soft white or warm amber LED lights work best for this look, as they replicate the gentle flicker of candlelight without any fire risk.
For a more bohemian or festival-inspired look, try using colored or patterned glass jars, which cast beautiful tinted shadows on surrounding surfaces when the LEDs shine through them. Alternatively, you can paint the outside of clear jars with translucent glass paint in blues, purples, and greens to create a stained-glass mosaic effect. Macramé knotting around the jar body instead of simple twine adds another layer of texture and craftsmanship. Mixing different sizes of jars within a single installation creates a dynamic, layered display that draws the eye upward and adds height to your outdoor décor.
For a sleek, modern aesthetic, consider using geometric terrariums made from copper-framed glass panels instead of traditional jars. These angular containers give a sophisticated, architectural quality to the lights and look particularly striking when hung in multiples over a contemporary patio. Geometric terrariums are widely available at home décor stores and are usually simple to adapt for solar use by opening the top panel and inserting a small solar fairy light strand inside. The clean lines of the metal frame pair beautifully with the soft organic glow of the LEDs to create a lighting installation that feels both designed and effortless.
Placement, Maintenance, and Seasonal Care
Choosing the right placement for your hanging solar lights is just as important as the construction itself. The two main factors to consider are solar panel exposure and the visual impact of the lighting arrangement. For optimal battery charging, the solar panel portion of each light needs access to at least six hours of direct or very bright indirect sunlight each day. Hang your lights in locations that are sheltered from wind and rain if possible, but never place the solar panel under a roof or deep in permanent shade, as this will prevent the battery from charging adequately.
Maintenance for DIY solar hanging lights is minimal but important for longevity. Every few weeks, wipe the solar panel surface with a soft damp cloth to remove dust, bird droppings, or debris that could reduce its efficiency. Check the hanging cords or wires periodically for signs of fraying, especially after storms or periods of high wind. The rechargeable batteries inside solar lights typically last between one and three years with regular use and should be replaced when you notice a significant drop in how long the lights stay illuminated at night. Most units use standard AA or AAA rechargeable batteries that are inexpensive and easy to source.
In regions with harsh winters, consider bringing your solar lights indoors during the coldest months. Freezing temperatures can crack glass containers and degrade battery performance significantly. Store your lights in a dry indoor location, ideally partially charged, and bring them back outside when temperatures consistently stay above freezing. A little seasonal care will ensure your DIY solar lights remain beautiful and functional for many years rather than just a single season. With proper attention, a well-made set of hanging solar lights can become a permanent and beloved feature of your outdoor living space.
Why DIY Solar Lights Are Worth the Effort
Beyond the obvious appeal of saving money and reducing electricity consumption, there is a deeper satisfaction that comes from creating something beautiful with your own hands. A set of handmade hanging solar lights carries a personal history that no mass-produced product ever could. Each jar, each knot, each careful arrangement of pebbles and sea glass represents a creative decision you made, and that investment of thought and time is visible in the final result. Guests who visit your outdoor space will immediately sense the care and intentionality behind your lighting, and many will ask how they can make their own.
DIY projects like this are also a wonderful way to involve children, friends, or family members in a shared creative experience. Making solar lights together on a sunny afternoon is an activity that spans skill levels and age groups, requiring no specialized expertise but rewarding patience and creativity. Children particularly enjoy choosing their decorative fillers and seeing the lights glow for the first time after dark. These shared moments of making something together build memories that last far longer than the lights themselves, turning a simple craft project into a meaningful shared experience.
Finally, choosing to make your own solar lights rather than buying disposable or electricity-powered alternatives is a small but meaningful step toward a more sustainable lifestyle. Every solar light you create displaces demand for plastic-packaged, electricity-consuming alternatives, and every hour your garden glows on solar power is an hour your home is drawing less from the grid. Taken individually these choices may seem small, but multiplied across thousands of people making similar decisions, they represent a genuinely significant collective shift. Your beautiful, handmade hanging solar lights are not just décor; they are a quiet statement of values, craftsmanship, and care for the world around you.








What do you think?
It is nice to know your opinion. Leave a comment.