







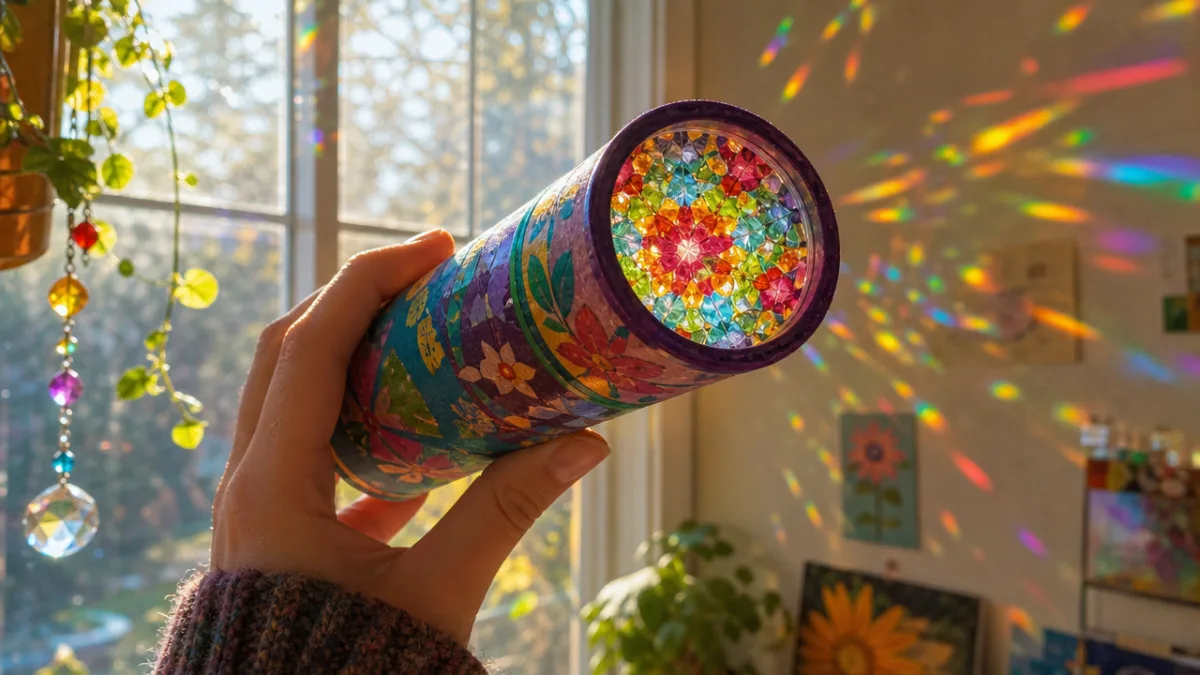
![Fun DIY Kaleidoscope Kids Craft Tutorial [Pictures]](https://i.pinimg.com/originals/9b/ba/c3/9bbac3351b1eb6d8f4f35c6dae3447d2.jpg "Fun DIY Kaleidoscope Kids Craft Tutorial [Pictures]")


Fun DIY Kaleidoscope Kids Craft Tutorial
Introduction: The Magic of Homemade Kaleidoscopes
Is there anything quite like watching a kid press their eye to a kaleidoscope for the first time? That little gasp, the way they go completely still — it gets me every time. Kaleidoscopes have been doing that to people for over two centuries, and here’s the best part: you don’t have to buy one. Making your own at home is honestly one of the most satisfying craft projects you can do with your kids. It hits that rare sweet spot where science, art, and hands-on fun all collide in a single afternoon.
This project works great for kids six and up, though younger ones can absolutely join in with a little help from a grown-up. Building a kaleidoscope from scratch is a sneaky-good way to talk about light, reflection, and symmetry — and it never feels like a lesson, because they’re too excited about what they’re making. The moment your kid holds up that finished tube and sees their first explosion of color, you’re going to see some genuine, unfiltered wonder. No screen comes close.
On top of being just plain fun, this craft builds fine motor skills, gets kids making real creative decisions, and gives them that great feeling of having built something that actually works. Whether you’re filling a rainy afternoon, planning a classroom activity, setting up a birthday party craft table, or just looking for a good reason to sit down and make something together, this tutorial has you covered from first cut to final decoration.
Understanding the Science: How Kaleidoscopes Work
Before we jump into building, let’s take a quick look at what’s actually happening inside one of these things — because it’s pretty cool. Kaleidoscopes run on reflection. Light comes in through the translucent end (the one filled with colorful bits), bounces off the mirrored surfaces inside, and each bounce creates a mirror image. Because the mirrors are set at a precise angle, those images multiply and snap into perfectly symmetrical, mandala-like patterns.
The classic setup is two mirrors at a sixty-degree angle, which gives you six-fold symmetry — the pattern repeats six times around a central point. Arrange three mirrors into a triangular prism, and things get even more complex and gorgeous. The beads, gems, sequins, or cellophane pieces inside the viewing chamber tumble around every time you rotate the tube, and because they’re always landing in a new position, no two views are ever identical. That’s the thing that hooks people — it’s genuinely endless.
This is a great moment to pull curious kids into a real conversation. You can talk about angles and degrees, point out symmetry in nature (snowflakes, flowers, honeycombs — they’re everywhere once you start looking), and explore how mirrors behave differently from other shiny surfaces. Ask them what they think will happen if you change the mirror angle or swap out the objects inside. Getting kids to make predictions before they test them is basically scientific thinking in its purest, most fun form.

Materials You Will Need
One of the things I love about this project is that you probably already have half of what you need lying around the house. The rest is easy to grab at a craft store or dollar store without spending much. Before you start, get everything laid out on the table — it keeps the session flowing smoothly and gives kids a chance to look everything over and get excited before the real fun begins.
The most important element is the reflective surface inside the tube. Mylar reflective sheets or mirror card are your best bet and are easy to find at craft stores or online. If you’re in a pinch, aluminum foil pulled tightly over cardboard strips can work as a beginner alternative — it won’t give you the crispest reflections, but it does the job. For the tube itself, a cardboard paper towel roll is perfect, though a Pringles can with the bottom removed works just as well. You’ll also need a couple of clear plastic circles to seal one end and hold your decorative objects in place.
Here’s everything you’ll want to gather before you sit down to build:
- One cardboard tube (paper towel roll or similarly sized tube)
- Mylar reflective sheet or mirror card — enough to cut three strips
- Small colorful objects: beads, sequins, gems, glitter, buttons, or small buttons
- Two clear plastic circles (cut from a plastic lid or use transparency sheets) — one slightly larger than the tube’s diameter
- Wax paper or tissue paper for the viewing end
- Strong craft glue or a low-temperature glue gun
- Tape (both regular clear tape and black electrical tape work well)
- Scissors and a ruler
- Decorating supplies: stickers, washi tape, paint, markers, or wrapping paper
- A pencil for marking measurements
A few fun optional extras: glitter glue for the outside of the tube, foam stickers in stars and hearts, and a bit of ribbon or twine if you want to hang the finished kaleidoscope as a decoration. If you’re making this a group activity, buying materials in bulk means every kid gets to put their own spin on their creation — and the more ownership they feel over it, the prouder they’ll be when it’s done.
Step-by-Step Assembly Instructions
Okay, here’s where it all comes together. Take your time with these steps — there’s no rush, and things don’t need to be perfectly precise to turn out beautifully. Actually, small imperfections in a handmade kaleidoscope often produce the most interesting patterns. I’d suggest reading through all the steps once before picking up your scissors, just so you have a sense of where everything is headed.
Start with the reflective strips. Cut three pieces of equal width, long enough to sit inside your tube with just a little room to spare — so if your tube is 30 cm long, aim for strips around 28 cm. Each strip’s width should be roughly one-third of the tube’s inner circumference so that when you form them into a triangle, they fit snugly together. Take your time with the ruler here, because cleaner cuts mean better reflections. Once you’ve got your strips cut, score them lightly along the long edges so they’ll fold into a clean triangular shape.
Then follow these steps in order:
- Form the mirror prism: Arrange your three reflective strips into a triangle with the shiny sides facing inward. Tape carefully along the edges to hold the shape. Peek through one end — you should already be able to see some reflections bouncing around in there.
- Insert the prism into the tube: Slide the triangular mirror prism into your cardboard tube. It should fit snugly without crumpling. If it’s a little loose, wrap the outside of the prism with a thin layer of cardboard before sliding it in.
- Create the object chamber: Cut one clear plastic circle to fit just inside one end of the tube. Cut a second circle slightly larger than the tube’s opening to serve as the outer cap. Pour your beads, sequins, and other colorful bits onto the smaller circle, then place the larger circle over it and tape the edges to create a sealed little chamber of color.
- Attach the object chamber: Push the chamber into the end of the tube over the mirror prism and secure it firmly with tape. Give the tube a gentle shake — the objects should rattle around freely inside without falling out.
- Create the viewing hole: At the opposite end of the tube, tape a small circle of wax paper or tissue paper over the opening. Then use a pencil to poke a small peephole right in the center. This diffuses the incoming light gently while still letting you see through clearly.
- Test your kaleidoscope: Point the object-chamber end toward a light source — a sunny window is ideal — and look through the peephole. Rotate slowly and enjoy the show!
If the patterns look dim, experiment with your light source. Natural daylight gives you the most vivid colors. If things look blurry instead of crisp, your mirror prism might need a tweak — gently pressing the strips into a tighter triangle and re-taping usually clears it right up. And when something isn’t quite working, try to resist the urge to fix it yourself. Let the kids troubleshoot first. That little stretch of persistence before something finally works? That’s where a lot of the real confidence gets built.

Decorating Your Kaleidoscope
Now for the part most kids have been waiting for — making it look amazing. Once the functional build is done, the outside of the tube is a completely blank canvas. There are genuinely no rules here, which is kind of the whole point. Encourage kids to think about their favorite colors and patterns, a theme they love, or even try to echo the colors inside the object chamber on the outside for a really cohesive, intentional look.
Washi tape is probably my top recommendation for this part — it comes in hundreds of patterns and colors, it sticks easily without any glue or drying time, and even younger kids can handle it independently. Wrapping the whole tube in overlapping strips of different washi tapes gives you a vibrant, layered patchwork effect that always looks great. You can also cut sections of decorative wrapping paper or scrapbook paper and glue them around the tube in panels. For kids who want to paint, acrylic craft paint applied with a small sponge brush dries quickly and produces a cool watercolor-like texture.
Here are some specific ideas to help spark some inspiration:
- Galaxy theme: Paint the tube black, then dab on dots and swirls of purple, blue, and white paint for a starry night effect.
- Rainbow wrap: Use washi tapes in every color of the rainbow, wrapped in diagonal stripes from end to end.
- Nature-inspired: Press and glue dried flowers or leaves directly onto the tube, then seal everything with a coat of decoupage medium.
- Glitter glam: Apply craft glue in swirling patterns and dust generously with fine glitter before it dries.
- Sticker art: Cover the entire tube with foam stickers, gem stickers, and alphabet stickers to build a totally personalized collage.
- Comic style: Hand the kid a set of permanent markers and let them go — their own characters, doodles, and whatever else comes to mind.
Don’t overlook the viewing end either — a small decorative button glued over the peephole looks like a really polished finishing touch. A ribbon tied around the middle means it can hang as a room decoration or be worn around the neck between uses. Let all glue and paint dry fully before anyone starts playing with it — overnight is ideal if you can manage the anticipation. One last sweet idea: have kids sign their name and date on the inside of the tube before it’s fully assembled, so years from now there’s a little hidden reminder of the day they made it.
Tips, Variations, and Ways to Extend the Fun
Once you’ve got the basic kaleidoscope down, there’s a lot of room to keep experimenting. One of the easiest and coolest variations is a teleidoscope — same build, but instead of a sealed object chamber at one end, you leave it completely open. Now whatever you point it at gets reflected and multiplied: a garden, a colorful painting, a pile of fall leaves, your own hand. The results are genuinely surprising every time.
Another fun idea is to make interchangeable object chambers. Build several small disc chambers filled with different combinations — warm reds and oranges for a fiery look, blues and silvers for something icy, pastels and glitter for springtime vibes. Swap them in and out by removing the tape at one end, and suddenly one tube becomes a completely different experience depending on which chamber you pop in. It’s also a sneaky great way to get kids sorting and categorizing colors and materials without it feeling like a chore.
For older kids or anyone who wants to push things further, here are some great extension ideas:
- Experiment with different mirror angles — try 45 degrees versus 60 degrees and count how many repeating sections appear in each pattern. Write it down and compare.
- Swap beads for colored cellophane pieces and see how filtering light changes the whole look of the reflections.
- Set up a “kaleidoscope gallery” where each child displays their creation alongside a card explaining the science — works really well as a science fair project.
- Use the kaleidoscope as an art prompt: have kids look through it for a minute, then try to recreate what they saw in watercolor or colored pencil.
- Make a miniature version using a short tube (like the cardboard core inside a roll of tape) for a pocket-sized one they can carry everywhere.
Most of all, make a big deal of the finished product. Put them on display somewhere visible, share photos with grandparents and friends, and take a real moment to acknowledge just how much skill and creativity went into building a working optical instrument from scratch. Kids who feel genuinely proud of what they’ve made are so much more likely to stay curious, try new things, and think of themselves as people who can build and create. This project is bigger than a rainy afternoon activity — it’s about that spark of confidence that comes from making something real and beautiful with your own two hands. And honestly, it’s a pretty great way to spend a few hours together.








What do you think?
It is nice to know your opinion. Leave a comment.