










How to DIY Painted Arch: Transform Your Walls with a Stunning Architectural Detail
A painted arch might just be the best-kept secret in home decorating. It’s one of those projects that looks like it cost a fortune and required serious skill — but really, all you need is some paint, a handful of basic tools, and a little patience. Unlike a real built-in arch (which means carpentry, contractors, and a much bigger budget), a painted arch tricks the eye into seeing structure and depth where there isn’t any. It’s been showing up everywhere lately, from cozy boho bedrooms to sleek minimalist living rooms, and honestly, it’s easy to see why.
Whether you want a dramatic focal point above your bed, a cozy frame for a reading nook, or just something to break up a flat, boring wall, a painted arch can completely change the way a room feels. And the versatility is real — you could go bold with deep terracotta or moody forest green, keep it soft and dreamy with a pale pastel, or even do a subtle tonal variation that’s more of an “is that paint or a built-in?” kind of effect. Any way you take it, the options are pretty much endless, and the process is way more approachable than it probably looks.
This guide covers everything from picking your paint color and tracking down your supplies, to sketching out the arch shape, laying down the paint, and styling the finished result. Even if you’ve never done anything more decorative with a paintbrush than rolling on a fresh coat of white, you’ll find that with some decent prep and a bit of care, you can walk away with something that looks genuinely impressive.
Choosing the Right Location and Style for Your Painted Arch
Before you crack open a single can of paint, you need to figure out where your arch is going and what shape it’s actually going to be. Location matters more than people expect. Above a headboard is a classic choice — it creates this built-in canopy effect that makes a bedroom feel like a boutique hotel room. But arches also work really well in entryways, hallways, behind a sofa in a living room, or even in a home office where you want a creative, inspiring backdrop. A good rule of thumb: think about where your eye naturally goes when you walk into the room, and consider making that your focal point.
Once you’ve nailed down the location, it’s time to think about shape. A classic semicircle has a timeless, slightly Roman quality that fits both traditional and modern spaces. A pointed Gothic arch is a bit more dramatic — great for moody, maximalist rooms. The Moorish or keyhole arch, with that distinctive scalloped top, brings a global, bohemian feel. And if you want something that feels more contemporary and sculptural, an asymmetric or organic arch with free-flowing curves is worth considering. Each shape creates a completely different mood, so it’s genuinely worth sketching a few rough options before you commit to one.
Proportions are worth thinking about carefully too. Really tall ceilings can handle a tall, dramatic arch without it feeling overwhelming. In a room with standard eight-foot ceilings, a wider and shallower shape tends to look more intentional. A helpful trick: rough out the dimensions with painter’s tape first, just to see how it reads in the actual space. Step back, look at it from across the room, even take a photo — you’d be surprised how much that perspective helps before you’ve made a single permanent mark.
Gathering Your Materials and Tools
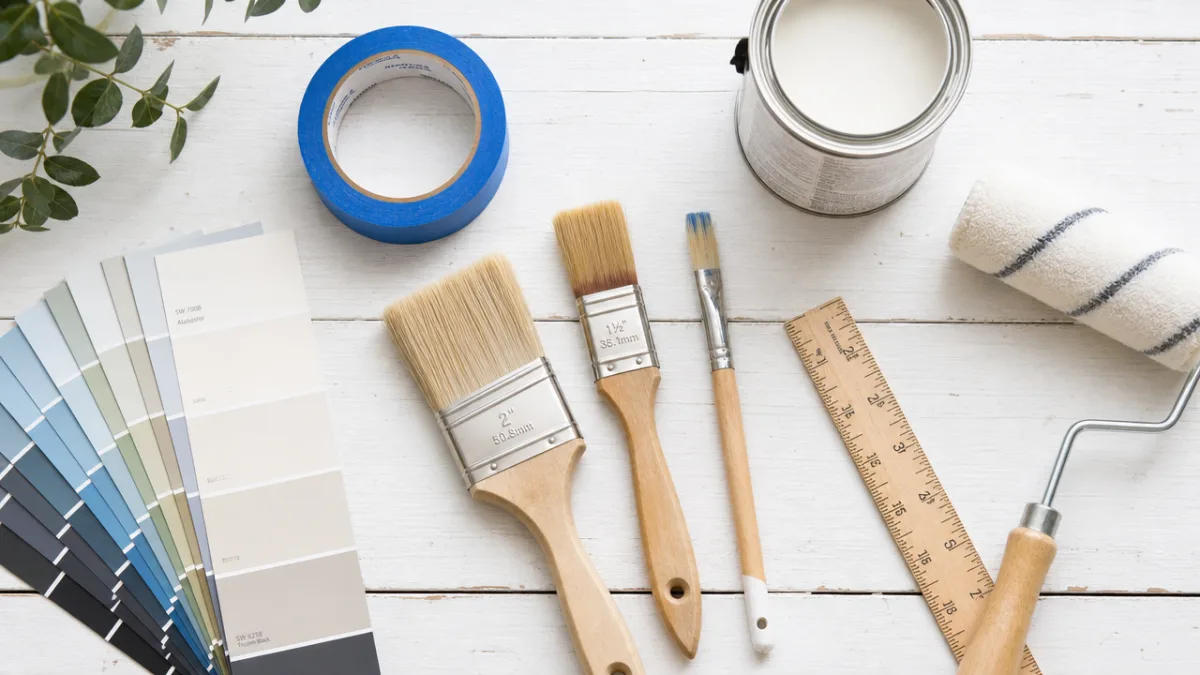
One of the genuinely great things about this project is how little you actually need to pull it off. Most of the materials are either already kicking around your house or cost next to nothing at a hardware or craft store. It’s worth getting everything together before you start — there’s nothing more annoying than getting halfway through and realizing you’re out of painter’s tape or can’t find your pencil. A bit of prep upfront makes the whole thing run so much more smoothly.
Here is a list of everything you will need for a standard DIY painted arch:
- Interior wall paint in your chosen color (a sample pot is often enough for a single arch)
- Painter’s tape (the wider 2-inch variety gives you better control)
- A pencil for marking your arch outline on the wall
- A string and a pushpin or thumbtack to create a makeshift compass
- A long ruler or straight edge for any straight portions of the arch
- A small roller for filling in larger areas of the arch
- A fine-tipped or angled paintbrush for edging and detail work
- A drop cloth or old sheet to protect your floor
- A small bowl or cup for decanting paint
- A damp cloth for wiping any small errors quickly
On the paint itself — finish matters almost as much as color. Matte or flat tends to give the most polished, gallery-wall kind of result, especially if your existing walls already have a flat finish. Eggshell or satin can work well too, and they’re a bit more practical if you’re painting in a busy area or a kid’s room since they’re easier to wipe down. If you’re going dark or heavily saturated over a lighter wall, grab a small tube of tinted primer — it’ll save you from needing four or five coats to get decent coverage.
Mapping Out and Drawing Your Arch Shape
This is the step that trips people up the most, but I promise it’s more manageable than it looks. The string-and-pin compass method is the go-to here, and once you try it, you’ll wonder why you were ever nervous about it. Start by finding and marking the center point of your wall section — this is the anchor for your whole arch, so take the time to get it right. Use a level to confirm it’s actually centered and not just eyeballed.
To draw the curve, push a thumbtack or pushpin into that center point, tie one end of a piece of string to it, and tie the other end around a pencil. Adjust the string length to whatever radius you want, pull it taut, and swing the pencil in an arc across the wall. Keep consistent tension the whole way through and you’ll get a beautifully smooth, even curve. For a wider arch, it really helps to have someone hold the pin steady while you do the sweeping — it’s a two-person job at that scale. Take your time here, because a clean pencil line makes every step after this a lot easier.
Once the curved top is in place, use your ruler and level to draw the straight sides dropping down from where the curve meets the wall. How far those sides extend depends on the style you’ve chosen — a pure semicircle barely has any, while a taller elongated arch might have sides that run a foot or more down the wall before the curve kicks in. Step back often and check the proportions as you go. If something looks off, just erase and redo it. Pencil marks on a painted wall disappear easily, and nothing is locked in until paint actually hits the surface.
Applying the Paint for a Flawless Finish
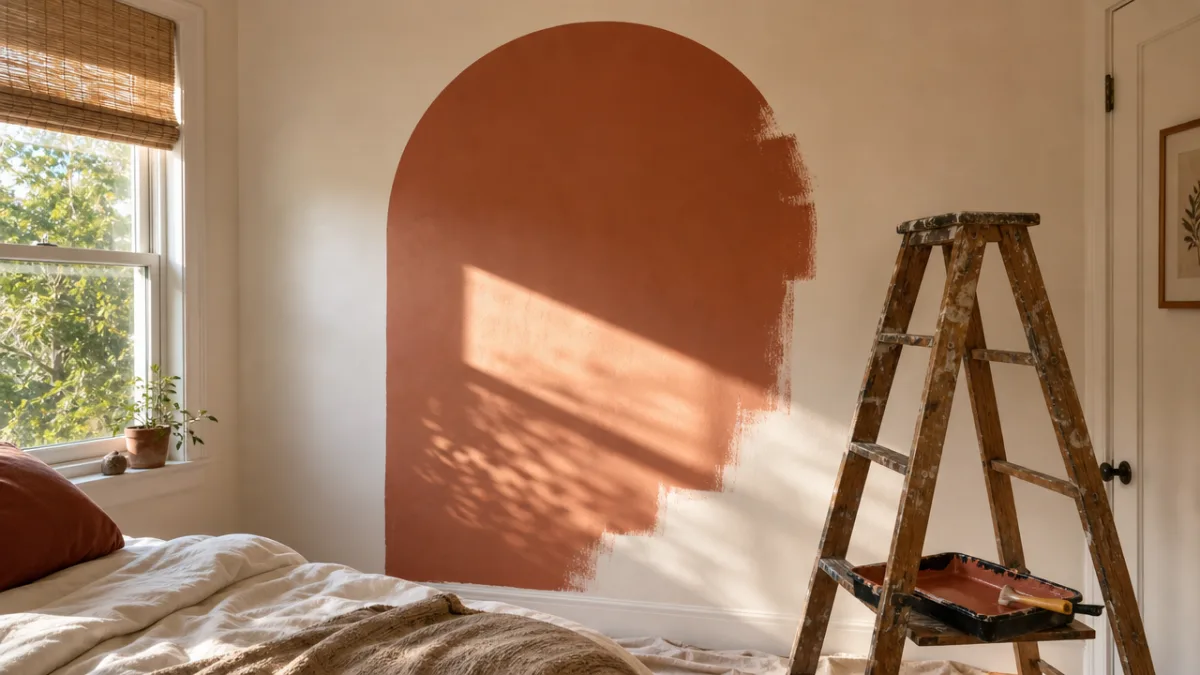
With your arch drawn in pencil, the next step is taping along that line to set yourself up for a really clean edge. This part rewards patience more than almost anything else in the whole project. Press the tape down firmly along the inner edge of your pencil line — the side that’s going to be painted — and smooth it carefully around the curve. For the curved sections, tear the tape into short two-to-three-inch pieces and slightly overlap them as you work around the bend, rather than wrestling a long piece around the arc. This keeps the tape from puckering or lifting, which is what lets paint sneak underneath.
Before you apply your arch color, paint a thin coat of your existing wall color right along the tape edge and let it dry completely. This sounds counterintuitive but it’s a great trick — it seals the tape edge with the base color, so if any paint does seep underneath, it matches the wall and disappears completely. Once that’s dry, go in with your arch color: the small roller for the main body, and the angled brush for cutting in right along the tape. Work in thin, even coats rather than one thick pass — it takes a little longer but avoids drips and gives you much more even coverage.
Most arches need two to three coats for a fully saturated finish, especially with darker or richer colors. Let each coat dry fully before adding the next — skipping ahead is the number one reason arches end up looking streaky. Once your final coat is on and the paint is still a little tacky (not fully wet, but not bone dry either), pull the tape off slowly at a 45-degree angle. Removing it at this slightly tacky stage — rather than waiting until it’s completely dry — makes a huge difference for getting that sharp, clean edge without pulling any dried paint away with it.
Adding Decorative Touches and Styling Your Arch
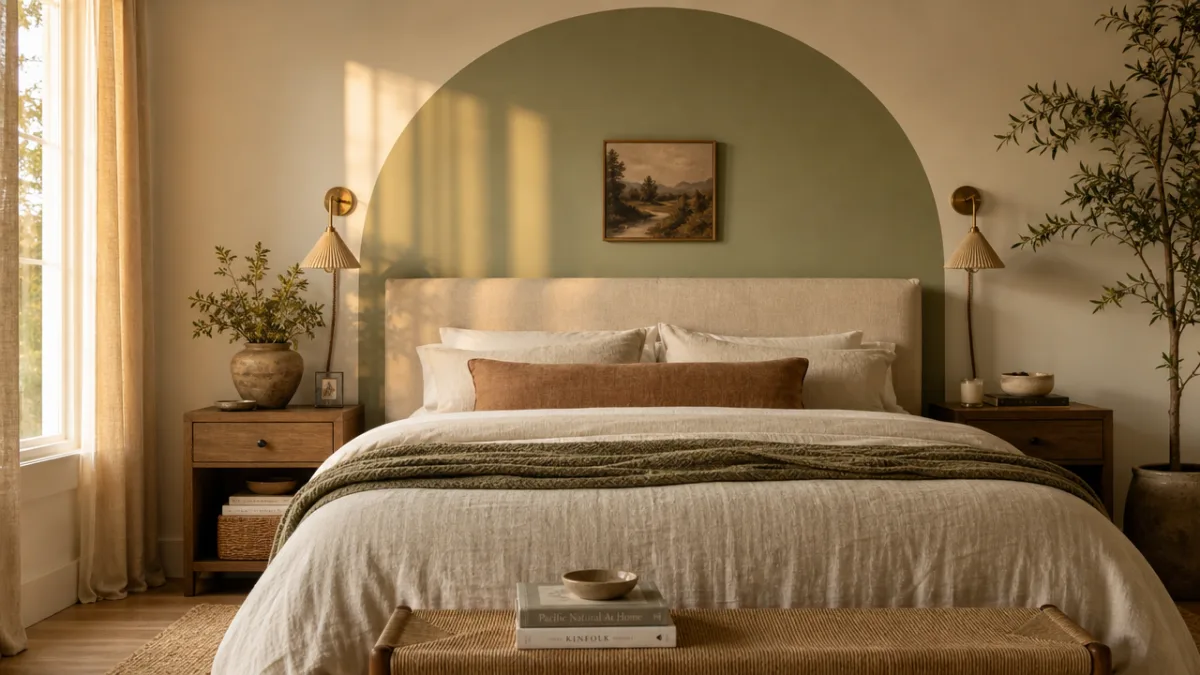
Once the paint is dry and the tape is off, the really enjoyable part starts — figuring out how to style the space so the arch looks its absolute best. Think of the arch as a frame, and ask yourself what you want it to frame. In a bedroom, centering the bed within the arch and layering in some textured pillows and a statement throw creates this incredibly pulled-together look. In a living room, a console table with a few carefully chosen objects, a mirror, or a grouping of plants inside the arch turns it into a composed vignette that feels genuinely intentional.
Lighting can take a painted arch from nice to really special. A sconce on each side creates a symmetrical, almost theatrical effect that’s particularly gorgeous in entryways and bedrooms. A picture light mounted above and angled down washes the painted surface with warm light, which emphasizes both the shape and the color in a way that’s especially striking at night. If hardwiring isn’t an option, battery-operated LED strips or plug-in sconces have gotten good enough that they’re a very convincing alternative without any electrical work involved.
There are also plenty of ways to take the arch further if you want to make it feel more layered and personal. A thin painted border in a contrasting or complementary color just inside the arch edge adds a more finished, elaborate look. Stenciling within the arch brings in pattern and texture. Hanging a single piece of art or a small mirror centered within the upper curve creates a really satisfying composition. And trailing plants like pothos or string of hearts draped along the sides add an organic, romantic quality that photographs beautifully and looks just as good in person.
Troubleshooting Common Mistakes and Maintaining Your Arch
Even with solid preparation, small things can go sideways, and it’s good to know how to fix them before they stress you out. The most common issue is paint bleeding under the tape, leaving a slightly fuzzy or uneven edge. If that happens, don’t panic — once the paint is completely dry, load a fine artist’s brush with the base wall color and carefully touch up the edge by hand. Professional decorators do this all the time, and it can make a rough edge look perfectly crisp with surprisingly little effort.
Patchiness or uneven coverage is another one that comes up a lot, particularly with highly pigmented colors going over a lighter wall. If the arch looks streaky once dry, just add another thin coat using smooth, overlapping strokes, and make sure you’re working in good light so you can catch any thin spots while they’re still workable. Sometimes the issue is less about technique and more about the paint itself — cheaper paints genuinely have lower pigment loads and need more coats to reach full opacity, so it’s worth spending a little more on a quality interior paint upfront to avoid the frustration later.
Keeping the arch looking good over time is easy. It’s just a painted section of wall, so you can touch it up whenever you need to with the same paint — which is a good reason to label and save whatever’s left over in a small jar. If you ever decide to change the look or repaint the room, you can simply paint right over it. That’s honestly one of the biggest advantages a painted arch has over a structural one: it’s completely reversible. It’s a genuinely low-commitment, high-impact decision that you can change as your taste evolves, and there’s something really freeing about that.
Color Inspiration and Trending Combinations for Your Painted Arch
Picking the color is probably the most personal part of this whole project — and one of the most fun. The arch doesn’t need to tie in with anything else already in the room; in fact, some of the most striking arches introduce a completely new hue that acts as an unexpected accent. Deep, warm tones like burnt sienna, dusty rose, sage green, navy, and terracotta have all been huge in recent years because they bring personality and warmth without taking over a space. They tend to look especially good against white or off-white walls, where the contrast is bold without feeling harsh.
If you’d rather keep things quieter, a tonal arch — painted a shade or two deeper than your existing wall color — creates a sophisticated, almost subliminal effect that adds depth without making a big statement. This works especially well in rooms that already have a lot going on with color or pattern, where a strongly contrasting arch might compete instead of complement. Think warm off-white against bright white, soft putty against warm beige, or dusty mauve against blush pink. It’s a more understated approach, but done well it looks really refined.
Here are some of the most popular and enduring color combinations for painted arches to inspire your own choices:
- Terracotta arch on white walls — warm, Mediterranean, and eternally stylish
- Sage green arch on cream walls — fresh, calming, and beautifully botanical
- Navy arch on white walls — bold, graphic, and timelessly classic
- Dusty pink arch on white walls — soft, romantic, and perfect for bedrooms
- Charcoal arch on light grey walls — moody, modern, and architecturally sophisticated
- Mustard yellow arch on warm white walls — playful, optimistic, and full of personality
- Forest green arch on off-white walls — rich, dramatic, and deeply elegant
Whatever color you land on, please do yourself a favor and test a swatch on the actual wall before committing — and then live with it for at least 48 hours. Paint shifts dramatically depending on which way the room faces, the time of day, and what kind of artificial light you’re using at night. Something that looks like the perfect dusty rose in a store under fluorescent lighting can read almost orange under warm incandescent bulbs, or go strangely cool and lavender in a south-facing room in the afternoon. Give it time. The color choice is the one decision that defines everything else about the finished arch, so it’s worth getting right.








What do you think?
It is nice to know your opinion. Leave a comment.