










How to Build Raised Garden Beds: A Complete Guide
Why Raised Garden Beds Are Worth Building
Raised garden beds have taken off in the home gardening world, and honestly, it’s easy to see why. They give you real control over your soil, your drainage, and your whole growing setup in a way that just planting in the ground never quite can. Dealing with rocky soil, heavy clay, or a yard that turns into a swamp every time it rains? A raised bed sidesteps all of that from day one.
There’s a physical comfort angle too that doesn’t get mentioned enough. Since the soil is raised up off the ground, you’re doing a lot less bending and kneeling — which is a pretty big deal if you have back trouble or just find that kind of strain wears on you. A lot of people discover they actually enjoy gardening more once they’re not wrecking their knees every time they go outside. Raised beds are one of the most practical ways to make that happen without giving anything up on the productivity side.
And then there’s just how good they look. A well-built raised bed with clean edges and dark, rich soil becomes a real feature in your yard rather than just a scruffy patch of dirt. You can lay out several beds in tidy rows, add pathways between them, and end up with a kitchen garden that’s genuinely pretty to look at. The time and money you put in upfront pays you back in harvests, sure, but also in that quiet satisfaction of walking past something you built yourself.
Choosing the Right Materials for Your Raised Bed
What you build your bed out of matters more than you might think — it affects how long the thing lasts, how it looks, and whether it’s actually safe for growing food. Cedar and redwood are the go-to choices for most experienced gardeners, and for good reason. Both woods have natural oils that fight off rot and insects without any chemical treatment, so they’re food-safe and genuinely long-lasting. A well-built cedar bed can easily hold up for ten to fifteen years without much fuss.
Pressure-treated lumber is another option, and it sparks a lot of debate. The good news is that modern pressure-treated wood uses copper-based preservatives rather than the old arsenic-based stuff, and current research generally says it’s fine for vegetable gardens. That said, if you’d rather not worry about it, untreated cedar or pine with a natural finish works perfectly well. Pine costs noticeably less than cedar, though you’re probably looking at about five years before it starts to seriously break down.
Beyond wood, you’ve got some interesting alternatives. Composite lumber — made from recycled plastic and wood fiber — is tough, low-maintenance, and will outlast most wood options, though it tends to cost more upfront. Galvanized steel beds have gotten really popular lately for their clean, modern look and they essentially last forever. Stone and concrete block beds are as permanent as it gets, and depending on the material they can look either rustic or quite formal. They also hold heat in a way that wood doesn’t, which can give you a longer growing window on both ends of the season.

Planning Your Raised Bed Layout and Dimensions
Before you cut a single board or dig up any grass, it’s really worth taking your time on placement and sizing. Sunlight is the biggest thing to get right. Most vegetables want at least six hours of direct sun a day, and eight or more is where you’ll really start to see the difference in your harvests. Spend a day watching how shadows from trees, fences, and your house move across the yard at different times. Pick the spot that gets the most open, uninterrupted sun through the middle of the day.
Width is probably the single most important dimension to nail. Four feet is the standard, and it’s not arbitrary — most adults can reach about two feet comfortably from either side, so a four-foot bed means you can get to the center without ever having to step in. That matters because stepping on the soil compacts it, which undermines one of the whole points of building a raised bed in the first place. If you can only access the bed from one side, keep it two feet wide at most.
Length is more flexible and mostly comes down to your space and what feels manageable to work around. Four, six, and eight feet are the most common, though beds longer than eight feet can start to feel awkward. Depth is the other key number: six inches will work for shallow-rooted crops like lettuce and herbs, twelve inches is the reliable standard for most vegetables, and eighteen or more is ideal if you want to grow carrots, tomatoes, or parsnips. Taller beds also mean less bending, so if accessibility matters to you, going up to twenty-four inches is absolutely worth considering.
Step-by-Step Construction Process
Once you’ve done the planning, the actual building goes faster than you’d expect and only calls for basic tools. You’ll need a tape measure, a circular saw or miter saw, a drill with screwdriver bits, exterior-grade screws, a level, and a rubber mallet. For a standard four-by-eight-foot bed using two-by-six lumber, cut two boards to eight feet for the long sides and two boards to just under four feet to account for the side board thickness. Measure twice — seriously, it saves a lot of grief.
Lay the boards flat and pre-drill your screw holes before you start putting things together. Pre-drilling keeps the wood from splitting, which is especially important near the ends of the boards where the grain is most vulnerable. Use at least two screws at each corner, and think about adding corner brackets if you want extra sturdiness. Once it’s assembled, check the frame is square by measuring diagonally from corner to corner in both directions — if the two measurements match, you’re good. Use the rubber mallet to nudge things into alignment before you tighten everything down for good.
Set your frame in its spot and use a level to make sure the top edges are even. On sloped ground, you may need to dig down a bit on the high side or add extra boards to build up the low side. Once it’s level, lay cardboard or several layers of newspaper on the bottom if you want to smother any grass or weeds trying to grow up from below. Some gardeners also staple hardware cloth to the bottom to keep out moles and voles. With that done, you’re ready for the most satisfying part: filling it with soil.
First-time builders are almost always surprised by how much soil a raised bed actually needs. Here’s the math: multiply length by width by depth in feet, then divide by 27 to get cubic yards. A four-by-eight-by-one-foot bed takes about 1.2 cubic yards of mix. For most vegetables, a good fill is roughly 60 percent topsoil, 30 percent compost, and 10 percent perlite or coarse sand for drainage. That blend gives your plants nutrients, decent moisture retention, and that light, airy structure that roots really thrive in.

Choosing What to Grow and Spacing Your Plants
One of the best things about raised bed gardening is that the quality of your soil lets you pack plants in more densely than you ever could in a regular row garden. Square-foot gardening was actually developed with raised beds specifically in mind, and it’s a really practical system for getting the most out of your space. The idea is simple: divide your bed into one-foot squares and plant each square based on how big the plants get at maturity. Big plants like tomatoes and peppers get one per square, medium ones like beets and lettuce get four to nine, and small ones like carrots and radishes can go sixteen or more to a square.
If you’re just starting out, a few crops tend to make people fall in love with the hobby fast. In spring, lettuce, spinach, radishes, peas, and kale are forgiving and quick — you’ll be harvesting before you know it, which does a lot for your confidence. Once summer rolls around, tomatoes, zucchini, cucumbers, beans, and basil really hit their stride in the warm soil that raised beds hold so well. As the season winds down, you can switch back to cool-weather crops like broccoli, cauliflower, and root vegetables that actually taste better after a light frost.
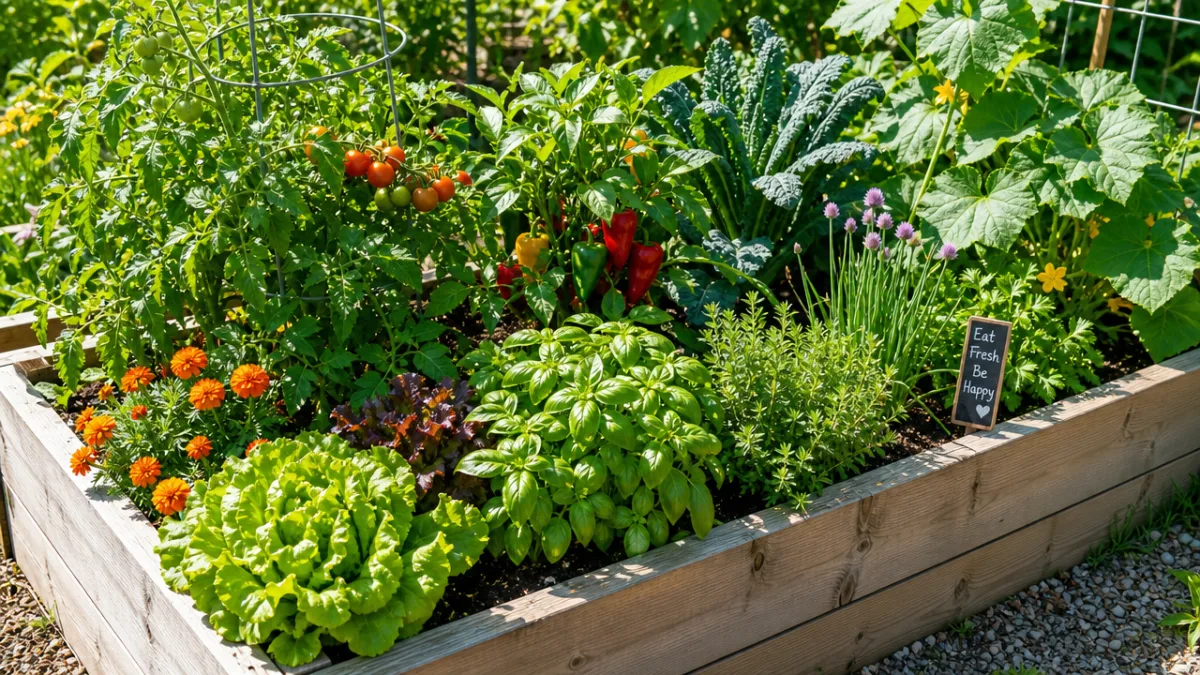
Companion planting is worth thinking about too, and it’s especially easy to do intentionally in a raised bed. The Three Sisters combination — corn, beans, and squash — is a classic for a reason and works great in bigger beds. Basil near tomatoes is widely thought to improve flavor and help with certain pests. Marigolds are probably the single most recommended companion plant out there because they repel aphids, whiteflies, and other common nuisances through scent and root secretions alike. When you start thinking about your plants as a little community rather than individuals, you tend to end up with a healthier, more resilient bed overall.
Maintenance, Watering, and Long-Term Care
Raised beds dry out faster than in-ground plots because they drain more freely and the raised soil surface gets more exposure to wind and sun. In warm weather, most vegetable beds want at least an inch of water a week, and sandy soil mixes may need even more than that. The best habit to get into is watering deeply but less often, rather than a little bit every day — deep watering pushes roots downward, which makes plants much tougher when dry stretches hit. Drip irrigation or soaker hoses are ideal here because they put water right at the roots without wetting the leaves, which cuts down on fungal problems significantly.
Each growing season, the soil in your bed will settle and lose some volume as the organic matter breaks down. That’s actually a good sign — it means the soil is alive and active — but it does mean you’ll need to top things up. At the start of each season, spread two to four inches of fresh compost over the bed and work it lightly into the top few inches of existing soil. This refreshes the nutrients, improves the texture, and brings in new microbial life that your plants will thank you for. Try to avoid deep tilling, though, since it disrupts the fungal networks and earthworm communities that build up naturally over time and do a lot of quiet good work.
Pest management in a raised bed is generally easier to stay on top of than in a big open garden, but it still takes some regular attention. Walk through and look closely at your plants every few days, especially on the undersides of leaves where aphids, caterpillar eggs, and spider mites like to hide. When populations are small, just pick them off by hand. Row covers — that lightweight fabric you drape over the bed and tuck in at the edges — work surprisingly well at keeping flying insects out while still letting in light and rain. For anything more stubborn, insecticidal soap or neem oil applied in the early morning or evening will handle most problems without hurting the bees and ladybugs you want to keep around.
The bed structure itself needs a little attention too if you want it to last. Each spring, check your boards for rot, splitting, or any screws that have worked loose. Cedar and redwood can be treated with a food-safe linseed oil finish every few years to slow down weathering without putting anything harmful into your soil. If one board eventually gives out, you don’t have to tear the whole thing down — just swap in a new board and keep going. With that kind of simple upkeep, a well-built raised bed will genuinely serve you for ten years or more.
Extending Your Growing Season with Simple Techniques
One thing people often don’t realize about raised beds is how naturally they lend themselves to squeezing more out of the growing season. The soil in a raised bed warms up several weeks earlier in spring than ground-level soil does, so you can get cold-tolerant crops in the ground noticeably sooner. You can push that advantage even further by laying black plastic mulch over the bed for a week or two before planting — it soaks up heat and gets the soil temperature up fast. In a lot of climates, this simple trick can shift your planting date two to four weeks earlier, which is a meaningful head start.
Hoop houses are another option that’s both effective and surprisingly cheap. You bend flexible PVC conduit or metal tubing into arched hoops, anchor the ends along the inside edges of your bed, and drape clear plastic or row cover fabric over the top to create a little tunnel greenhouse. This setup can protect plants from frosts down into the mid-twenties Fahrenheit, which can easily add four to six weeks to your fall harvest. When the season’s over, the hoops come out, flatten down for storage, and go right back up next year.
Cold frames take things one step further — essentially a box with a clear lid that you build directly over or next to a raised bed. An old window sash laid over a raised bed frame on cold nights can keep lettuce, spinach, and other tough greens going well into winter in a lot of regions. Put together a raised bed’s naturally warm soil, its solid drainage, and a simple cold frame, and you’ve got one of the most effective low-tech systems a home gardener can use for getting fresh food on the table for as many months of the year as possible — no expensive greenhouse required.








What do you think?
It is nice to know your opinion. Leave a comment.