










13 Creative Art Studio & Hobby Room Ideas to Inspire Your Perfect Creative Space
Why Every Artist Needs a Dedicated Creative Space
Creating art is more than a pastime — it’s a practice that demands focus, intention, and an environment that nurtures your imagination. When you carve out a dedicated studio or hobby room, you signal to your brain that this is sacred time and space for creativity. The simple act of having a room, a corner, or even a well-organized nook that belongs entirely to your artistic pursuits can dramatically elevate both the quality and consistency of your creative output. Without that dedicated space, art often gets pushed aside in favor of daily responsibilities.
Many artists, whether hobbyists or professionals, underestimate how much their physical environment shapes the work they produce. A cluttered, poorly lit, or disorganized space introduces friction into the creative process. You waste time searching for supplies, you feel uninspired by dull surroundings, and the mental noise of an unorganized room seeps into your work. On the other hand, a thoughtfully arranged studio invites you to sit down, pick up a brush or pencil, and lose yourself in the flow state that makes creating so rewarding.
The good news is that a great art studio doesn’t require a massive budget or a large square footage. Some of the most inspiring creative spaces in the world are compact, resourcefully outfitted rooms filled with personality and purpose. What matters most is intentionality — understanding your medium, your workflow, and your aesthetic sensibilities, then building a space that serves all three. The ideas collected here draw from a wide range of styles and disciplines to help you envision and build your ideal creative sanctuary, no matter how much space or money you’re working with.
Planning Your Art Studio Layout and Zoning
Before purchasing a single shelf or paint rack, the most valuable thing you can do is map out how you actually work. Think about your primary medium — do you paint large canvases that need floor space, or do you do intricate jewelry work that requires a close-up bench? Are you someone who works on multiple projects simultaneously, or do you prefer to complete one piece at a time? These behavioral patterns should drive every decision about your layout, from where you position your main worktable to how you allocate wall space for storage versus display.
Effective zoning is the secret to a studio that feels both organized and inspiring. Consider dividing your space into functional zones: a creation zone where the main work happens, a storage zone for supplies and materials, a display zone for finished or in-progress pieces, and ideally a planning zone where you can sketch ideas, review references, or simply think. Even in a small room, these zones can be implied through furniture arrangement, lighting differences, or rug placement rather than physical walls. Good zoning reduces the mental overhead of working and makes it easier to shift between different phases of a project.
Traffic flow is an often-overlooked element of studio planning. You should be able to move comfortably between your zones without having to shuffle chairs, step over supply caddies, or awkwardly reach across your workspace. Leave generous pathways between your largest furniture pieces, and position your most frequently accessed supplies within arm’s reach of your primary work surface. If you share the space with a partner or collaborate with others, factor in enough room for two people to work comfortably without encroaching on each other’s creative territory. A well-planned layout quietly eliminates friction and keeps you in the creative zone longer.

Lighting Strategies That Make Your Work Come Alive
Lighting is arguably the single most important element in any art studio, and it’s frequently the one most neglected by beginners setting up their first creative space. Poor lighting doesn’t just make it harder to see what you’re doing — it actively distorts colors, strains your eyes, and introduces fatigue that shortens your creative sessions. Natural north-facing light is the gold standard for visual artists because it provides a consistent, cool, shadow-free illumination that doesn’t shift dramatically throughout the day. If north-facing windows aren’t available in your space, frosted glass or light-diffusing window film can soften harsh direct sunlight to something more workable.
Layered artificial lighting is essential for working during evening hours or in windowless spaces. The key is to combine ambient lighting, which fills the overall room, with task lighting directed precisely at your work surface. Color temperature matters enormously: bulbs in the 5000–6500 Kelvin range mimic daylight and render colors most accurately, which is critical if you’re working with paint, fabric, or any medium where color fidelity matters. Avoid warm incandescent tones in your primary work zone, as they shift color perception significantly and can lead to work that looks very different when viewed in natural light.
Beyond function, lighting is also a powerful tool for setting mood and atmosphere in your studio. Consider installing dimmable overhead fixtures so you can dial up bright, focused light for detailed work and soften the room when you want to step back and evaluate a piece at a distance. String lights, LED strip lighting under shelves, and adjustable desk lamps all add layers of warmth and personality. Some artists install color-changing smart bulbs that can be tuned throughout the day, ensuring accurate color rendering during active work and a cozier ambiance during brainstorming or journaling sessions. Lighting designed with this level of care transforms a functional workspace into a genuinely atmospheric creative refuge.
Smart Storage Solutions for Every Type of Artist
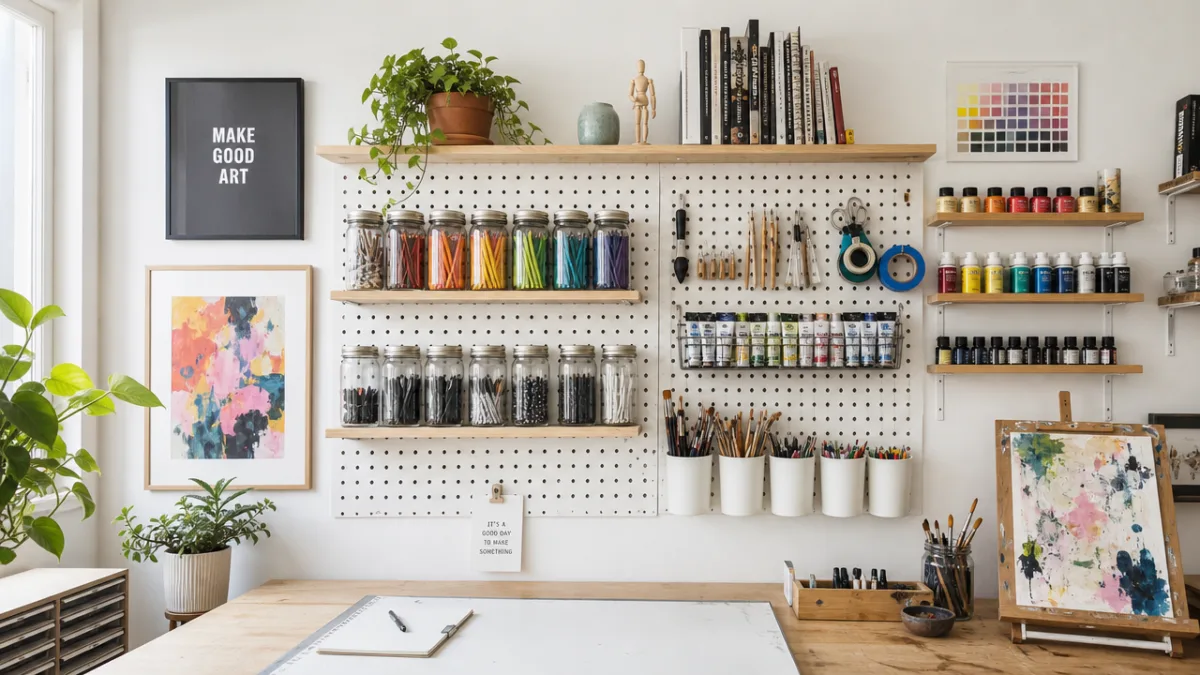
Storage is where most home studios fall apart. Supplies accumulate faster than shelving, drawers overflow with half-used materials, and before long the space that was meant to inspire you becomes a source of stress. The solution is a storage philosophy built on visibility and accessibility. Art supplies you can’t see tend to get forgotten, leading to duplicate purchases and wasted materials. Open shelving, glass jars, pegboards, and transparent bins put everything in sight and within easy reach, which makes both tidying up and reaching for what you need a much faster and more intuitive process.
Consider the specific storage needs of your medium when designing your system. Painters benefit enormously from vertical wall-mounted paint storage that organizes tubes by color family, along with dedicated brush holders that keep bristles from being crushed. Textile artists need deep drawers or cubbies for fabric bolts and clear bins for yarn organized by weight and fiber content. Illustrators and paper crafters need flat files or wide shallow drawers to store paper without bending or creasing. Sculptors need sturdy shelving capable of bearing weight, as well as dust-proof display cases for finished work. There is no one-size-fits-all storage system — the best setup is always tailored to the specific demands of your practice.
Vertical space is the most underused asset in the average art room. Floor space is precious and quickly consumed by furniture, but walls extend all the way to the ceiling and can house an enormous amount of organized storage without crowding your work area. Install floating shelves at multiple heights to hold jars, caddies, and small bins. Mount a large pegboard panel above your primary worktable and customize it with hooks, shelves, and holders arranged exactly to your workflow. Roll-out carts tucked beneath tables or in corners provide additional portable storage that can be repositioned as your needs change. Thinking vertically will almost certainly double your effective storage capacity without requiring any additional square footage.
Here are some of the most effective storage tools for a well-organized art studio:
- Pegboards with modular hooks and shelves — endlessly customizable and perfect for keeping frequently used tools visible and accessible
- Glass mason jars — ideal for storing brushes, pens, scissors, and small loose supplies while adding visual warmth to the room
- Rolling utility carts — perfect for organizing supplies by project or medium, with the flexibility to move them wherever they’re needed
- Flat file cabinets — essential for paper artists and illustrators who need to store large sheets without damage
- Clear stackable bins — great for categorizing supplies and making inventory visible at a glance
- Wall-mounted magnetic strips — excellent for metal tools like scissors, palette knives, and small craft implements
Inspiring Decor and Aesthetic Themes for Your Studio
The visual environment of your studio feeds your creative imagination in ways that are easy to underestimate until you experience it firsthand. Artists who fill their studio walls and surfaces with objects that inspire them — reference images, color swatches, artwork by creatives they admire, interesting textures, or found objects — consistently report feeling more motivated and inventive during their creative sessions. Your studio decor isn’t decoration for decoration’s sake; it’s a curated sensory input system designed to keep your mind buzzing with ideas and associations whenever you enter the room.
There are as many possible aesthetic directions for an art studio as there are artistic personalities, and the most meaningful choice is always the one that reflects your authentic creative identity. Some artists gravitate toward a bright, airy Scandinavian aesthetic with white walls, natural wood, and abundant natural light — a space that feels clean, expansive, and free of distraction. Others prefer a richly layered bohemian look with collected textiles, eclectic objects, pattern-heavy wallpaper, and warm, moody lighting that feels like stepping into a treasure trove of creative material. Still others embrace an industrial aesthetic with raw brick, exposed pipes, metal shelving, and concrete floors that have an honest, unadorned energy.
A gallery wall of your own work is one of the most powerful and personally meaningful ways to decorate a studio. Seeing your artistic journey displayed — from early experiments to recent accomplishments — reminds you how far you’ve come and keeps you connected to your creative evolution. Rotate pieces in and out as your work develops, and include pieces by artists who inspire your practice alongside your own. This kind of living, evolving display turns your studio walls into a continuously updated source of visual reference, aspiration, and personal pride that no purchased decor can replicate.
Budget-Friendly Studio Setups and DIY Solutions
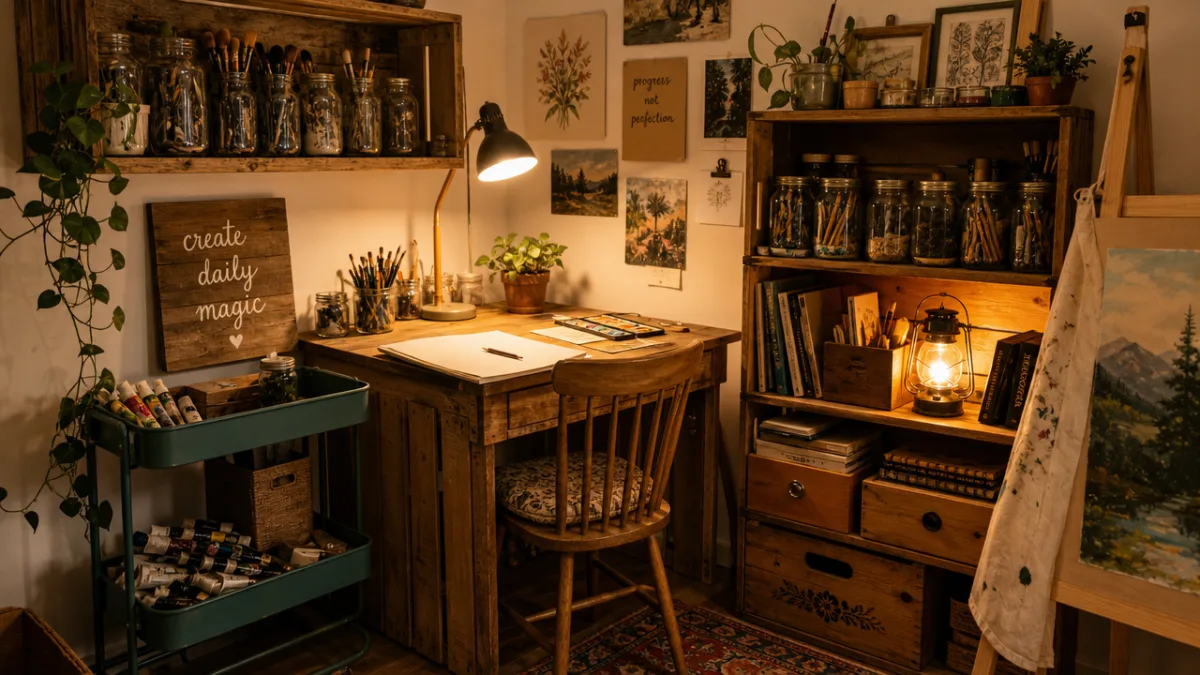
One of the most persistent myths about art studios is that they require a significant financial investment to be functional or beautiful. In reality, some of the most enviable creative spaces are assembled almost entirely from thrifted, repurposed, or DIY-built components. The key insight is that artists are, by definition, people who see creative potential in ordinary materials — and that instinct translates perfectly to studio building. Before spending money on purpose-built studio furniture, visit thrift stores, estate sales, and online marketplace listings to find pieces that can be repurposed for your needs at a fraction of the retail cost.
A solid wooden door laid across two filing cabinets makes an extraordinary, inexpensive work surface with substantial storage built right in. Old kitchen cabinets removed during a renovation make outstanding studio storage — they’re built to handle heavy loads, they include both drawers and shelving, and they often come with countertop surfaces already attached. Wooden pallets can be mounted on walls and fitted with hooks for pegboard-style tool storage. Glass jars salvaged from the recycling bin become elegant organizers for brushes and pencils when grouped together on a shelf. Repurposing with intention is both budget-friendly and environmentally responsible.
DIY projects can also add highly personalized organizational elements that commercial products rarely provide. Building a custom art supply caddy sized precisely for your most-used tools, constructing a wall-mounted drying rack for wet paintings, or sewing a custom apron with pockets arranged exactly where you need them are all projects that make your studio more functional while engaging your creative skills in a practical direction. Even simple interventions — painting furniture in your studio’s accent color, adding casters to a heavy shelving unit so it becomes mobile, or installing a simple curtain rod to hang reference images — can meaningfully improve the usability and atmosphere of your space at minimal cost.
Here are some of the best budget-friendly studio upgrades to consider:
- Thrifted furniture repurposed for studio use — filing cabinets, bookshelves, kitchen carts, and dressers all translate beautifully to art studio storage
- DIY pegboard panels — inexpensive at hardware stores and endlessly adaptable with standard hooks and accessories
- Painter’s tape color charts — label shelves and bins with swatches instead of purchasing expensive label systems
- Repurposed glass jars and containers — a zero-cost storage solution that looks polished when grouped consistently
- Tension rods inside cabinets — hung vertically, they create perfect slots for organizing flat files, canvas boards, and cutting mats
- String lights and secondhand lamps — inexpensive ways to add layered lighting and atmosphere without rewiring the room
Making the Most of Small Spaces and Multipurpose Rooms
Not every artist has the luxury of a dedicated room set aside exclusively for their practice. Many creative people work in spaces that serve double or even triple duty — a home office that transforms into an art studio, a guest bedroom that converts to a craft room when company isn’t visiting, or a corner of the living room that functions as a creative nook. These multipurpose arrangements present genuine challenges, but they also push you to think ingeniously about furniture selection, organization, and boundaries in ways that often result in more streamlined, efficient setups than a fully dedicated space might inspire.
Murphy beds with integrated desk systems have become increasingly sophisticated and are a genuine game-changer for guest room and studio combinations. When guests arrive, the desk folds away and the bed lowers down; when they leave, the sleeping space disappears and your full work surface is restored. Fold-down wall-mounted desks perform similar magic in living spaces where square footage is at a premium. Mobile supply carts can be rolled out during creative sessions and tucked neatly into a closet afterward. The discipline of building a setup that can be deployed and packed away quickly is excellent practice for maintaining organization and ensuring your supplies are always properly stored rather than left spread across a shared space.
Visual boundaries are critically important in multipurpose rooms where your creative space coexists with living or working areas. Even without physical walls, a large area rug, consistent color scheme, or dedicated lighting can define your creative zone and signal a psychological shift when you enter it. Some artists hang curtains on ceiling-mounted tracks that can be drawn around their studio corner to create a sense of enclosure and focus during work sessions. This kind of psychological boundary-setting isn’t trivial — it actively helps your brain transition into creative mode rather than remaining in the diffuse attention state of everyday domestic life. With a little ingenuity, a compact corner can deliver all the inspirational power of a much larger dedicated space.








What do you think?
It is nice to know your opinion. Leave a comment.