










DIY Peace Pole for Garden Art: A Complete Guide to Creating Your Own Symbol of Hope
What Is a Peace Pole and Why Make One?
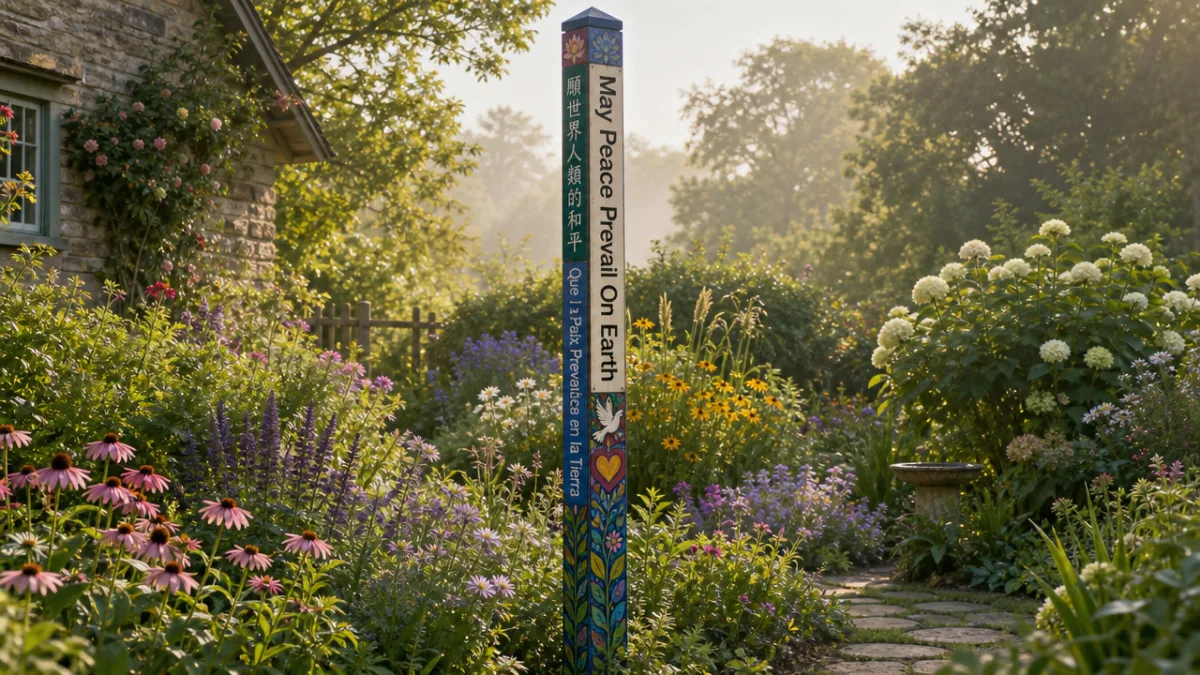
A peace pole is a handmade monument that carries the message “May Peace Prevail on Earth” written out in multiple languages — a quiet, visible reminder that the hope for a more peaceful world is something we all share. The tradition started with the World Peace Prayer Society in Japan back in the 1970s, and since then peace poles have been planted in gardens, parks, schools, and spiritual centers on every continent. Making one for your own garden is honestly one of the most meaningful art projects you can take on, because it weaves together creativity, craftsmanship, and a very personal statement about the kind of world you want to live in.
What I love most about making your own peace pole is how completely you get to make it yours. You pick the wood, the colors, the languages, the decorative details, the height — all of it. Maybe you want something rustic and weathered that quietly disappears into a cottage garden, or maybe you want a brightly painted, mosaic-covered pillar that stops people in their tracks. Both are completely valid. The only real requirement, if you want your pole to be part of the global tradition, is that it carries that central message of peace in at least one language.
Beyond what they symbolize, peace poles are genuinely beautiful things to have in a garden. They add height to a planting bed, bring a sense of ceremony to a seating area, and give visitors something to slow down for — something to read, think about, and talk over. If you have kids, building one together makes for a memorable afternoon and a natural conversation about world cultures, global citizenship, and the idea that peace is actually worth working toward every day. The project is approachable enough for total beginners, and satisfying enough that experienced woodworkers enjoy it too.
Choosing Your Materials and Gathering Tools
The first big decision is what to make your pole from. Cedar and redwood are the go-to choices for outdoor garden poles because both naturally resist rot, insects, and moisture without much fuss. A four-by-four post in either wood will give you the strength you need while still being manageable to work with on your own. Pine is cheaper but will need thorough sealing and more regular upkeep to hold up over time. Reclaimed lumber is another great option — it brings character to the project right from the start, and there’s something fitting about giving old wood new purpose for a peace pole.
For height, most garden peace poles run five to eight feet total, with about eighteen inches to two feet going into the ground. That means your finished above-ground pole will stand roughly four to six feet — tall enough to be seen across a garden bed without dwarfing a smaller planting area. If you want something more dramatic in a bigger yard, going taller is totally fine. Just keep in mind that a heavier, taller pole will need a more solid anchor, like a concrete footing, to stay put through wind and weather.
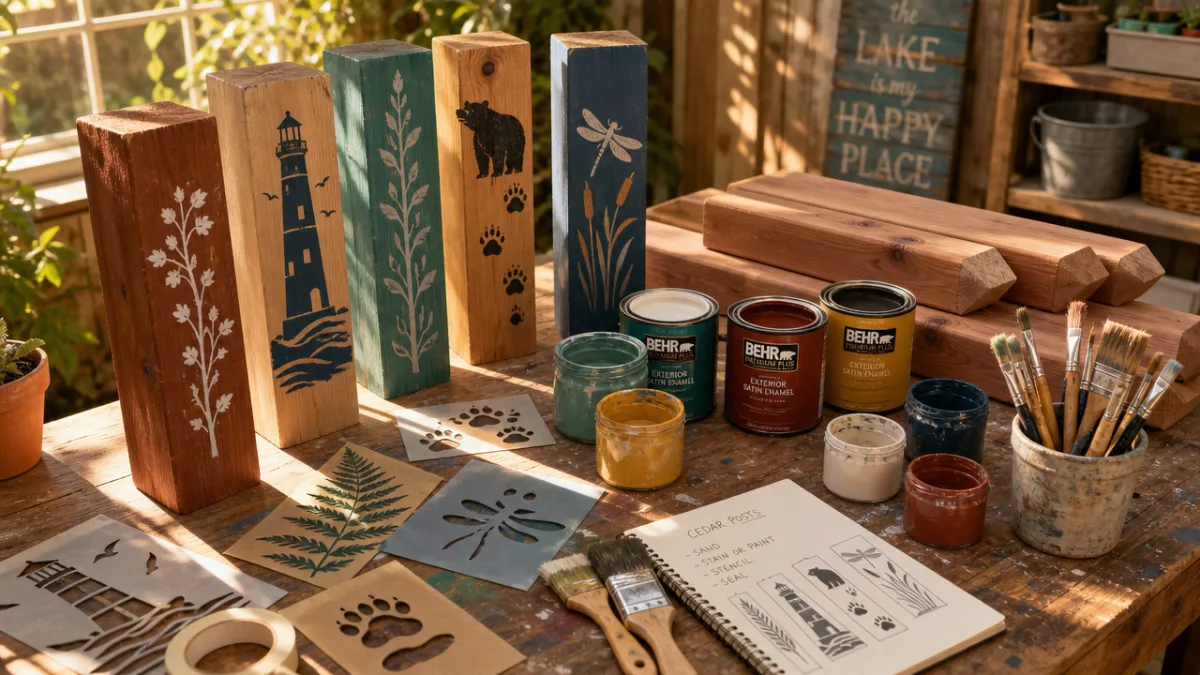
For tools, you’ll need a saw if you’re cutting your own post, sandpaper in a few grits from coarse to fine, exterior primer and paint, brushes in different sizes, a pencil for sketching, and a good exterior sealant or varnish for the finish. A few things that aren’t strictly necessary but make the project a lot easier: a wood burning kit for engraving text or designs, stencils for lettering, masking tape for crisp paint edges, and a drill with a spade bit if you want to inset any decorative elements. Get everything together before you start — you’ll want the creative flow to stay uninterrupted once you’re in it.
Preparing and Priming Your Post
Prep work is the unglamorous part of this project, but it’s also what separates a peace pole that looks great a decade from now from one that starts peeling after its first winter. Begin by sanding the whole post, starting with 80-grit to knock off any rough mill marks or splinters, then moving up to 120-grit, and finishing with 220-grit for a smooth, even surface. Give extra attention to the end grain at the top of the post — that’s where moisture gets in most aggressively and where rot tends to start.
Once you’ve sanded, wipe the entire post down with a tack cloth or a slightly damp rag to get rid of all the dust. Let the wood dry completely before you touch the primer. Use an exterior-grade wood primer and put on at least two coats, letting each one dry fully before the next. If you’re planning to paint in light or bright colors, a white primer base will make them pop. For darker, earthier tones, a gray primer often works just as well and can cut down on how many coats of topcoat you’ll need.
Before you put down your base color, take a few minutes to plan out your layout. A four-sided post naturally gives you four panels, and each one can carry the peace message in a different language. Lightly mark where each panel starts and ends, and decide whether you want the whole pole in one background color or a different shade for each face. A lot of makers go with a single unifying background and different accent colors per panel, which keeps things cohesive while still celebrating each language individually. Sketch your lettering and any decorative borders or motifs in pencil first, so you have a clear roadmap before the paint comes out.
Painting Your Design and Adding the Peace Message
This is the part where the project really comes to life. Apply your base coat evenly across all four sides using long, smooth brushstrokes that follow the wood grain. Two coats are almost always worth it, especially when you’re going over a natural wood tone with a bright color. Give each coat time to fully dry — at least four hours in mild weather — before adding the next one. Rushing this step is how you end up with streaking, bubbling, or peeling, and that undoes all the careful prep work you just did.
Deciding which languages to use is one of the most personal and culturally interesting parts of the whole project. The World Peace Prayer Society has verified translations of “May Peace Prevail on Earth” into dozens of languages, and their website is the best place to find them. English, Spanish, French, Japanese, Arabic, and Swahili are all popular choices, but you might also lean toward languages tied to your own heritage, languages spoken in your neighborhood, or ones that feel meaningful for reasons that are entirely your own. Whatever you choose, always verify non-Latin scripts with a native speaker or a reliable source before you commit them to paint or wood burning — it’s a matter of genuine respect.
For actually getting the text onto the wood, you have a few good options depending on your skill level and what tools you have. Stencils give you clean, consistent lettering and are especially helpful for alphabets you’re not familiar with, where freehand work can easily go sideways. A wood burning tool creates a beautiful engraved quality that will never peel or fade, and it looks especially good on a lightly stained rather than painted background. If you’re confident with a brush and have a steady hand, painting the text freehand produces a wonderfully organic quality that no stencil can match. Whichever route you take, go slowly, and keep a damp cloth nearby so you can catch any mistakes before the paint dries.
Decorative elements are what turn a nice painted post into a real piece of garden art. Think about adding painted borders of flowers, leaves, vines, suns, moons, stars, or geometric patterns around and between the text panels. Many peace pole makers weave in symbols from different world spiritual traditions — a lotus, a crescent moon, a dove, an olive branch — arranged around the surface in a way that feels harmonious rather than cluttered. Others press small mosaic tiles, mirror pieces, or glass stones into wet paint or an adhesive layer, which catch the sunlight in a way that makes the finished pole look completely different depending on the time of day.
Sealing and Weatherproofing for Long-Term Durability
Even the most beautifully painted peace pole won’t hold up outdoors for long without proper sealing. Exterior varnish, polyurethane, or spar urethane all work well, but spar urethane is particularly worth using for anything that will face direct sun and rain — it’s made to stay flexible through the wood’s natural expansion and contraction across seasons. Put on at least three coats, and sand very lightly with 400-grit paper between each one to help the layers bond properly and knock down any dust that settles while it’s drying.
The top of the pole deserves extra attention since it takes the brunt of rain coming straight down, and so does the section just above ground level, where soil moisture can slowly wick up into the wood over time. Some makers cap the top with a small copper or metal roof piece, which looks great and keeps water from soaking into the end grain. Others simply apply a few extra coats of sealant to the bottom eighteen inches of the post and let that section cure for a full week before installation, giving it as much protection as possible before it goes into the ground.
Plan to check on your sealant every two to three years, looking for any spots where the finish is cracking, clouding, or starting to lift. Touching those areas up early with a fresh coat is so much easier than stripping and refinishing the whole post later. Same goes for paint — touch up any chips or scratches before moisture gets a chance to sneak under the finish. With that kind of modest, ongoing care, a well-made cedar or redwood peace pole can stay beautiful and solid for fifteen to twenty years or more, becoming a true long-term feature of your garden rather than a project you eventually have to replace.
Installing Your Peace Pole in the Garden
It’s worth taking a bit of time to choose the right spot. Ideally you want somewhere visible from multiple angles — the center of a garden bed, the point where two paths cross, or the entrance to a seating or meditation area all work beautifully. Give it enough breathing room so it doesn’t disappear among tall plants or get swallowed by a nearby tree. A spot that catches morning light from the east will make the pole glow in the first half of the day, and one that also gets some late afternoon western light will give it a warm, golden quality in the evening.
For getting it in the ground, you have two main approaches: a simple post hole or a concrete footing. For most garden conditions, digging a hole eighteen to twenty-four inches deep with a post-hole digger, setting the pole, checking it’s plumb with a level, and backfilling firmly with compacted soil is perfectly adequate. For softer or sandier soils — or for poles over six feet tall — mixing a bag of fast-setting concrete in the hole will make a noticeable difference in long-term stability. Let concrete cure for at least 24 to 48 hours before the pole takes any sideways load.
Before you set the pole for good, consider brushing an extra layer of exterior wood preservative or sealant onto the section that will be underground. That buried section is the most vulnerable part of the whole installation — it’s in constant contact with soil moisture, microorganisms, and (in colder climates) the freeze-thaw cycle. Some makers wrap it in roofing tar paper or a waterproof membrane before it goes in the ground. It sounds like a lot, but it can genuinely add years to the life of the whole project, and it only takes a few extra minutes when the ground is already open.
Once the pole is in and the backfill is firm, step back and take it in. Plant some low-growing perennials, ornamental grasses, or trailing annuals around the base to help it settle into the garden and soften that transition between post and soil. Creeping thyme, sweet alyssum, ornamental sage, or a ring of smooth river stones all look lovely. If it feels right to you, consider dedicating the space with a small personal ceremony — reading the peace message aloud in each of its languages as a way of marking the moment and setting an intention for this new corner of your garden.
Tips for Personalizing and Inspiring Others
One of the best things a garden peace pole can do is start a conversation. People who notice it naturally want to read the languages, ask questions, and share what peace means to them. To lean into that, consider adding a small weatherproof card or laminated tag near the base that explains the peace pole tradition, lists the languages you chose and why, and maybe includes a short personal note about what moved you to make it. That small addition turns your garden art into a genuine point of connection with the people who visit.
If you find you love the process of making your first one, think about organizing a pole-making workshop at a local school, community garden, place of worship, or neighborhood center. Bring pre-cut and sanded posts along with paints, brushes, and reference sheets of verified peace translations in lots of languages, and you’ll find that people of all ages and skill levels can contribute something meaningful. Poles made in community workshops carry a special kind of energy — they’re genuinely collective acts, and it shows in every mark and color choice.
You can also let your pole grow with you over time. A new language added after a trip abroad, a painted symbol marking the birth of a grandchild, a mosaic tile a close friend pressed in themselves — all of these layers build personal meaning into the object and make it a living record of your life and relationships rather than a static decoration. The peace pole tradition is wide enough to hold all of that, and the most treasured examples tend to be the ones that have clearly been loved and added to over many years.
- Cedar or redwood are the best wood choices for outdoor durability and natural rot resistance without heavy chemical treatment.
- Verify all translations with the World Peace Prayer Society or a native speaker before applying them permanently to your pole.
- Use spar urethane as your final sealant for superior flexibility and UV resistance in direct sun and rain exposure.
- Set the underground section in concrete in sandy or wet soils to ensure the pole remains stable through storms and seasonal ground movement.
- Refresh your sealant every two to three years and touch up paint chips promptly to prevent moisture damage and extend the life of the pole significantly.
- Surround the base with low-growing plants or decorative stones to integrate the pole naturally into the garden landscape.
- Consider hosting a workshop to share the tradition with neighbors, friends, or community members and multiply the ripple of the project outward.
A DIY peace pole is so much more than a garden decoration. It’s a small, handmade act of faith — a belief, planted literally into the earth of the place where you live, that a more peaceful world is worth working toward. Every time you walk past it, tend the garden around it, or watch someone stop to read it, you get a little reminder of what you made it to say. In a world that can feel pretty overwhelming sometimes, there’s something quietly radical and genuinely beautiful about driving a hand-painted post into your own backyard and letting it say — in as many languages as you have room for — that peace is what you’re choosing to stand for.








What do you think?
It is nice to know your opinion. Leave a comment.