










How to Make Your Own Hose Guards DIY: A Complete Guide to Protecting Your Garden Hose
What Are Hose Guards and Why Do You Need Them?
If you’ve ever spent a frustrating afternoon untangling a kinked garden hose — or watched it scrape right across the corner of a raised bed you worked so hard on — you already know the problem hose guards are meant to solve. Hose guards (sometimes called hose guides or hose protectors) are simple little devices you place at the corners and edges of your garden to steer the hose around obstacles smoothly, so it stops dragging through your beds and flattening everything you’ve worked to grow.
They also do your hose itself a real favor. A hose that constantly bends sharply around corners or gets dragged over brick edging and rough gravel is going to wear out a lot faster than one with a smooth, guided path. The outer casing cracks, frays, and starts leaking well before its time when it’s put through that kind of repeated stress. So a small investment in hose guards — especially ones you make yourself — can easily save you the cost of replacing a hose every season or two.
The good news is that hose guards are one of the quickest, most satisfying DIY garden projects you can take on. You don’t need fancy carpentry skills, a full workshop, or a big budget. Most of the time, you can knock these out in a single afternoon with materials you already have or can pick up cheaply at any hardware store or garden center. Whether you’re going for a rustic, natural look with wood and stone, or something a little more polished with metal pipe or repurposed materials, there’s a design out there that’ll fit your garden just right.
Tools and Materials You Will Need
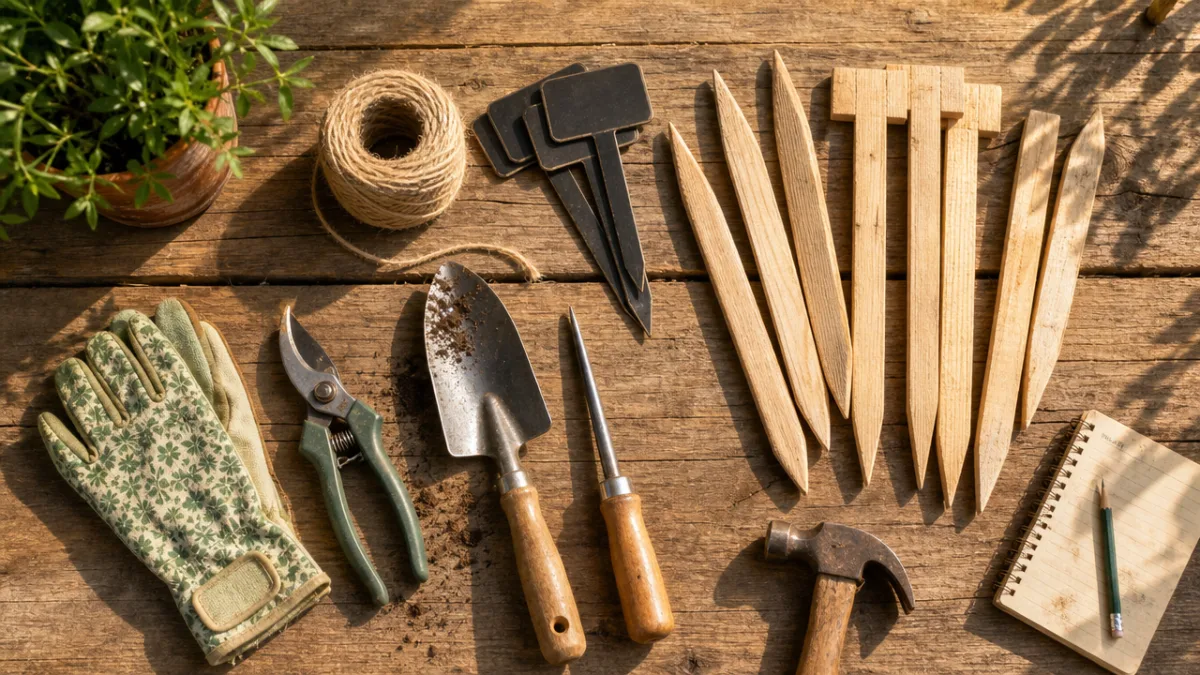
Before you dive in, it’s worth taking a few minutes to gather everything you need. The exact materials depend on which design you go with, but most approaches share a common set of basics. Having it all in front of you before you start means you won’t have to run back to the hardware store halfway through — which is the kind of small annoyance that makes a simple afternoon project feel way more complicated than it needs to be.
For the most popular and beginner-friendly designs, here’s what you’ll want to have on hand:
- Wooden stakes, dowels, or thick branches (at least 12 to 18 inches long so they anchor well in the soil)
- PVC pipe sections, copper pipe offcuts, or galvanized steel conduit for smooth hose movement
- A handsaw or pipe cutter, depending on your chosen material
- A mallet or hammer for driving stakes into the ground
- Sandpaper in medium and fine grits to smooth any rough edges that could wear on the hose
- Exterior-grade paint, wood stain, or sealant if you want a finished, weather-resistant look
- Zip ties, hose clamps, or strong waterproof adhesive for assembling multi-part designs
- A measuring tape and pencil for marking cut lines accurately
One of the best things about making your own hose guards is getting to choose materials that actually match the feel of your garden. A cottage or rustic space? Natural wood and stone will blend right in. Something more modern and structured? Powder-coated metal or painted PVC can look surprisingly sleek. You can also easily scale up or down — make two or three for a small plot, or a dozen-plus for a bigger, more complex layout. It’s a genuinely flexible project.
Step-by-Step Instructions for Building a Classic Wooden Stake Hose Guard
The wooden stake hose guard is the go-to design for good reason — it’s fast to build, needs only basic tools, and looks tidy and intentional in just about any garden. The concept is simple: you drive a sturdy stake into the soil at a corner or bed edge, then add a small arm or loop near the top that catches the hose and guides it smoothly around the obstacle instead of letting it cut across your plantings or snag on the edging.
Start by cutting your wooden stakes to about 18 to 24 inches long. You’ll want at least 8 to 10 inches buried in the ground so the stake holds firm against the sideways pull of a dragging hose, leaving 8 to 14 inches sticking up above the soil. Once they’re cut, sand every edge and face well — especially the top and anywhere the hose will actually make contact. Rough wood will slowly wear away your hose’s outer coating, so smooth is essential here.
With your stake sanded, you’ve got a few options for the guiding part at the top. The simplest is drilling a hole through the upper portion and threading a short length of thick smooth rope or a bent piece of heavy wire through it to form a loop. For an even better gliding surface, attach a large eye bolt or a smooth metal ring to the top instead. Then drive the stake into the soil at each corner of your garden bed with a mallet, positioning it just outside the planting area so the hose gets routed cleanly around the perimeter without ever touching your plants.
Creative Variations and Decorative Hose Guard Ideas
Once you’ve got the basic wooden stake design down, you can really have fun with it. A lot of gardeners see hose guards as a chance to sneak in a small decorative touch, and there’s a surprisingly wide range of materials worth repurposing for this. From painted terracotta to mosaic stones, the main limit is what you have access to and what fits your garden’s personality.
One of the most popular natural options is using large smooth river stones or landscaping boulders as guides. Just place a heavy, rounded stone at each corner — the hose naturally rolls up and over smooth stone without catching, and it looks completely at home in a naturalistic or cottage-style garden. For a more permanent setup, stack two or three flat stones and use a dab of exterior adhesive or mortar to keep them in place.
Here are a few other creative approaches worth trying:
- Repurposed metal pipe elbows: Short sections of plumbing pipe bent into an L-shape and mounted on stakes create a smooth, professional-looking guide that lets the hose slide with almost no friction.
- Painted wooden mushroom or animal stakes: Carve or buy decorative wooden toppers and attach them to your functional stakes for a whimsical garden art element that actually earns its place.
- Upcycled wine bottles: Empty glass bottles buried neck-down in the soil at garden corners are surprisingly effective guides and add a colorful, eclectic vibe to the bed edge.
- Terracotta chimney flue liner sections: Cut into short lengths and set vertically in the soil, these make wide, durable guide channels that can handle even bigger-diameter hoses without a fuss.
- Bent rebar with rubber tubing: A piece of rebar driven into the ground and capped with a short section of rubber hose or tubing is about as sturdy and long-lasting as it gets — practically indestructible.
Whatever material you go with, the one rule that applies to all of them is this: the surface the hose actually touches must be smooth. No sharp edges, no abrasive textures at the contact point. It doesn’t matter how great something looks — if it’s rough where the hose rubs against it, you’ll be shortening the life of that hose with every single watering. Before you install any guard, run your hand along every spot the hose will make contact and sand, file, or cover anything that feels even slightly rough.
Installing Your Hose Guards for Maximum Effectiveness
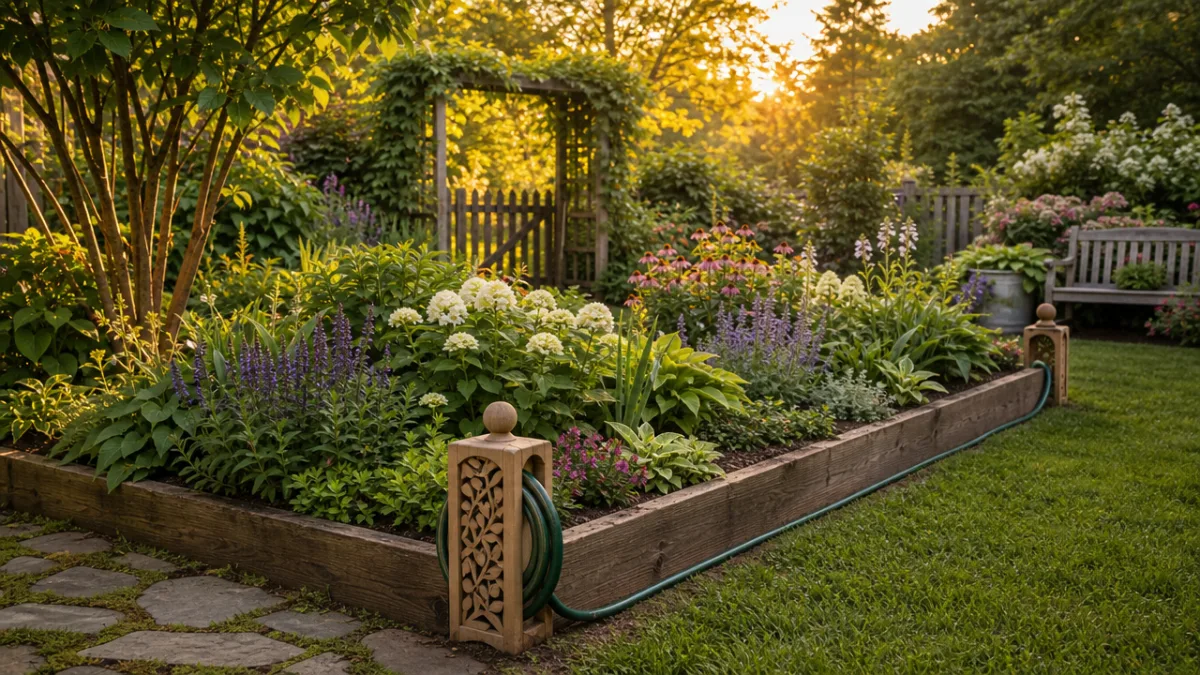
Building good hose guards is only half the job. Where and how you install them matters just as much. A guard that’s placed in the wrong spot can be entirely useless — or worse, create a new awkward angle that stresses the hose in a different way. Taking ten minutes to think through your garden’s layout before you start pounding stakes into the ground will pay off every single time you drag that hose out to water.
Walk the actual route your hose takes from the spigot to wherever you water most often. Take note of every corner, raised bed edge, pathway crossing, and tight turn along the way — those are your guard locations. A good rule of thumb is to place a guard anywhere the hose needs to change direction by more than about 45 degrees, and at any spot where it currently tends to drag across a planting area or catch on something fixed like a fence post or bed frame corner.
When you’re driving in stake-style guards, make sure each one goes deep enough to stay put under the tension of a moving hose. A stake that wobbles or tips the moment you pull the hose defeats the whole point. In loose or sandy soil, you may need to go deeper than 10 inches or use a wider stake to get a solid hold. In hard or clay-heavy soil, pre-drilling a pilot hole with a metal rod or long masonry bit makes driving the stake much easier and saves you from splitting the wood or straining your back in the process.
Maintaining and Upgrading Your DIY Hose Guards Over Time
Like anything else in the garden, your hose guards will need a little attention now and then to keep working well season after season. Wood especially will rot, weather, and attract insects if you don’t give it some protection, so brushing on a coat of exterior wood sealant or paint at the start of each season is an easy habit that makes a real difference in how long your stakes last. If any part of the stake is buried in the soil, make sure you’re using a sealant rated for ground contact — standard exterior finishes tend to fail quickly when they’re sitting in moisture from below.
At the beginning of each gardening season, do a quick walk around your guide positions and check for anything that’s shifted, loosened, or taken a beating over the winter. Freeze-thaw cycles have a way of heaving stakes upward out of the ground, and heavy rain or foot traffic can knock them sideways so they’re no longer at the right angle to do their job. Re-seating a loose stake takes about thirty seconds with a mallet, and it’s well worth doing before your first watering of the year so you’re not dealing with surprises.
As your garden grows and evolves, don’t be shy about adding new guards, moving existing ones, or upgrading to more durable or decorative versions as your skills build. A lot of gardeners start with a handful of basic wooden stakes and gradually swap them out over the years for designs that better reflect their aesthetic and their garden’s changing shape. That’s actually one of the best things about DIY hose guards — there’s no permanent commitment, nothing expensive to waste if you change your mind, and every iteration teaches you a little more about how your hose actually moves through the space.

Cost Comparison: DIY vs. Store-Bought Hose Guards
Cost is probably the biggest reason most people decide to make their own hose guards rather than buying them. Commercial versions typically come in sets of four to six, and quality metal or cast-iron decorative styles can run anywhere from fifteen to fifty dollars a set. If your garden has a lot of corners and beds to cover, outfitting the whole space with store-bought guards can quickly push past a hundred dollars — which feels like a lot for something that is, at its core, a pretty simple tool.
By comparison, six basic DIY wooden stake guards can usually be made for just a few dollars, especially if you have any scrap wood lying around or can grab stakes from the budget bin at a garden center. Even if you buy everything new — a bundle of hardwood dowels, a small bottle of exterior sealant, a handful of eye bolts — the total for a full set rarely breaks ten to fifteen dollars. That’s fifty percent or more in savings over the cheapest commercial options, and you end up with something custom-fit to your exact garden rather than whatever size the packaging happened to come in.
But honestly, there’s more value here than just the money saved. A hose guard you designed, cut, sanded, and installed yourself is something you’ll notice every time you water. You know exactly what it’s made of, how it was built, and how to fix it if something breaks. That kind of hands-on familiarity with your own space is worth something — and it’s the sort of quiet satisfaction that no off-the-shelf product can really replicate. The combination of savings, customization, and the simple pleasure of making something useful yourself is why this one keeps showing up on the short list of most rewarding small DIY garden projects.








What do you think?
It is nice to know your opinion. Leave a comment.