










Learn to Make a Crocheted Star Stitch: A Complete Guide
What Is the Star Stitch and Why You’ll Love It
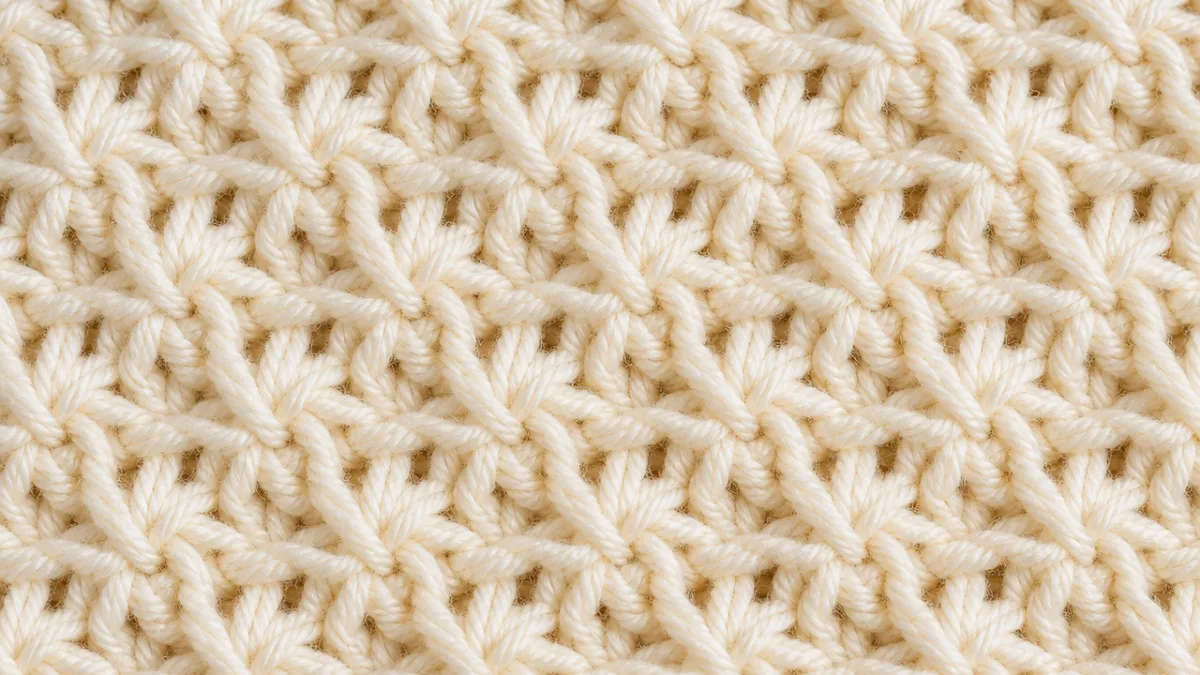
The star stitch, sometimes called the daisy stitch or marguerite stitch, is one of the most beautiful and distinctive patterns in the world of crochet. Unlike simpler stitches that create uniform rows, the star stitch produces a textured, almost three-dimensional fabric that resembles a series of interlocking stars or flowers radiating across the surface. This visual complexity belies the stitch’s relative accessibility, making it a favorite among crafters who want impressive results without years of advanced training.
What makes the star stitch particularly appealing is the way it plays with yarn and light. Each completed star captures a small loop of yarn at its center, creating a subtle puckering effect that adds depth and dimension to any project. When worked in a single solid color, the stitch creates an elegant, almost damask-like fabric. When worked in multiple colors or a variegated yarn, the results can be absolutely breathtaking, with each star catching color in slightly different ways depending on where the loops fall within the color sequence.
Beyond its beauty, the star stitch is remarkably versatile. It works beautifully in lightweight cotton for summer tops and market bags, in medium-weight acrylic for cozy scarves and blankets, and in chunky wool for statement accessories that are as warm as they are stylish. Once you learn the basic mechanics of building each star, you will find that the stitch becomes almost meditative in its rhythm, and you’ll want to incorporate it into project after project. Many crocheters cite the star stitch as one of the techniques that truly deepened their love of the craft.
Materials and Tools You’ll Need
Before diving into the stitch itself, it’s important to gather the right materials. The good news is that the star stitch doesn’t require any specialized or expensive equipment beyond what most crocheters already own. Your most important choices will be your yarn and your hook, since these two elements work together to determine the drape, texture, and size of your finished fabric. Taking a little time to select the right combination for your specific project will save you frustration and ensure that your finished work meets your expectations.
For beginners learning the star stitch for the first time, a smooth, light-colored medium-weight yarn — commonly labeled as worsted or aran weight — is strongly recommended. Smooth yarns allow you to see each stitch clearly, which is invaluable when you’re learning to identify where to insert your hook. Light colors reflect more light, making it easier to count stitches and follow your progress. Avoid highly textured or fluffy yarns like mohair or bouclé until you are completely comfortable with the stitch structure, as these can hide the individual loops and make the process far more frustrating than it needs to be.
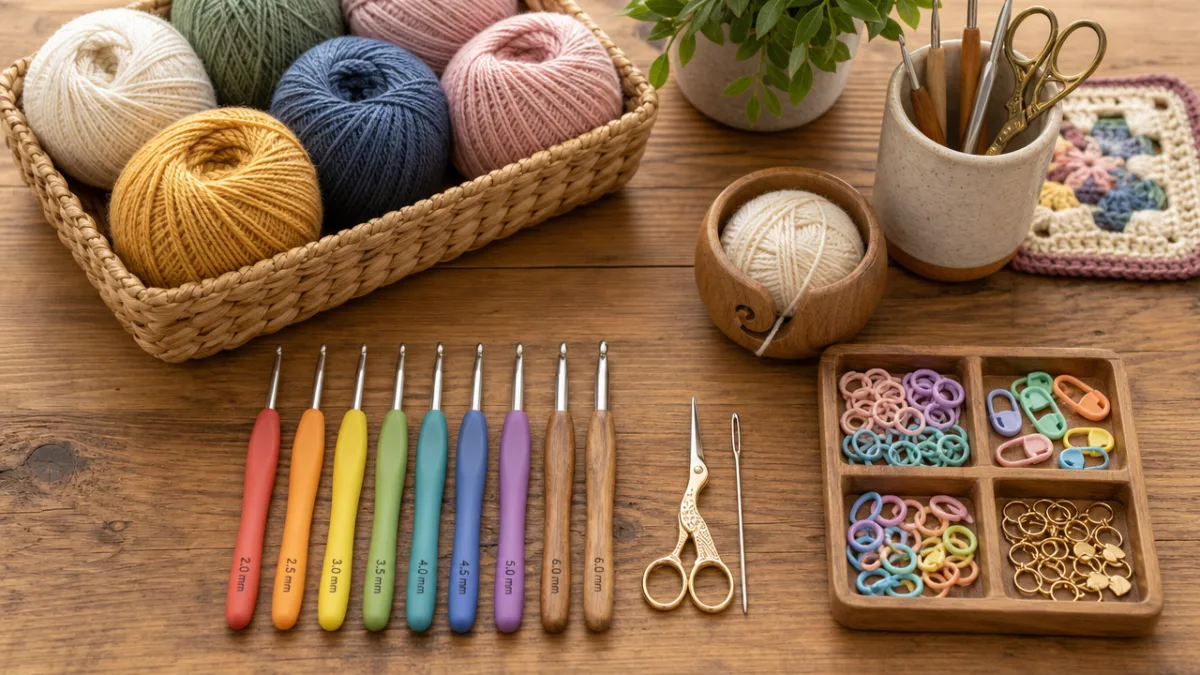
Here is a complete list of materials you will need to get started:
- Medium-weight (worsted or aran) smooth yarn in a light color for practice
- Crochet hook sized to match your yarn (typically 5.0mm to 5.5mm for worsted weight)
- Scissors for cutting yarn at the end
- A yarn needle or tapestry needle for weaving in ends
- Stitch markers to keep track of pattern repeats
- A ruler or measuring tape for checking gauge
- A printed or digital copy of your pattern for reference
Gauge matters more with the star stitch than with many other patterns, because the structure of the stitch relies on consistent tension to keep the stars looking uniform and well-defined. Before beginning any project, always work a gauge swatch of at least four inches square. Measure it carefully and compare it to your pattern’s gauge requirements. If your swatch is too small, go up a hook size; if it is too large, go down a hook size. Never skip this step, especially for garments or anything where fit matters significantly.
Understanding the Star Stitch Structure
The star stitch is built from a foundational unit called a “star,” and understanding exactly what constitutes one complete star is the key to mastering the pattern. Each star is created by pulling up multiple loops from the fabric and then joining them together at a single point, which forms the center of the star. This joining creates the characteristic gathered appearance that gives the stitch its name. Once you can visualize this structure clearly in your mind, your hook placement will become intuitive and your work will develop a natural, even rhythm.
A standard star stitch begins with a foundation chain that must be a specific multiple of stitches — usually a multiple of two, plus a set number of turning chain stitches depending on the pattern. The first star of the row is typically worked by inserting the hook into the second chain from the hook and then into subsequent chains, pulling up a loop from each insertion point. You will generally have five loops on your hook when you are ready to complete the first star. At this point, you yarn over and draw the yarn through all five loops simultaneously, creating the gathered center of the star, followed by a chain stitch to lock the center in place.
Subsequent stars in the same row share one or two loops with the star that came before them, which is what creates the interlocked, continuous look of the finished fabric. This shared loop structure means you must pay close attention to where you insert your hook for each new star. Most patterns will instruct you to insert the hook into the “eye” of the previous star — that is, the small space created by the chain stitch at the star’s center — and then into the next one or two stitches in the row. This overlapping technique is what distinguishes the star stitch from other gathered stitches and is responsible for its uniquely organic, floral appearance.
It’s also important to understand the difference between a right-side row and a wrong-side row in star stitch patterns. Because of the structure of the stitch, many patterns work the stars only on right-side rows and use simple half double crochets or single crochets on wrong-side rows to build height and keep the fabric stable. This alternating approach means your row count may not look the way you expect — each “round” of stars actually spans two rows of work. Being aware of this from the beginning will prevent confusion when you try to count your rows or follow a pattern that references row numbers.
Step-by-Step Instructions for the Star Stitch
Now that you understand the structure and have your materials ready, it’s time to work through the stitch step by step. These instructions assume you are working flat, in rows, which is the most common context for learning the star stitch. Once you are comfortable with the flat method, you can explore working the stitch in the round, though this requires some adjustments to the technique. For your practice swatch, chain 21 stitches using your chosen yarn and hook. This gives you a foundation that will produce approximately five stars per row, which is enough to clearly see the pattern developing.
Follow these steps to complete your foundation row and first full row of stars:
- Chain 21. Insert your hook into the 2nd chain from the hook, yarn over, pull up a loop. You now have 2 loops on your hook.
- Insert hook into the 3rd chain, yarn over, pull up a loop. You now have 3 loops on your hook.
- Insert hook into the 4th chain, yarn over, pull up a loop. You now have 4 loops on your hook.
- Insert hook into the 5th chain, yarn over, pull up a loop. You now have 5 loops on your hook.
- Yarn over and draw through all 5 loops. This closes the first star. Chain 1 to create the eye of the star.
- To begin the next star, insert your hook into the eye of the star just made, pull up a loop. Then insert into each of the next 2 chains, pulling up a loop each time. You now have 4 loops on your hook.
- Yarn over and draw through all 4 loops. Chain 1 to close. Repeat step 6 across the row.
- At the end of the row, chain 2 and turn your work.
- On the return row, work one half double crochet into each eye space and one at the end of the row. Chain 2, turn.
- Begin the next star row by inserting your hook into the first stitch, then into the next two stitches, pulling up loops, and continuing as before.
As you work through these steps, you will likely notice the fabric beginning to take shape after just two or three complete pairs of rows. The stars will become clearly visible, and you will start to feel the rhythm of the stitch. If you find that your stars look uneven or that some are larger than others, the most common culprit is inconsistent tension when pulling up loops. Try to keep each pulled-up loop the same height — roughly the same height as a half double crochet stitch. With practice, this will become automatic.
Common mistakes to watch for and how to avoid them include the following: accidentally skipping the chain stitch that forms the eye of the star (this collapses the star’s center and makes the next repeat difficult to find), pulling up loops that are too loose (causing floppy, undefined stars) or too tight (causing the fabric to pucker uncomfortably), and miscounting the insertion points so that stars end up with too few or too many loops. If something looks wrong, don’t be afraid to rip back — called “frogging” in crochet slang — and try again. Every experienced crocheter has spent significant time frogging their work, and it is simply part of the learning process.
Project Ideas to Practice the Star Stitch
Once you feel confident working the star stitch in a practice swatch, the next exciting step is to put your new skill to work in an actual project. Choosing the right project for your skill level at this stage is important — you want something that will give you enough repetition to solidify your technique without being so large or complex that it becomes discouraging. A small, practical project that you will actually use or gift is ideal, because having a purpose behind your practice keeps motivation high and makes the learning feel meaningful rather than mechanical.
One of the best beginner projects for the star stitch is a simple headband or ear warmer. These projects require only a small, manageable strip of fabric, usually between four and six inches wide and long enough to fit around the head. Because they are worked flat and then seamed at the ends, they give you excellent practice in both the stitch itself and in finishing techniques. The finished piece is practical, stylish, and quick enough to complete in a single afternoon, which provides the satisfying sense of completion that helps reinforce new skills.
For those ready to take on something slightly larger, a star stitch scarf is a wonderful next step. A basic scarf is essentially just a very long practice swatch — you work the stitch repeatedly across a fixed number of stitches until you reach your desired length, then fasten off and weave in the ends. The repetitive nature of scarf making is actually a feature rather than a drawback for learning this stitch, because the hours of consistent practice will engrain the hand movements deeply into your muscle memory. By the time your scarf reaches its full length, the star stitch will feel completely natural.
More adventurous crocheters might consider these additional project ideas that showcase the star stitch beautifully:
- A small throw pillow cover using a solid or semi-solid yarn for an elegant home décor piece
- A market tote bag worked in cotton yarn, perfect for farmers market trips
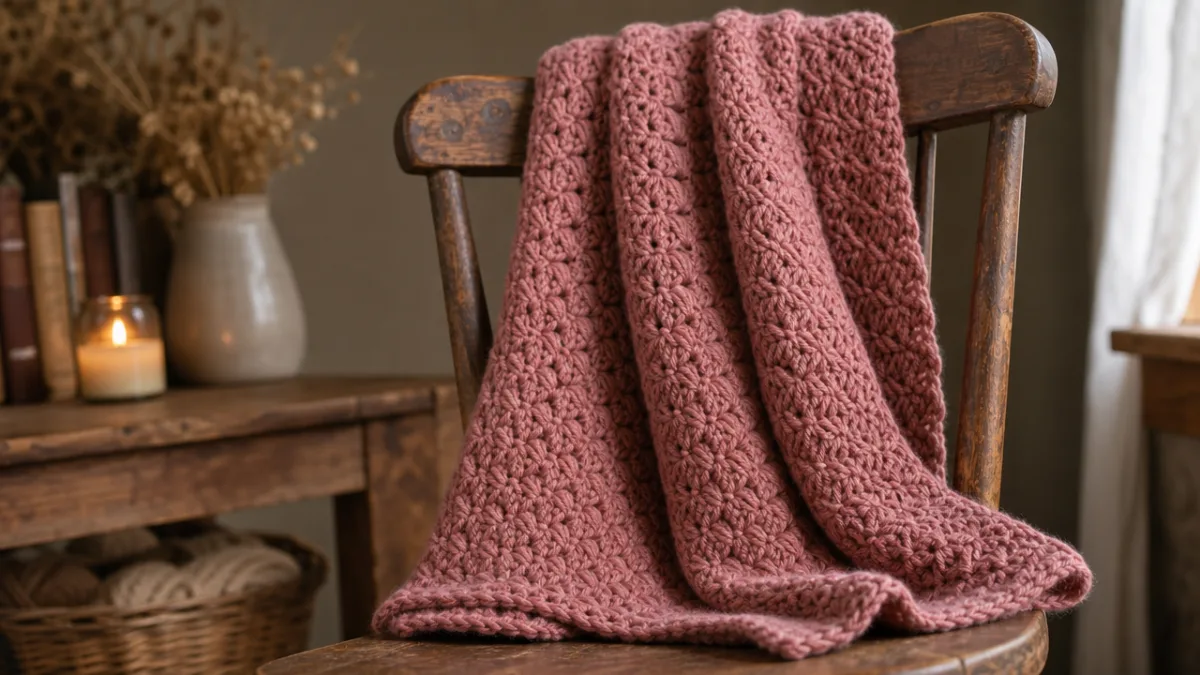
- A baby blanket in soft, hypoallergenic yarn that makes a treasured handmade gift
- A textured table runner or placemat set for a craft fair or holiday gift
- A stylish beret or hat incorporating the star stitch as a feature panel
Tips for Perfecting Your Star Stitch Technique
Like any crochet technique, the star stitch rewards patience and deliberate practice. Even experienced crocheters often find that their first few rows of a new-to-them stitch look messy or irregular, and the star stitch is no exception. The good news is that most of the issues that arise for new learners are easily corrected once you know what to look for. Developing the habit of pausing after every few stars to look at your work critically — not with frustration, but with honest curiosity — will accelerate your progress enormously and help you catch errors before they compound across many rows.
Blocking is one of the most transformative tools available to star stitch makers, and it is genuinely astonishing how much it can improve the appearance of finished work. Blocking involves wetting your finished fabric — or exposing it to steam — and then gently shaping it and pinning it flat to dry. This process evens out inconsistencies in tension, opens up the stitch structure so the stars are more clearly defined, and gives the finished piece a professional, polished appearance. Natural fibers like cotton, wool, and linen respond particularly well to blocking, though the technique offers benefits for most yarn types to varying degrees.
Yarn choice has an outsized impact on how your star stitch fabric looks and behaves. Here are some key considerations to keep in mind as you grow beyond practice swatches into intentional project planning. Tightly plied yarns with smooth surfaces tend to produce the crispest, most clearly defined stars. Yarns with a slight halo, like some merino or alpaca blends, create a softer, more romantic appearance with slightly blurred star edges. Highly textured yarns, as mentioned earlier, can obscure the stitch structure entirely. Cotton yarns produce a firm, structured fabric with excellent stitch definition, while wool yarns produce a softer, more elastic fabric that is particularly forgiving for beginners still working on tension consistency.
Finally, don’t underestimate the power of the crochet community as a learning resource. Pattern platforms like Ravelry host thousands of star stitch patterns at every skill level, complete with project photos shared by makers around the world that show how the stitch looks in different yarns, colors, and scales. Video tutorials on platforms like YouTube allow you to watch the stitch being worked in real time, pausing and rewinding as needed to catch details that written instructions sometimes fail to convey clearly. Local yarn stores frequently offer classes and crochet nights where you can get hands-on guidance. The star stitch has been beloved by crafters for generations, and there is a vast wealth of shared knowledge available to help you master it at whatever pace suits you best.
Caring for Your Star Stitch Projects
Once you have invested time and care into creating something beautiful with the star stitch, you will want to make sure it lasts as long as possible. Proper care of crocheted items begins with understanding the fiber content of your yarn, because different fibers have very different requirements. Always save the yarn label from your project, or at minimum write down the fiber content and care instructions before you begin. A simple tag or note kept with the finished item ensures that whoever owns it — whether you or a recipient — knows exactly how to care for it properly without guessing or risking damage.
For cotton star stitch projects like bags, dishcloths, or summer tops, machine washing on a gentle cycle in cold water is usually perfectly safe, and many cotton items can even tolerate the dryer on a low setting, though air drying is always gentler on the fibers and helps the item retain its shape. Wool star stitch projects require more care, as wool is prone to felting if it is agitated in hot water. Most wool crochet items should be hand washed gently in cool water with a wool-specific detergent, then rolled in a clean towel to remove excess water and laid flat to dry in their original shape. Never wring or twist wool fabric, as this can distort the stitch structure irreparably.
Acrylic yarn star stitch projects are the most forgiving when it comes to care, which is one reason acrylic remains a popular choice for blankets, scarves, and items that will see frequent use and washing. Most acrylic yarns are fully machine washable and dryable, making them ideal for gifts intended for people with busy lives or for baby items that will need frequent laundering. However, acrylic should never be blocked with heat — steam or a hot iron can melt the fibers and permanently damage the fabric. If you need to block an acrylic star stitch project to even out the tension, use the spray blocking method with cool water and gentle reshaping by hand, then allow it to air dry completely before removing the pins.
Storing your star stitch pieces correctly will also extend their life significantly. Avoid hanging heavy crocheted items, as the weight of the fabric can cause stretching over time, especially in the shoulder areas of garments or along the long edges of blankets. Fold items gently and store them in a cool, dry place away from direct sunlight, which can cause colors to fade over time. For wool items, consider adding cedar blocks or lavender sachets to your storage area as a natural deterrent to moths, which are attracted to natural animal fibers. With thoughtful care, a well-made star stitch project can be enjoyed for decades and even passed down as a treasured handmade heirloom.








What do you think?
It is nice to know your opinion. Leave a comment.