










DIY Garden Bed Edging Just About Anyone Can Do
Why Garden Bed Edging Matters More Than You Think
Garden bed edging is one of those finishing touches that separates a well-tended yard from a truly polished landscape. It creates a clear visual boundary between your lawn and your planting areas, giving the entire outdoor space a sense of intentionality and design. Even if your flowers are blooming beautifully and your shrubs are perfectly pruned, without clean edging the whole garden can feel unfinished and somewhat chaotic to the eye.
Beyond aesthetics, edging serves a genuinely practical purpose that many gardeners underestimate until they skip it. Grass is remarkably persistent, and without a physical barrier, lawn grasses will creep steadily into your garden beds over time, competing with your plants for water, nutrients, and sunlight. A good edge acts as a first line of defense against this invasion, reducing the amount of weeding you need to do throughout the growing season and keeping your carefully tended beds exactly as you designed them.
The good news is that you do not need to be an experienced landscaper or have a large budget to achieve results that look completely professional. The wide variety of edging materials and techniques available today means that homeowners at virtually every skill level can find an approach that works for their yard, their budget, and their personal aesthetic. Whether you prefer a natural rustic look or something sleek and modern, there is a DIY edging solution that will fit your vision.
Choosing the Right Edging Material for Your Garden
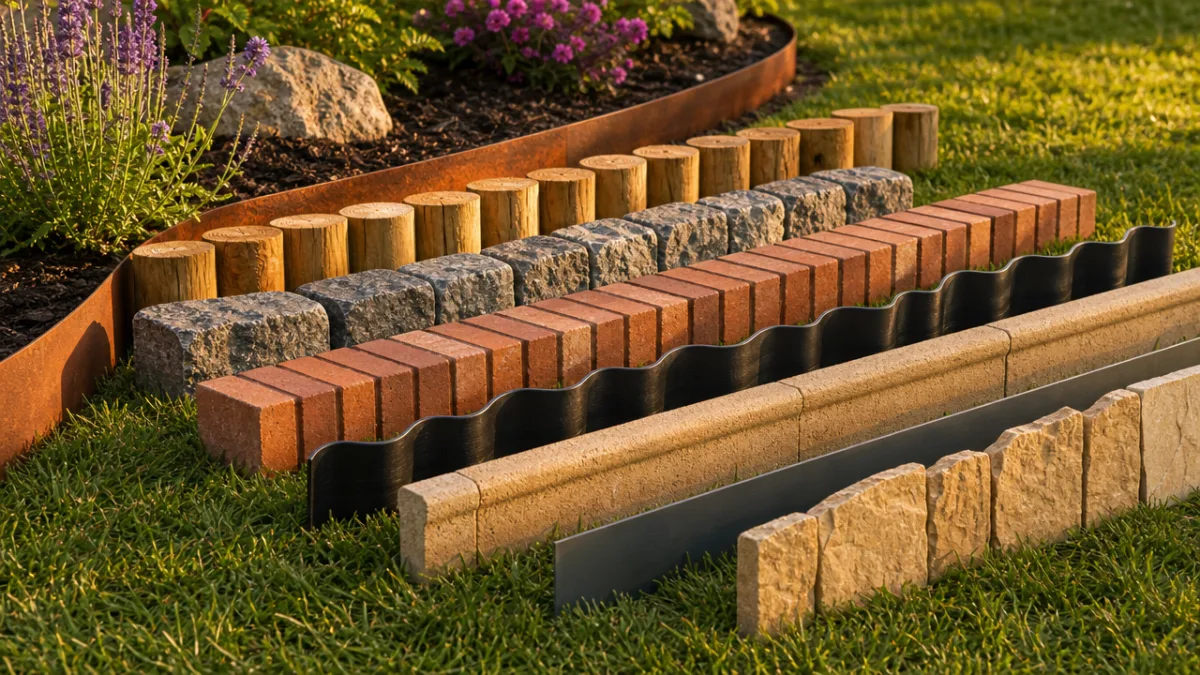
The first real decision you will face is choosing what material to use, and the options are genuinely extensive. Natural materials like stone, brick, and wood offer a warm, organic aesthetic that blends beautifully into most garden settings. Manufactured options like steel, aluminum, and plastic edging tend to offer cleaner lines and require less maintenance over time. The best choice depends on the overall style of your home and landscape, how much time you want to spend on upkeep, and of course what your budget allows.
For homeowners who want a budget-friendly option that still looks intentional, landscape timbers and rot-resistant wood are excellent starting points. Cedar and redwood are naturally resistant to decay and insects, making them practical choices for long-term installation. Reclaimed wood adds character and sustainability to the project, though you will want to make sure it has not been treated with chemicals that could leach into your soil and affect your plants. Wood edging can be cut to any length and shaped around curves with some patience and the right tools.
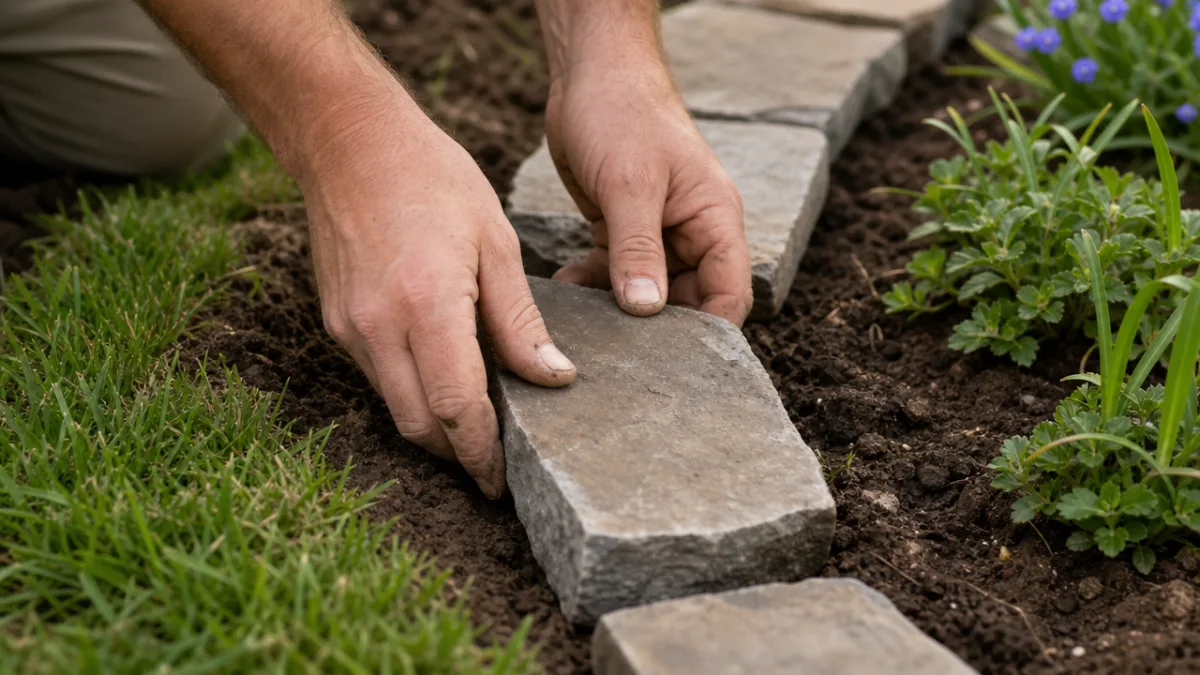
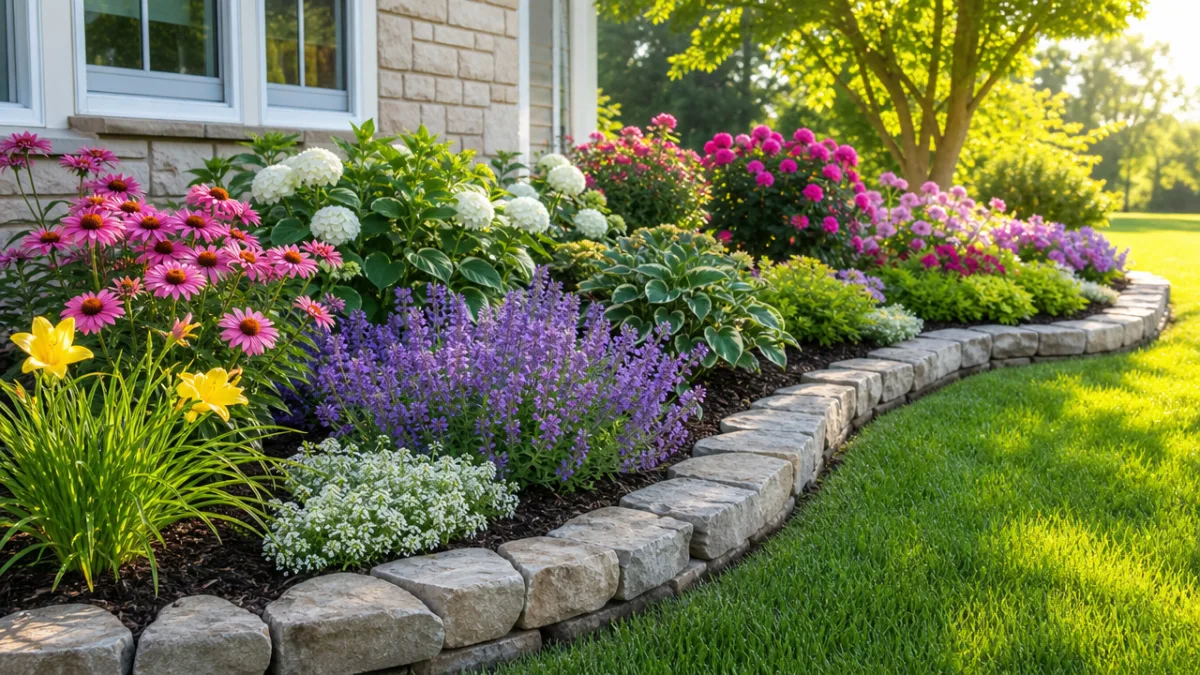
Stone and brick are perennial favorites for a reason. They are durable, they age gracefully, and they work with almost every planting style from cottage gardens to formal geometric layouts. Flat fieldstones can be set directly into the ground with no mortar required, making them one of the most beginner-friendly options available. Bricks can be laid vertically in a soldier course for a tidy upright edge, or at an angle in a traditional sawtooth pattern for something with a bit more visual personality. Both materials are heavy enough to stay in place without any additional fastening.
- Natural Stone: Durable, beautiful, and low maintenance once installed, though heavier to transport and set.
- Brick: Classic and versatile, available in a wide range of colors, and easy to replace individual pieces if needed.
- Cedar or Redwood: Warm and natural-looking, rot-resistant, and easy to cut and shape on site.
- Steel or Aluminum: Crisp modern lines, very durable, and excellent for sweeping curves or geometric shapes.
- Plastic or Rubber: The most affordable option, flexible for curves, and widely available at garden centers.
- Concrete Pavers: Sturdy and customizable, available in many shapes and finishes to complement different styles.
Tools and Supplies You Will Need Before You Start
One of the most common mistakes DIY gardeners make is beginning a project without having all the necessary tools and materials on hand. Running back and forth to the hardware store mid-project is frustrating and can cause you to lose momentum or make mistakes in the process. Before you dig a single shovel’s worth of earth, take time to inventory what you already have in your garage and make a complete list of what you still need to gather. A well-prepared project almost always goes more smoothly and produces better results.
The essential tools for most garden edging projects are relatively simple and inexpensive. A flat-bladed spade or half-moon edging tool is the most important item for cutting a clean, straight edge into the soil. A garden hose or a length of rope is invaluable for laying out curved edges before you commit to digging. Stakes and string help keep straight sections perfectly aligned, which makes a significant visual difference in the finished project. A rubber mallet is useful for setting bricks or stones firmly and evenly without cracking them.
Depending on the material you choose, you may also want a level to ensure your edging sits evenly, a tape measure for accurate spacing, and a wheelbarrow for moving heavy materials around the yard. Gloves are an obvious safety necessity, and knee pads will make the hours spent close to the ground significantly more comfortable. If you are working with metal edging, tin snips will be necessary for cutting sections to length, and a pair of safety glasses is a wise precaution. Having everything organized and within reach before you begin transforms the experience from frustrating to genuinely enjoyable.
Basic Tool Checklist
- Flat-bladed spade or half-moon edging tool
- Garden hose or rope for layout
- Stakes and string line
- Rubber mallet
- Level
- Tape measure
- Wheelbarrow
- Work gloves and knee pads
- Tin snips (for metal edging)
- Safety glasses
Step-by-Step Installation Guide for Beginners
Start by clearly defining the shape of your garden bed before you do anything else. Use your garden hose to lay out curved shapes, adjusting it until you are happy with the line, then mark the edge with spray paint, flour, or stakes and string. Take your time at this stage because the layout determines everything that comes after it. Walk around the marked area and look at it from different angles and distances to make sure it looks the way you imagined. It is far easier to adjust a line of string than it is to move a row of bricks.
Once your line is established, use your flat spade or edging tool to cut vertically into the soil along your marked line. You want a clean, sharp cut that goes down at least three to four inches, which is deep enough to create a meaningful barrier against grass roots. Remove the cut strips of sod and shake the soil free before composting or discarding them. The trench you create should be just wide enough to accommodate your chosen edging material, with walls that are as vertical as possible for a neat appearance. Take care to keep your depth consistent throughout the entire length of the trench.
Set your chosen edging material into the trench, pressing it firmly against the garden-side wall so that the finished edge will sit flush with or very slightly above the lawn grade. For stone or brick, add a thin layer of sand at the bottom of the trench to help you level each piece as you go. Tap each piece firmly into place with your rubber mallet, checking frequently with your level to maintain an even surface. When all the edging is placed, backfill soil firmly on both sides to lock everything in position, and tamp it down with your foot to eliminate air pockets that could cause settling.
Pro Tips for a Cleaner Finish
A few small refinements can make the difference between a result that looks decent and one that looks truly professional. First, always work in a single continuous direction rather than jumping around to different sections, as this helps you maintain consistent depth and alignment throughout the project. Second, cut your trench slightly deeper than you think you need to, because you can always add sand to raise a piece but removing material once it is in place is much more difficult. Third, mist the soil lightly before you begin cutting if it is very dry, as moist soil produces cleaner, crisper edges.
If you are working with flexible plastic or rubber edging, one excellent trick is to unroll it and leave it in direct sunlight for an hour or two before installation. Heat makes the material significantly more pliable, which means it will conform to curves more smoothly and be far less likely to develop kinks or buckle in tight bends. Metal edging benefits from being bent gently around curves before installation rather than forced into shape after it is partially set in the ground. A little preparation at this stage pays visible dividends in the quality of the finished edge.
Pay attention to your connections and corners, as these are the places where DIY edging most often reveals its amateur origins. Miter bricks or cut wooden sections at a precise 45-degree angle where they meet at corners rather than simply butting them together, which leaves an obvious gap. For materials like steel edging that come with connecting stakes, take the time to use them properly rather than relying on soil pressure alone to hold sections together. Neat connections and tidy corners give the entire project a craftsmanship that elevates it well beyond what most people expect from a DIY project.
Creative Edging Ideas to Inspire Your Design
Once you understand the fundamentals, there is tremendous room to get creative and design an edging solution that is completely unique to your property. Broken ceramic tile set on edge creates a colorful, mosaic-style border that doubles as a conversation piece and works particularly well in cottage or bohemian garden styles. Salvaged wine bottles buried neck-down in a row have been used by gardeners for generations to create a charming, whimsical edge with a beautiful glass texture. Vintage terra cotta flue tiles, which can often be found at architectural salvage yards, make stunning upright borders with a textured, handmade quality.
For a more naturalistic woodland garden aesthetic, consider using logs or thick branches cut into sections of equal length and set upright in the soil to create a rustic stockade-style border. The natural variation in size and color gives this type of edging an organic quality that complements shade gardens and native plant beds especially well. Gabion baskets, which are wire cages filled with stones, create a bold structural edge with an industrial-chic appeal that works surprisingly well in contemporary landscape designs. Thinking outside the standard options available at your local garden center often produces the most memorable results.
Painted cinder blocks are another approach worth considering, particularly for raised bed gardens where you want an edging that also contributes to soil retention. Arrange them in alternating orientations with some standing upright and some laid flat to create an interesting textural pattern, then fill any hollow openings with soil to plant with trailing flowers like alyssum or lobelia for a living edge that changes with the seasons. The combination of structure and living plants softens the hardscape quality of the blocks and creates a layered, abundant look. This approach is especially effective in urban and suburban settings where garden space is limited and every element needs to work hard visually.
Edging Styles by Garden Type
- Cottage Garden: Irregular fieldstone, salvaged brick, or painted bottles for a relaxed, romantic feel.
- Modern Minimalist: Cor-Ten steel or sleek aluminum edging for crisp, clean geometric lines.
- Woodland or Native: Log rounds, thick branches, or rough-cut stone that echoes natural materials.
- Formal or Traditional: Soldier-course brick, clipped boxwood hedging, or uniform concrete pavers.
- Kitchen Garden: Treated timber boards, galvanized steel, or concrete blocks for a functional, durable border.
Maintenance and Long-Term Care of Your Garden Edging
Even the most durable edging materials require some degree of ongoing maintenance to keep them looking their best, and building a simple maintenance routine into your gardening schedule will extend the life of your edging significantly. Twice per year, in spring and fall, walk the full perimeter of each bed and check for sections that have shifted, settled, or been displaced by frost heave or root pressure. Catching and correcting small movements early prevents larger problems from developing, and a quick reset of a single brick or stone takes only a few minutes compared to the much larger job of relaying an entire section.
Trimming the grass along the edge of your borders is one of the most impactful maintenance tasks you can perform for the overall appearance of your landscape. Even perfect edging looks sloppy if the grass immediately beside it is ragged and overgrown. A manual or powered string trimmer can clean up this area quickly, and some homeowners find it useful to apply a narrow strip of mulch or gravel along the lawn side of the edging to reduce the frequency of trimming needed. Keeping the soil in the bed slightly lower than the top of the edging material also helps shed water away from the border and prevents splashback during rainstorms.
Wooden edging requires the most attentive long-term care of all the common materials. Inspect it annually for signs of rot, insect damage, or cracking, and treat or replace affected sections promptly before the damage spreads. Applying a coat of linseed oil or exterior wood sealer every two to three years will significantly extend the life of timber or log edging in most climates. Metal edging should be checked for rust spots or sharp edges that have emerged over time, particularly at cut ends. A coat of rust-inhibiting paint on exposed metal edges will prevent oxidation from becoming a structural problem and keep the edging looking neat and intentional year after year.
Common Mistakes to Avoid When Edging Your Garden
The most frequent error beginners make is not digging a deep enough trench, which results in edging that shifts, tips, and migrates over time rather than staying firmly in place. A trench depth of at least three inches is the minimum for most materials, and four to five inches is even better for heavy stones or bricks that you want to remain completely stable through multiple seasons of freeze-thaw cycles. Spending an extra ten minutes digging more thoroughly at the start saves you from resetting the same section repeatedly throughout the years that follow.
Another common mistake is trying to force rigid materials around tight curves without the benefit of flexible connectors or scored cuts. Bricks and thick timbers have inherent limitations when it comes to curves, and trying to muscle them into a shape they cannot comfortably take results in gaps, cracks, and an overall appearance that looks strained rather than natural. If you want flowing, organic curves in your garden beds, choose materials that are suited to them, like flexible rubber or plastic edging, metal edging that can be bent gradually, or smaller individual stones that can step around a curve naturally.
Finally, many gardeners underestimate how much material they will need and run short midway through the project. Before purchasing anything, measure your total linear footage carefully, add at least ten percent as a buffer for cuts and breakage, and buy everything at once so that you have consistent material throughout. Brick and stone colors and textures can vary noticeably between different production batches, and a visible difference in material partway along a bed edge is one of the most noticeable signs of an unplanned project. A little extra on hand also means you have replacements available if a single piece cracks or chips in future seasons, and matching material perfectly months or years later can be surprisingly difficult.








What do you think?
It is nice to know your opinion. Leave a comment.