










Introduction to Garden Archways: Timeless Beauty for Your Outdoor Space
A garden archway is one of the most rewarding projects a homeowner can undertake, transforming an ordinary yard into a space that feels intentional, romantic, and full of character. Whether you envision climbing roses cascading over weathered wood, a sleek metal frame covered in wisteria, or a rustic arbor marking the entrance to a vegetable patch, a garden arch creates a sense of arrival and wonder that few other structures can match. The good news is that building one yourself is entirely achievable with basic tools, a weekend of your time, and a clear plan.
Garden archways have graced outdoor spaces for thousands of years, appearing in everything from ancient Persian pleasure gardens to Victorian English estates. Their enduring appeal lies in their dual function: they serve as both a practical support structure for climbing plants and as a powerful design element that draws the eye and guides movement through a space. Modern gardeners have embraced this tradition enthusiastically, and you’ll find DIY archway projects ranging from simple PVC pipe curves to elaborate timber constructions that rival professional landscaping work.
Before you swing a hammer or break ground, it’s worth taking time to envision exactly what you want your archway to achieve. Are you framing a pathway between two garden beds? Creating a shaded tunnel of greenery? Marking the transition from a patio to a lawn? Your intended purpose will influence every decision that follows, from the materials you choose to the dimensions you build to and even the plants you’ll eventually train up the sides. A well-thought-out archway becomes a permanent, beloved feature of your garden for decades to come.
Why a DIY Archway Beats Store-Bought Options
Pre-made garden arches are widely available at garden centers and home improvement stores, but they rarely satisfy in the long run. Most are made from thin, powder-coated steel that looks attractive in the box but begins to wobble and rust within a few seasons. They’re also designed to a single standard width and height, which may not suit the specific pathway or garden bed you’re trying to frame. Building your own gives you complete control over the dimensions, materials, and finish, ensuring the structure integrates perfectly with your garden’s existing style and scale.
Cost is another significant factor. A quality pre-made wooden archway can cost several hundred dollars, and a decorative metal one even more. By sourcing your own materials and doing the work yourself, you can often build a sturdier and more attractive structure for a fraction of the price. The satisfaction of watching climbing plants cover something you built with your own hands adds an emotional dimension to the project that no retail purchase can replicate.
Planning Your Garden Archway: Dimensions, Style, and Materials
Successful archway construction begins long before you pick up a tool. The planning phase is where most DIY projects either succeed or run into problems, and a garden archway is no exception. Start by measuring the space where the arch will stand. A standard garden archway should be at least 7 feet tall at its apex and 4 feet wide internally, giving enough clearance for comfortable passage and room for plants to grow without brushing against anyone walking through. If you plan to push a wheelbarrow or garden cart through the arch, add another foot of width to be safe.
The style of your archway should complement your garden’s overall aesthetic. A formal garden with clipped hedges and symmetrical beds calls for a clean, classical arch with straight uprights and a simple curved or pointed top. A cottage-style garden suits a more rustic structure, perhaps built from rough-sawn lumber or even twisted willow branches. A contemporary outdoor space might call for clean steel angles or powder-coated aluminum in a bold geometric shape. Spend some time browsing images and noting what appeals to you before committing to a design.
Material selection is perhaps the most consequential decision you’ll make. Pressure-treated pine is the most affordable and widely available lumber option and resists rot and insect damage well, though some gardeners prefer to avoid it near edible plants. Cedar and redwood are naturally rot-resistant, beautiful, and ideal for a high-quality wooden arch but come at a higher price. Hardwoods like oak or teak are extremely durable but difficult to work with and expensive. For a more contemporary look, galvanized steel or aluminium requires almost no maintenance and will outlast any timber option.
Sketching Your Design and Creating a Cut List
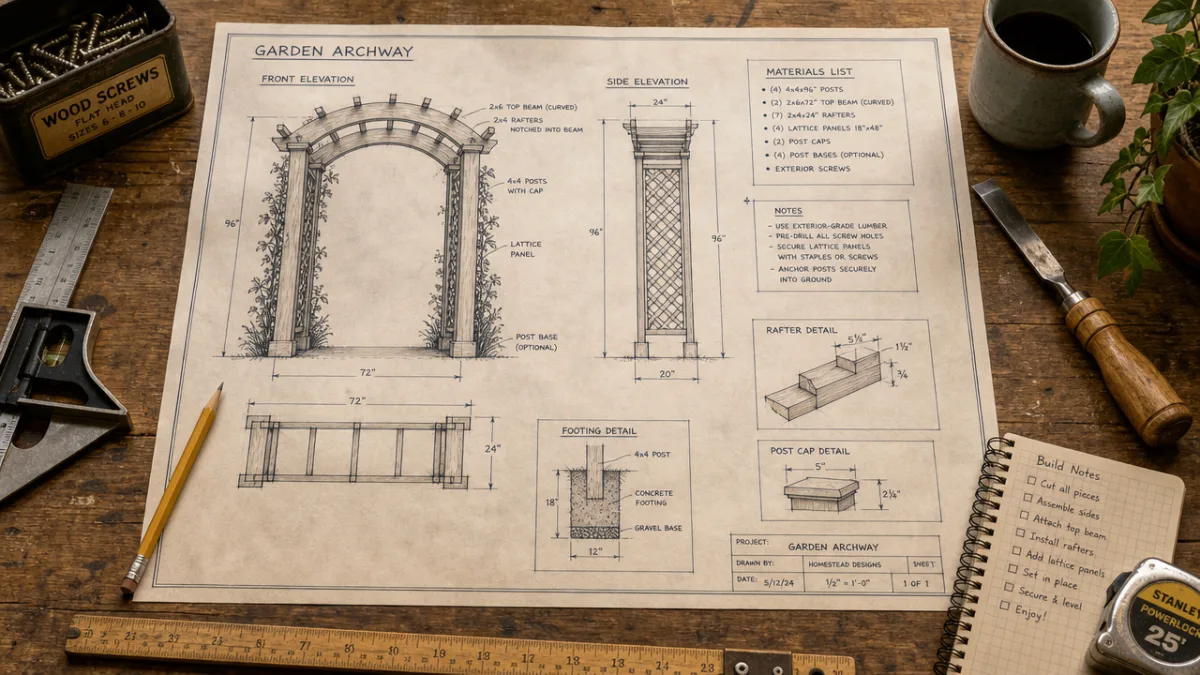
Once you’ve decided on your dimensions and materials, sketch your design on paper or use a free online tool like SketchUp to create a simple 3D model. Mark every component with its precise measurements and label it clearly. From this sketch you’ll create a cut list — a complete inventory of every piece of material you need, including the lengths, widths, and quantities. Having a detailed cut list before you go to the lumber yard or hardware store prevents expensive mistakes and wasted trips.
Think carefully about the joinery and connection methods you’ll use. Simple butt joints held together with galvanized screws are the easiest approach and perfectly adequate for most garden archways, but if you want a more polished look, mortise-and-tenon or lap joints create cleaner lines and stronger connections. Whatever method you choose, make sure all your fasteners are rated for outdoor use, as standard interior screws and nails will rust quickly and stain the wood, weakening the structure over time.
Tools and Materials You’ll Need for the Build
Gathering everything before you begin is essential. Few things derail a DIY project more reliably than discovering mid-build that you’re missing a critical tool or material. For a standard wooden garden archway, you’ll need a reasonably modest toolkit, most of which you probably already own or can borrow from a neighbour. Having everything laid out and ready before you start means you can work in a steady, satisfying rhythm from first cut to final screw.
The building process becomes much safer and more accurate when you’re working with the right equipment. A miter saw, for instance, makes clean, repeatable angled cuts that are difficult to achieve with a handsaw. A cordless drill with multiple charged batteries keeps the work moving without interruption. Safety gear is not optional — wear safety glasses when cutting, hearing protection when using power tools for extended periods, and gloves when handling pressure-treated lumber, which contains preservative chemicals.
Here is a comprehensive list of what you’ll typically need for a standard timber garden archway project:
- 4×4 inch pressure-treated posts, 8–10 feet long (4 pieces for a double-post design)
- 2×4 inch lumber for the top rails, side rails, and decorative lattice frame
- 1×2 inch or 1×4 inch lumber for lattice panels or decorative cross pieces
- Galvanized post base brackets or concrete for setting posts in the ground
- Galvanized structural screws (3 inch and 1.5 inch sizes)
- Post hole digger or auger
- Concrete mix (rapid-setting is easiest for post setting)
- Spirit level and string line
- Tape measure, pencil, and combination square
- Circular saw or miter saw
- Cordless drill and drill bits
- Sandpaper (80 and 120 grit)
- Exterior wood stain, paint, or sealant
- Safety glasses and work gloves
Beyond the tools themselves, consider your workspace. Cutting long lengths of lumber requires adequate space — ideally a flat, firm surface outdoors or in a garage. If you’re working alone, set up sawhorses or a workbench at a comfortable height to avoid awkward lifting. Recruit a helper for the assembly stage if you can, as holding posts plumb while filling post holes with concrete is genuinely a two-person job and attempting it alone can result in a misaligned structure that frustrates you every time you look at it.
Preparing the Ground and Setting Your Posts
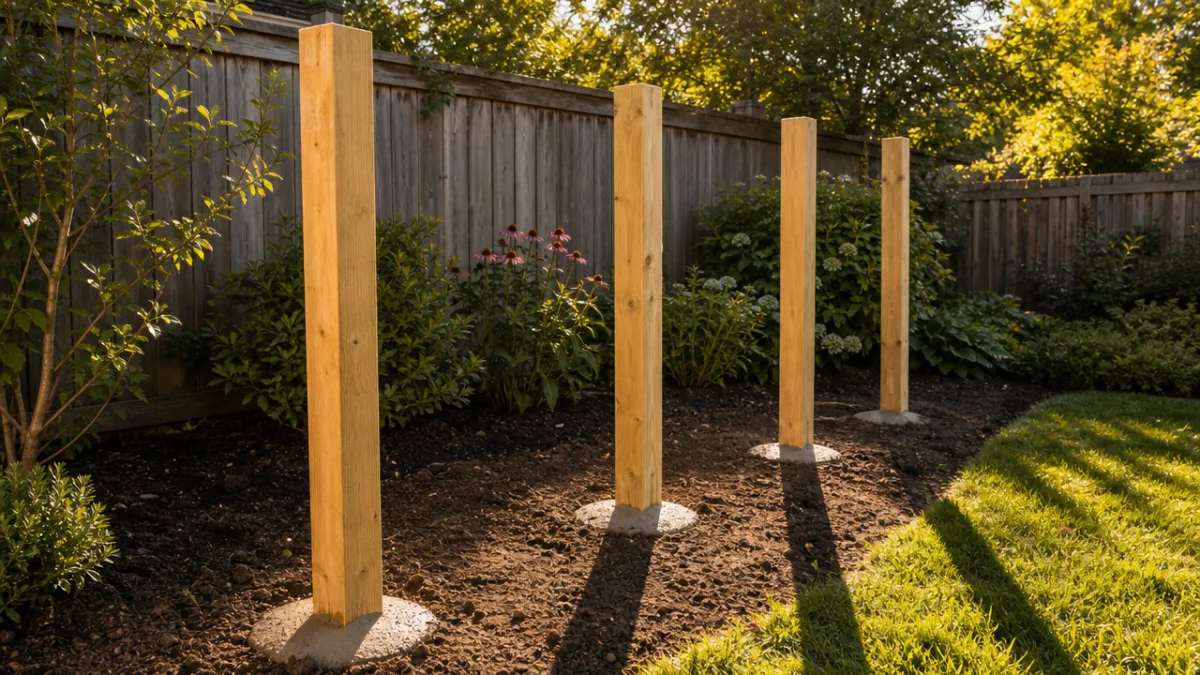
The posts are the foundation of your archway’s structural integrity, and setting them correctly is the most critical step in the entire build. Mark out the four post positions carefully using a tape measure and string line, ensuring they are perfectly square by measuring the diagonal distances — if both diagonals are equal, your layout is square. Use a post hole digger to excavate each hole to a depth of at least 18 inches, or deeper if you live in an area with significant ground frost, which can heave shallow foundations.
Mix your concrete according to the package instructions and pour it into the hole around the base of the post. Work quickly, as rapid-setting concrete can begin to cure within minutes. Use your spirit level on two adjacent faces of the post to check it is perfectly vertical in both directions, and prop it in position with temporary timber braces while the concrete sets. Allow the concrete to cure for at least 24 hours, and ideally 48, before applying any load to the posts. Rushing this stage risks creating a leaning or unstable arch that no amount of remedial work can fully correct.
Building and Assembling the Archway Structure
With your posts set firm and level, the assembly phase begins, and this is where the project starts to look genuinely exciting. Begin by cutting and fitting your top rails — the horizontal beams that connect the posts at the top of the arch on both the front and back faces. These should be secured with structural screws driven at an angle through the rail into the post, or with purpose-made joist hanger brackets for a cleaner, stronger connection. Check for level again as you fit each component, as even small errors compound as the structure grows taller.
The arch itself — the curved or angled top that gives the structure its name — can be constructed in several ways depending on your skill level and the look you’re after. The simplest method is to cut two identical curved pieces from wide sheet material like plywood and sandwich them together for thickness and strength. More ambitious builders steam-bend thin strips of timber and laminate them into a smooth curve. A straightforward alternative that suits many garden styles is a simple peaked or square-topped frame with decorative curved corbels cut from plywood and attached beneath the top rail at each corner.
Lattice panels on the sides of the arch provide the climbing surfaces that your plants will eventually cover. You can buy pre-made lattice panels and cut them to fit your frame, which saves time, or build your own from strips of timber for a more custom look. Either way, leave enough space between the lattice and any solid framing to allow climbing plants to twine and cling without restriction. Attach the panels securely to the inside of the frame, ensuring they won’t flex or rattle in the wind, which can damage delicate young plant stems over time.
Finishing Touches: Sanding, Sealing, and Decorative Details
Raw lumber, even pressure-treated, benefits enormously from a thorough sanding and application of a quality exterior finish before plants begin to cover it. Start with 80-grit sandpaper to remove any rough spots, mill marks, or splinters, then move to 120-grit for a smoother finish. Pay particular attention to any surfaces that will be at eye level or that people might brush against when walking through. A well-sanded archway simply looks more intentional and craft-quality than one with rough or fuzzy surfaces.
Choose your finish carefully based on the look you want and the maintenance you’re willing to undertake. A clear exterior wood sealant preserves the natural colour of the timber and is easy to maintain with a fresh coat every couple of years. An exterior wood stain adds colour while still allowing the wood grain to show through, and comes in a huge range of shades from natural cedar tones to bold contemporary colours. Exterior paint gives the most dramatic and durable finish but requires more preparation and is harder to refresh later. Whatever you choose, apply at least two coats and allow each to dry fully before applying the next.
Consider adding decorative elements that personalise the structure and elevate it from functional to genuinely beautiful. Cap the tops of your posts with pyramid-cut or ball-finial post caps, which shed rainwater away from the end grain and prevent splitting. Add decorative jigsaw-cut corbels, scrollwork brackets, or simple chamfered edges to the visible timbers for visual interest. If you want to add lighting, now is the time to run a weatherproof cable through a drilled channel in the post before the plants cover everything. Small solar-powered fairy lights woven through the lattice create a magical evening atmosphere with no electrical work required.
Choosing and Training Climbing Plants for Your New Archway
An archway without plants is a structure; an archway clothed in living greenery is a destination. Choosing the right climbing plants for your arch is as important as the construction itself, and the best choice depends on your climate, the amount of sunlight the arch receives, how quickly you want coverage, and the sensory experience you’re hoping to create. The good news is that the climbing plant world offers extraordinary variety, from fast-growing annual climbers that cover an arch in a single season to woody perennials that become more magnificent with each passing year.
For sheer romance and fragrance, climbing roses are the classic choice and for good reason. Varieties like ‘New Dawn’, ‘Compassion’, and ‘Climbing Iceberg’ have been bred specifically for growing over structures, offering abundant blooms, strong fragrance, and manageable growth habits. Wisteria is another perennial favourite, with its dramatic cascading flower clusters in purple, pink, or white creating a breathtaking spring display, though it requires firm structural support and regular pruning to keep it in bounds. For faster coverage, clematis is an excellent option with dozens of varieties offering flowers in almost every colour imaginable.
Training your plants is an ongoing commitment, but a deeply rewarding one. In the early stages, gently tie new shoots to the lattice using soft garden twine, encouraging them to spread horizontally rather than rushing upward, which promotes bushier coverage and more flowers. Check ties regularly as the season progresses and loosen any that might be cutting into thickening stems. An annual prune at the appropriate time for your chosen species keeps the plant healthy, prevents the archway from becoming overwhelmed, and ensures a fresh flush of growth and flowers every year.
Maintenance Tips for a Long-Lasting Garden Archway
A well-built garden archway should give you many years of pleasure with relatively modest maintenance. The most important annual task is inspecting the structure for any signs of wood decay, particularly at the base of the posts where they meet the soil or concrete, and at any joints where water might collect. Catch rot early and it can be treated with a wood hardener and stabiliser; leave it too long and you’ll be replacing structural components. A light sanding and fresh coat of sealant or stain every two or three years keeps the wood protected and looking its best.
Check all fixings annually as well. Galvanized screws can eventually show surface rust in wet climates, and it’s worth replacing any that look compromised before they lose their holding power. Look for any joints that have opened up due to seasonal wood movement and reattach them if needed. Keeping on top of these small tasks during the dormant season, when plants have died back and the structure is fully visible, means you’ll never face a major structural repair job — just a pleasant hour or two of routine upkeep.
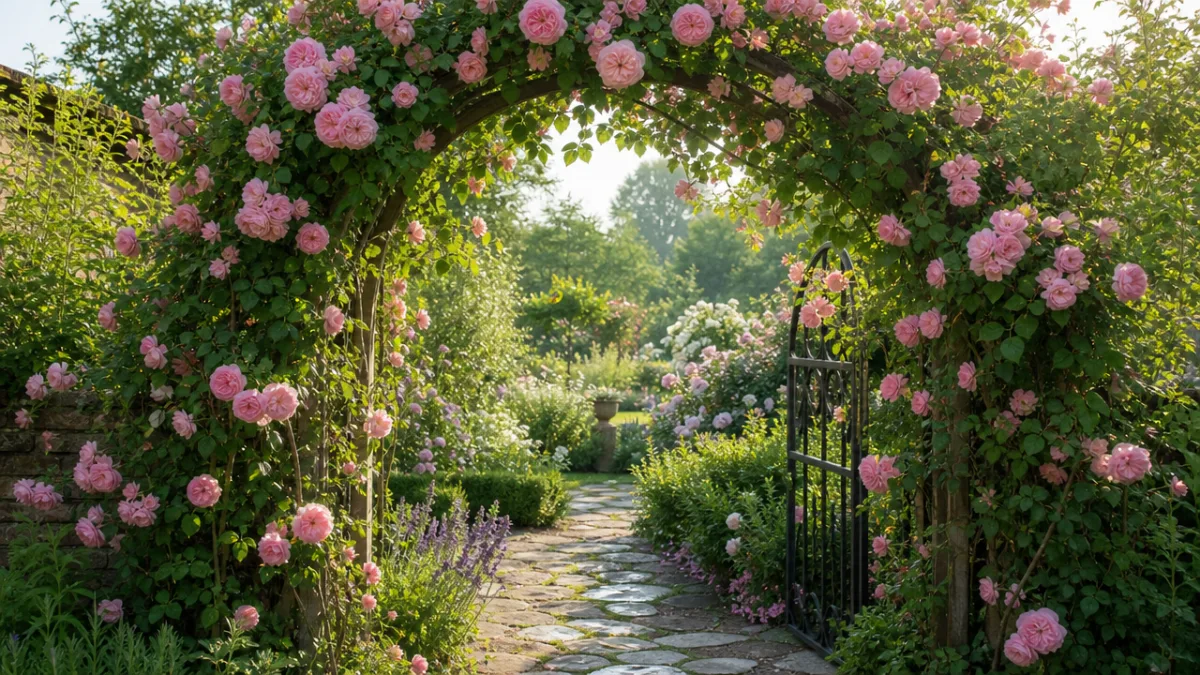
Finally, enjoy the evolving relationship between your structure and the plants that grow over it. A new archway looks crisp and clean; a five-year-old archway covered in established climbers has a depth and beauty that no amount of money can buy instantly. Take photographs each season to track the transformation, share them with gardening friends, and note what’s working and what you might do differently next time. Your garden archway is not just a building project — it’s the beginning of a long, living collaboration between craft and nature.








What do you think?
It is nice to know your opinion. Leave a comment.