










DIY Cement Mushrooms: A Complete Guide to Whimsical Garden Art on a Budget
Introduction: Why Cement Mushrooms Are the Perfect Garden Accent
Garden décor has a way of transforming an ordinary outdoor space into something that feels genuinely personal and alive. Among the many DIY projects that have captured the imagination of gardening enthusiasts, cement mushrooms stand out as one of the most charming and surprisingly accessible crafts you can undertake. Their whimsical shape, durability in outdoor conditions, and the enormous creative freedom they offer make them an ideal weekend project for beginners and experienced crafters alike.
What makes cement mushrooms so appealing is the combination of simplicity and visual impact. A cluster of handmade mushrooms nestled among ferns, peeking out from under a rose bush, or lining a garden path creates an almost storybook quality that draws the eye and sparks conversation. Unlike many garden ornaments you find at big-box stores, these are entirely unique because your hands shaped them, your choices determined their size and color, and your garden is where they belong.
Budget-conscious gardeners will be particularly pleased to learn that the materials required are minimal and inexpensive. A bag of cement or concrete mix, some basic molds or fabric, and a handful of craft supplies are really all you need to get started. Many crafters report spending less than ten dollars per mushroom cluster, making this one of the most cost-effective ways to add striking decorative elements to your outdoor space without compromising on quality or longevity.
Gathering Your Materials: Everything You Need Before You Begin
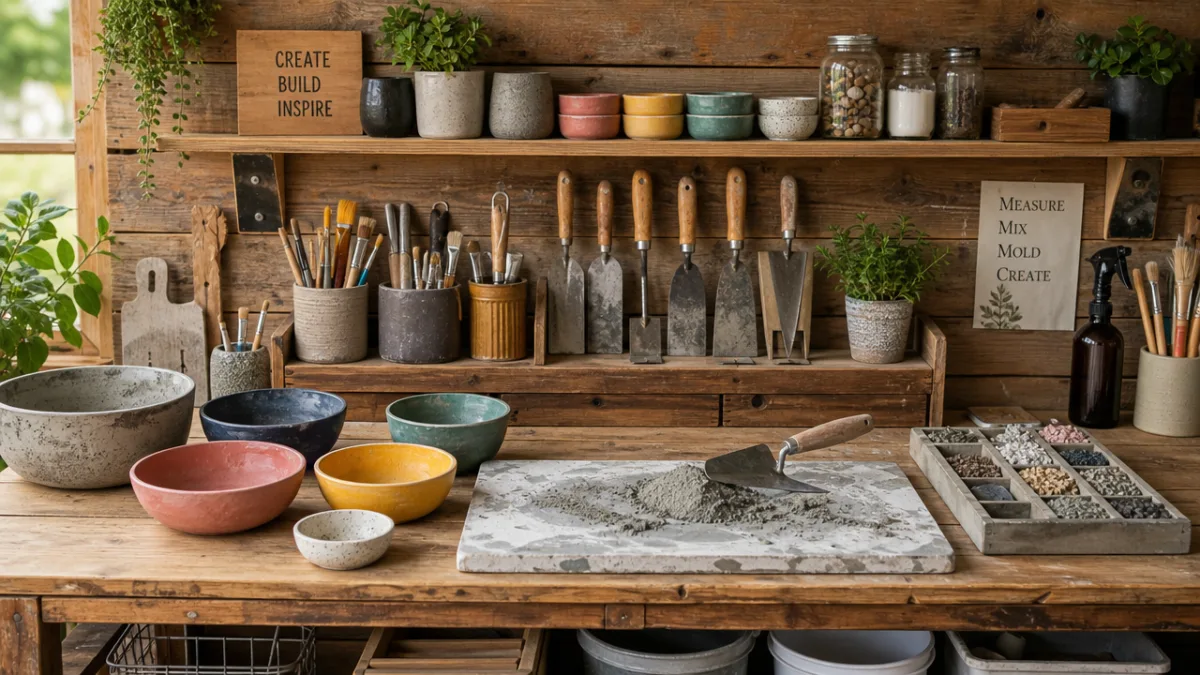
Before diving into the actual construction process, it pays to spend a little time gathering everything you need so that you are not scrambling mid-project with wet cement on your hands. The primary ingredient is Portland cement or a pre-mixed concrete blend, both of which are readily available at hardware stores. Portland cement gives you more control over consistency and is often preferred by experienced crafters, while a pre-mixed blend is friendlier for absolute beginners who want predictable results without much experimentation.
For the mushroom caps, you have several excellent mold options depending on the size and shape you want to achieve. Plastic bowls, rubber balls cut in half, old mixing bowls, and even large balloons work wonderfully as forms for rounded caps. The stem can be shaped around a cardboard tube, a PVC pipe segment, or even a tightly rolled piece of newspaper wrapped in plastic wrap to prevent sticking. The beauty of this project is that you are not locked into any single approach — your available household items will largely dictate your method, and that improvisation is part of the fun.
You will also want to have the following on hand before you start mixing: rubber or latex gloves to protect your skin from the alkaline nature of wet cement, a plastic tub or bucket for mixing, water, petroleum jelly or cooking spray to use as a mold release agent, and acrylic craft paints along with an exterior sealant for the finishing stage. Optional but highly recommended are pebbles, glass beads, or mosaic tiles if you want to embed decorative elements into the surface while the cement is still wet, adding texture and personality to your finished pieces.
- Cement or concrete mix — Portland cement or pre-blended concrete; a small bag goes a long way for a mushroom project.
- Mold materials — Plastic bowls, rubber balls, balloons, or silicone molds for the cap; cardboard tubes or PVC pipe for the stem.
- Mold release — Petroleum jelly, cooking spray, or plastic wrap to prevent sticking.
- Mixing equipment — A plastic bucket or tub, a sturdy stick or trowel, and measuring containers for water.
- Protective gear — Rubber gloves, safety glasses, and old clothing you do not mind getting dirty.
- Finishing supplies — Acrylic paints, exterior sealant, brushes, and optional decorative elements like glass beads or mosaic tiles.
Step-by-Step Construction: Building Your Cement Mushroom from Scratch
Begin by preparing your molds. Coat the inside of your bowl or the surface of your balloon generously with petroleum jelly or cooking spray — this step is critical and should not be skipped, because without a proper release agent you will find it nearly impossible to separate the hardened cement from your mold without damaging the piece. If you are using a balloon, inflate it to the desired cap size and tie it off, then coat the outside of the balloon. For a fabric-drape method, which is a popular alternative technique, soak a piece of burlap or a flour sack cloth in a cement slurry and drape it over an upturned bowl, allowing it to take the shape of the form beneath.
Mix your cement according to the package instructions, aiming for a consistency similar to thick peanut butter. Too watery and it will crack as it dries; too dry and it will not flow into the details of your mold or adhere properly to itself. Press or pour the mixture into your prepared mold, building up layers if needed to achieve a thickness of at least half an inch to three-quarters of an inch for durability. Smooth the interior surface as best you can with a damp gloved hand or a small trowel, and then gently tap the mold against your work surface to release any trapped air bubbles that could weaken the final piece.
Allow the cap to cure undisturbed for at least 24 to 48 hours in a cool, shaded location. Avoid direct sunlight during curing, as rapid drying can cause cracking. For the stem, pack your cement mix tightly around a cardboard tube or into a cylindrical mold, again with walls at least half an inch thick. Once both pieces have cured sufficiently to hold their shape but before they have reached full hardness — typically around 24 hours — you can join them using fresh cement as a bonding agent, pressing the stem into the underside of the cap and holding it steady. Full curing takes approximately 28 days, though most pieces will be stable enough to paint and display after 72 hours.
- Prepare your molds — Apply mold release generously to all surfaces that will contact wet cement.
- Mix the cement — Combine cement and water to a thick, uniform consistency with no dry lumps remaining.
- Fill or drape the mold — Press cement into bowl molds or drape slurry-soaked fabric over a form.
- Cure the cap — Allow 24 to 48 hours of undisturbed curing in a cool, shaded spot.
- Form the stem — Pack cement around a tube form or into a cylindrical mold to match your cap’s scale.
- Join the pieces — Bond the stem to the cap using fresh cement before full hardness is reached.
- Full cure — Wait at least 72 hours before painting, and allow 28 days for maximum strength.
One technique that many experienced crafters swear by is the hypertufa approach, which blends Portland cement with peat moss and perlite to create a lighter, more porous finished product that has a wonderfully aged and naturalistic appearance. This mixture is particularly well-suited to mushrooms because it mimics the rough, organic texture of real fungi and weathers beautifully over time, developing a patina that looks as though your garden ornaments have been there for decades. If weight is a concern — especially for larger pieces — this is an excellent alternative to standard cement mix.
Painting and Finishing: Bringing Your Mushrooms to Life
Once your cement mushrooms have cured sufficiently, the painting stage is where your creativity truly gets to shine. Because cement is porous, it is best to apply a base coat of exterior latex paint or a watered-down acrylic primer before adding your decorative colors. This base coat seals the surface slightly and ensures that your subsequent layers of paint adhere evenly rather than being absorbed unevenly into the cement, which can result in a blotchy, dull appearance. White or light grey are popular base coat choices because they allow subsequent colors to appear vivid and true to tone.
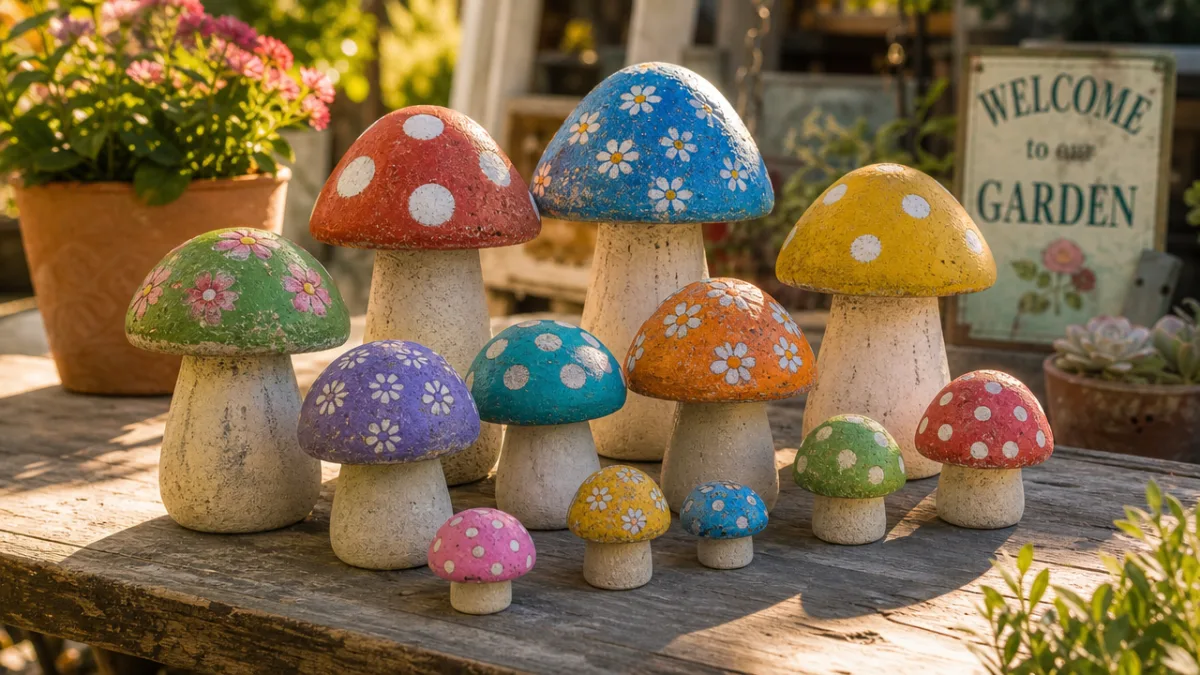
For the classic toadstool look inspired by fairy tales, paint the cap in a bold red with irregular white spots — a nod to the iconic Amanita muscaria mushroom that has captured human imagination for centuries. However, the possibilities extend far beyond this single reference. Earth tones like terracotta, warm brown, and cream create a naturalistic look that blends seamlessly into a cottage garden. Pastel shades of lavender, mint, and blush pink give mushrooms a fantastical, otherworldly quality perfect for a whimsical children’s garden. For a more sophisticated look, consider a deep forest green with metallic gold highlights, or a weathered grey wash that mimics aged stone.
After your decorative paint has dried completely — usually 24 hours for acrylic paints — apply at least two coats of an exterior sealant to protect your work from rain, UV exposure, frost, and general weathering. A matte sealant preserves a natural, earthy look while a satin or semi-gloss sealant gives the colors a more vibrant, protected appearance. Reapplying sealant once a year will keep your mushrooms looking fresh and extend their lifespan significantly. With proper care, cement garden ornaments can last for many years outdoors, becoming a lasting and beloved feature of your garden landscape.
Creative Variations and Design Ideas to Personalize Your Project
One of the most delightful aspects of the DIY cement mushroom project is how readily it lends itself to variation and personalization. Once you have mastered the basic technique, a world of creative possibilities opens up before you. You can vary the scale dramatically — from tiny fairy-garden mushrooms no bigger than a golf ball to statement pieces standing a foot or more tall that command attention in a large border planting. Mixing sizes within a cluster creates a natural-looking grouping that echoes how mushrooms actually grow in the wild, which adds an element of authentic charm to the display.
Texture is another powerful dimension to explore. Before the cement cap fully hardens, you can press objects into the surface to create patterns — lace fabric leaves an intricate impression, bubble wrap creates a pitted, organic texture, and real leaves pressed cap-side-down into the wet cement leave behind beautiful, botanically accurate impressions that are visible once the leaf is peeled away after curing. Glass beads, sea glass, and small pebbles can be pressed into the wet surface for a mosaic or embedded jewel effect that catches light in the garden and adds visual excitement even when plants around them are not in bloom.
Consider also incorporating your mushrooms into broader garden art installations. A cluster of mushrooms at the base of a garden gnome or fairy house creates an enchanted scene. Mushrooms of graduated sizes placed along a garden path function as whimsical wayfinding markers. You can even drill a small hole through the stem before the cement fully cures and insert a solar-powered LED light for a magical nighttime glow that transforms your garden after dark. These are the kinds of details that elevate a simple craft project into a genuinely memorable garden feature that brings joy every time you look at it.
- Fairy garden clusters — Create miniature mushroom groupings scaled for fairy gardens or terrarium landscapes.
- Lace-impressed caps — Press fabric lace into wet cement caps for an intricate floral pattern that becomes visible once painted.
- Leaf impressions — Press real leaves onto the cap surface before curing for a botanically detailed texture.
- Mosaic embellishments — Embed glass beads, tiles, or sea glass into the wet surface for color and sparkle.
- Solar light installation — Drill a stem channel before curing and insert a solar LED for nighttime illumination.
- Painted scenes — Use fine brushes to paint tiny landscapes, animals, or patterns on the cap surface for a storybook effect.
Displaying and Caring for Your Cement Mushrooms in the Garden
Placement is everything when it comes to making the most of your handmade cement mushrooms. Think about the natural habitats where real mushrooms appear — beneath trees, at the base of logs, tucked among ferns and mossy ground covers — and use this as inspiration for positioning your ornaments. Placing them in dappled shade not only mimics nature convincingly but also protects paint and sealant from the most intense UV exposure, which is the primary cause of fading and deterioration in painted cement garden art. A mushroom peeking out from behind a hosta leaf or nestled into a carpet of creeping thyme looks far more enchanting than one sitting isolated on bare soil.
Ground stability is an important practical consideration, particularly in areas with soft or loose soil. For smaller mushrooms, simply pressing the base of the stem firmly into the ground is usually sufficient. For larger, taller pieces, consider drilling a hole through the base of the stem during construction and inserting a length of rebar or a sturdy wooden dowel that extends into the ground, providing an anchor against wind and accidental knocking. In regions with freezing winters, it is worth knowing that properly cured and sealed cement mushrooms will generally withstand frost well, though extremely porous pieces may absorb water that expands when frozen and causes cracking over several seasons.
Annual maintenance is minimal and straightforward. At the beginning of each growing season, inspect your mushrooms for any chips, cracks, or areas where paint has faded or peeled. Small chips can be repaired with fresh cement or a masonry patching compound. Touch up paint as needed with the same acrylic colors you used originally, and reapply a fresh coat of exterior sealant to restore the protective barrier. If you notice any algae or moss beginning to grow on the surface — which some gardeners actually encourage for a beautifully aged look — you can either remove it with a mild bleach solution or embrace it as part of the natural character your piece is developing over time.

Troubleshooting Common Problems and Tips for Success
Even experienced crafters encounter challenges with cement projects, and knowing what to expect makes the process far less frustrating. One of the most common issues beginners face is cracking during the curing phase. This almost always results from one of two causes: the cement mixture was too wet and dried too quickly in warm or sunny conditions, or the walls of the piece were built too thin to withstand the stresses of drying. To prevent this, always cure your pieces in shade, mist them lightly with water once or twice during the first 24 hours to slow the drying process, and never build walls thinner than half an inch in any section.
Sticking to molds is another frequent source of frustration, particularly for new crafters who may underestimate how thoroughly the release agent needs to be applied. A common mistake is coating the mold lightly and then pressing cement in firmly — the pressure pushes the cement into every tiny scratch and crevice of the mold surface, defeating the purpose of the release agent. Apply your petroleum jelly or cooking spray generously and repeatedly, and consider lining smooth-sided molds with plastic wrap as a foolproof backup. If a piece stubbornly refuses to release, placing the mold in the freezer for an hour can sometimes cause enough contraction to break the bond.
Color results can sometimes disappoint if you have not properly primed and sealed the cement surface before painting. Cement is highly alkaline, and this alkalinity can affect certain pigments, causing colors to shift or dull over time. Using an exterior-grade acrylic primer designed for masonry surfaces neutralizes this issue effectively. Additionally, applying paint in multiple thin layers rather than one thick coat produces more even, vibrant results and reduces the likelihood of peeling. Patience at every stage of this project — from mixing to curing to painting — is genuinely the single most valuable skill you can bring to the work, and pieces created with care and patience will reward you for many years in the garden.








What do you think?
It is nice to know your opinion. Leave a comment.