










12 Homemade Garden Ornaments to Add Charm to Your Yard or Patio
Why Homemade Garden Ornaments Make All the Difference
There is something deeply satisfying about walking into a garden and knowing that every decorative piece you see was crafted by hand. Homemade garden ornaments carry a warmth and personality that store-bought items simply cannot replicate. When you create something yourself, you infuse it with intention, creativity, and a story — and those qualities shine through every time a guest admires your outdoor space. The result is a garden that feels genuinely yours, not a catalogue showroom transplanted into your backyard.
Beyond the personal touch, DIY garden ornaments offer remarkable flexibility. You can tailor the size, color, style, and materials to suit your existing landscape perfectly. Whether your patio leans toward a rustic farmhouse aesthetic, a whimsical fairy-tale vibe, or a sleek modern design, handmade pieces can be adapted to match. This level of customization is virtually impossible when shopping at a garden center, where the selection is finite and the designs are mass-produced for general appeal rather than your specific vision.
Cost is another compelling reason to go the DIY route. Many of the most striking garden ornaments can be made from materials you already have at home — broken terracotta pots, leftover timber, old glass bottles, or mismatched mosaic tiles. With a little creativity and a few basic supplies, you can transform what would otherwise be household waste into breathtaking focal points. The money you save can be reinvested into plants, soil amendments, or more crafting supplies for your next project.
Mosaic and Ceramic Garden Stepping Stones
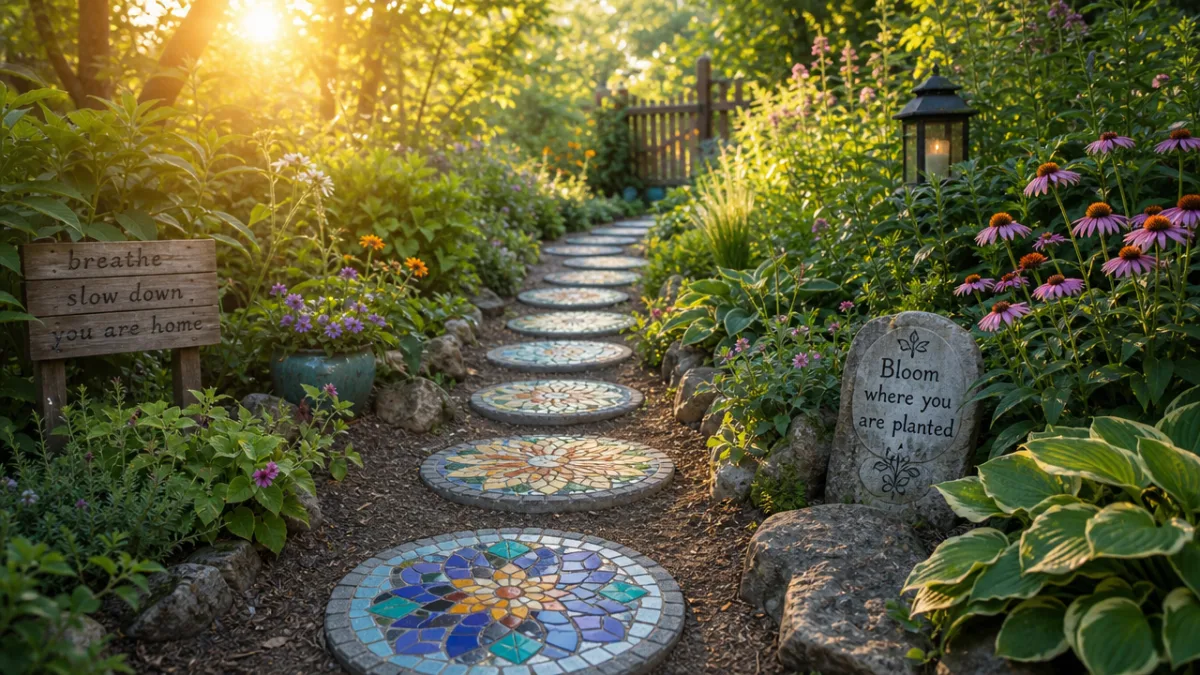
Stepping stones are one of the most rewarding homemade garden ornaments to create because they serve a practical function while doubling as miniature works of art. To make your own, you simply pour concrete or hypertufa into a mold — a plastic container, a cake tin, or even a shallow cardboard box lined with plastic wrap — and then press decorative elements into the surface before it sets. The result is a durable, weather-resistant stone that guides visitors along your garden path with genuine style.
The decorative possibilities for stepping stones are almost limitless. Mosaic designs using broken ceramic tiles, colored glass, or even pebbles collected from a local beach can produce stunning geometric or floral patterns. Alternatively, you might press real leaves, ferns, or flowers into the wet concrete to leave behind delicate botanical impressions. Glass marbles catch sunlight beautifully, while painted stones sealed with outdoor varnish add a pop of color that endures through multiple seasons of rain and frost.
For families with young children, stepping stones become a cherished keepsake when small handprints or footprints are pressed into the concrete before it cures. Writing a name and date beside the impression transforms an ornamental garden piece into a living timeline of your family’s history in the home. These stones age gracefully, developing a patina that only makes them more characterful over time, and they require virtually no maintenance beyond an occasional rinse with a garden hose.
Upcycled Container Planters as Sculptural Ornaments
One of the cleverest ways to add ornamental interest to a yard is to reimagine everyday objects as extraordinary planters. Old rubber boots, vintage watering cans, cracked ceramic colanders, wooden wine crates, and even retired bicycles can all be filled with potting soil and planted with trailing flowers, succulents, or aromatic herbs. The object itself becomes the ornament, drawing the eye and sparking curiosity before a visitor even notices the plant spilling beautifully over its rim.
The key to making upcycled planters look intentional rather than accidental lies in the planting choices and the arrangement. A weathered galvanized bucket planted with cascading petunias in a single bold color creates a cohesive, sophisticated look. A cracked teapot overflowing with creeping thyme has a storybook quality that suits cottage gardens perfectly. When you group three or five upcycled containers of varying heights and sizes together, you create a vignette with visual depth — a sculptural composition that rivals anything found in an expensive garden boutique.
Preparing these containers properly ensures your plants thrive and the ornaments last through seasons of outdoor exposure. Drill drainage holes in any container that lacks them, since waterlogged roots are the fastest way to kill a beautiful planting. Apply a coat of outdoor sealant to wooden containers to prevent rot, and treat metal ones with a rust-inhibiting primer if you want to preserve their current finish — though many gardeners actively welcome the rusty patina that develops naturally, finding that it adds authenticity and age to the display.
Wind Chimes and Kinetic Art from Recycled Materials
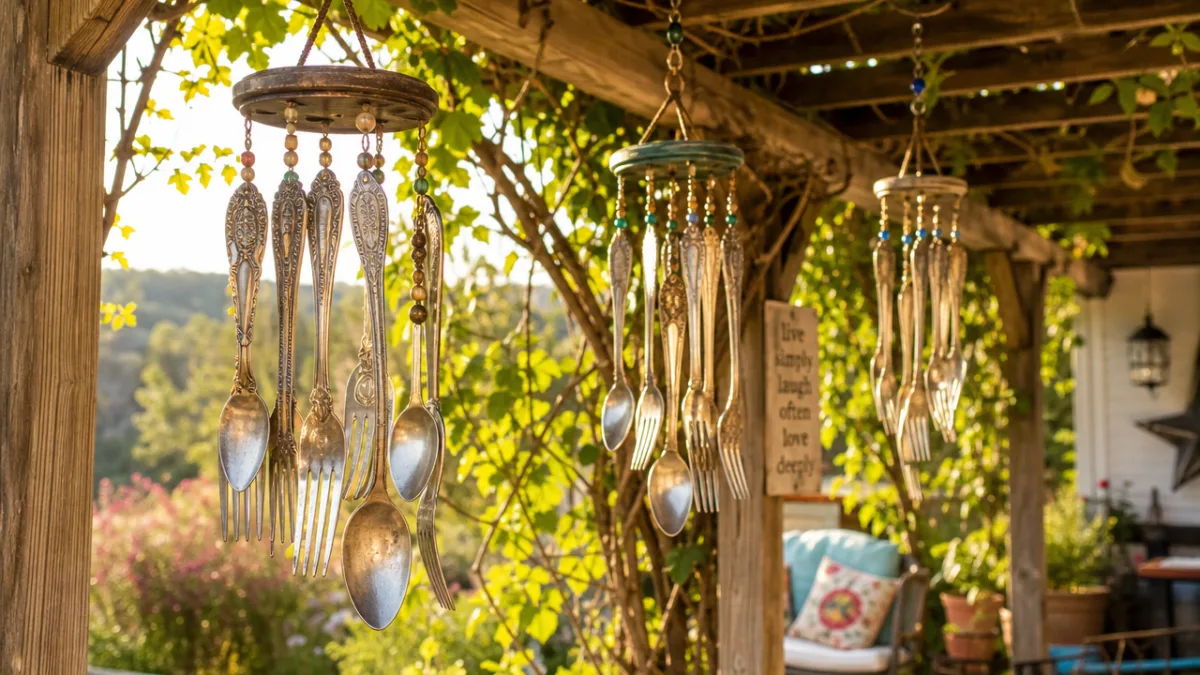
Wind chimes crafted from recycled materials bring a multi-sensory dimension to the garden that static ornaments cannot match. The gentle tinkling of old keys, the hollow knock of bamboo tubes, or the bright ring of repurposed cutlery creates an ever-changing soundtrack that shifts with every breeze. These sounds mask street noise, attract a contemplative mood, and make a patio feel like a genuine sanctuary rather than simply an outdoor extension of the house.
Making wind chimes at home requires surprisingly few tools. A driftwood branch, a length of sturdy twine or fishing line, and a collection of hanging elements are all you need to get started. Popular materials include vintage silverware drilled with small holes, smooth sea glass strung on wire, painted tin cans arranged to clang melodiously against one another, and ceramic beads salvaged from broken jewelry. The hanging elements can be uniform for a minimalist look or gloriously eclectic for a bohemian garden aesthetic.
Kinetic garden art extends the concept further by incorporating spinning or rotating elements that respond to air movement. Pinwheels made from aluminum cans cut into petal shapes and mounted on wooden dowels create hypnotic spiraling effects in a light wind. Whirligigs carved from scrap wood and painted in cheerful primary colors have a long history as American folk art garden ornaments. Even a simple mobile of painted driftwood pieces suspended from a pergola beam can create a meditative, ever-shifting display that transforms as the day progresses and the wind direction changes.
Garden Sculptures from Concrete and Hypertufa
Concrete and hypertufa — a lightweight blend of Portland cement, peat moss, and perlite — have become the favorite medium of dedicated garden crafters because they allow you to create sophisticated, long-lasting sculptures without specialist equipment or training. Garden spheres, animal figurines, decorative bowls, and even simulated stone troughs can all be formed by hand using these materials. Once cured, they weather beautifully outdoors, gradually developing the moss and lichen growth that gives new creations the appearance of genuine antiques.
The most accessible concrete project for beginners is the garden sphere, formed by packing hypertufa mixture around an inflated ball, allowing it to cure for a day or two, then deflating and removing the ball from inside. The resulting hollow sphere is surprisingly lightweight and can be placed singly as a focal point, grouped in odd numbers for maximum visual impact, or even stacked to create abstract tower sculptures. Paint them with watered-down acrylic in earthy tones, or coat them with a yogurt and moss slurry to encourage rapid natural colonization.
More ambitious crafters move on to leaf castings, pressing large hosta, rhubarb, or elephant ear leaves face-down into a pile of damp sand, then draping hypertufa over the leaf surface and allowing it to cure for several days. Once the leaf has decomposed or been peeled away, you are left with a precise concrete impression of every vein and texture, transformed into a durable garden dish that holds birdbath water or serves as a shallow planter for alpines and sedums. These pieces consistently impress visitors who assume they were purchased from a high-end garden sculpture gallery.
Painted Rock Art and Stone Cairns
Painted rocks are among the most accessible and joyful garden ornament projects available, requiring nothing more than smooth stones, outdoor acrylic paint, a set of fine brushes, and a coat of weatherproof sealant to finish. The artistic possibilities range from bold geometric patterns and mandala designs to realistic botanical illustrations and whimsical animal faces. Even simple polka dots and stripes in cheerful colors make a striking display when a group of painted rocks is arranged together among garden plants or along a border edge.
Stone cairns — towers of carefully balanced, unadorned rocks stacked one atop another — offer a more meditative form of garden ornamentation. Building a cairn requires patience and a quiet attentiveness to the weight and balance of each individual stone, making the construction process itself a form of mindfulness practice. Placed at the entrance to a garden path, at the edge of a water feature, or partially hidden within a dense planting of ferns, cairns introduce a sense of ancient spiritual presence that resonates deeply in natural outdoor settings.
Combining painted rocks with natural stone cairns creates layered visual interest throughout a garden. A cairn topped with a single painted stone glowing in a vivid color acts as a subtle yet striking punctuation mark within an otherwise naturalistic planting scheme. Rock art is also wonderfully low-maintenance — stones require no watering, feeding, pruning, or seasonal replacement. A quality outdoor sealant will protect painted designs through several years of weather exposure, requiring only an occasional reapplication to keep the colors looking vibrant and fresh.

Fairy Gardens and Miniature Landscape Ornaments
Fairy gardens have captured the imagination of gardeners of all ages for good reason: they allow you to create an entire world in miniature, packed with handmade detail and storytelling that rewards close inspection. A shallow terracotta pot, a wooden wine barrel half, or a dedicated corner of a raised bed can become the stage for a tiny landscape complete with pebble pathways, moss lawns, driftwood furniture, and diminutive planted trees crafted from twisted wire and preserved lichen. The charm is in the scale and the evident care invested in every tiny element.
Many of the best components for fairy gardens can be made by hand rather than purchased from specialty shops. Small furniture is easily fashioned from twigs lashed together with jute twine. Miniature fences can be constructed from rows of small sticks pushed into the soil. Tiny lanterns made from acorn caps and wire, doors cut from tree bark and hinged with leather scraps, and windows made from small mirrors or pieces of colored glass all add to the sense that a real, unseen community has made this corner of your garden their home.
Fairy gardens work particularly well when they evolve gradually over time, with new elements added season by season. In spring, tiny flowering bulbs like muscari or miniature daffodils can be planted to bloom inside the fairy world. In autumn, tiny carved pumpkins or dried seed pods add seasonal decoration. This ongoing creative engagement means the garden never feels finished or static — it remains a living, growing project that reflects the passing of time and the changing moods of its maker, delighting visitors who return to discover what new detail has appeared since their last visit.
Tips for Long-Lasting Homemade Garden Ornaments
Creating beautiful garden ornaments is only half the project — ensuring they survive the elements and continue to look their best over multiple seasons requires thoughtful finishing and placement. Weather, UV exposure, frost, and moisture are the primary enemies of outdoor crafts, and each material has specific vulnerabilities that can be addressed with the right protective treatments. Taking an extra hour during the finishing stage to apply sealants, waterproof coatings, or protective paints will dramatically extend the life of your homemade pieces.
Here are the most important protective measures to consider for common garden ornament materials:
- Concrete and hypertufa: Seal with a penetrating masonry sealer to reduce water absorption and prevent freeze-thaw cracking. Reapply every two to three years for best results.
- Painted surfaces (wood, metal, stone): Always use outdoor-rated acrylic paint and finish with two coats of UV-resistant exterior varnish or Mod Podge Outdoor formula. This prevents fading and peeling through rain and direct sun exposure.
- Timber and driftwood: Treat with teak oil, linseed oil, or an exterior wood preservative to prevent rot, splitting, and insect damage. Avoid placing untreated wood directly on damp soil.
- Metal and tin: Apply a coat of rust-inhibiting primer before painting, or embrace the weathered look by sealing the existing patina with a clear outdoor lacquer to prevent further deterioration.
- Terracotta and ceramics: In cold climates, bring frost-sensitive pieces indoors over winter or store them in a dry shed to prevent cracking caused by water expanding as it freezes inside the clay.
Placement is equally important when it comes to longevity. Ornaments positioned in full sun will fade faster than those in dappled shade, and pieces placed in poorly draining areas will deteriorate rapidly from constant moisture exposure. Think carefully about the microclimate of each spot in your garden before committing a prized handmade piece to a permanent location. Rotating ornaments seasonally not only protects them from concentrated weathering but also keeps your garden feeling fresh and surprising — a good reason to view your outdoor space as an ever-evolving gallery rather than a fixed installation.
Finally, the maintenance of homemade garden ornaments should be approached with the same enthusiasm as their creation. An annual inspection at the start of each growing season allows you to identify chipped paint, loose mosaic tiles, crumbling concrete, or rusting metal before minor issues become irreparable damage. Keep a small box of your original crafting materials — leftover paint, grout, sealant, and brushes — specifically reserved for touch-up work. This small habit keeps every piece in your collection looking intentional and well-loved, transforming your yard or patio into an enduring showcase of personal creativity that improves with every passing year.








What do you think?
It is nice to know your opinion. Leave a comment.