










My Yard Finally Feels Complete! 🌿 DIY Walkway: A Complete Guide to Transforming Your Outdoor Space
There is something deeply satisfying about standing at the edge of your property and looking out at a yard that truly feels finished. For years, many homeowners live with that nagging sense that something is missing — a visual anchor, a sense of intention, a pathway that guides the eye and the foot from one beautiful spot to the next. A DIY walkway is often exactly that missing piece, and the best part is that creating one yourself is far more achievable than most people realize. Whether you are working with a modest suburban lot or a sprawling country yard, a well-designed walkway can completely transform how your outdoor space looks and feels.
This guide is inspired by the growing number of homeowners who have taken on this rewarding weekend project and emerged on the other side with yards that feel polished, purposeful, and complete. We will walk you through everything you need to know — from planning and material selection to installation and finishing touches — so that you can achieve that same sense of satisfaction in your own outdoor space. By the time you finish reading, you will have a clear picture of exactly what it takes to build a walkway that serves your yard for years to come.
Why a Walkway Makes Such a Dramatic Difference
Before diving into the how-to details, it is worth pausing to understand why a walkway has such an outsized impact on the overall appearance of a yard. Landscaping professionals frequently cite pathways as one of the most transformative elements you can add to an outdoor space, and the psychology behind this is straightforward. A walkway creates visual structure. It tells the eye where to travel, organizes the landscape into intentional zones, and gives the entire yard a sense of purpose and design that a collection of plants and grass alone simply cannot achieve. Without a pathway, even a beautifully planted yard can feel chaotic or unresolved.
From a functional standpoint, walkways solve real everyday problems. They protect your lawn from the wear and tear of foot traffic patterns that inevitably develop over time. Anyone who has watched a dirt path wear itself into the grass between the driveway and the front door knows exactly what this looks like. A properly installed walkway channels that traffic onto a durable surface, preserving the surrounding turf and garden beds while keeping your shoes cleaner in the process. This practical benefit compounds over the years as your lawn remains healthier and your landscaping stays looking intentional rather than worn.
There is also a significant curb appeal and property value component to consider. Real estate professionals consistently note that well-designed hardscaping — including walkways, patios, and edging — contributes meaningfully to a home’s perceived value and marketability. A DIY walkway built with quality materials and thoughtful design can return a substantial portion of its modest cost in increased curb appeal, making it one of the smarter investments you can make in your property. Even if you never plan to sell, the daily enjoyment of walking through a beautiful, finished yard is its own reward.
Planning Your Walkway: The Foundation of a Successful Project
Every successful DIY walkway begins not with a shovel but with a plan. Before you purchase a single stone or bag of sand, you need to spend meaningful time thinking about where your walkway will go, how wide it should be, what curves or angles it might follow, and how it will connect to existing structures and landscape features. A pathway that ignores these questions and simply draws a straight line from point A to point B often feels forced and unnatural. The best walkways follow the organic logic of how people actually move through the space, with gentle curves that feel inevitable rather than imposed.
Start by observing your yard over the course of several days. Notice where you and your family naturally walk, where guests tend to drift when approaching the door, and where existing wear patterns have already begun to form in the grass. These worn paths are telling you something important — they represent the most efficient and intuitive routes through your space. Your walkway should honor this natural logic. You can use a garden hose or a length of rope to lay out the proposed path on the ground and live with it for a day or two before committing. This low-tech trick is one of the most valuable steps in the planning process.
Width is another critical planning consideration that many beginners underestimate. A walkway that is too narrow feels cramped and creates an obstacle course rather than an invitation. As a general rule, a minimum width of 36 inches is recommended for a single-file path, while 48 to 60 inches allows two people to walk comfortably side by side — which matters considerably for a front entry walkway where you want guests to feel welcomed rather than funneled. For secondary garden paths that see lighter traffic, 24 to 30 inches can work well and can actually look quite charming when flanked with low-growing plants that spill softly over the edges.
- Use a garden hose to lay out your path design before digging
- Aim for a minimum width of 36 inches for primary walkways
- Consider the grade and drainage of your yard when planning the route
- Mark your final design with spray paint or landscape flags before breaking ground
- Check for underground utilities before you begin any digging
Choosing the Right Materials for Your DIY Walkway
The material you choose for your walkway will define its character more than almost any other decision you make. Fortunately, the range of available options has never been wider, spanning a spectrum from rustic and naturalistic to sleek and contemporary. Your choice should be guided by three key factors: the overall style of your home and existing landscaping, your budget, and your honest assessment of your DIY skill level. Some materials are extremely forgiving for beginners, while others require greater precision and patience to install successfully. Understanding these trade-offs will help you select the right material for your specific situation.
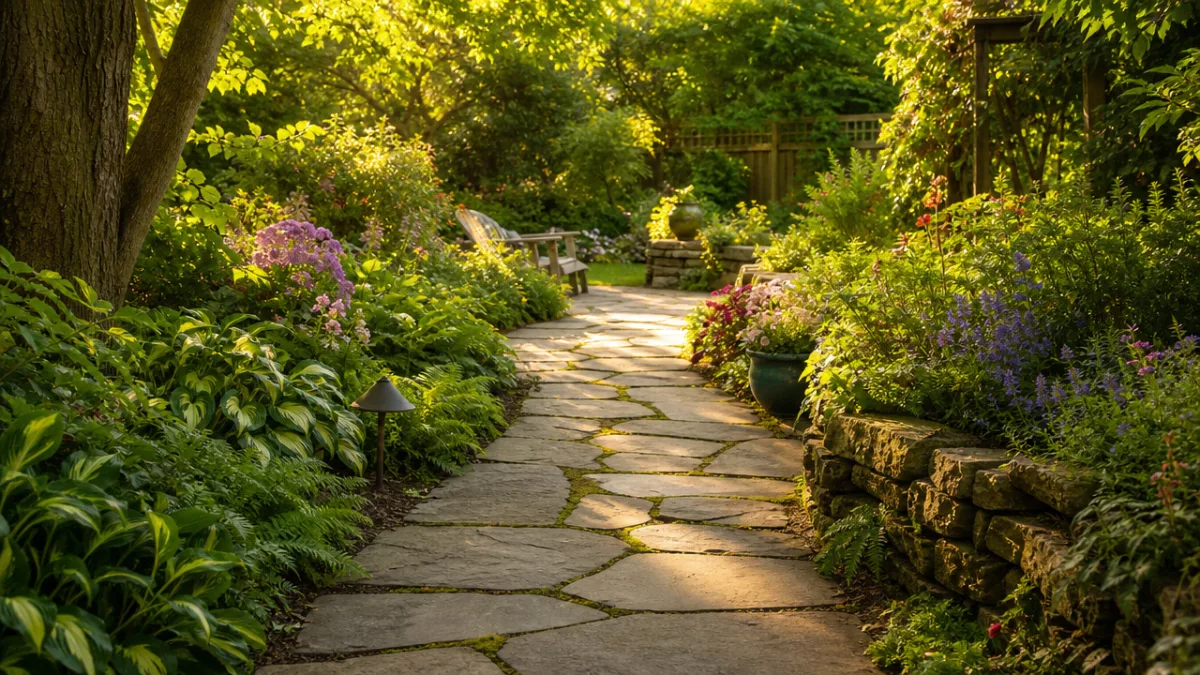
Natural stone pavers — including flagstone, slate, bluestone, and limestone — are perennially popular because they bring a timeless, organic quality to any yard. Each piece is unique, which gives a flagstone path a handcrafted appearance that manufactured materials simply cannot replicate. Flagstone in particular is well-suited to DIY installation because its irregular shapes actually make precise cutting unnecessary. You simply fit the pieces together like a puzzle, filling gaps with gravel, ground cover plants, or polymeric sand. The cost of natural stone is higher than some alternatives, but the resulting aesthetic and durability are genuinely difficult to match.
Concrete pavers represent the middle ground that many DIY enthusiasts find most practical. Available in a vast array of shapes, sizes, colors, and textures — including options that convincingly mimic natural stone or brick — concrete pavers are dimensionally consistent, making them easier to install in tight, precise patterns. They are also durable, frost-resistant, and relatively affordable. For those who want the look of a more traditional brick path, actual clay bricks are another excellent option that age beautifully over time, developing a patina and character that only improves with the years. Gravel and decomposed granite paths round out the options for those seeking a more naturalistic, cottage-garden aesthetic at a very accessible price point.
- Flagstone: Organic, unique appearance; excellent for naturalistic or cottage-style yards
- Concrete pavers: Consistent sizing, wide variety of styles, budget-friendly and durable
- Brick: Classic appeal, ages beautifully, suitable for traditional and formal landscapes
- Gravel or decomposed granite: Very affordable, easy to install, excellent drainage
- Stepping stones: Casual, garden-friendly, ideal for secondary paths through planted areas
Step-by-Step Installation: Building Your Walkway from the Ground Up
With your plan finalized and your materials selected, it is time to get your hands dirty. The installation process for most DIY walkways follows a consistent sequence regardless of the specific material you are using: excavate, establish a base, set your edging, lay your surface material, and finish with jointing material to lock everything in place. Working through these steps methodically and not rushing any of them is the single most important thing you can do to ensure a walkway that looks great and holds up over time. Shortcuts taken during installation have a way of becoming very visible problems within a season or two.
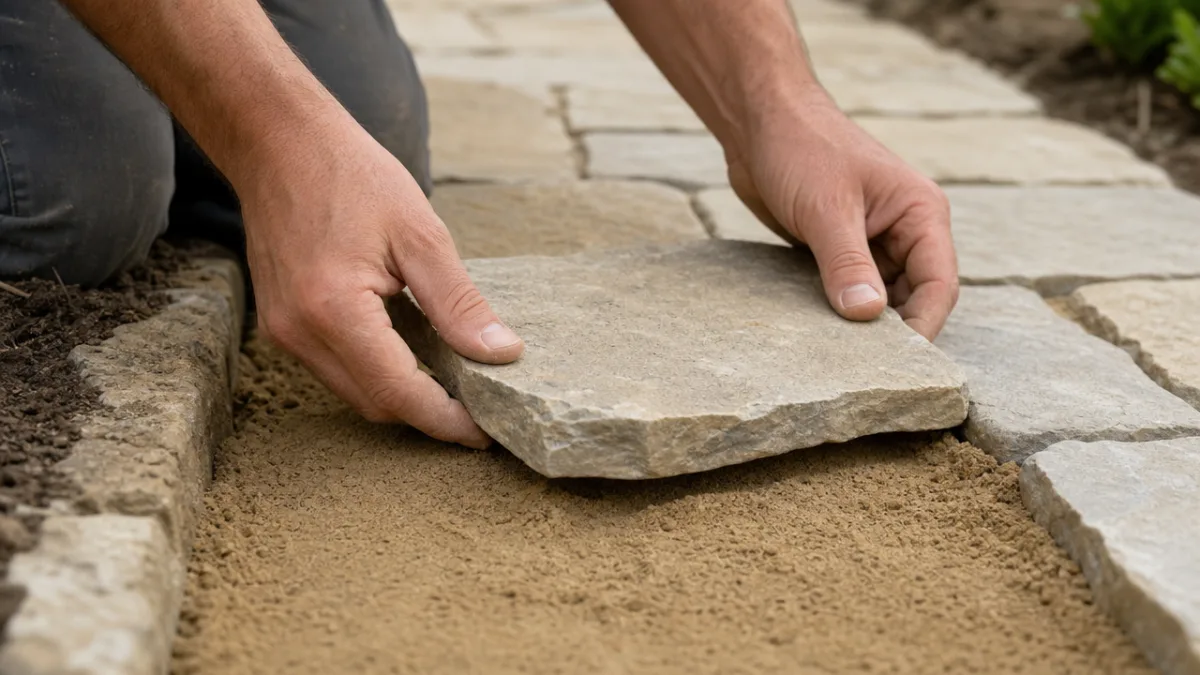
Excavation is where the real labor begins. Dig out your marked path to a depth that accounts for your base layer plus your surface material — typically six to eight inches total for a paver walkway in a climate with freezing winters. A proper base is the unglamorous secret behind every walkway that stays level and beautiful for years. Compact a two-inch layer of crushed gravel as your sub-base, then add a one-inch layer of coarse sand as your bedding layer. Both layers should be compacted and leveled carefully, with a slight pitch of about one-quarter inch per foot away from any structures to ensure proper drainage. Skipping or skimping on this base preparation is the most common reason DIY walkways fail prematurely.
Setting your pavers, stones, or bricks is the most satisfying part of the process, where the walkway begins to take its final shape before your eyes. Work from one end to the other, placing each piece into the sand bed and pressing it firmly into place. Use a rubber mallet to seat each paver fully and a level to ensure consistent elevation across the surface. For patterned concrete pavers, consult your chosen pattern layout before you begin and maintain your spacing with plastic paver spacers for consistent joints. For flagstone, take time to audition different piece combinations before committing, rotating and flipping stones to find the most harmonious fit. Once all your material is set, compact the entire surface with a plate compactor — rented from any equipment rental center — before sweeping polymeric sand into the joints to lock everything permanently in place.
- Excavate six to eight inches deep for most paver walkways
- Compact a layer of crushed gravel as your sub-base
- Add one inch of coarse sand as your bedding layer and screed it level
- Maintain a slight drainage pitch away from your home’s foundation
- Use a plate compactor after setting pavers for a locked, stable surface
- Sweep polymeric sand into joints and lightly mist with water to activate
Landscaping the Edges: Making Your Walkway Feel Intentional
A walkway without thoughtful edge landscaping can look like an afterthought, but a walkway flanked by intentional planting, edging, and ground cover becomes something truly special — a designed element that draws the entire yard together into a cohesive composition. The plants and materials you choose for the edges of your path are just as important as the path surface itself, and in many ways they are what transform a utilitarian route from one point to another into a genuine garden feature that invites people to slow down and notice the beauty around them. This is where your personal taste gets to shine most brightly.
Low-growing plants that spill softly over pathway edges are among the most charming and effective choices for this purpose. Creeping thyme is a perennial favorite for good reason — it releases a gentle fragrance when brushed or stepped upon, tolerates light foot traffic, and produces a flush of tiny purple flowers in early summer that is absolutely delightful. Alyssum, lobularia, and ajuga are similarly excellent options that create a soft, cottage-garden quality along path edges. For a more formal look, dwarf boxwood, lavender, or ornamental grasses clipped into tidy mounds provide structure and year-round interest without requiring constant maintenance.
Landscape edging along the sides of your walkway also plays an important practical role beyond aesthetics. Metal, plastic, or stone edging creates a physical barrier that keeps your lawn grass from creeping into the path joints and your mulch or garden soil from washing onto the pavers during rain events. Clean, well-maintained edging is one of those details that people may not consciously notice, but its absence is immediately apparent to the eye. Installing a quality edging product as part of your walkway project is a modest additional investment that pays dividends in the long-term cleanliness and maintenance ease of your path for every season that follows.
Maintaining Your Walkway and Keeping It Beautiful for Years to Come
The work of building a walkway is a one-time investment, but keeping it looking its best requires a modest and very manageable ongoing maintenance commitment. The good news is that a properly installed walkway with quality materials is genuinely low-maintenance compared to many other landscape features. A few simple habits performed consistently through the seasons will keep your path looking as fresh and intentional years from now as it did on the day you completed it. Understanding what to watch for and how to address small issues before they become larger ones is the key to long-term walkway success.
Cleaning is the most routine maintenance task, and for most walkways it is as simple as occasional sweeping and periodic rinsing with a garden hose or pressure washer. Organic debris — leaves, seed pods, and soil blown in from adjacent garden beds — should be swept regularly to prevent staining and to discourage weed seeds from settling into joints. For stubborn staining from algae, moss, or mildew, a solution of diluted white vinegar or a commercial masonry cleaner applied with a stiff brush will typically restore the surface without damaging the material. Avoid harsh acid-based cleaners on limestone or other calcium-based stones, as these can cause surface etching over time.
Joint maintenance deserves particular attention as your walkway ages. Polymeric sand, while excellent at locking pavers in place initially, can gradually wash or erode from heavily trafficked joints or areas subject to strong rain runoff. Check your joints annually and top them up with fresh polymeric sand as needed. This simple task prevents the most common walkway problems — shifting pavers, weed intrusion, and ant colonization in the joints — from ever gaining a foothold. In colder climates, inspect your walkway each spring after the frost cycle has completed, as freeze-thaw movement can occasionally shift a paver out of level. These are typically easy to reset by lifting the paver, adding or removing a small amount of sand beneath it, and resetting it in place.
- Sweep regularly to prevent organic debris from staining surfaces or introducing weed seeds
- Rinse with a hose or pressure washer seasonally to refresh the appearance
- Inspect and replenish polymeric sand in joints each year
- Check for and reset any shifted or uneven pavers each spring
- Apply a quality stone sealer every two to three years to protect natural stone surfaces
- Keep edge plantings trimmed to prevent them from creeping onto the walkway surface
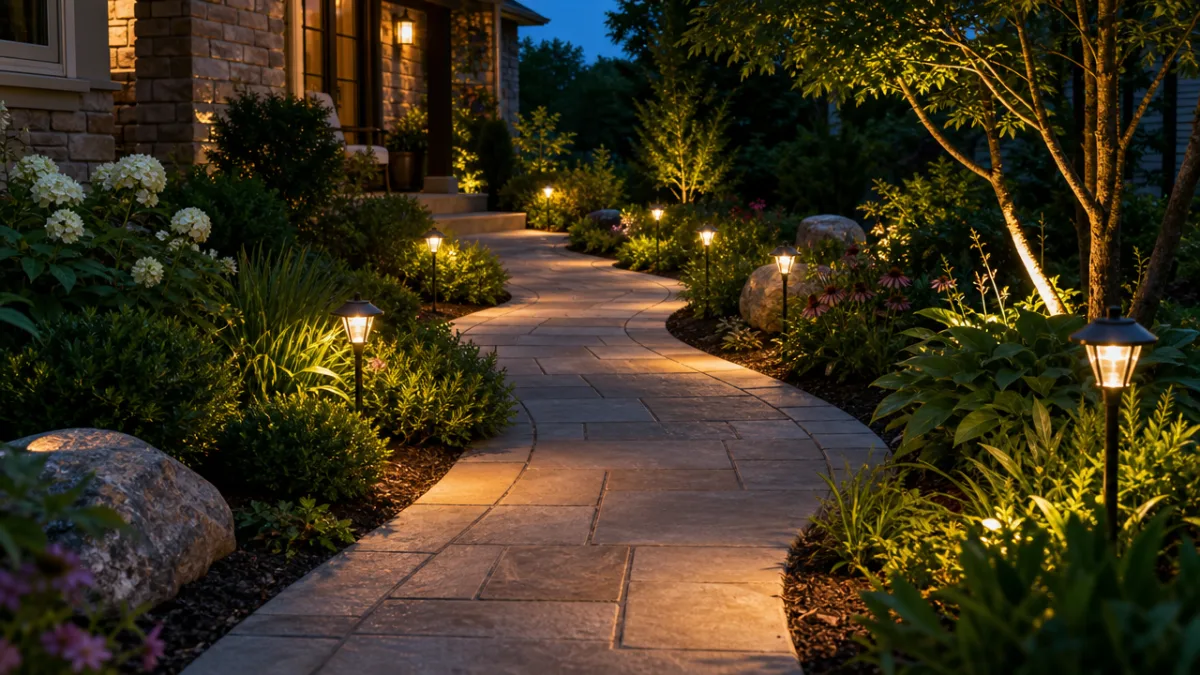
Beyond these practical maintenance steps, think of your walkway as an evolving feature of your landscape rather than a finished, static object. As the plantings alongside your path mature and fill in, as you add lighting fixtures that illuminate the path at night, or as you swap out seasonal flowers in adjacent beds, the walkway will continue to grow in beauty and character. Many homeowners find that the completion of a walkway inspires a cascade of other improvements — a new garden bed here, a seating area there — because the path has given the yard a spine of organization that makes additional features feel natural and connected. That sense of momentum and creative engagement with your outdoor space is perhaps the most unexpected and rewarding benefit of all.








What do you think?
It is nice to know your opinion. Leave a comment.