










23 Whimsical DIY Garden Mushroom Ideas to Add a Pop of Magic and Color Outdoors
Why Garden Mushrooms Are the Hottest DIY Trend Right Now
There is something undeniably enchanting about a garden dotted with colorful, hand-crafted mushrooms peeking out from flower beds, nestled beneath trees, or lining a winding garden path. This playful trend has taken the DIY and gardening world by storm, and it is easy to see why. Whether you lean toward a fairy-tale cottage aesthetic or simply want to breathe new life into a neglected corner of your yard, decorative garden mushrooms offer a versatile, affordable, and endlessly creative solution that suits almost any outdoor space.
Unlike many garden décor trends that require significant skill or expensive materials, DIY mushroom projects are genuinely accessible to crafters at every level. A beginner can produce a charming toadstool from a repurposed bowling ball and a terracotta pot, while a seasoned maker can sculpt an entire enchanted mushroom grove from hypertufa or concrete. The range of techniques, scales, and styles means there is always a new challenge waiting, and always room for more mushrooms in the garden. The creativity this trend unlocks is one of its most compelling qualities.
Beyond their visual appeal, handmade garden mushrooms carry a sense of personal expression that mass-produced garden ornaments simply cannot replicate. Each one reflects the maker’s choices of color, texture, and whimsy, making your outdoor space feel genuinely one of a kind. Communities of DIY enthusiasts on Pinterest and Instagram share thousands of variations each season, continually inspiring new spins on the concept. If you have been looking for a project that blends artistry with the joy of being outdoors, a garden mushroom is the perfect place to start.
The Appeal of Whimsy in Outdoor Spaces
Whimsy in garden design is not merely decorative frivolity — it is a deliberate choice to invite wonder, playfulness, and storytelling into a space that is often thought of primarily in functional terms. A well-placed mushroom sculpture can transform a dull corner into a scene from a fairy tale, encouraging visitors of all ages to slow down, look closely, and let their imagination roam. This kind of intentional charm has real psychological benefits, fostering a sense of delight and well-being every time you step outside.
For families with children, whimsical garden features like mushrooms become focal points for imaginative play. Kids are drawn instinctively to tiny, magical-looking things, and a cluster of painted toadstools near a flower bed can spark hours of storytelling and creative games. Even for adults without children, these playful elements serve as a counterpoint to the stresses of everyday life, offering a gentle reminder that beauty and wonder are worth cultivating right at home. The garden becomes not just a place to grow plants but a place to grow joy.
Essential Materials and Tools for DIY Garden Mushrooms
Before diving into your first mushroom project, it pays to understand the range of materials available and what each one offers in terms of durability, workability, and final appearance. The most popular choices include concrete and hypertufa for a natural, stone-like finish; air-dry clay or foam for lightweight, easy-to-shape pieces; repurposed items like bowling balls, terracotta pots, and river rocks for eco-conscious upcycling projects; and wood, both natural stumps and carved forms, for a rustic woodland aesthetic. Each material has its own strengths and quirks worth exploring.
Concrete and hypertufa mushrooms are among the most durable options, capable of withstanding multiple seasons outdoors without significant deterioration. Hypertufa, a blend of Portland cement, peat moss, and perlite, is lighter than standard concrete and takes on a pleasingly rough, organic texture that looks beautifully aged within just a season or two. Projects made from these materials require a bit more patience during the curing process, but the results are stunning and long-lasting. Many crafters find the process deeply satisfying, almost meditative, as you work the mixture into organic mushroom forms using simple molds.
For those who prefer a quicker and more colorful result, repurposed materials offer fantastic possibilities. Terracotta pots inverted over a stake form a classic mushroom cap shape that can be painted in any color imaginable. Bowling balls, with their smooth, rounded surfaces, take exterior paint beautifully and can be decorated with intricate dot patterns to mimic the classic red-and-white Amanita muscaria toadstool. River rocks and pebbles can be painted in clusters to suggest a mushroom colony nestled among ground cover. The only real limit is your willingness to experiment.
- Concrete mix or hypertufa blend for durable, weather-resistant sculptures
- Air-dry clay or polymer clay for detailed, lightweight decorative pieces
- Terracotta pots and saucers in various sizes for pot mushroom stacks
- Bowling balls or large smooth river rocks as ready-made cap bases
- Exterior acrylic paint and sealant for color and weather protection
- Wooden dowels, rebar, or PVC pipe for stems and structural support
- Foam carving blocks for lightweight large-scale statement pieces
- Mosaic tiles, glass gems, or mirror pieces for decorative embellishment
Choosing the Right Paint and Sealant for Outdoor Durability
The longevity of your garden mushrooms depends enormously on the quality of paint and sealant you choose. Exterior-grade acrylic paints are the go-to recommendation for most DIY crafters because they offer excellent UV resistance, flexibility during temperature fluctuations, and a broad range of colors that stay vibrant season after season. Avoid interior paints, which will crack and peel relatively quickly when exposed to rain, frost, and direct sun. Craft-store acrylic paints can work for pieces that will be brought indoors during winter, but outdoor-rated formulas are worth the investment for permanent installations.
Sealing your finished mushroom is non-negotiable if you want it to survive the elements. A good outdoor polyurethane or exterior varnish applied in two or three coats will shield your paintwork from moisture, UV degradation, and the general wear that comes with an outdoor life. Some crafters prefer a matte sealant for a more natural, organic look, while others choose a semi-gloss finish that makes colors pop and gives the surface a slightly dewy appearance, as if the mushroom has just emerged after rain. Whichever you choose, reapply the sealant annually to maintain maximum protection.

23 Creative Ideas to Inspire Your Garden Mushroom Project
With so many possible approaches, it helps to browse a curated selection of ideas before committing to a project. The following collection spans a wide range of styles, skill levels, and materials, so whether you have an afternoon and a few dollars to spare or a whole weekend and an ambitious vision, there is something here to spark your creativity. These ideas have been gathered from the most popular and highly saved DIY mushroom projects circulating in the crafting community, chosen for their originality, visual impact, and achievability for home crafters.
Some of the most beloved ideas include painting clusters of smooth river rocks in classic red-and-white polka-dot patterns and arranging them in the base of a flower bed for a low-maintenance, permanent display. Another crowd favorite involves stacking terracotta pots of descending sizes — a large one inverted for the cap, a smaller one right-side-up beneath it for the stem — sealed together with exterior-grade adhesive and then painted in any color palette that suits your garden’s mood. These simple pot mushrooms are among the easiest entry points for beginners and the results are reliably charming.
For those with more ambition, hypertufa mushroom sculpting produces results that genuinely look like natural stone fungi discovered in a woodland clearing. Carved foam mushrooms, coated in textured paint or cement, offer a way to create very large-scale statement pieces without the weight and cost of solid concrete. Mosaic mushrooms, covered in broken tile or stained glass fragments, catch the light in spectacular ways and can be customized to complement any outdoor color scheme. Recycled wine bottles, painted and arranged with their necks pressed into the soil, can suggest a glowing mushroom cluster when filled with solar fairy lights — a magical effect after dark.
- Painted river rock toadstool clusters for flower bed borders
- Stacked terracotta pot mushrooms in bold rainbow colors
- Hypertufa sculpted mushroom family groupings
- Carved foam giant statement mushrooms with textured paint
- Mosaic tile covered mushroom sculptures with mirror accents
- Bowling ball toadstools with hand-painted dot patterns
- Solar-lit wine bottle mushroom lantern clusters
- Concrete mushrooms cast in balloon molds for organic cap shapes
- Log slice and branch naturally shaped rustic mushrooms
- Painted garden stone mushroom stepping stone path markers
- Repurposed colander cap mushrooms with rebar stems
- Wire and papier-mâché mushrooms for sheltered garden spots
- Air-dry clay miniature fairy mushroom ring installations
- Upcycled metal bowl cap mushrooms with copper pipe stems
- Glow-in-the-dark painted mushrooms using phosphorescent outdoor paint
- Pinecone-textured concrete mushrooms for woodland gardens
- Driftwood base mushroom sculptures for coastal garden themes
- Crocheted mushroom covers for existing garden ornaments
- Giant papier-mâché mushroom playhouse for children’s gardens
- Painted cement block mushroom borders for raised garden beds
- Resin-cast translucent mushrooms for a glowing jewel effect
- Recycled tire mushroom seat sculptures for functional garden art
- Painted terracotta mushroom wind chimes with ceramic bead details
Sizing Your Mushrooms for Maximum Visual Impact
One of the most important and often overlooked decisions in any garden mushroom project is scale. A single small mushroom, however beautifully made, can easily get lost in a busy garden bed and fail to deliver the magical effect you are going for. Thinking carefully about the relationship between your mushroom’s size and its surroundings will dramatically improve the visual impact of your finished display. As a general rule, groups of three or more mushrooms in varied sizes tend to read as a cohesive, intentional installation rather than a stray ornament.
Large-scale mushrooms — those 18 inches or taller — make powerful focal points when positioned near a garden entrance, at the end of a path, or beside a water feature. Their presence commands attention and sets the tone for the entire garden’s aesthetic. Medium mushrooms work beautifully in transitional spaces, bridging the gap between major plantings and drawing the eye along a garden’s journey. Small mushrooms are best used in intimate clusters, tucked among ground cover or at the base of trees, where their diminutive scale feels natural and inviting rather than accidental.
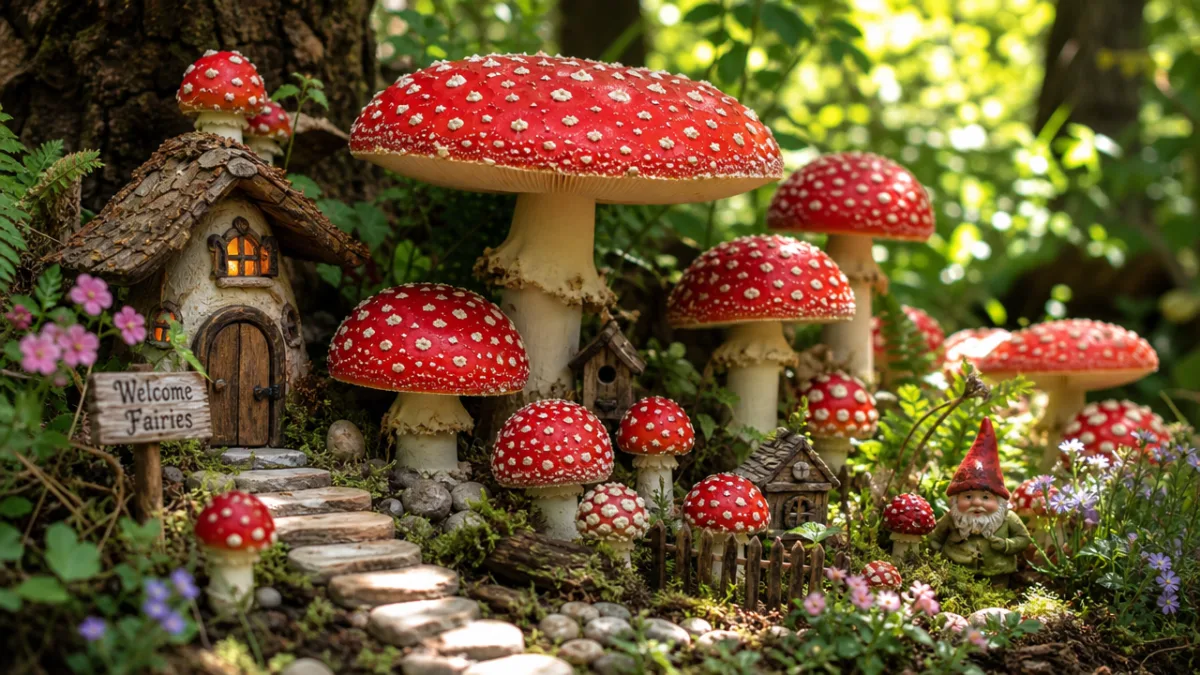
Step-by-Step Guide to Making Terracotta Pot Mushrooms
Terracotta pot mushrooms are the ideal starting project for anyone new to garden crafting. They require no special skills, minimal tools, and materials that are widely available and inexpensive. The finished result is reliably cheerful and weather-resistant when properly sealed, and the process itself is genuinely enjoyable, especially when done with children or friends. Before you begin, gather your materials and set up a comfortable workspace outdoors or in a well-ventilated area, as you will be working with adhesive and spray sealant.
Start by selecting two terracotta pots: a larger one that will become the mushroom cap and a smaller one that will form the stem. The larger pot should be roughly twice the diameter of the smaller one for the most natural-looking proportion. Clean both pots thoroughly and allow them to dry completely — any moisture trapped beneath the paint will cause premature peeling. Once dry, apply a base coat of exterior primer to both pots, which will help your color coats adhere more strongly and last longer in outdoor conditions. Allow the primer to cure fully before proceeding.
Once primed, paint the larger pot your chosen cap color — a classic bright red, a dreamy purple, a sunshine yellow, or anything your heart desires. Use at least two coats of exterior acrylic paint, allowing each to dry fully before applying the next. The stem pot can be painted white, cream, or a complementary color. Once the paint is completely dry, decorate the cap with polka dots, stars, spirals, or any pattern you love using a contrasting color and a round sponge tip or dotting tool. Seal both pieces with two coats of exterior-grade sealant, then join them together with a strong waterproof adhesive and allow to cure before placing outdoors.
Adding Personality with Painted Details and Embellishments
The detail work is where your mushroom truly comes to life and becomes a reflection of your personal aesthetic. Beyond the classic polka-dot pattern, consider adding painted faces to give your mushrooms character and charm — a simple pair of eyes and a small smile transforms a decorative object into a garden personality. Faux aging effects, achieved by dry-brushing a darker brown or gray over raised surfaces, give even freshly made pieces the appearance of having been weathered gracefully over many seasons, lending them an air of established magic.
Embellishments beyond paint can take a garden mushroom from charming to truly extraordinary. Small glass gems adhered to the cap catch sunlight and create a sparkling, jewel-like effect. Copper wire can be wound around stems for a steampunk or woodland witch aesthetic. Pressed flowers or leaves, sealed beneath a layer of clear resin, can be incorporated into the surface of flat-topped mushrooms for a botanical art quality. Tiny doors and windows, crafted from polymer clay or carved from balsa wood, can be attached at the base of the stem to suggest a fairy home, delighting visitors of all ages.
Styling Your Garden Mushroom Display for a Cohesive Look
Creating a collection of garden mushrooms is one thing; styling them into a cohesive, magical display is another skill entirely. The most effective mushroom gardens feel intentional and story-like, as if the mushrooms have naturally colonized particular spots rather than been placed there randomly. To achieve this effect, think about your garden as a stage and your mushrooms as characters within a scene. Consider their relationship to one another, to the surrounding plants, and to the larger landscape of your outdoor space.
Grouping mushrooms in odd numbers — threes, fives, or sevens — tends to feel more organic and visually pleasing than even groupings, which can look symmetrical and formal in a way that works against the whimsical aesthetic. Vary the heights within each group by using mushrooms of different sizes or by positioning some on slightly elevated ground, rocks, or tree roots. Interplanting your mushroom display with low-growing companions like moss, creeping thyme, hostas, or ferns reinforces the woodland fairy-tale atmosphere and helps the sculptures feel integrated into the garden rather than plopped on top of it.
Color cohesion is another important consideration when assembling a mushroom display from multiple projects made at different times. Choosing a consistent palette — for example, all warm tones of red, orange, and yellow, or a cool palette of blue, purple, and teal — will unify even a diverse collection of mushroom styles and sizes. If you enjoy making mushrooms in many different colors, consider gathering them into a designated “mushroom meadow” zone where the riot of color reads as an intentional celebration of variety rather than a disjointed collection. Adding a small hand-lettered garden stake or a tiny fairy door nearby reinforces the idea of a deliberately magical space.
Seasonal Care and Winterizing Your Garden Mushrooms
Even the most durably made garden mushroom benefits from a little seasonal care to extend its life and keep it looking its best year after year. At the end of each growing season, inspect all your mushroom sculptures for any signs of paint peeling, cracking, or surface damage caused by moisture infiltration. Small chips and cracks are easy to address with a touch of matching exterior paint and a fresh coat of sealant, and doing so in autumn prevents minor damage from becoming major deterioration over the freeze-thaw cycles of winter.
For mushrooms made from more vulnerable materials — painted rocks, pot mushrooms, or clay pieces — consider bringing them indoors or storing them in a sheltered shed or garage during the harshest winter months. Even a single severe freeze can crack terracotta or cause paint to lift in sheets if moisture has worked its way beneath the surface. Concrete and hypertufa pieces are generally more cold-hardy, but it is still worth moving them away from areas that experience standing water in winter, as prolonged submersion combined with freezing can eventually compromise even these robust materials.
Spring is the perfect time to refresh your collection, touching up paint colors that have faded in the sun and reapplying sealant across all surfaces. It is also the natural moment to add new mushrooms to your display, expanding the colony with fresh ideas inspired by another year of browsing and crafting. Many dedicated garden mushroom makers find that their collection grows organically each spring, with new pieces joining the garden family and the overall display becoming richer and more layered with every passing season. This slow accumulation is part of the joy — a garden mushroom collection is never truly finished, only ever evolving.
Where to Find Inspiration and Share Your Own Creations
The DIY garden mushroom community is one of the most generous and enthusiastic corners of the broader crafting world, and tapping into it is a wonderful way to stay inspired, troubleshoot challenges, and celebrate your own creations. Pinterest remains the single richest source of garden mushroom inspiration, with boards dedicated entirely to the subject gathering tens of thousands of saves and serving as ongoing, ever-expanding galleries of what crafters around the world are making. Searching terms like “DIY garden mushrooms,” “toadstool garden decor,” and “fairy garden mushrooms” will surface a virtually endless stream of ideas.
Instagram and Facebook groups for garden crafting and DIY outdoor décor are equally valuable, particularly because they tend to be more interactive and community-oriented than Pinterest. Members regularly share works in progress, ask for advice, and celebrate each other’s finished projects with enthusiasm that feels genuinely supportive rather than performative. Finding a group or two that aligns with your aesthetic — whether you lean toward naturalistic hypertufa sculptures or gloriously colorful painted pot creations — gives you a ready-made audience and a community of fellow enthusiasts who will understand exactly why you stayed up until midnight finishing one more mushroom cap.
YouTube tutorials have also become an invaluable resource for mushroom makers at every skill level, offering step-by-step visual guidance for techniques that can be difficult to follow from written instructions alone. Watching an experienced crafter mix and apply hypertufa, or seeing exactly how to achieve a convincing faux-aging effect with dry-brushed paint, can make the difference between a project that feels intimidating and one that feels completely within reach. Many tutorial creators are active in the comments sections of their videos, answering questions and offering encouragement to beginners — a reminder that behind every beautiful garden mushroom is a maker who started somewhere, probably with a terracotta pot and a pot of red paint.
Turning Your Passion into a Small Business or Community Project
For crafters who find themselves making mushroom after mushroom and running out of space in their own garden, turning the hobby into a small creative business is a natural next step. Handmade garden mushrooms sell consistently well at farmers markets, craft fairs, and on platforms like Etsy, particularly in spring and early summer when gardeners are actively looking for ways to refresh their outdoor spaces. Pricing should reflect the genuine time, skill, and materials involved, and photographing your pieces in a beautifully styled garden setting will help potential buyers envision the magic they could bring to their own yards.
Community garden mushroom projects offer another wonderful avenue for sharing the joy of this craft beyond your own backyard. Organizing a workshop at a local community garden, library, or school where participants make and install mushroom sculptures together creates a sense of shared ownership and collective creativity that enriches the whole neighborhood. Painted rock mushrooms arranged along a public walking trail, or a fairy mushroom installation in a community park, invite everyone who passes to experience that moment of delight and wonder — the same feeling that makes us fall in love with garden mushrooms in the first place, and the best possible reason to keep making more.








What do you think?
It is nice to know your opinion. Leave a comment.