










12 Cheap DIY Garden Path Ideas That Still Look Great
Why a Garden Path Makes All the Difference
A well-designed garden path does far more than simply guide your feet from one place to another. It creates structure, draws the eye through the landscape, and gives your outdoor space a sense of intentionality and care. Without a path, even a beautifully planted garden can feel chaotic or unfinished, like a room with no furniture arrangement. The moment you introduce a defined route through your green space, everything around it snaps into focus.
The good news is that creating a beautiful garden path does not have to cost a fortune. Many homeowners assume that professional-looking hardscaping requires professional budgets, but the truth is that some of the most charming and Pinterest-worthy paths are entirely homemade. With a little creativity, some elbow grease, and materials you may already have lying around, you can transform a muddy trail through your garden into something genuinely impressive.
This article brings together twelve of the best budget-friendly DIY garden path ideas, each one proven to look stunning while keeping costs low. Whether your style leans rustic and naturalistic or clean and contemporary, there is an approach here that will suit your outdoor space and your wallet. Let’s explore what is possible when creativity meets a tight budget.
Natural Stone and Stepping Stone Paths
Using Salvaged Flagstone
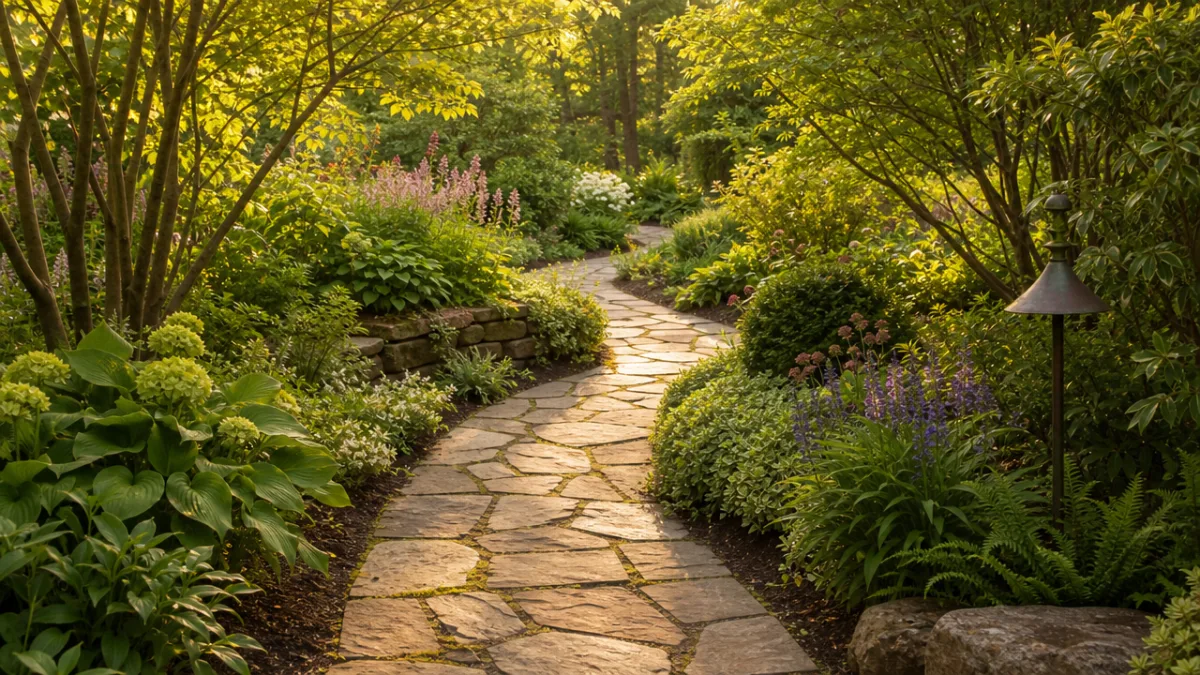
Salvaged flagstone is one of the most beautiful and affordable materials you can use for a garden path. Local stone yards, demolition sites, and even online marketplace listings often have irregular pieces of sandstone, slate, or limestone available for very little money — sometimes free if you are willing to collect them yourself. The irregular shapes actually work in your favor, giving the finished path an organic, timeless quality that looks like it has been there for decades.
To lay a flagstone path successfully, start by mapping your route with a garden hose or rope and removing the top layer of sod and soil to a depth of about three inches. Fill this channel with compacted sand or grit, which provides drainage and a stable base for the stones. Lay your flagstones with deliberate gaps between them — around an inch to two inches — and fill those gaps with creeping thyme, moss, or fine gravel for a polished, finished appearance that looks intentional rather than improvised.
The real magic of flagstone paths is how naturally they age. Over time, moss colonizes the gaps, the stones develop a patina, and the path seems to grow out of the garden rather than being placed upon it. This is exactly the aesthetic many gardeners spend considerable money trying to replicate, and here you can achieve it authentically, simply by being patient and choosing natural materials from the start.
Concrete Stepping Stone Molds
If sourcing natural stone sounds too uncertain, concrete stepping stone molds offer a wonderfully controllable alternative that still delivers a high-quality result. These plastic molds are available from garden centers for just a few dollars each, and a single bag of ready-mix concrete can fill several molds at once. The upfront investment is minimal, and the results can be surprisingly attractive, especially when you add texture, color pigment, or embedded pebbles to the surface before the concrete fully cures.
One particularly effective technique is to press seashells, smooth river pebbles, or even decorative glass beads into the wet concrete surface, creating personalized stepping stones that look like artisan garden art. You can also use a damp sponge to create a roughened texture that mimics natural stone. Adding a small amount of iron oxide pigment to your concrete mix before pouring will give the finished stones a warm, earthy tone that blends beautifully into planted borders.
The versatility of this method is hard to overstate. Because you are making the stones yourself, you have complete control over their size, shape, spacing, and finish. You can create a perfectly uniform, modern-looking path with evenly spaced round stones, or mix different sizes and shapes for a more eclectic, cottage-garden feel. Either way, nobody who walks along the finished path would ever guess that the stepping stones came from a plastic mold and a bag of cement.
Wood and Timber Path Solutions
Reclaimed Wood Plank Paths
Reclaimed timber planks make an exceptionally warm and inviting garden path material, and because you are sourcing salvaged wood rather than buying new, the cost is often negligible. Old scaffold boards, fence panels, decking offcuts, and even thick tree branches can all be repurposed into attractive path elements. The weathered texture and natural color variation in reclaimed wood creates a rustic, cottage aesthetic that is almost impossible to replicate with new materials, no matter how much you spend.
The practical key to success with wood paths is preparation. Even naturally durable timbers like oak or larch will rot prematurely if they sit in direct contact with wet soil without any treatment. Before laying your planks, brush the underside with a wood preservative or linseed oil, and consider laying a strip of landscape fabric beneath the path to suppress weeds and create a slight barrier between the wood and the ground. These simple steps can extend the life of your path by many years without adding significant cost.
Spacing your planks with small gaps between them, rather than laying them flush together, serves two practical purposes. First, it allows rainwater to drain away rather than pooling on the surface, which reduces slip risk and slows the deterioration of the wood. Second, those gaps invite moss and creeping plants to establish themselves, softening the edges and blending the path organically into the surrounding garden. The result is a path that looks beautifully considered and completely at home in its environment.
Log Slice Stepping Stones
Perhaps the most satisfying of all DIY garden path projects is the log slice path, and the materials cost almost nothing if you have access to fallen trees or know someone who does. Using a chainsaw or a handsaw, you simply cut sections from a log at around three to four inches thick, creating circular or oval wooden discs that are then set into the ground as stepping stones. The cross-section of a log reveals the growth rings within, giving each slice a naturally beautiful pattern that no manufactured product can match.
To prepare log slices for outdoor use, it is worth treating the cut surfaces with a wood hardener or a generous coat of exterior-grade decking oil. This helps seal the end grain, which is where moisture tends to enter most aggressively and cause splitting and rot. Setting the slices into a bed of sharp sand or gravel rather than directly into bare soil also helps enormously with drainage. Species like oak, sweet chestnut, and yew are particularly durable and will last many years with minimal maintenance.
The visual effect of a log slice path is extraordinary considering how little it costs to create. The circles of wood, with their rings and natural markings, create a rhythm through the garden that feels playful yet sophisticated. In a shaded area, moss will quickly colonize the surface of the slices, turning them a soft green that looks like something from a fairy tale. In a sunnier spot, the wood dries to a warm silver-grey that is equally appealing. Either way, the path becomes a genuine feature of the garden rather than merely a functional surface.
Gravel and Loose Material Paths
Pea Gravel and Border Edging
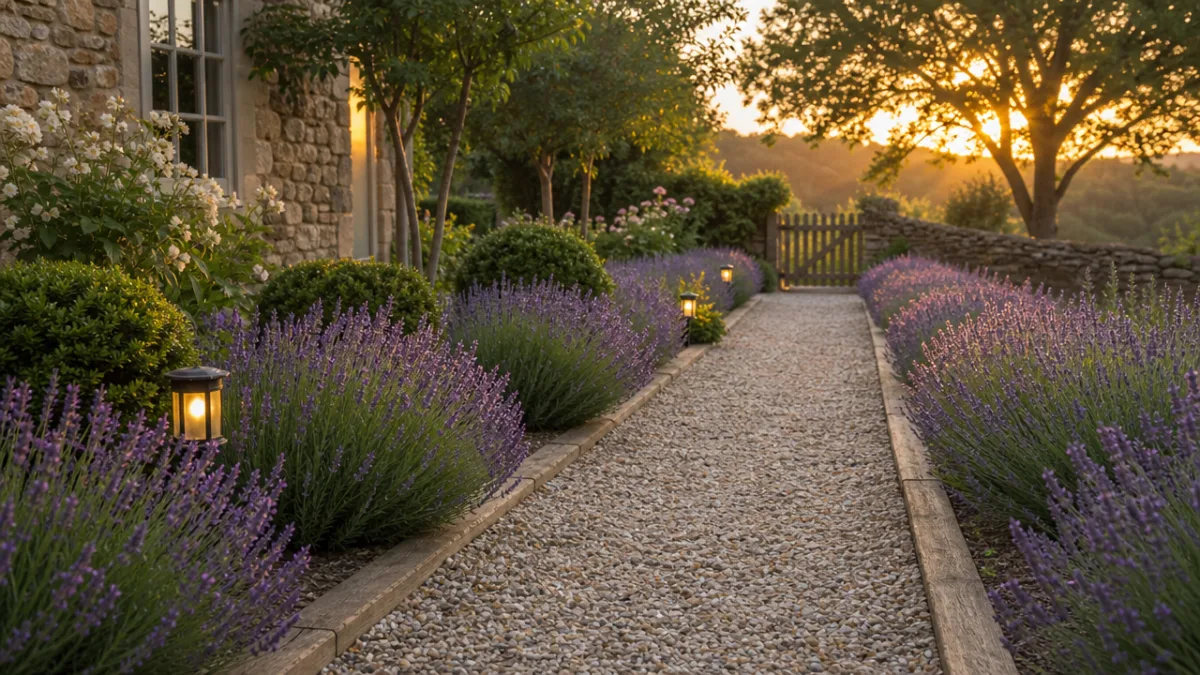
Gravel is one of the most cost-effective path materials available, and when laid correctly with proper edging and a weed-suppressing membrane beneath, it can look polished and well-maintained for years with very little upkeep. Pea gravel, with its smooth, rounded pebbles in warm cream and golden tones, is particularly popular because it reflects light beautifully and feels pleasant underfoot. A bag of pea gravel goes a long way, and it is available from most garden centers and builders’ merchants at very reasonable prices.
The secret to a gravel path that looks intentional rather than haphazard is good edging. Without a defined border, gravel migrates into surrounding beds and lawn within a single season, leaving the path looking bare and ragged. Simple wooden edging boards, metal lawn edging strips, or even rows of large cobblestones set vertically in the ground can all serve as effective and attractive borders. These edging options vary in cost, but even the simplest wooden board edging gives the path a clean, finished profile that elevates the overall effect.
One additional benefit of gravel paths is their excellent drainage, which makes them particularly suitable for gardens that experience heavy rainfall or have clay-heavy soil. Unlike solid paving, gravel allows water to percolate directly into the ground, reducing runoff and waterlogging. This makes gravel not only a budget choice but also an environmentally considered one, contributing to better water management in your garden without any additional effort or expense on your part.
Bark Chip and Woodchip Paths
Bark chip and woodchip paths are the perfect solution for informal, naturalistic garden spaces, woodland gardens, or areas beneath trees where grass struggles to grow. The material itself is often available for free or at very low cost — many local tree surgeons and arborists are glad to offload freshly chipped material rather than pay to dispose of it, and you can find such offers through local community groups and online platforms. Even purchased bark chip is among the cheapest path materials available by volume.
Laying a bark chip path is straightforward enough for anyone with a free weekend and a wheelbarrow. Lay landscape fabric along your path route first to suppress weeds, then pour the chips on top to a depth of at least three inches. This depth ensures the chips feel soft and springy underfoot, provides good insulation for the soil beneath, and gives the surface enough mass that it does not blow away in ordinary wind. Top up the chips every one to two years as they decompose, which also has the benefit of gradually improving the soil beneath.
The color and texture of fresh bark chips is genuinely attractive — a rich, warm reddish-brown that complements almost any planting style. Over time, as the chips weather and age, they shift to cooler grey-brown tones that blend softly into the surrounding landscape. In a woodland or cottage garden setting, this kind of path feels entirely natural, as though it evolved from the landscape rather than being deliberately placed there. That quality of naturalness is difficult to achieve with manufactured materials, no matter the budget.
Creative and Upcycled Path Ideas
Broken Paving and Crazy Paving
Broken paving, sometimes called crazy paving, transforms what would otherwise be waste material into something genuinely attractive. Broken concrete slabs, smashed terracotta tiles, pieces of old paving, and even fragments of brick can all be combined in a mosaic-like arrangement that has considerable visual charm. This approach is especially well-suited to gardens with a relaxed, eclectic character, and because you are essentially using waste material, the cost of the path itself can be zero if you source your pieces from skips, renovation sites, or your own garden clearance.
The technique requires a little patience but no specialist skills. Begin by laying out your pieces dry on the prepared path base, experimenting with different arrangements until you find one that pleases you and minimizes large gaps. Then bed each piece individually into a mortar mix, tapping it level with a rubber mallet. Once the mortar beneath has cured, fill the joints between the pieces with a stiff pointing mix, smoothing it neatly with a damp sponge. The finished path, once the mortar has dried and been brushed clean, looks genuinely impressive.
An alternative to mortar for a more relaxed, slightly softer look is to simply bed the broken pieces into sharp sand and fill the joints with fine gravel or soil into which you scatter seeds of creeping plants such as thyme, chamomile, or mind-your-own-business. This approach requires no mixing and no specialist knowledge at all, yet the finished result, once the plants begin to fill the gaps, is charming and appears as though it required considerable planning and skill. It is one of the most rewarding garden DIY projects you can undertake.
Wine Bottle Border Paths
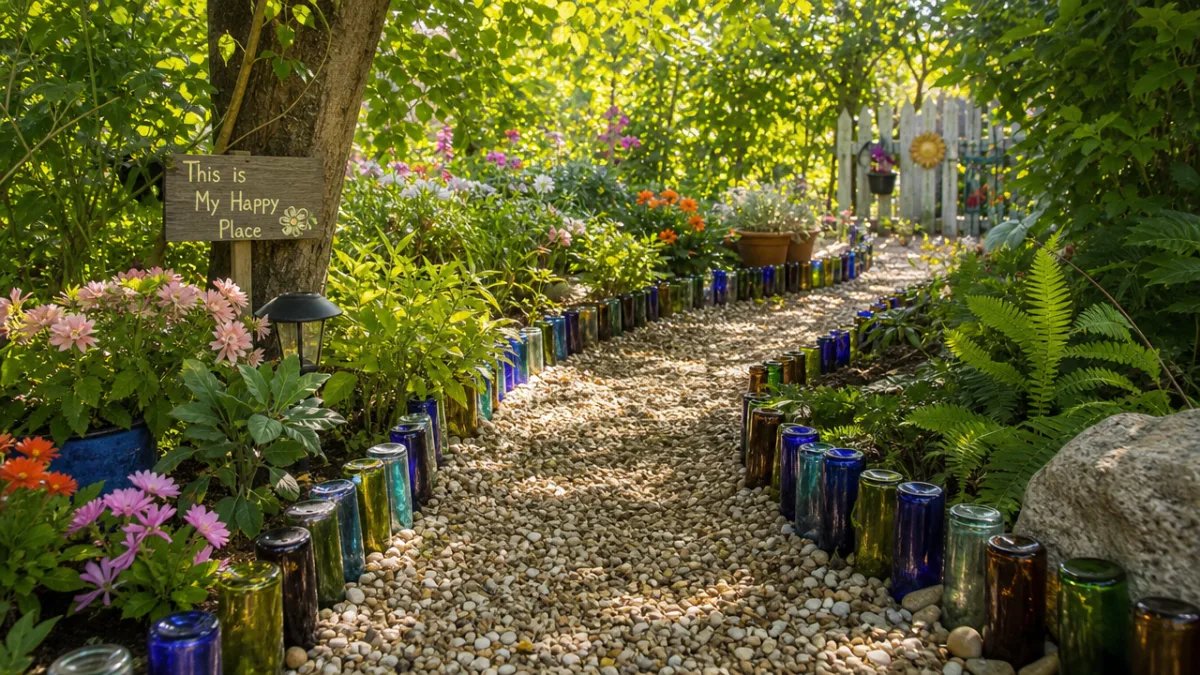
One of the more unexpected but genuinely effective upcycled path solutions involves using empty wine or beer bottles, buried neck-down in the soil, as both a path edging and a decorative element. The bases of the bottles, which remain visible above the soil surface, catch the light beautifully, especially if you mix green, brown, and clear glass for variety. This technique has a long history in folk and vernacular garden design, and it creates an effect that is simultaneously quirky and genuinely beautiful when done well.
To create a bottle-border path, dig a trench along your path edges about eight to ten inches deep and six inches wide. Place each bottle neck-down into the trench so that only the base protrudes above soil level — typically about an inch or two. Pack soil firmly around each bottle, then continue along the length of the trench until the entire border is edged. The space between the bottle borders can then be filled with any surface material you prefer: fine gravel, bark chip, sand, or even compact soil that you allow to grass over lightly.
The magical quality of glass bottle edging is how it changes with the light and weather. On a bright day, sunlight passes through the glass and creates gentle pools of color on the path surface. After rain, the wet glass gleams richly. Even in winter, the bottle tops catch the light from low sun and create points of interest in an otherwise dormant garden. This is a path that genuinely becomes a talking point, yet the materials cost nothing beyond the time it takes to collect enough bottles — usually six to twelve per meter of edging.
Making Your Path Last: Practical Tips for Every Budget
Planning and Preparation
No matter which path material you choose, the long-term success of your garden path depends far more on preparation than on the quality or cost of the surface material itself. A path laid directly onto unprepared ground, without weed suppression, without a stable base, and without adequate drainage consideration, will deteriorate quickly regardless of how attractive it looks on the day it is completed. Taking the time to prepare your route properly before you lay a single stone, plank, or handful of gravel is the single most important investment you can make in your path’s future.
Begin by marking out the route clearly and removing all vegetation, including grass roots, which will otherwise regenerate beneath your path surface and create an uneven, lifting effect over time. Excavate the path to a minimum depth of four inches across its entire width, and compact the resulting base firmly with a hand rammer or by treading it thoroughly with your feet. For paths that need to carry significant weight — a wheelbarrow route to a vegetable garden, for instance — a deeper base of four to six inches of compacted hardcore beneath your chosen surface material will significantly increase durability.
Landscape fabric, laid over the compacted base before your chosen surface material, is a relatively inexpensive addition that pays dividends over the life of the path. It allows water to drain through while preventing weed roots from establishing beneath the surface. This is particularly valuable for gravel and bark chip paths, where weeds would otherwise emerge through the loose material and require constant removal. A roll of good-quality woven landscape fabric represents a modest investment that will save you many hours of maintenance work over the coming years.
Maintaining Your Homemade Path
The maintenance requirements of your garden path will vary depending on the materials you have chosen, but all paths benefit from periodic attention to keep them looking their best. Gravel paths benefit from an annual raking to redistribute settled material and top up any areas that have become sparse. Bark chip paths need a fresh layer added every year or two as the material decomposes — though this decomposition is itself beneficial, gradually improving the soil beneath. Stone and concrete paths benefit from an annual scrub with a stiff brush and, where necessary, an application of patio cleaner to remove algae and moss.
Wooden paths require the most vigilant maintenance, particularly in damp climates where moisture and fungal decay can act quickly. Check wood plank paths annually for soft spots, splits, or loose fixings, and treat the surface with decking oil or wood preservative every second year. If individual planks or log slices become too deteriorated to be safe underfoot, replace them promptly — individual sections of a wood path are easy and cheap to replace, and staying ahead of deterioration prevents it from spreading to adjacent timbers.
Finally, pay attention to the edges of your path throughout the growing season. Grass and plants are remarkably persistent in their attempts to colonize path surfaces, and a quick trim with edging shears every few weeks during spring and summer will keep the path margins looking clean and intentional. This one simple maintenance habit makes an enormous difference to how professional a homemade path appears. A beautifully constructed path with overgrown, ragged edges looks neglected; the same path with neat, sharp edges looks cared for and considered, regardless of how modestly it was built.
- Weed regularly: Even with landscape fabric, some weeds will establish over time. Hand-pulling while they are small prevents them from becoming established and damaging your path surface.
- Top up loose materials annually: Gravel, bark chip, and sand all compact and disperse over time. An annual top-up keeps the depth and appearance consistent.
- Check drainage after heavy rain: If puddles form on or around your path, address the drainage issue before it causes structural damage to the surface material.
- Re-bed any rocking stones promptly: Loose stepping stones are a trip hazard. Lift them, adjust the sand beneath, and re-set them level at the first sign of movement.
- Trim path edges seasonally: Keeping the borders of your path sharply defined is the simplest and most effective way to maintain a polished, finished appearance.
Creating a garden path on a budget is genuinely one of the most rewarding weekend projects a gardener can undertake. The transformation from unmarked ground to a defined, attractive route through your outdoor space is immediate and dramatic, and the range of low-cost materials available means there is truly an approach to suit every garden style and every level of experience. Whether you choose the organic beauty of salvaged stone, the warmth of reclaimed timber, the simplicity of gravel, or the creativity of upcycled materials, the result will be a path that you are proud of — and that nobody would ever guess was made for next to nothing.








What do you think?
It is nice to know your opinion. Leave a comment.