










Two Ways to Make Balloon Flowers: A Complete Guide to Floral Balloon Art
Introduction to Balloon Flower Art
Balloon flowers are one of those things that just make people happy — kids, adults, everyone. Whether you’re a total beginner who just bought your first bag of twisting balloons or a seasoned crafter looking to try something new, making balloon flowers is genuinely fun to learn. It takes a little patience and practice, sure, but once things start clicking, you’ll be amazed at what you can pull off with a handful of long balloons and the right technique.
What makes balloon flowers so great is how versatile they are. You can scale them up or down, pair them with green stem balloons to build full bouquets, or turn them into centerpieces and wearable pieces like corsages and headbands. Party entertainers love them because once you’ve got the basics down, they come together fast — and kids absolutely light up when they get to take a handmade flower home. Even a simple five-petal daisy on a little twisted green stem can make someone’s whole day.
In this guide, we’re going to walk through two different ways to make balloon flowers. The first is the classic pinch-twist petal method — the traditional approach you’ll see taught in most beginner balloon twisting classes. The second is the round balloon stacking method, which uses a completely different balloon shape to create a fuller, more dimensional bloom. Both have their strengths, and by the time you finish reading, you’ll be ready to start practicing whichever one calls to you.
Understanding the Basics: Balloon Types and Tools You Will Need
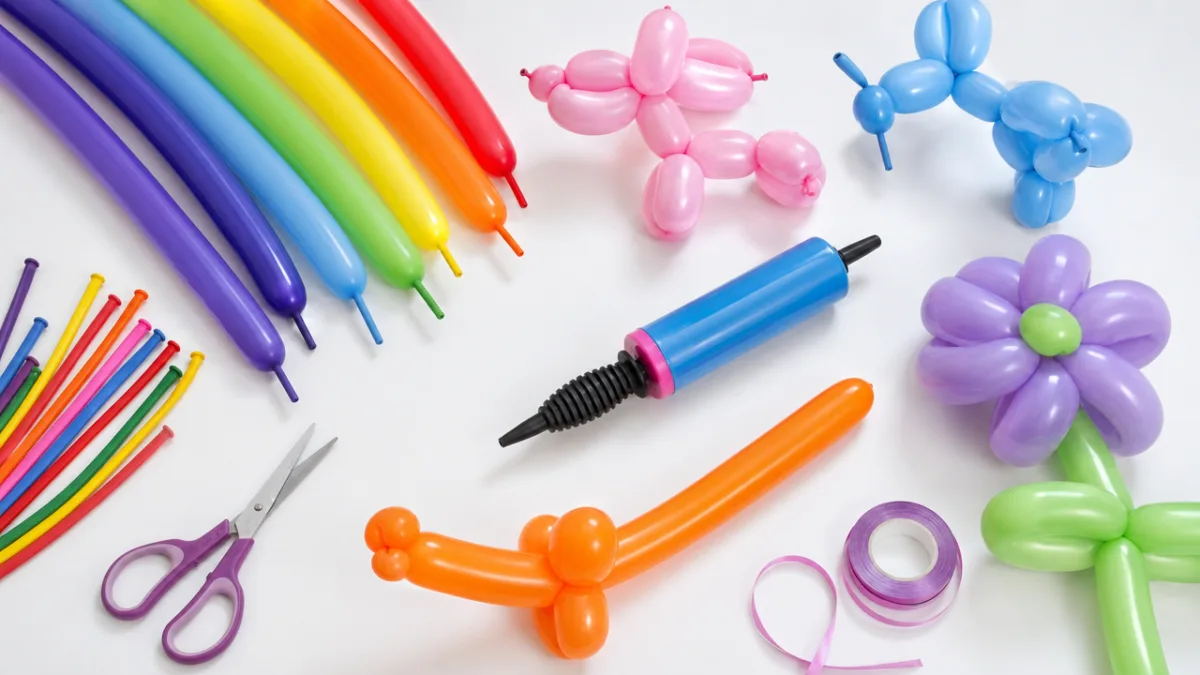
Before jumping in, it’s worth getting familiar with the materials. The most commonly used balloons for flower making are 260 balloons — the name comes from their dimensions: about two inches wide and sixty inches long when inflated. These long, slender balloons are the workhorse of the balloon twisting world, and you can grab them in bulk at craft stores or online. They come in a huge range of colors, so matching your flowers to a party theme or season is easy. For petals, you’ll want vibrant pinks, reds, yellows, purples, and whites, and green is a must for stems and leaves.
For the round balloon stacking method, you’ll need five-inch or eleven-inch round balloons depending on how large you want the finished flower to be. Smaller ones give you a compact, dense bloom, while larger ones make a real statement piece. You’ll also want a hand pump — trying to inflate these by mouth gets tiring fast and makes it hard to keep sizes consistent. A decent hand pump is one of those purchases you won’t regret; it’ll save your breath and give you much better control over firmness, which matters more than you’d think when it comes to how your flowers hold together.
A few other helpful things to have on hand: a permanent marker if you want to add little details, clear fishing line or floral wire for attaching flowers to sticks or arranging them in vases, and a small spray bottle of water to cut down on static when you’re working with a bunch of balloons at once. Some artists also keep balloon-safe adhesive or small rubber bands nearby for extra security when connecting clusters. Getting your workspace organized and your colors sorted before you start makes the whole process a lot smoother.
Method One: The Classic Pinch-Twist Petal Flower
The pinch-twist petal method is the foundation of balloon flower making, and it’s what you’ll see most often at birthday parties and festivals. To start, inflate a 260 balloon leaving about a three to four inch uninflated tail at the end. That tail is really important — as you twist and shape the balloon, air shifts around, and having that extra room keeps it from popping under the pressure. Tie off the nozzle end securely, then hold the balloon so the tied end is in your dominant hand.
To form the first petal, pinch the balloon about three inches from the tied end and fold it back on itself to make a loop. Twist the base of that loop several times to lock it in place — this move is called a pinch twist or ear twist, and it’s the signature technique of this whole method. Repeat that four more times until you have five evenly sized petal loops arranged around a central point. When you hold the finished flower up, the petals should fan out naturally, giving you a classic five-petal daisy or a simple rose shape, depending on how tight or loose you made each loop.
To finish things off, grab a green balloon for the stem and leaves. Inflate a green 260 balloon about two thirds of the way, leaving a good tail at the end. Fold it into thirds and twist the three sections together at their midpoints to form two leaf shapes on either side of a central stem. Thread the bottom of your petal balloon through the center of that leaf-and-stem assembly and adjust everything until the flower sits nicely on top. Once you’ve practiced a bit, the whole thing takes about ninety seconds — which is exactly what you need when you’ve got a long line of kids waiting at an event.
Step-by-Step Breakdown of the Pinch-Twist Method
Breaking the pinch-twist flower down into a clear sequence makes it a lot easier to learn — and to teach. Following these steps methodically when you’re first starting out helps build the muscle memory that’ll eventually let you work quickly without thinking through every move. Here’s the numbered sequence to use in your practice sessions.
- Inflate a 260 balloon to roughly fifty inches, leaving a three to four inch uninflated tail, and tie off the nozzle.
- Starting about two inches from the tied end, measure a three-inch section and fold it into a loop, twisting the base to lock it — that’s your first petal.
- Make four more identical pinch-twist loops, spacing them evenly along the balloon.
- Pull all five loops together so their bases line up at the center, and give the middle point a firm twist to lock the flower shape in place.
- Prepare a green 260 balloon for the stem by inflating it to about forty inches and forming two pinch-twist leaf loops near the top.
- Thread the tied end of the flower balloon through the center of the leaf assembly and secure everything with a firm twist.
- Gently pull and adjust each petal loop until you’re happy with how it looks.
One of the most common struggles for beginners is keeping the petals the same size. A simple trick: use your thumb and index finger as a measuring gauge and pinch the balloon at the same distance every single time before forming the loop. Also make sure your twists are tight before moving on to the next petal — loose twists tend to unravel as you work, which is frustrating and wastes balloons. Don’t get discouraged if your first few flowers look a little lopsided; evenness comes naturally with repetition.
Color makes a bigger difference than most people expect. Pastels like lavender, peach, and baby pink give you a soft, romantic look that’s perfect for weddings and baby showers. Bolder, saturated colors like fire red, bright yellow, and electric purple feel festive and energetic — great for birthdays and carnival-style events. You can also try marbled or tie-dye 260 balloons, which give each petal its own color gradient and make the flower look especially handcrafted and lush.
Method Two: The Round Balloon Stacking Method
The round balloon stacking method produces a totally different kind of balloon flower — rounder, fuller, and more like a peony or chrysanthemum than the flat daisy you get from the pinch-twist approach. It’s especially popular with balloon decorators working on centerpieces, photo backdrops, and table arrangements because the finished flowers have serious visual presence. Instead of twisting one long balloon into petal shapes, you inflate and stack multiple small round balloons around a central anchor point to build up layers of color and dimension.
To get started, inflate five five-inch round balloons in your petal color of choice, each to about four inches in diameter. You want them firm but not rock hard — overly tight balloons are more likely to pop when you push them together. Tie each one off, then tie pairs together at their necks to make what balloon artists call a duplet. Take two duplets and twist them together at the center to create a four-balloon cluster, which is the basic building block of this style. Your fifth balloon gets added in the next step to complete the flower’s core.
Now inflate one small round balloon in a contrasting color to serve as the flower’s center — think of it as the stamen or button in the middle of a real bloom. Tie this center balloon to the base of your four-balloon cluster and position it so it sits a little raised above the four petals. For a fuller look, make a second cluster of five round balloons in the same or a complementary color and attach it underneath the first, offsetting the petals so they nestle in between the ones above. That layering is what gives this style of balloon flower its distinctive, lush, three-dimensional look.
Comparing the Two Methods and Choosing the Right One for Your Project
Now that you know both techniques, it’s worth thinking about which one fits what you’re trying to do. The pinch-twist method is at its best when speed and portability matter. A skilled balloon artist can knock out a pinch-twist flower in under two minutes, and the finished flowers are lightweight, self-standing on their twisted stems, and easy to hand out individually. It’s the go-to for balloon artists and face painters at events where there’s a steady line of kids and you need to keep things moving.
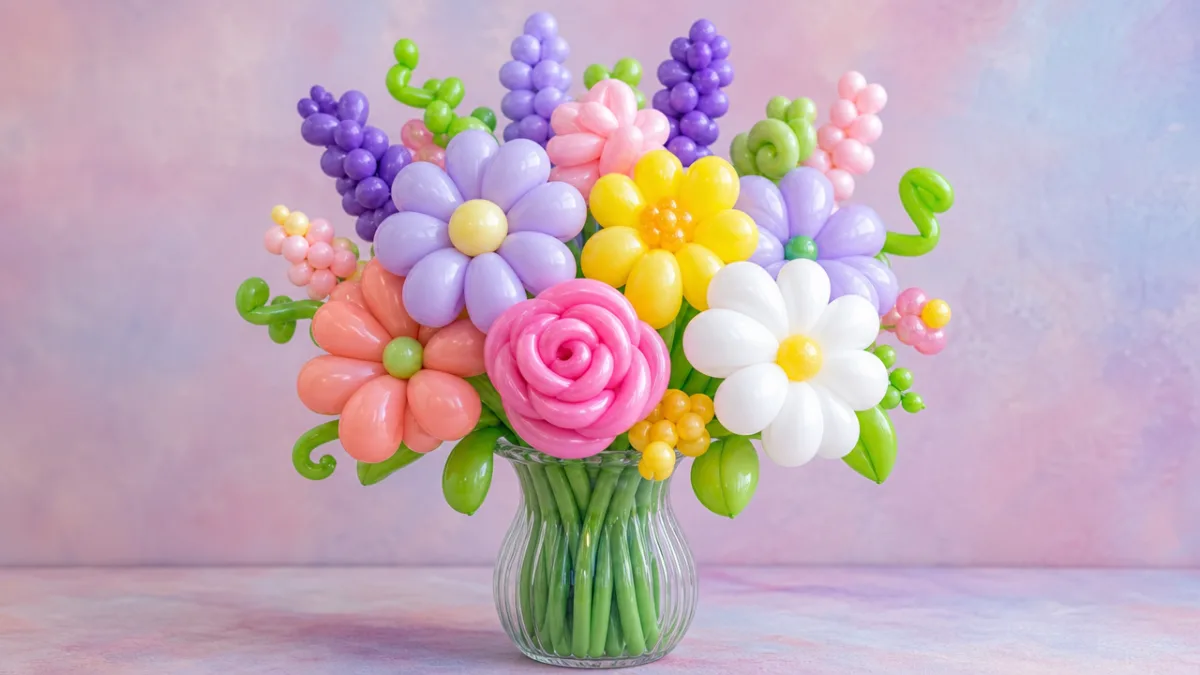
The round balloon stacking method is a different story — it’s better suited for decorative applications where visual impact is the whole point and you’re not racing the clock. A stacked flower takes more time and more balloons to build, but what you end up with is a showpiece that commands attention from across the room. Large stacked flowers in complementary colors make stunning photo booth backdrops, wall installations, and oversized table centerpieces. That kind of scale and dimension is just something the pinch-twist approach can’t match.
A lot of experienced balloon artists use both methods in the same project — pinch-twist flowers for bouquet hand-outs, stacked flowers for backdrop decoration. Knowing both techniques also makes you a more flexible artist who can adapt to whatever a client or event calls for. And as you get more comfortable, you’ll naturally start experimenting with combinations: adding pinch-twist accent petals around the base of a stacked flower center for extra texture, or mixing in foil balloons as leaves for a mixed-media arrangement.
Tips for Perfecting Your Balloon Flowers and Avoiding Common Mistakes
Practice is everything when it comes to improving your balloon flower skills, but practicing with good habits from the start will save you from picking up patterns that are hard to undo later. One of the most important things to get into the habit of is keeping your balloons slightly underinflated rather than blown up to maximum. A fully inflated balloon has almost no flexibility and will pop at the slightest stress point. Inflating to about eighty percent of capacity leaves enough give for twisting, shaping, and manipulating without things going bang — and this matters even more in warm or humid environments where balloons are already under extra strain.
Another mistake that catches a lot of beginners is twisting in inconsistent directions. When you lock a balloon joint, you need at least three full rotations in the same direction to hold it securely. If you switch — clockwise for one joint, counterclockwise for the next — your earlier joints will start unwinding as you work and the whole thing can fall apart. Practice always twisting in one direction until it’s automatic. Some artists quietly count rotations as they go just to make sure they always hit that minimum of three.
Here are some additional tips to keep in mind as you develop your balloon flower craft:
- Store unused balloons somewhere cool and dark, away from sunlight and heat. UV exposure and warmth break down latex, making balloons much more likely to pop when you actually go to use them.
- Keep your fingernails trimmed or wear thin latex gloves while working — jagged edges are one of the most common culprits behind accidental pops.
- Practice on less expensive balloons before moving on to premium or specialty ones, so early mistakes don’t eat through your best materials.
- After finishing a flower, step back and look at it from a few feet away. Something that looks fine up close can appear uneven or lopsided from a distance, and it’s good to check before you hand it over or put it on display.
- Try mixing metallic or pearl-finish balloons with matte ones to add visual richness and variety to your arrangements.
One last thing: don’t underestimate how much you can learn from other people. Online video tutorials, balloon twisting forums, and local balloon art workshops are all fantastic for picking up new tricks, troubleshooting problems, and getting inspired. The balloon art community is genuinely one of the most welcoming and generous creative communities out there — people love sharing what they know, and even following a few social media groups can speed up your learning considerably. Ultimately, making balloon flowers is supposed to be joyful, so bring that playful energy into every practice session and you’ll improve faster than you think.








What do you think?
It is nice to know your opinion. Leave a comment.