










Mastering Hoya Care: Expert Tips for Thriving Wax Plants Indoors
Understanding Hoya Plants: A Brief Introduction
Hoyas, commonly known as wax plants, are a remarkable genus of tropical flowering vines and shrubs that have captivated houseplant enthusiasts for decades. Native primarily to Asia and Australia, these plants belong to the subfamily Asclepiadoideae and encompass over 500 recognized species, each with its own unique leaf shape, texture, and flowering habit. Their thick, waxy leaves — which give them their popular common name — serve as natural water reservoirs, making them surprisingly forgiving plants once you understand their basic needs.
What sets Hoyas apart from many other common houseplants is their dual appeal: they are both easy-care foliage plants and spectacular bloomers when given the right conditions. The flowers themselves are nothing short of extraordinary, forming perfect geometric clusters called umbels that can resemble something sculpted from porcelain or sugar. Many species produce blooms with a sweet, sometimes intoxicating fragrance that intensifies in the evening hours, making them a genuinely multi-sensory addition to any indoor garden. Species like Hoya carnosa, Hoya kerrii, and Hoya pubicalyx are among the most widely cultivated and beloved.
Beyond their aesthetic appeal, Hoyas are also celebrated for their longevity. These are not fleeting seasonal houseplants — a well-cared-for Hoya can live for decades, becoming a treasured heirloom passed between generations of plant lovers. Many gardeners report inheriting grandmother’s Hoya, still blooming faithfully after forty or fifty years. This remarkable lifespan, combined with their relatively low maintenance requirements and stunning visual impact, makes them an ideal choice for both beginner and seasoned indoor gardeners alike who want a plant that truly grows with them.
Light Requirements: Finding the Perfect Spot
Light is perhaps the single most important factor in successful Hoya cultivation, and getting it right will determine whether your plant merely survives or genuinely thrives. Hoyas are best described as bright indirect light lovers — they want as much gentle, filtered luminosity as you can offer them, but direct harsh sunlight, particularly the intense afternoon rays of a south-facing window in summer, can scorch their leaves and cause irreversible damage. An east-facing window is often considered the gold standard placement, delivering bright morning light that energizes the plant without the heat stress of midday or afternoon sun.
For those working with west or south-facing windows, a sheer curtain can make all the difference, diffusing direct sun into the soft, bright ambient light that Hoyas crave. North-facing rooms present the opposite challenge, offering too little light to sustain vigorous growth or flowering, although some of the more shade-tolerant species like Hoya curtisii or Hoya lacunosa can manage reasonably well with supplemental grow lighting. In general, the more variegated or splash-patterned a Hoya’s leaves are, the more light it typically needs to maintain those distinctive markings and produce blooms reliably.
A useful rule of thumb is to observe your Hoya’s growth over time as a diagnostic tool. A plant stretching toward the window with long, spindly stems and widely spaced leaves — a condition called etiolation — is clearly reaching for more light than it’s receiving. Conversely, leaves that look washed out, develop pale patches, or feel unusually warm to the touch may be telling you they’re getting too much direct sun. Learning to read these visual cues allows you to make gradual adjustments that keep your Hoya in the optimal light zone where it will reward you most abundantly.

Watering and Humidity: Striking the Right Balance
One of the most common mistakes new Hoya owners make is overwatering, and it is by far the leading cause of plant decline in this genus. Because Hoyas store water in their thick, succulent-like leaves, they are far more drought-tolerant than most people expect. A general guideline is to water thoroughly but infrequently — allow the top inch or two of soil to dry out completely before reaching for the watering can. During the active growing season of spring and summer, this might mean watering once every seven to ten days, while in winter the plant may only need attention every two to three weeks or even longer.
The quality and temperature of the water you use also matters more than many growers realize. Hoyas are sensitive to the fluoride and chlorine found in municipal tap water, which over time can cause brown leaf tips and marginal scorching that are often mistaken for signs of low humidity. Allowing tap water to sit overnight in an open container lets the chlorine dissipate, and some dedicated growers use rainwater or filtered water for their most prized specimens. Water temperature is equally important — always use room temperature water, as cold water can shock the root system and cause leaf drop, particularly in cooler months.
Humidity is another variable that significantly influences Hoya health and flowering performance. As tropical plants, most Hoyas prefer relative humidity levels between 40 and 60 percent, though many species are admirably adaptable to the drier conditions typical of heated or air-conditioned homes. If your indoor environment is particularly dry, grouping your Hoyas with other plants creates a microclimate with elevated humidity through collective transpiration. Alternatively, a small humidifier placed nearby can make a dramatic difference during dry winter months. Misting, while popular, is generally less effective and can occasionally encourage fungal issues if foliage stays wet overnight.
Soil, Potting, and Root Health
Hoyas are epiphytes or semi-epiphytes in their natural habitat, meaning they often grow on or near trees rather than rooting deeply into rich ground soil. This origin story explains their need for an airy, fast-draining growing medium that allows oxygen to reach the roots between waterings. A standard potting mix used alone is too dense and moisture-retentive for most Hoyas and dramatically increases the risk of root rot, which can silently destroy a plant before any above-ground symptoms become visible. Amending your mix is essential for long-term success.
An excellent all-purpose Hoya substrate can be created by combining standard potting mix with perlite or pumice in roughly equal parts, then adding a portion of orchid bark or coco coir to improve texture and drainage while still retaining just enough moisture at the root zone. Some growers working with particularly rot-prone species prefer an even chunkier mix with more bark and less potting soil. The goal in every case is a medium that drains freely when watered but doesn’t become completely hydrophobic when dry — striking this balance is one of the foundational skills of successful Hoya cultivation.
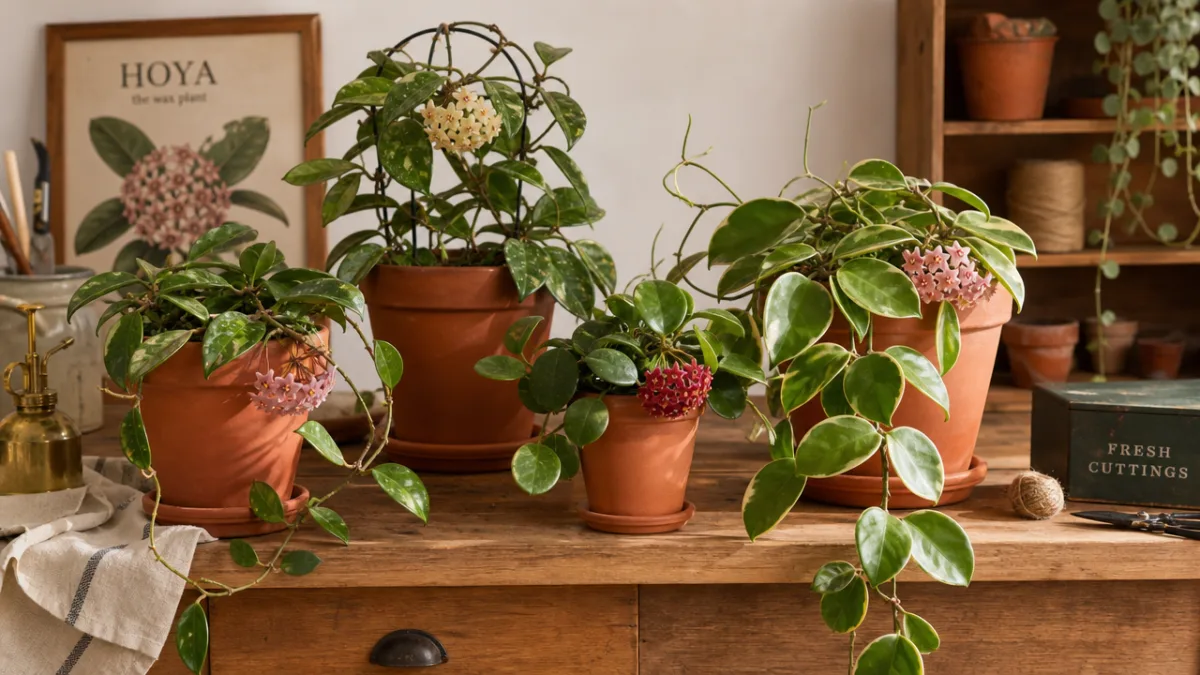
Pot choice plays an equally important role in maintaining healthy roots. Terracotta pots are widely recommended for Hoyas because their porous walls allow moisture to evaporate through the sides, effectively reducing the window of time that roots sit in damp conditions. Plastic and glazed ceramic pots retain moisture much longer and require correspondingly less frequent watering to avoid waterlogging. Regardless of material, always ensure your pot has at least one adequate drainage hole — growing Hoyas in containers without drainage is a recipe for root rot even with the most careful watering habits. Hoyas also tend to bloom better when slightly root-bound, so resist the urge to upsize your pot too frequently.
- Perlite or pumice: improves drainage and aeration, prevents compaction over time
- Orchid bark: adds chunky texture that mimics epiphytic growing conditions
- Coco coir: retains some moisture without compacting, a sustainable peat alternative
- Worm castings: a gentle organic amendment that slowly releases nutrients into the root zone
Fertilizing and Encouraging Blooms
Feeding your Hoya correctly is what separates a plant that simply exists from one that grows vigorously and produces its legendary clusters of star-shaped flowers year after year. During the active growing season — generally spring through early autumn — Hoyas benefit from regular fertilization with a balanced liquid fertilizer diluted to half the recommended strength, applied every two to four weeks. Using a fertilizer at full strength on these relatively sensitive plants can lead to fertilizer burn, manifesting as brown, crispy leaf margins that are both unsightly and permanent on the affected leaves.
When your goal is to encourage flowering specifically, many experienced Hoya growers recommend transitioning to a fertilizer with a higher phosphorus ratio — the middle number in the N-P-K formula — in the months leading up to and during the plant’s typical bloom season. Phosphorus is the nutrient most directly associated with flowering and root development, and giving your Hoya a gentle boost can tip the balance toward bud production. Some growers swear by organic fertilizers like fish emulsion or liquid seaweed during this period, appreciating both their gentleness on roots and their broad spectrum of trace minerals not always found in synthetic formulas.
One of the most important and counterintuitive rules of Hoya flowering is to never remove the spent flower spurs, known as peduncles. These short, woody stalks emerge from the nodes of the plant and produce flower clusters repeatedly over many years, and cutting them off — even after flowers have faded — eliminates future blooming potential from that spur forever. This is a mistake many new Hoya growers make once and learn from emphatically. Mark your peduncles with a small twist of colored yarn if needed to remind yourself and others in your household to leave them undisturbed through all seasons.
- Use a balanced fertilizer at half-strength every two to four weeks during spring and summer
- Transition to a higher-phosphorus formula to encourage bud set and flowering
- Suspend fertilization entirely during winter when growth naturally slows
- Never remove peduncles — these woody spurs are the source of repeat blooms
- Flush the soil with plain water every few months to prevent salt buildup from fertilizer residue
Common Pests, Problems, and How to Solve Them
Even the most attentive plant parent will eventually encounter a pest or cultural problem with their Hoya collection, and knowing how to identify and respond quickly is essential for keeping plants healthy. Mealybugs are among the most frequently reported Hoya pests — small, soft-bodied insects that cluster in the joints and undersides of leaves, covered in a white cottony wax that makes them easy to recognize once you know what to look for. They feed by sucking plant sap, causing stunted growth, yellowing, and a sticky residue called honeydew that can invite secondary fungal infections. Catching them early makes treatment significantly easier and more successful.
Spider mites are another common threat, particularly in dry indoor environments during winter months when central heating reduces humidity significantly. These tiny arachnids are often difficult to spot with the naked eye, but their presence is revealed by fine webbing on stems and leaf undersides and a characteristic stippled, dusty appearance to the foliage as their feeding damages individual cells. A strong blast of water in the shower can dislodge a minor infestation, while more persistent cases respond well to neem oil spray or insecticidal soap applied consistently every five to seven days for several weeks to break the lifecycle of new hatching eggs.
Root rot caused by overwatering and poor drainage remains the most serious and potentially fatal problem affecting Hoyas, and it is especially insidious because it progresses underground long before visible symptoms appear above the soil line. By the time leaves begin to yellow, wilt, or drop for no apparent reason, significant root damage may already have occurred. If you suspect root rot, unpot the plant immediately and inspect the root ball — healthy roots should be white or tan and firm, while rotten roots are brown to black, mushy, and may smell unpleasant. Remove all compromised roots with clean scissors, allow the remaining healthy roots to air dry for a few hours, then repot into fresh, dry, well-draining medium and hold off watering for at least a week to allow any cuts to callous over.

Propagation: Multiplying Your Collection
One of the great pleasures of growing Hoyas is how readily most species can be propagated, allowing you to expand your collection, share plants with friends, or simply create insurance copies of particularly prized specimens. Stem cuttings are by far the most reliable and widely used propagation method, and the process is refreshingly simple. Select a healthy stem with at least two nodes — the small bumps or joints along the stem from which leaves and roots emerge — and use a clean, sharp pair of scissors or pruning shears to make your cut just below a node. Remove the lower leaves to expose the node that will be submerged in your chosen rooting medium.
Water propagation has become enormously popular thanks to its simplicity and the satisfaction of watching roots develop visibly in real time. Place your prepared cutting in a small glass or jar of clean water, ensuring that the node is submerged but the leaves remain above the waterline to prevent rotting. Position the glass in bright indirect light and change the water every few days to keep it fresh and oxygenated. Most Hoya cuttings will show their first root nubs within two to four weeks, and once roots reach an inch or two in length, the cutting can be transitioned into a well-draining potting mix. Water-rooted cuttings sometimes require a brief adjustment period as they develop soil-adapted roots, so keep the medium slightly more moist than usual for the first few weeks.
Sphagnum moss propagation is another highly effective method, particularly favored for more difficult or slow-rooting species. Wrap a pre-moistened clump of long-fiber sphagnum moss around the node of your cutting, then enclose the whole arrangement loosely in a clear plastic bag to maintain high humidity around the developing root zone. Place this in bright indirect light and check every few days to ensure the moss stays damp but not waterlogged. This method often produces robust, well-developed roots more quickly than water alone and with less transplant shock than other approaches, making it a favorite technique among serious collectors propagating rarer or more valuable Hoya varieties.
Leaf propagation, while less reliable and significantly slower than stem cuttings, is possible with certain Hoya species and makes for a fascinating long-term project. A single Hoya kerrii leaf, for instance — the iconic heart-shaped leaf often sold as a Valentine’s Day novelty — will root readily in soil or water but will only develop into a full plant if it includes a piece of stem with a node attached. This is why the single-leaf Hoyas sold in small pots so rarely develop further: without that node, there is no growing point from which new stems can emerge. This distinction illustrates why understanding the anatomy of your cutting is as important as any other aspect of the propagation process.








What do you think?
It is nice to know your opinion. Leave a comment.