










How To Plant Muscari Bulbs: The Complete Grape Hyacinth Planting Guide
What Are Muscari (Grape Hyacinths) and Why You Should Grow Them
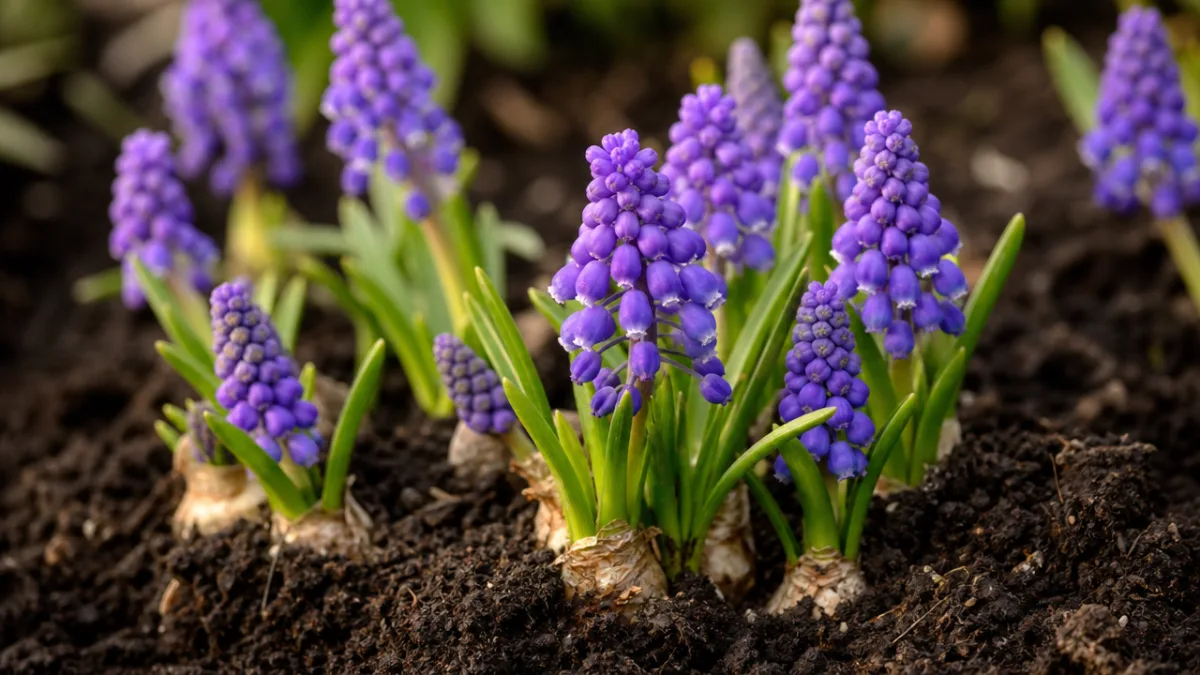
Muscari, commonly known as grape hyacinths, are among the most charming and rewarding spring-blooming bulbs you can add to your garden. These small but mighty plants produce dense clusters of tiny, bell-shaped flowers that resemble miniature bunches of grapes, arranged on upright spikes that typically reach four to eight inches in height. Their signature color is a rich, jewel-toned blue-purple, though varieties exist in white, pink, and even bicolor shades that can add surprising versatility to any planting scheme.
Native to the Mediterranean region and parts of Asia, Muscari have naturalized beautifully across temperate climates worldwide. They belong to the Asparagaceae family and thrive in USDA hardiness zones 3 through 9, making them accessible to gardeners across a broad geographic range. Their adaptability is one of their greatest strengths — they tolerate a range of soil conditions, require minimal maintenance once established, and return reliably year after year with very little intervention from the gardener.
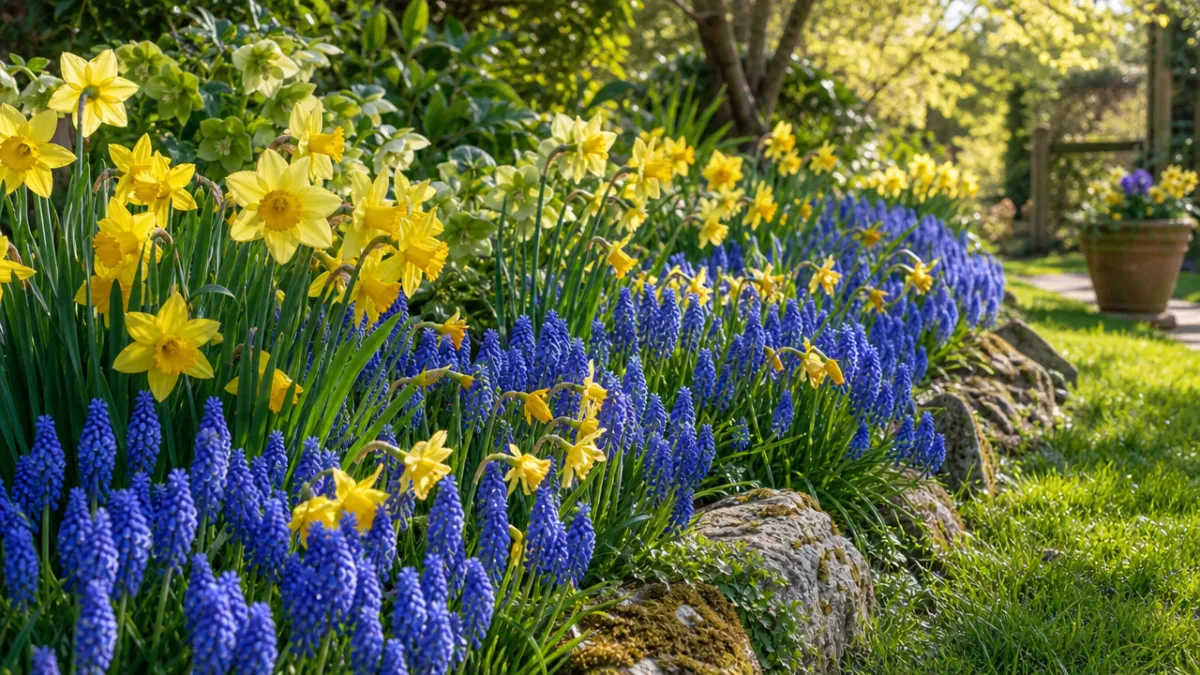
One of the most compelling reasons to grow grape hyacinths is their ability to multiply and naturalize over time. A small planting of ten to twenty bulbs can gradually spread into a breathtaking carpet of color that fills gaps between shrubs, edges pathways, or weaves through a lawn. They are also excellent companions for tulips, daffodils, and other spring bulbs, providing a low-growing blue underplanting that beautifully contrasts taller bloomers. For gardeners seeking maximum impact with minimal effort, Muscari are practically unbeatable.
Choosing the Right Muscari Varieties for Your Garden
Before you head to the garden center or order online, it is worth taking a little time to explore the range of Muscari varieties available, as the selection has expanded considerably in recent years. The classic species, Muscari armeniacum, remains the most widely grown and is celebrated for its intensely blue-violet flower spikes and vigorous spreading habit. It blooms in mid-spring alongside mid-season tulips, creating some of the most iconic color combinations in the spring garden. Its reliable performance and affordability make it an excellent choice for large-scale naturalistic plantings.
For something a little different, Muscari latifolium offers a bicolor effect with dark violet flowers at the base and lighter, sky-blue sterile flowers at the top of each spike. This unusual graduated effect makes it stand out as a focal point in a mixed border or container planting. Another standout is Muscari botryoides ‘Album,’ a pure white form that brings an elegant and unexpected freshness to spring displays. It pairs beautifully with blue varieties planted nearby and adds a luminous quality to shaded garden areas where it can glow in softer light.
If you are interested in extending the season of interest, consider planting a mixture of early, mid, and late-blooming varieties. Muscari aucheri ‘Ocean Magic’ blooms early with bright turquoise-blue flowers, while Muscari ‘Peppermint’ produces unusual white flowers lightly touched with blue at the tips. For a feathery, plume-like texture that differs entirely from the typical grape cluster form, Muscari comosum ‘Plumosum,’ known as the feather or tassel hyacinth, is a fascinating choice that always draws admiring comments from garden visitors. Planning a thoughtful variety mix ensures your display remains vibrant across a broader portion of the spring season.
When and Where to Plant Muscari Bulbs
Timing is everything when it comes to planting spring-flowering bulbs, and Muscari are no exception. The ideal planting window falls in autumn, typically from September through November in the Northern Hemisphere, depending on your climate zone. The goal is to plant bulbs after the summer heat has passed but with enough time remaining before the ground freezes hard for the roots to establish themselves. A soil temperature of around 40 to 50 degrees Fahrenheit at planting depth is generally considered optimal for encouraging healthy root development before dormancy sets in.
When selecting a planting location, sunlight is the primary consideration. Muscari perform best in full sun to partial shade, receiving at least four to six hours of direct sunlight per day. In warmer climates, a spot with some afternoon shade can actually help prolong the blooming period and prevent flowers from fading too quickly. In cooler northern regions, a south or west-facing slope or bed often provides the warmest microclimate and encourages the earliest blooms as spring arrives. Avoid planting in low-lying areas where cold air and water collect, as these conditions can encourage bulb rot.
Soil drainage is equally critical to success. Muscari bulbs, like all true bulbs, are highly susceptible to rot if they sit in waterlogged soil, particularly during their dormant summer period. Sandy loam or loamy soil with good structure and drainage is ideal. If your soil is heavy clay, amending it with coarse sand, perlite, or organic compost before planting will significantly improve drainage and reduce the risk of bulb loss. Raised beds and slope plantings naturally provide the drainage that Muscari require, and these situations often produce the healthiest, longest-lived colonies of plants.
Step-by-Step Guide to Planting Muscari Bulbs
Planting Muscari is a straightforward and satisfying process, well within the ability of even the most novice gardener. Begin by gathering your tools and materials: a trowel or bulb planter, a bag of quality bulb fertilizer or bone meal, and your Muscari bulbs. Inspect each bulb before planting, discarding any that are soft, moldy, or shriveled beyond reasonable firmness. Healthy bulbs should feel solid and weighty for their size, with their papery outer tunics largely intact. Larger bulbs generally produce more vigorous plants and larger flower spikes in the first season.
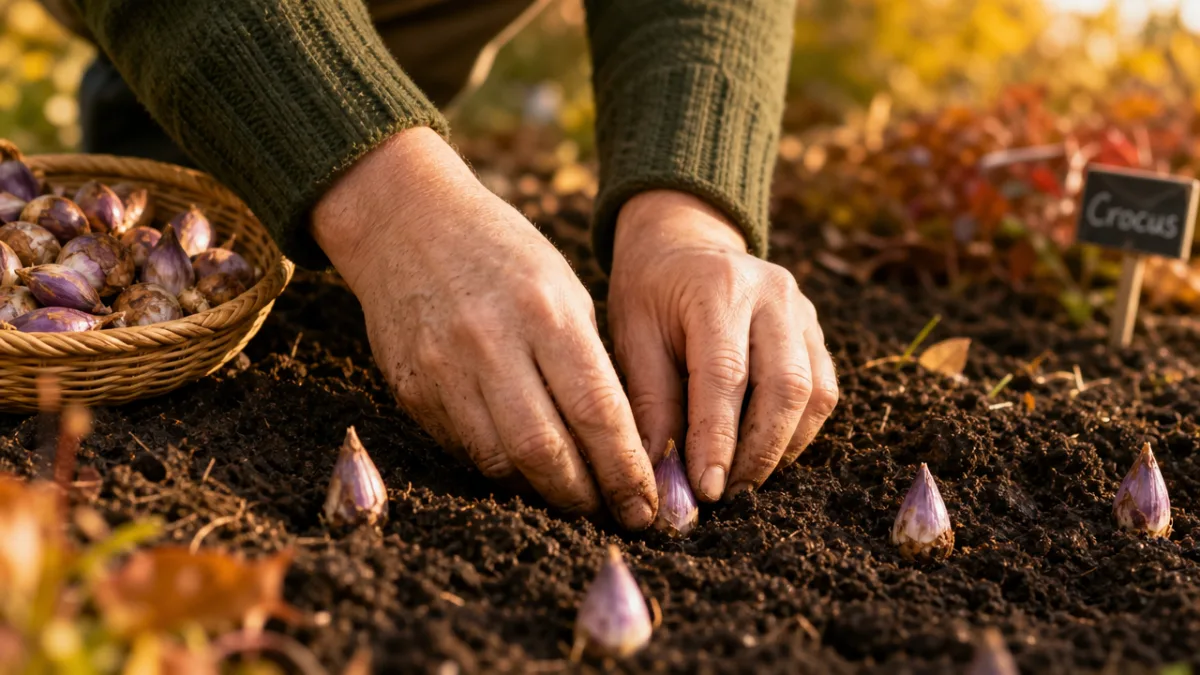
Dig planting holes approximately three inches deep, which places the base of each bulb at the recommended depth of about two to three times the bulb’s diameter. Space bulbs three to four inches apart for a naturalistic drifting effect, or place them closer together — as tight as two inches — for a more densely packed, carpet-like display. Before placing each bulb, sprinkle a small amount of bone meal or slow-release bulb fertilizer into the bottom of the hole to support strong root growth. Position each bulb with the pointed end facing upward and the flat, root-producing base facing downward. If you are uncertain which end is which, planting the bulb on its side is acceptable as the sprout will naturally orient itself upward.
Once all bulbs are placed, backfill with soil and firm it gently with your hands to remove large air pockets without compacting the soil excessively. Water the planting area thoroughly after you are done to settle the soil and initiate root growth. In most climates, autumn rainfall will take over from this point, but during unusually dry falls it is worth watering once a week until the ground freezes. Applying a two-to-three-inch layer of mulch over the planting area after watering helps regulate soil temperature, retain moisture, and protect bulbs from freeze-thaw cycles that can heave them out of the ground. Use shredded leaves, straw, or wood chips for this purpose.
For those who want to create particularly dramatic displays, consider some of these popular planting strategies:
- Mass planting in drifts of fifty or more bulbs under deciduous trees, where Muscari will naturalize freely and benefit from the dappled spring light before the tree leafs out fully.
- Edging pathways or borders with a continuous ribbon of Muscari for a tidy, formal look that guides the eye through the garden.
- Combining Muscari with late-blooming tulips in containers so the grape hyacinth provides a low blue skirt around taller tulip stems.
- Planting in the lawn in informal clusters to create a meadow-style effect, ensuring you delay the first mowing until the Muscari foliage has fully yellowed and died back naturally.
- Filling gaps in perennial borders where Muscari will bloom before the border perennials emerge, maximizing the use of space throughout the season.
Caring for Muscari After Planting
One of the many pleasures of growing Muscari is that once established, they ask very little of you in terms of ongoing care. During the autumn months following planting, keep an eye on moisture levels and water if the weather turns unusually dry and warm. Once winter arrives and the ground freezes, no further watering is required or beneficial. Many gardeners are surprised to discover that Muscari foliage often emerges in late autumn or early winter, producing a flush of narrow, strap-like leaves that persist through cold temperatures without damage. This is entirely normal behavior and not a sign of premature growth that needs to be protected.
In spring, as temperatures warm, flower spikes emerge from the center of the leaf rosettes and quickly develop their characteristic grape-like clusters. To encourage the strongest flowering, apply a balanced, slow-release fertilizer or a top dressing of compost around the planting area as soon as growth appears in spring. Avoid using high-nitrogen fertilizers, which promote leafy green growth at the expense of flower production. After flowering is complete, deadhead the spent flower spikes if you prefer a tidier appearance, though this step is purely cosmetic and has no impact on the plant’s health or next year’s performance, as Muscari do not set seed prolifically enough for deadheading to be a meaningful concern in most gardens.
The foliage must be allowed to die back naturally after flowering — this is a non-negotiable aspect of bulb care that many beginners are tempted to skip in the interest of tidiness. The yellowing, dying leaves are performing a critical function: photosynthesizing and transferring energy back into the bulb to fuel next year’s growth and flowering. Cutting back or tying up the foliage before it has fully yellowed and withered significantly weakens the bulbs over time, resulting in smaller flower spikes and eventually diminished blooming. Plant a ground cover or late-emerging perennial nearby to mask the untidy dying foliage if its appearance bothers you.
Dividing, Propagating, and Troubleshooting Muscari
One of the most delightful characteristics of Muscari is their tendency to multiply generously over time, producing offsets — smaller daughter bulbs — around the base of the parent bulb each year. After three to five years, a single planting can develop into a dense, overcrowded clump where competition between bulbs begins to reduce flowering quality and individual plant vigor. This is the signal that division is needed, and it is also a wonderful opportunity to expand your plantings or share bulbs with friends and neighbors. Dividing established Muscari is one of the easiest forms of plant propagation in the garden.
To divide Muscari, wait until the foliage has fully died back in early to midsummer, which makes the resting bulbs dormant and easier to handle without damage. Using a garden fork or trowel, carefully lift the entire clump and gently separate the individual bulbs by hand, distinguishing between larger, flowering-size bulbs and the smaller offsets. Replant the larger bulbs immediately at the standard three-inch depth, spacing them more generously than before to give the colony room to expand again over the coming years. The smaller offset bulbs can be grown on in a nursery bed or a less prominent garden area until they reach flowering size, which typically takes one to two growing seasons.
While Muscari are generally trouble-free plants, a few problems can occasionally arise. Bulb rot caused by poor drainage or overwatering is the most common issue and is best addressed by improving soil structure before planting rather than treating affected bulbs after the fact. Squirrels and other rodents occasionally dig up and eat newly planted bulbs, though Muscari are far less palatable to them than tulips or crocuses and are rarely seriously damaged. Placing a layer of wire mesh just below the soil surface or sprinkling dried blood meal around the planting area can deter digging. Viral mosaic diseases occasionally cause mottled or streaked foliage, and affected plants should be removed and disposed of rather than composted to prevent spread to healthy bulbs nearby.
For those interested in container growing, Muscari perform exceptionally well in pots, troughs, and window boxes, provided the following guidelines are observed:
- Use a well-draining potting mix blended with extra perlite or coarse grit to prevent waterlogging during winter.
- Plant bulbs at the standard depth but closer together than you would in the ground — as little as one inch apart — to create a lush, impactful display in a smaller space.
- Place containers in an unheated garage, shed, or cold frame during the coldest winter months if temperatures regularly drop below minus ten degrees Fahrenheit, as pot-grown bulbs are more vulnerable to extreme freezing than those insulated by the ground.
- Water sparingly during winter dormancy, just enough to prevent the compost from drying out completely, and resume regular watering as growth begins in early spring.
- After flowering, allow containers to dry out gradually during summer dormancy, then refresh the potting mix and replant the bulbs in autumn for another season of display.
Design Ideas and Companion Planting with Muscari
Beyond their practical cultivation, Muscari offer tremendous design potential in the garden, and thinking creatively about how you use them can elevate your spring displays from pleasant to truly spectacular. The classic and most celebrated pairing is Muscari with tulips, particularly orange, yellow, or red varieties whose warm tones create an electrifying contrast against the cool blue-violet of the grape hyacinths. The Keukenhof Gardens in the Netherlands have made this combination world-famous, planting millions of bulbs together in sweeping ribbons that demonstrate just how powerfully two complementary colors can interact in a large-scale landscape.
For a more naturalistic and meadow-inspired aesthetic, combine Muscari with other early-spring bulbs including snowdrops, species crocuses, Chionodoxa (glory of the snow), and Scilla siberica. These low-growing companions share similar cultural requirements and blooming periods, and together they create a rich tapestry of blues, purples, whites, and pinks that blanket the ground before taller perennials have begun to emerge. Planted beneath the high, branching canopy of ornamental trees such as flowering cherries, crabapples, or serviceberries, this combination creates one of the most beautiful and fleeting spring garden scenes imaginable — one that will deepen and improve with every passing year as the bulbs multiply and intermingle.
In the formal garden, Muscari can be used with great precision to create geometric patterns, edging effects, and structured color blocks that complement architectural elements such as box hedging, clipped topiary, or stone paving. A double row of grape hyacinths planted along the edge of a gravel path, for instance, creates a vivid blue border that defines the line of the path and signals the arrival of spring with unmistakable clarity. For those who garden in containers on balconies, patios, or small urban plots, a deep blue pot overflowing with Muscari combined with trailing ivy and white violas creates a sophisticated spring arrangement that requires almost no expertise to assemble yet looks as though it was designed by a professional. No matter your garden size or style, there is a place for the humble but utterly enchanting grape hyacinth.








What do you think?
It is nice to know your opinion. Leave a comment.