










How to Use a CANDLE Mold: A Complete Guide to Beautiful, Professional Candles
Understanding Candle Molds: Types and Materials
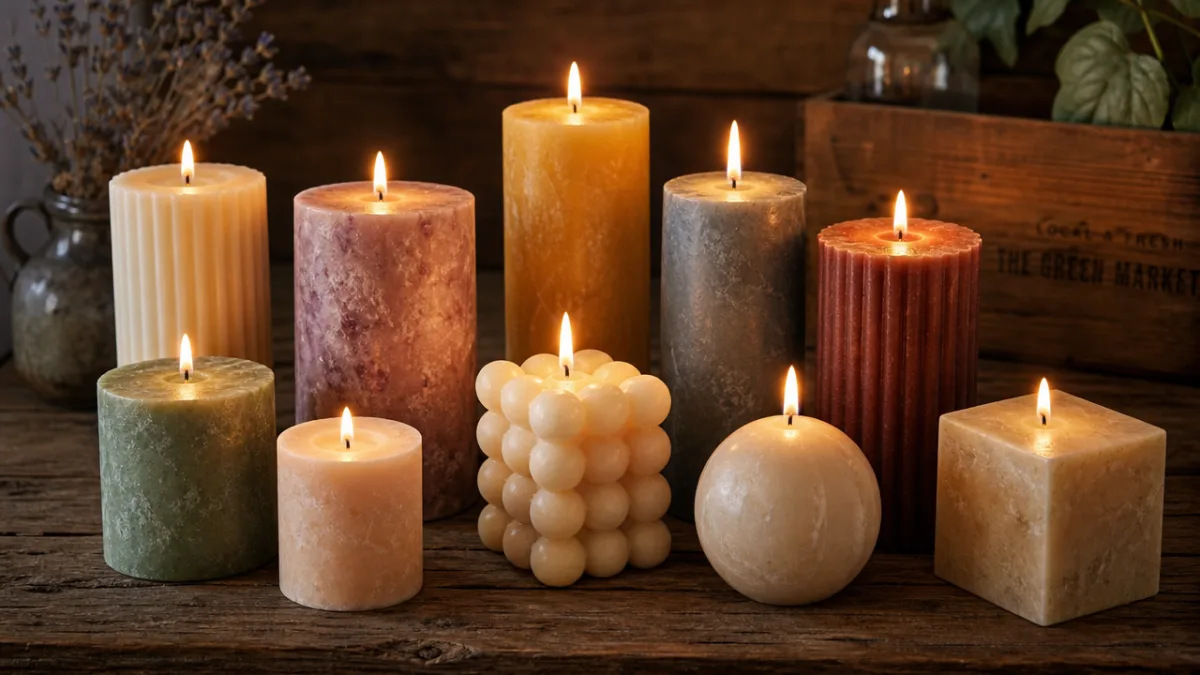
If you want to make candles that actually look like you know what you’re doing, it all starts with choosing the right mold. There’s a surprisingly wide variety out there — different shapes, sizes, and materials — and each one has its own personality. Whether you’re going for a sleek geometric pillar or something with a lot of decorative detail, the mold you pick is really going to shape (pun intended) what your finished candle looks and feels like.
The four most common mold materials you’ll run into are silicone, plastic, metal, and polycarbonate. Silicone is a fan favorite for good reason — it’s flexible, forgiving, and makes getting your candle out a breeze. It also picks up fine detail really well and handles heat without any fuss, so it works great for all kinds of candle styles. Plastic molds are a solid budget-friendly option, while metal molds (usually aluminum or tin) are built to last and give your candles that satisfyingly smooth exterior.
Polycarbonate molds are more of a professional-grade tool — they’re rigid and durable, and they produce candles with a gorgeous glossy finish that really catches the eye. You’ll often see them used for votives and display-worthy pillars. Whatever material you go with, also think about size relative to how much wax you have, and consider how heavy your fragrance load and dye concentration will be, since some molds handle rich pigmentation better than others.
Preparing Your Mold Before Pouring
Honestly, prep work might be the most important part of this whole process. Skip it, and you could end up with wax stubbornly glued to your mold, a wonky surface, or a wick that’s gone completely sideways. Start by giving your mold a good once-over — look for any cracks, chips, or leftover debris. Even a tiny flaw on the interior can show up on your finished candle. New molds should get a wash with warm soapy water, a thorough rinse, and a complete dry-out before you use them. Any moisture in there when hot wax hits it can cause real problems.
For rigid molds — metal or plastic — you’ll want to apply a mold release spray or a thin coat of vegetable oil before every pour. This creates a barrier between your wax and the mold wall so the finished candle slides out cleanly instead of tearing or sticking. Use a soft cloth or paper towel to spread it in a thin, even layer all the way around the interior, including any textured spots. Silicone molds usually don’t need a release agent because of their natural flex, but a light coating can still be helpful if you’re working with a really intricate design.
Threading your wick before pouring is the other big prep step people sometimes rush. Cut it a few inches longer than the height of your mold so you have plenty to work with. Feed it through the wick hole at the base (which will become the bottom of the candle), and seal it with a wick screw or a bit of putty so wax can’t sneak out through the hole. Up at the top, center your wick and keep it there by resting a wick bar, pencil, or a couple of skewers across the opening and securing the wick to them.

Melting and Preparing Your Wax
Melting wax is one of those things that gets easier the more you do it, but there are a few non-negotiables you should know upfront. Always use a double boiler or a dedicated wax melting pot — never melt wax directly over a burner or open flame. Wax is flammable, and if it overheats without you noticing, things can go sideways fast. Fill the bottom pot with a few inches of water, put your wax in the upper pot or pitcher, and heat it over medium heat, giving it an occasional stir.
Different waxes have different sweet spots for pouring temperature, and it really does matter. Paraffin, one of the most popular candle-making waxes out there, is generally poured somewhere between 150°F and 170°F (65°C to 77°C) depending on the blend. Soy wax is a bit more laid-back and usually works best at slightly lower temps, around 130°F to 150°F (54°C to 65°C). Beeswax — with its naturally lovely honey scent and warm golden color — typically needs to be a bit hotter, around 160°F to 175°F (71°C to 79°C). Get yourself a good thermometer and actually use it throughout the process.
Once your wax is fully melted and at the right temperature, that’s when you add your fragrance oils and dyes. Follow the manufacturer’s recommended fragrance load — usually somewhere in the 6% to 10% of total wax weight range — and stir slowly but thoroughly for at least two minutes so everything is properly incorporated and won’t separate as it cools. For color, use candle-specific dye blocks or liquid dye, add it gradually, and test it on white paper as you go. Keep in mind the color will look noticeably lighter once the wax cools and hardens, so don’t be afraid to go a shade or two deeper than you think you need.
Pouring Wax Into the Mold
This is where all that prep pays off. A steady hand and a little technique go a long way toward getting a candle with a smooth, professional-looking finish. Before you pour anything, make sure your mold is sitting on a completely level surface — even a slight tilt can cause the candle to cure unevenly and come out lopsided. Lay down some newspaper or a silicone mat underneath to catch any drips, and double-check that your putty seal at the base is holding firm.
Pour your wax slowly and steadily, aiming for the center of the mold to cut down on air bubbles and splashing. Stop about half an inch from the top — don’t fill it all the way, because you’ll need that room for a second pour once the wax shrinks during cooling. Some candle makers prefer to pour at lower temperatures to minimize shrinkage and sinkholes, while others just plan ahead for a top-off pour regardless. Try both approaches and see what clicks for you and your particular wax and mold combo.
After you’ve poured, give the sides of the mold a few gentle taps to coax any trapped air bubbles to the surface. A skewer or toothpick can help pop any you can actually see before the wax starts to set. Then let the candle cool at room temperature — resist the urge to stick it in the fridge or freezer to speed things up unless your wax manufacturer specifically says that’s okay. Rapid cooling can lead to cracking, frosting, or wet spots, especially with soy and paraffin blends.

Cooling, Topping Off, and Demolding
If there’s one thing candle making will teach you, it’s patience. Most candles need at least 24 hours to cool completely at room temperature before you even think about demolding, and larger or thicker candles might need closer to 48. I know it’s tempting to check early, but if the wax is still soft inside, you risk deforming it or ending up with structural issues that you can’t really fix after the fact.
While your candle is cooling, you’ll almost definitely notice a depression forming around the wick — a little sinkhole right at the top. Totally normal. It happens because wax contracts as it solidifies and pulls inward toward the wick. The fix is easy: poke a few small relief holes around the wick with a skewer or chopstick, going about halfway down into the candle. Then reheat your reserved wax to the same temperature you originally poured at and do a small second pour to fill the sinkhole back up to level. For bigger candles, you might need to do this twice.
Once you’re confident the candle is completely solid all the way through, it’s time to demold. With metal or plastic molds, remove the wick screw, peel off the putty, flip the mold over a soft surface, and apply gentle, even pressure to the sides while gravity does most of the work. If it’s being stubborn, pop the whole thing in the freezer for 10 to 15 minutes — the slight contraction from the cold usually does the trick. With silicone molds, just flex and peel the mold back slowly, working your way evenly around the edges.
Finishing Touches and Caring for Your Molds
Getting the candle out of the mold is a great feeling, but a few finishing touches will take it from “homemade” to genuinely impressive. First, trim the wick down to about a quarter inch above the surface — that’s the ideal length for a clean, consistent burn. If the base looks a little rough around the wick hole, you can smooth it out with a heat gun on a low setting, or just rub it gently on a warm baking sheet lined with parchment paper.
If the surface looks dull or has a few minor imperfections, a quick buff with a piece of nylon stocking, a soft cloth, or a candle polishing cloth can bring back a nice sheen. For candles with textured surfaces from decorative molds, use a soft brush to clear out any wax fragments from the recessed areas. It’s also worth labeling your candles with the fragrance name, burn time, and basic safety instructions — especially if they’re going to someone as a gift or being sold. People genuinely appreciate knowing what they’re burning and how to do it safely.
Taking care of your molds is worth the effort because it really does extend their life and keep your results consistent. After each use, let the mold warm slightly and wipe out as much residual wax as you can with paper towels. Stay away from abrasive scrubbers on silicone or polycarbonate — scratches on the interior will show up on future candles. For stubborn wax, put the mold in a warm oven at a very low temperature until the wax softens enough to wipe away. Store everything in a cool, dry spot out of direct sunlight to prevent warping or breakdown over time.
- Always clean molds immediately after use while the wax is still warm and pliable, making removal much easier.
- Store metal molds with a very light coat of mineral oil to prevent oxidation and surface rust between uses.
- Inspect silicone molds regularly for tears or perforations, as even small damage can cause wax leaks during pouring.
- Label your molds with the candle size and wax volume they require to streamline future projects and batch pours.
- Avoid using household cleaning products with citrus or solvent bases on plastic molds, as these can cause cracking over time.
Candle making with molds is one of those crafts that just keeps getting more rewarding the more you do it. Every wax type, fragrance, and mold shape has its own quirks, and a big part of the fun is figuring out what works through hands-on experimentation. Keep a simple candle-making journal and jot down your temperatures, fragrance loads, dye amounts, and pour techniques for each batch — you’ll be amazed how useful that record becomes as you start developing a real feel for the craft. With good tools, quality materials, and the techniques covered here, you’re genuinely set up to make candles you’ll be proud to show off.








What do you think?
It is nice to know your opinion. Leave a comment.