










How to Grow Lotus Flowers in Your Pond: A Complete Guide
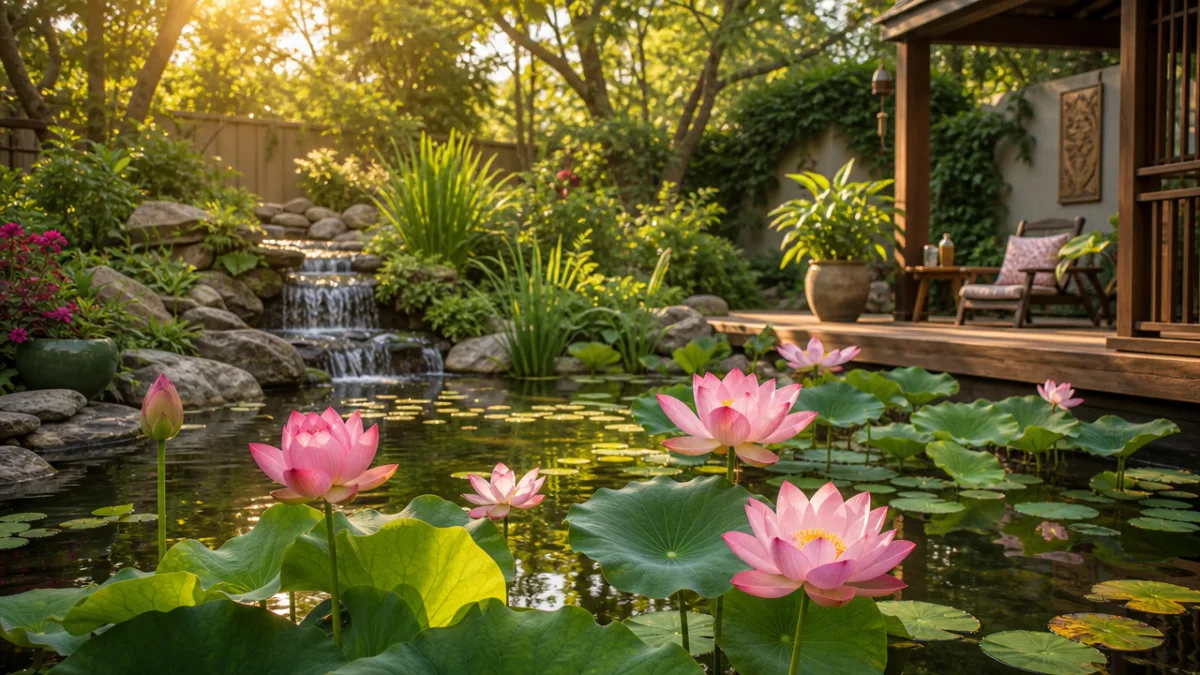
Few plants capture the imagination quite like the lotus flower. Rising gracefully from muddy water to bloom in stunning shades of pink, white, red, and yellow, the lotus has enchanted gardeners, spiritual seekers, and nature lovers for thousands of years. Growing lotus flowers in your own backyard pond is one of the most rewarding projects a water gardener can undertake, transforming an ordinary water feature into something truly extraordinary. Whether you have a large natural pond or a modest container garden, with the right knowledge and preparation, you can cultivate these magnificent aquatic blooms successfully.
Understanding Lotus Flowers: Species, Varieties, and What to Expect
Before you dig your hands into the mud, it pays to understand what you are actually working with. The lotus belongs to the genus Nelumbo, which contains only two true species: Nelumbo nucifera, the sacred or Asian lotus native to southern Asia and Australia, and Nelumbo lutea, the American lotus native to North America and the Caribbean. From these two parent species, horticulturalists have developed hundreds of cultivars ranging from miniature varieties suitable for a small barrel pond to towering giants that can send their leaves soaring four to six feet above the water surface. Understanding which type suits your space is the essential first step in a successful growing journey.
Lotus flowers are perennial aquatic plants, meaning they will return year after year in climates where winter temperatures do not freeze the rhizomes solid for extended periods. The plant’s lifecycle follows a predictable and beautiful pattern: the rhizomes sprout in spring as water temperatures climb above 60°F, sending up round, water-repellent leaves that seem to hold droplets of water like liquid mercury on their surface. By midsummer, the iconic flowers emerge on tall, sturdy stalks, each bloom lasting only three to four days before the petals fall away to reveal the distinctive seed pod that resembles a shower head. These seed pods are so architecturally striking that they are often dried and used in floral arrangements.
When choosing a variety, consider your climate zone, your pond size, and the visual effect you want to achieve. Miniature cultivars like ‘Momo Botan’ and ‘Baby Doll’ are perfect for container ponds and small water features, rarely exceeding two feet in height. Standard varieties such as ‘Mrs. Perry D. Slocum’ and ‘Alba Grandiflora’ make bold statements in larger ponds. Tropical-looking red varieties like ‘Redflush’ and deep pink selections offer a more exotic palette. Each cultivar has slightly different water depth requirements, bloom times, and cold hardiness ratings, so consulting a specialty nursery before purchasing your tubers will help ensure a good match for your specific conditions.
Choosing the Right Location and Pond Conditions
Lotus flowers are sun-worshippers of the highest order, and no amount of careful preparation will compensate for insufficient light. To thrive and bloom reliably, lotus plants require a minimum of six hours of direct sunlight daily, with eight or more hours being truly ideal. When scouting the perfect location in your garden, observe how sunlight moves across the area throughout the day. Avoid spots shaded by large trees, buildings, or fences, even if the shade is partial. A location that receives morning sun is acceptable, but a pond that basks in afternoon light during the peak growing season is even better, as afternoon temperatures and light intensity drive the most vigorous growth.
Water temperature is another critical factor that is easy to overlook. Lotus plants do not begin active growth until the water temperature consistently reaches at least 60°F, and they truly hit their stride between 75°F and 87°F. If you attempt to plant lotus tubers in cold water, they will simply sit dormant or rot before they can establish. In most temperate climates, this means waiting until late spring, typically May or early June, before introducing lotus to an outdoor pond. Using a simple aquarium thermometer to monitor water temperature before planting eliminates a great deal of guesswork and frustration for first-time growers.
The ideal water depth for most standard lotus varieties sits between twelve and eighteen inches above the soil surface where the rhizomes are planted. Miniature varieties can manage in as little as six inches, while some large cultivars can tolerate up to thirty-six inches, though they will grow and bloom more prolifically in shallower conditions. If your pond is deeper than optimal, consider placing potted lotus on submerged platforms, cinder blocks, or purpose-built aquatic plant shelves to bring them closer to the surface. Water movement should be kept to a minimum around lotus plants; they dislike strong currents or the turbulence created by nearby fountains and waterfalls, as constant agitation stresses the stems and leaves.
Preparing Your Planting Container and Soil
Selecting the right container is one of the most important decisions you will make when growing lotus in a pond. Unlike many aquatic plants that can be planted directly into a natural pond bottom, lotus in ornamental ponds are almost always grown in containers to control their famously aggressive spreading habit. Left unconstrained, a single lotus plant can colonize an entire pond within a few seasons, crowding out other aquatic plants and making management nearly impossible. Wide, shallow containers work best because lotus rhizomes grow horizontally and need lateral space to spread. A container that is at least sixteen to twenty-four inches in diameter and eight to twelve inches deep is recommended for standard varieties, while miniatures can get by in a ten to fourteen inch pot.
The most suitable containers are those without drainage holes, since any gap at the bottom will allow the soil to wash out into the pond and potentially cloud the water. Heavy-duty plastic pots, fabric grow bags designed for aquatic plants, and traditional terracotta troughs sealed with waterproof sealant are all popular options. Avoid containers with open lattice sides, as soil will escape through the gaps. The weight of a fully loaded lotus container filled with wet soil is considerable, so make sure your submerged shelves or the pond bottom can support it. Darker colored containers absorb more heat from sunlight, which can give the rhizomes a warmth advantage in the early season.
Soil selection matters enormously for lotus success. Standard garden soil or potting mix is not appropriate for aquatic planting because it contains lightweight organic matter like perlite, vermiculite, and peat moss that will float out of the container and turn your pond water murky. Instead, use heavy clay-based soil, purpose-formulated aquatic planting media, or a mixture of roughly two parts clay loam to one part well-composted organic matter. A layer of coarse sand added at the bottom of the container improves drainage at the root level. Many experienced lotus growers prefer pure clay or sandy loam with very little organic matter, as excessively rich soil can trigger algae blooms in the pond water without meaningfully improving lotus performance. Once filled and planted, top-dress the container with a layer of pea gravel to hold the soil in place when the pot is submerged.
Planting Lotus Tubers: Step-by-Step Process
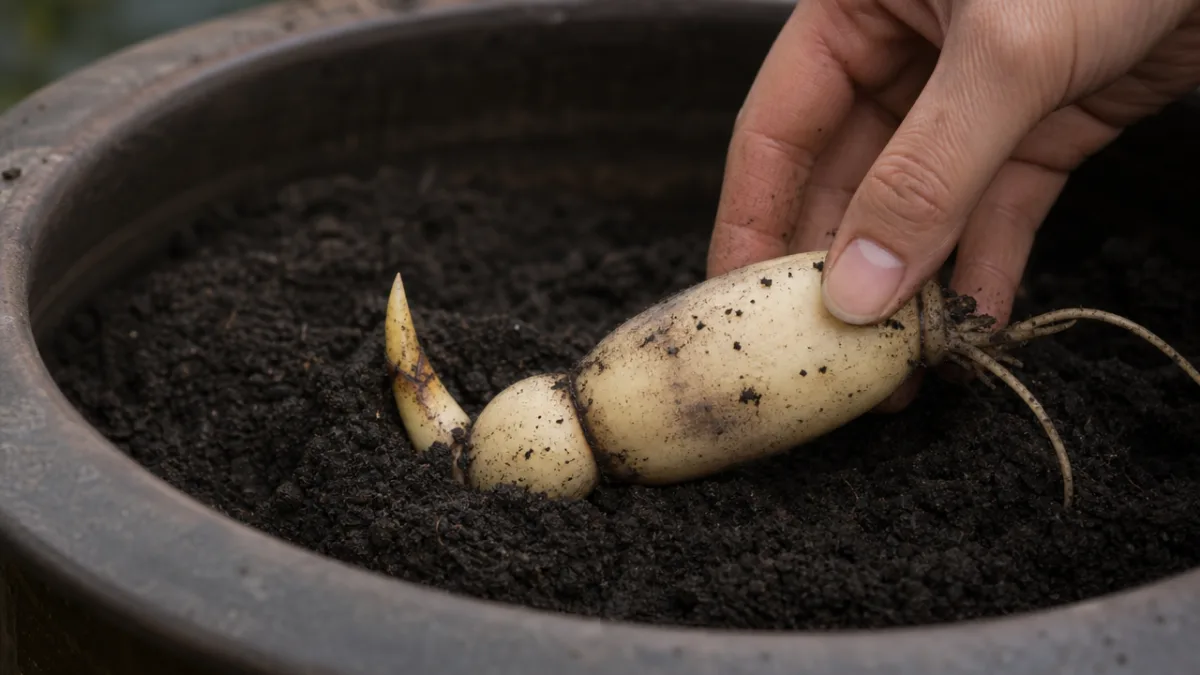
Lotus tubers are banana-shaped rhizomes that are remarkably delicate despite the plant’s robust mature appearance. The growing tips at each end of the tuber are the most vulnerable part, and snapping one off essentially ruins the tuber’s ability to sprout. Handle newly purchased tubers with extreme care, keeping them moist and protected from freezing temperatures. If you receive tubers by mail, inspect them immediately upon arrival. Healthy tubers are firm, light tan to cream in color, and have visible growing tips. Soft, dark, or mushy sections indicate rot. If only part of the tuber is affected, you can try cutting away the damaged section with a clean, sharp knife, but the chances of success diminish significantly with rotted stock.
To plant the tuber, fill your chosen container about two-thirds full with your prepared soil, then create a shallow trench or depression across the center of the container. Lay the tuber horizontally in the trench with the growing tips pointed slightly upward and toward the rim of the container, giving the new growth room to extend without immediately hitting the container wall. Cover the tuber very lightly with soil, leaving the growing tips exposed or barely covered. Press a few heavy stones or pieces of gravel on top of the tuber body, not the tips, to prevent it from floating out of the soil when the container is submerged. Even a brief exposure to air can desiccate the tender new sprouts, so move quickly once you begin the planting process.
With the tuber planted, you have two options for introducing water. The first method involves placing the container in a shallow, warm indoor tub or kiddie pool in a sunny spot, gradually increasing the water depth as the plant grows, before moving the whole operation outdoors once temperatures are reliably warm. This indoor sprouting method gives the tuber a head start and is particularly useful in climates with shorter summers. The second method involves waiting until outdoor pond conditions are ideal, then lowering the freshly planted container to a depth of just two to four inches initially, increasing depth gradually over several weeks as the stems elongate and the plant establishes itself. Both methods work well; the choice depends on your climate and the facilities available to you.
- Handle tubers gently at all times, keeping the growing tips intact and never allowing them to dry out or freeze during the planting process.
- Plant horizontally in heavy clay-based soil with tips slightly exposed and weighted down with gravel to prevent floating.
- Start in shallow water of two to four inches and gradually increase depth as the plant grows and acclimates to pond conditions.
- Maintain warm water temperatures of at least 60°F throughout the establishment period to encourage healthy rhizome development.
- Be patient — lotus tubers can take two to four weeks to show the first aerial leaves, and some cultivars are slower starters than others.
Feeding, Fertilizing, and Ongoing Care Through the Season
Once your lotus plant has established several aerial leaves and is growing actively, feeding becomes important for encouraging robust foliage and plentiful blooms. Lotus are heavy feeders by aquatic plant standards, responding enthusiastically to regular fertilization during the growing season. Aquatic plant fertilizer tablets or push-in pond plant fertilizer spikes are the most practical delivery method because they release nutrients slowly into the soil without dissolving into the surrounding pond water and fueling algae growth. Begin feeding about four to six weeks after the first aerial leaves appear, inserting fertilizer tabs around the perimeter of the container about four inches deep and several inches away from the rhizomes to avoid fertilizer burn on the roots.
Repeat fertilization every three to four weeks from early summer through late July or early August, then stop entirely as the plant begins preparing for dormancy. Feeding too late in the season with high-nitrogen fertilizers can encourage lush leafy growth at the expense of flower production and, more critically, at the expense of the thick, starchy rhizomes the plant needs to survive winter. During the peak growing season, watch for yellowing leaves, which can indicate either nitrogen deficiency, if the yellow color is uniform, or iron deficiency if the yellowing occurs between the leaf veins while veins remain green. Iron deficiency is common in lotus grown in alkaline water and can be corrected with chelated iron supplements formulated for aquatic use.
Beyond fertilizing, routine care involves very little intervention. Remove dying or yellowing leaves by cutting the stems as close to the soil surface as possible without disturbing the rhizomes. Leaving decaying foliage in the pond accelerates water quality problems and provides a breeding ground for fungal diseases and insect pests. Keep an eye out for aphids, which occasionally colonize lotus stems and leaves in large numbers, and for lotus leaf rollers, caterpillars that curl themselves inside rolled leaf edges. Both can be controlled with targeted applications of insecticidal soap or neem oil applied carefully to avoid contaminating the pond water. For the most part, a healthy, well-sited lotus plant in good water quality resists pests and diseases with minimal intervention.
Preparing for Winter Dormancy and Spring Comeback
As the days shorten and water temperatures begin their autumn decline, your lotus plant will shift its energy inward, converting the carbohydrates produced all summer into starch stored in increasingly plump, rounded rhizomes. The aerial leaves and flower stalks will yellow, brown, and eventually die back entirely. This is not cause for alarm; it is the natural and necessary preparation for winter dormancy. Resist the temptation to cut everything back too aggressively while leaves are still green, as the plant continues to photosynthesize and transfer energy to the rhizomes right up until the first hard frost. Allow the foliage to die back naturally before conducting any significant cleanup.
How you overwinter your lotus depends entirely on where you live and how cold your winters get. In USDA hardiness zones 8 through 11, where winters are mild and ponds rarely if ever freeze solid, lotus can stay in the pond year-round with minimal protection. In colder zones, the critical question is whether the rhizomes will be subjected to sustained below-freezing temperatures. Rhizomes that freeze solid will not survive. In zones 5 through 7, lotus in ponds deep enough to keep the container below the freeze line, typically eighteen inches or more in most climates, can often overwinter safely outdoors. In zones 4 and colder, or for container ponds and small water features with little thermal mass, you will need to bring the lotus indoors for winter storage.
To store lotus for winter, carefully lift the container from the pond after the first frost has killed back the foliage, then allow the container and rhizomes to drain slightly. Move the entire container to an unheated but frost-free location such as a garage, basement, or garden shed, and keep the soil barely moist throughout the winter. The rhizomes need to remain slightly damp but never sitting in standing water, which encourages rot. Some growers remove the rhizomes entirely from the soil, wrap them loosely in slightly damp newspaper or burlap, and store them in a cool, dark location between 40°F and 55°F. Either method works well. Come spring, when you are ready to reintroduce your lotus to the warming pond, you will often find the rhizomes have multiplied during dormancy, giving you extra plants to enjoy or share with fellow water gardeners.
- Late summer: Stop fertilizing to allow the plant to begin hardening its rhizomes for winter storage and dormancy.
- After first frost: Allow foliage to die back completely before removing or trimming dead stems near the soil surface.
- For cold climates: Lift the container from the pond and move to a frost-free but cool indoor location before temperatures drop below freezing.
- Winter maintenance: Check stored rhizomes monthly, keeping soil barely moist and removing any sections that show signs of softening or rot.
- Early spring: Reintroduce the container to shallow, warming water once temperatures consistently reach 60°F and new growing tips are visible on the rhizomes.
Troubleshooting Common Problems and Maximizing Bloom Production
Even experienced water gardeners encounter setbacks with lotus, and understanding the most common problems in advance helps you respond quickly and effectively when they arise. The single most frequent complaint among new lotus growers is that their plant produces plenty of lush, beautiful leaves but refuses to flower. This frustrating situation almost always has one of a handful of causes, the most common being insufficient sunlight. If your lotus is getting fewer than six hours of direct sun daily, it will prioritize vegetative growth over reproduction and simply not bloom. The solution is to relocate the container to a sunnier spot, which is easier said than done in an established pond but is absolutely necessary for blooming success.
Overly rich soil or excessive nitrogen fertilization produces the same symptom: spectacular leaves, no flowers. Lotus respond to an overabundance of nitrogen by putting all available energy into producing enormous leaves at the complete expense of reproductive effort. If you suspect over-fertilization, skip feeding entirely for the remainder of the season and switch to a low-nitrogen, high-phosphorus formula the following year. Water depth is another hidden culprit; a lotus planted too deeply will spend its energy fighting to reach the surface rather than blooming. If your container is sitting more than eighteen inches below the water surface, raise it up on blocks or an aquatic plant stand. Crowded rhizomes in a container that is too small will also reduce bloom production significantly, so repot into a larger container every two to three years.
Pest and disease problems, while generally less severe in lotus than in many garden plants, do occasionally require attention. Lotus leaf spot, caused by fungal pathogens, appears as dark brown or black spots with yellow halos on the leaf surface and thrives in warm, humid conditions with poor air circulation. Removing and disposing of affected leaves promptly, avoiding wetting the foliage when watering container ponds, and ensuring adequate spacing between plants helps prevent its spread. Root rot caused by Pythium species is the most serious disease threat, particularly during cool spring weather when the rhizomes are newly planted and most vulnerable. Improving drainage, maintaining proper water temperatures, and avoiding overwatering during the establishment phase are the best preventative measures available to home growers.
To truly maximize your lotus blooming season and get the most spectacular performance from your plants, think about the growing experience as a whole-system approach rather than a series of individual tasks. A lotus that receives ideal sun, appropriate water depth, correct fertilization at the right times, and proper winter care will reward you with blooms beginning in early to midsummer and continuing well into August or even September in warm climates. Some double-flowered varieties like ‘Charles Thomas’ and ‘Roseum Plenum’ produce so many layers of petals that each flower remains ornamental long after the central petals would have fallen on a single-flowered cultivar. Photographing the flowers at different stages, from the tight pointed bud to the fully open bloom to the sculptural seed pod, reveals the extraordinary beauty of a plant that has inspired artists, poets, and spiritual traditions across cultures and centuries.








What do you think?
It is nice to know your opinion. Leave a comment.