










How to Grow and Care for Crocosmia Flowers (Coppertips)
Introduction to Crocosmia: The Fiery Beauty of the Garden
If you’re looking for a plant that really stops people in their tracks, crocosmia — also called Coppertips or Montbretia — might be exactly what your garden needs. Originally from the grasslands and forests of South Africa, this perennial corm-producer has won over gardeners all over the world with its arching stems of tubular flowers in rich shades of red, orange, and yellow. Once it settles in, you can count on a stunning display year after year, which is why both beginners and seasoned gardeners tend to love it.
The name Crocosmia comes from the Greek words for saffron and smell — a nod to the faint saffron-like scent the dried flowers release when placed in water. It belongs to the Iridaceae family, which also includes irises and freesias, so it’s in good company. There are plenty of cultivars to choose from these days, ranging from the bold scarlet ‘Lucifer’ to the softer apricot-gold ‘Emily McKenzie.’ Getting familiar with what’s available makes it a lot easier to pick the right one for your climate, soil type, and the look you’re going for.
Beyond just looking beautiful, crocosmia is also a great plant for wildlife. Hummingbirds and bees are particularly fond of it, making it a genuinely useful addition to any pollinator-friendly garden. Even when it’s not in bloom, the sword-shaped, pleated leaves form attractive clumps that hold their color well through the growing season. Whether you plant it in borders, use it for mass plantings, or cut the stems for flower arrangements indoors, crocosmia brings a warm, almost tropical energy to the garden from midsummer right into early autumn.
Choosing the Right Location and Soil for Crocosmia
Getting the planting spot right is probably the most important thing you can do for your crocosmia. These plants do well in full sun to partial shade, but they really shine — and produce the most flowers — when they get at least six hours of direct sunlight a day. If you’re gardening somewhere warm, a bit of afternoon shade can actually help prevent the leaves from scorching. In cooler, northern gardens, though, it’s generally better to give them as much sun as possible to keep growth strong and flowering plentiful.
Soil matters just as much as sunlight. Crocosmia likes well-draining, moderately fertile soil with a pH somewhere between 6.0 and 7.0 — slightly acidic to neutral. What it really can’t stand is waterlogged or heavy clay soil, because sitting in too much moisture leads to corm rot and fungal problems. If your garden tends toward dense, poorly draining ground, work in plenty of organic compost, grit, or perlite before you plant to open things up. Raised beds are a great workaround if drainage is a persistent issue where you garden.
It’s also worth thinking about shelter. The flower stems can grow anywhere from two to four feet tall depending on the variety, and they can get knocked around badly in strong winds. A spot near a fence, wall, or mixed border where nearby plants offer some protection is ideal. And if you can find a position where the soil warms up a little earlier in spring, even better — crocosmia gets off to a stronger start in warmer ground, which sets it up well for the rest of the growing season.

Planting Crocosmia Corms: Timing, Depth, and Spacing
Crocosmia is most often grown from small corms — they look a bit like tiny gladiolus bulbs and come linked together in chains. The right time to plant them is spring, once you’re past the last frost and the soil has warmed to at least 50°F (10°C). If you’re in a milder area, like USDA zones 6 through 9, you can often start as early as March or April. In colder zones it’s safer to hold off until late April or May to avoid any frost setting things back before the corms have had a chance to establish.
Plant the corms about three to five inches deep with the pointed end facing up. Depth actually matters here — too shallow and they’re vulnerable to frost heaving and drying out; too deep and the shoots may struggle to push through. For spacing, about six to eight inches apart works well, giving each plant enough room without immediately crowding things. Just keep in mind that crocosmia spreads assertively through underground stolons, so even with good spacing, you’ll eventually end up with dense clumps.
If you’re starting with pot-grown plants rather than corms, spring through early summer is the sweet spot for planting. Dig a hole wide and deep enough that the root ball fits comfortably, set the plant at the same depth it was growing in its container, and firm the soil gently around it. Whether you’re planting corms or transplants, water thoroughly afterward to settle the soil and get root contact going. A light layer of mulch over the planting area helps hold in moisture, keep temperatures steady, and cut down on weeds while everything gets established.
The following planting checklist can serve as a helpful reminder for first-time growers:
- Plant in spring after the last frost date for your region
- Choose a site with full sun to partial shade and excellent drainage
- Set corms three to five inches deep with the pointed tip upward
- Space corms six to eight inches apart in clusters for visual impact
- Water well after planting and apply a two-inch layer of mulch
- Avoid planting in waterlogged or poorly drained soil
Watering, Feeding, and Ongoing Care Throughout the Season
Once crocosmia is established, it’s pretty easy to look after — but it does need consistent watering, especially in its first season and during dry stretches. Newly planted corms and transplants should be watered regularly enough to keep the soil evenly moist without letting it get soggy. As the plants mature and put down deeper roots, they become more drought-tolerant. That said, they’ll still appreciate some extra water during extended dry spells, particularly when buds are forming and flowers are opening in summer.
A balanced, slow-release fertilizer applied in early spring as new growth starts to appear gives crocosmia a good foundation for the season ahead. Something like a 10-10-10 formula works well. Alternatively, mixing well-rotted compost or aged manure into the soil at planting time provides a steady, gentle supply of nutrients without any risk of overdoing it. One thing to avoid is high-nitrogen fertilizer — it encourages lots of leafy growth but tends to come at the expense of flowers, which is the opposite of what you want.
Deadheading spent flower spikes isn’t strictly necessary, but it does keep things looking neat and can nudge the blooming period to last a little longer. More importantly, make sure you leave the foliage alone after flowering. Those leaves are still hard at work, photosynthesizing and channeling energy back into the corms to build up reserves for next year. Only once the foliage has yellowed and died back on its own in autumn should you cut it down to ground level and tidy up the bed for winter.

Managing Crocosmia’s Spreading Habit: Division and Control
One thing you’ll quickly learn about crocosmia is that it loves to spread. If left to its own devices, it multiplies through underground stolons and builds up dense, congested clumps over time. When that happens, the corms end up competing for water, nutrients, and light, and the result is fewer and smaller flowers. So regular division isn’t just about keeping the plant contained — it’s genuinely one of the best things you can do to keep it healthy and flowering well.
Early spring, just as new growth starts to show, is the best time to divide crocosmia. Early autumn after flowering has finished works too. To do it, carefully lift the whole clump with a garden fork, trying not to snap the corm chains in the process. Then gently break the clump into smaller sections, each with a few healthy corms attached. Replant the divisions right away at the correct depth and spacing, water them in well, and toss any corms that look soft, shriveled, or diseased. Healthy divisions establish quickly and will usually flower in their first full season.
If you’re worried about crocosmia wandering too far, there are a few ways to keep it in line. Planting it in containers or in sunken pots within a border is one of the most effective methods — it still looks great in the garden but can’t spread laterally. Keeping an eye on the edges of the planting area and pulling up any corms that stray outside the intended zone also helps. In places where crocosmia is considered invasive — parts of the Pacific Northwest and some areas of the British Isles, for example — it’s worth being extra watchful to stop it from creeping into surrounding natural areas.
Winter Care and Overwintering Crocosmia Successfully
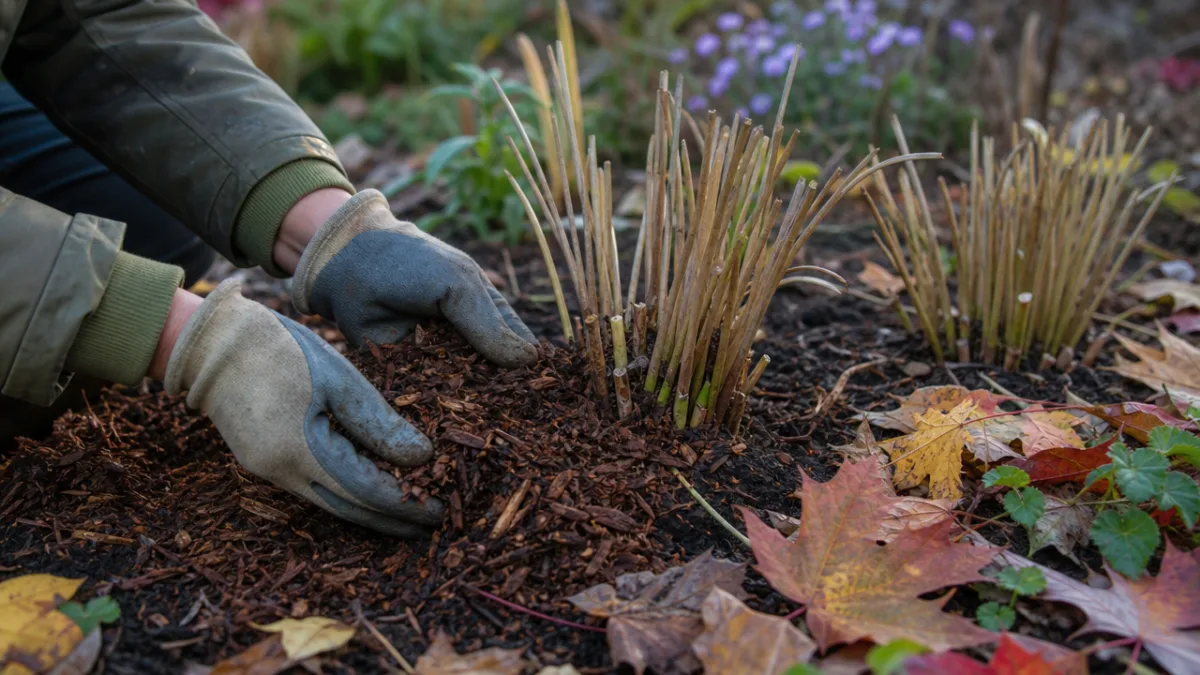
How well crocosmia handles winter depends a lot on the variety and where you live. Most cultivars are reliably hardy in USDA zones 6 through 9, meaning you can leave the corms in the ground all year with minimal fuss. In those regions, simply spread a generous layer of dry mulch — straw, shredded bark, or dried leaves all work well — over the planting area after the foliage has died back. That’s usually enough to insulate the corms through winter. Come early spring, rake the mulch back a bit as new shoots start to emerge.
In colder climates, particularly zone 5 and below, it’s safer to lift and store the corms indoors for winter. After the first frost kills the foliage, cut the stems down to a few inches above the ground and carefully dig up the clumps with a garden fork. Let the corms dry for a few days somewhere warm and airy, then pack them into paper bags or wooden crates with slightly moist vermiculite or peat-free compost. Store them somewhere cool but frost-free — ideally between 35°F and 50°F (2°C and 10°C). Check on them a few times over winter and remove any that have started to rot.
Come spring, replant the stored corms once the conditions are right. It’s worth mentioning that some gardeners in borderline climates simply leave their crocosmia in the ground and accept that they might lose a few corms in a really harsh winter. The thinking is that replacing a few lost corms is less work than lifting and storing the whole lot every year. It’s a reasonable call, and really comes down to your local conditions and your own judgment. Either way, a little autumn preparation makes a big difference to how good your crocosmia looks the following summer.
Common Problems, Pests, and Diseases Affecting Crocosmia
The good news is that crocosmia is a tough plant and doesn’t run into serious trouble all that often — which is a big part of its appeal. That said, no plant is completely problem-free, and knowing what to look out for means you can deal with things early before they get out of hand. Spider mites are one of the more common pests, especially during hot, dry summers. You’ll often notice them first as a fine webbing on the underside of the leaves, along with a stippled, bronzed look to the foliage. Keeping the soil adequately moist and misting the leaves regularly makes conditions less inviting for them.
Thrips are another occasional nuisance, feeding on the surface of leaves and petals and leaving behind a silvery, streaked look. They rarely do enough damage to seriously threaten the plant, but they can take the shine off the flowers. Insecticidal soap or neem oil applied early in an infestation usually does the trick. It also helps to avoid broad-spectrum pesticides that would wipe out beneficial insects like lacewings and ladybirds, which naturally keep thrip numbers down.
When it comes to disease, corm rot is the most serious thing you’re likely to encounter, and it almost always traces back to poor drainage or overwatering. The signs are hard to miss: soft, discolored corms, yellowing leaves, and plants that look wilted even after watering. Good drainage and careful watering habits are your best defense. If you do find rot, remove and destroy the affected corms straight away, treat the healthy ones with a fungicide, and replant them in fresh, well-draining soil. Moving crocosmia to a different spot in the garden after an outbreak is also a smart move to interrupt the disease cycle.
A quick-reference summary of common crocosmia problems and their solutions:
- Spider mites: Increase humidity around the plant, apply neem oil or insecticidal soap, avoid drought stress.
- Thrips: Use insecticidal soap or neem oil early in the infestation, encourage beneficial insects.
- Corm rot: Improve drainage, reduce watering, remove and destroy affected corms, apply fungicide.
- Overcrowding: Divide clumps every three to four years to maintain vigor and flowering performance.
- Poor flowering: Ensure adequate sunlight, avoid excess nitrogen, divide congested clumps promptly.
With a bit of consistent care and a good eye for early warning signs, crocosmia more than earns its place in the garden. The flowers are spectacular, the foliage looks great all season, and the pollinators love it. Whether you’ve been gardening for decades or you’re just getting started and want something reliable and dramatic, crocosmia is one of those plants you’ll be glad you gave a chance.








What do you think?
It is nice to know your opinion. Leave a comment.