










Understanding Crochet Stitches and Why They Go Missing
Crochet is one of the most rewarding fiber arts, but even experienced crafters occasionally discover a missing stitch partway through a project or after completing a piece. A missing stitch can appear as an unexpected gap, a noticeably uneven edge, or a section of fabric that seems narrower than the rest. Before you can repair the problem effectively, it helps to understand what a missing stitch actually looks like and why it happens in the first place. Recognizing the issue early makes the repair process significantly easier and less stressful.
Stitches go missing for a variety of reasons, and none of them mean you are a bad crocheter. One of the most common culprits is simply losing count, especially when working on large, repetitive projects like blankets or scarves. Distractions, fatigue, or working in poor lighting can all cause you to accidentally skip a stitch or fail to work into the correct loop. Another frequent cause is accidentally working two stitches together as if they were one, reducing your stitch count without you realizing it until several rows later.
Yarn type and hook size can also contribute to the problem. Fuzzy or textured yarns like mohair, bouclé, or chenille make it notoriously difficult to see individual stitches clearly, which increases the chance of missing one. Similarly, if your hook is too small for the yarn weight, the loops can become compressed and hard to identify. Understanding these root causes not only helps you repair mistakes but also teaches you how to prevent them in future projects, making you a more confident and skilled crocheter overall.
Common Signs That You Have a Missing Stitch
Detecting a missing stitch early is the key to an easier repair. The most obvious sign is a visible hole or gap in your fabric that does not appear anywhere else in the pattern. If the pattern does not call for decorative holes such as in lace or mesh work, any unexpected opening is a red flag worth investigating. Run your fingers along the fabric and count the stitches in each row to see whether the number decreases at any point, which will confirm your suspicion.
A decreasing stitch count is another telltale indicator. If you started with 30 stitches and now have 28, two stitches have gone missing somewhere along the way. This is why experienced crocheters recommend placing a stitch marker at the beginning and end of each row, especially when working in the round. Counting your stitches at the end of every few rows takes only a moment but can save you hours of frogging and restarting later in the project.
You might also notice that one side of your work looks uneven or that a seam does not line up correctly when you go to assemble separate pieces. Edges that slant inward rather than remaining straight are a classic symptom of gradually lost stitches. If the fabric looks puckered or gathered in one spot while the rest lies flat, that localized area is worth a closer inspection. These physical clues guide you directly to the problem zone so you can target your repair efficiently.
Gathering Your Tools and Preparing for the Repair
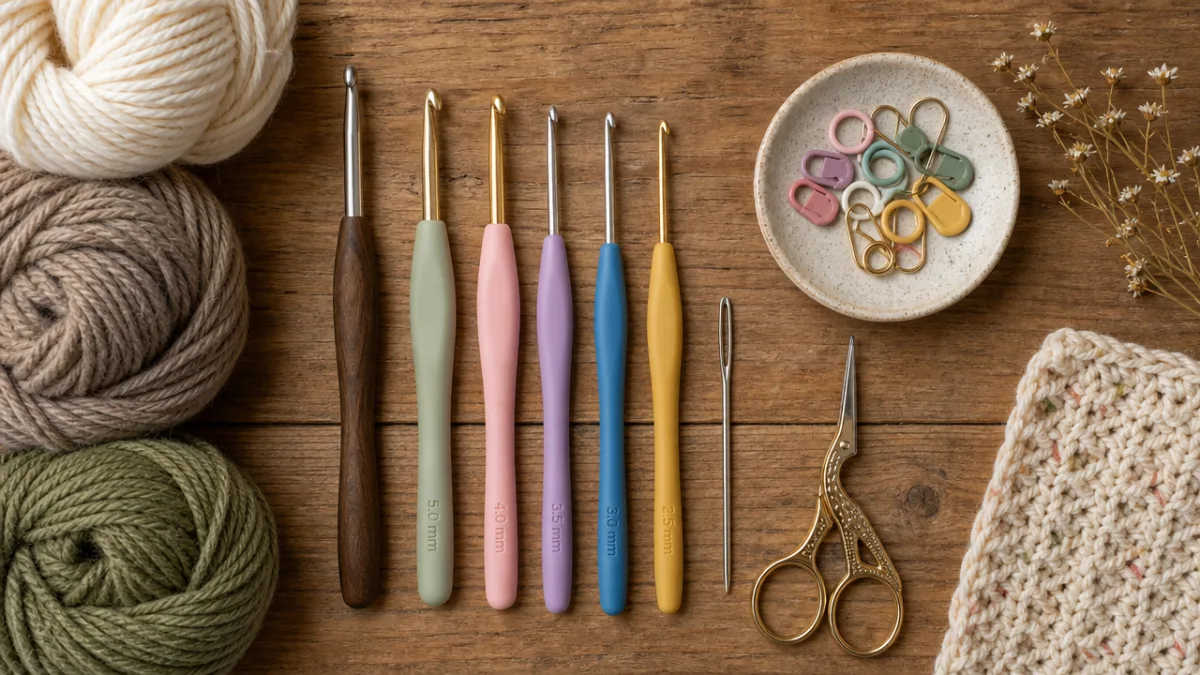
Before you attempt any repair work, gathering the right tools will make the process smoother and more successful. At minimum you will need a crochet hook in the same size you used for the original project, a tapestry or yarn needle with a blunt tip, scissors, and ideally a small amount of matching yarn in case you need to add new material. Good lighting is absolutely essential for repair work, even more so than for regular crocheting, because you need to see individual loops and strands with precision. A magnifying glass can be a real help if your yarn is fine weight or the stitches are small.
Locking stitch markers or even simple loops of contrasting yarn are invaluable for marking the area where the missing stitch occurred. Once you identify the problem row, place a marker on either side of the gap so the area does not shift while you work. If the surrounding stitches have become distorted or stretched due to the missing stitch, gently blocking that section of fabric before you begin the repair can help the loops relax into a more workable position. Steam or wet blocking works well for natural fibers, while acrylic yarns respond better to a gentle pressing with a damp cloth.
It is also wise to take a photograph of the damaged area before you begin, especially if you are working on an intricate pattern. The photo serves as a reference so you can see clearly what the surrounding stitches look like and ensure that your repair blends in seamlessly. If you are working on a garment or a project with a highly visible surface, take time to test your repair technique on a small swatch of the same yarn before touching the actual piece. A little preparation up front prevents you from making the situation worse with a hasty approach.
Reading the Stitch Structure Around the Gap
One of the most important skills for repairing crochet is the ability to read your stitches, meaning you can look at the fabric and understand exactly how each loop connects to the ones above and below it. When you find the location of the missing stitch, spend a moment studying the stitches on either side of the gap. Notice the V-shaped tops of the stitches in the rows above and the post, or vertical column, of each stitch below. This visual understanding will guide where and how to insert your hook when you begin the repair.
If the missing stitch is in the middle of the fabric rather than at the edge, you may see a laddering effect, which looks like a small run similar to what you see in a dropped knitting stitch. In crochet this ladder appears as loose horizontal strands or bars hanging between the stitches on either side of the gap. These loose strands are actually the yarn that was supposed to form the missing stitch, and they are your raw material for the repair. Recognizing them as an asset rather than a source of frustration is a helpful shift in perspective.
Take particular note of how many rows above the error the damage extends. A missing stitch in the bottom row of a finished project may have caused a ripple of misalignment through every subsequent row. In those cases you may not be able to repair just one stitch in isolation; you might need to address the visual distortion in the rows above as well. Understanding the full scope of the damage before you start will prevent you from declaring victory too soon and then discovering that the repair is still visible from the right side of the fabric.
Step-by-Step Method for Repairing a Missing Single Crochet Stitch
The most straightforward type of missing stitch to repair is a single crochet, because it is a short stitch with a simple structure. Begin by inserting your crochet hook from the front to the back of the fabric through the stitch directly below where the missing stitch should be. This is the stitch in the row beneath the gap. If there are loose strands hanging in the gap from the dropped stitch, hook onto those strands; if the yarn has been pulled into the surrounding stitches, you may need to use a small length of matching yarn to create the replacement stitch from scratch.
Once your hook is through the correct location, draw up a loop. If you are using the existing loose yarn, simply pull it through to the front of the work. If you are adding new yarn, fold a short length in half, insert the midpoint through the base stitch, and pull both tail ends through the loop to secure it. You now have a working loop on your hook. Insert the hook into the stitch directly above the gap, which is the base of the stitch in the row above, yarn over, and pull through both loops on your hook to complete the single crochet. The stitch is now recreated in the correct position.
After completing the repair stitch, weave in any yarn tails securely on the wrong side of the work using your tapestry needle. Weave each tail in at least two different directions for maximum security, following the path of the surrounding stitches so the tail blends in and does not show through the front of the fabric. Give the repaired area a gentle tug in all directions to test that the stitch holds, and then compare it visually to the surrounding stitches to ensure the tension matches. A stitch that is dramatically tighter or looser than its neighbors will stand out, so adjust your technique as needed.
Repairing More Complex Stitches: Double and Treble Crochet
Repairing a missing double crochet or treble crochet follows the same logical approach as the single crochet repair, but requires you to replicate the additional height of these taller stitches. For a missing double crochet, insert your hook into the base location, yarn over once before drawing up the loop, and then work the stitch in the same way you would normally, completing it by drawing through two loops at a time. The extra yarn over is what gives the double crochet its characteristic height, so do not skip it during the repair or the resulting stitch will be too short and will pull the surrounding fabric downward.
Treble crochet repair follows the same principle with two yarn overs before drawing up the initial loop. The challenge with taller stitches is that the repair stitch needs to span a greater vertical distance, which means there may not be enough slack yarn available in the gap to complete the stitch naturally. In these situations, you will almost certainly need to introduce a small amount of new yarn. Choose a yarn that matches as closely as possible in fiber content, weight, and color, and ensure the new piece is long enough to complete the stitch and leave sufficient tails for weaving in on both ends.
When repairing stitches in specialty patterns such as shells, clusters, bobbles, or popcorns, the same foundational logic applies but you must also replicate the grouped structure of these stitches. A shell stitch, for example, consists of multiple double crochets all worked into the same base stitch, so your repair needs to recreate that fan shape. Work each component stitch of the shell individually into the correct position, and use stitch markers generously to keep track of where each element belongs. Consulting the original pattern while you repair is always a good idea for these more complex stitch types.

Repairing Missing Stitches at the Edges of Your Work
Edge stitches require a slightly different approach because there is only one neighboring stitch rather than two to anchor the repair. A missing stitch at the beginning or end of a row can cause the entire edge of your work to slant inward, creating a visible diagonal line that is especially obvious on scarves, blankets, and garment panels. The repair process starts the same way, with identifying the exact row and location of the missing stitch, but you will need to pay extra attention to maintaining the correct tension since there is less surrounding structure to keep the new stitch in place.
For a missing edge stitch, begin by examining the turning chain at the start of the problem row. In many crochet patterns, the turning chain counts as the first stitch of the row, and a missing edge stitch is often the result of failing to work into or count the turning chain correctly. If this is the case, you may be able to work a salvage stitch directly into the chain or into the side of the stitch below the gap, securing it with a tight weave-in on the wrong side. This approach works particularly well for simple stitch patterns where the edge does not need to be highly decorative.
After completing the edge repair, consider reinforcing the entire edge of the affected section with a row of slip stitches or a single crochet border if the project design allows for it. A border not only conceals minor inconsistencies in the edge stitches but also adds structural stability so the repair holds up well over time and through repeated washing. Even a simple round of single crochet along the edge of a blanket or dishcloth can transform a slightly uneven repair into a polished, professional-looking finish that no one else would ever suspect had once been a problem area.
Preventing Future Missing Stitches
Prevention is always more efficient than repair, and a few simple habits can dramatically reduce the frequency of missing stitches in your crochet work. The single most effective preventive measure is counting your stitches at regular intervals, ideally at the end of every row or round. If you are working a long row with many stitches, consider placing a stitch marker every ten or twenty stitches so you can count in manageable segments rather than trying to count the whole row at once. This approach catches errors immediately while they are still easy to address.
Working in good lighting cannot be overstated as a preventive strategy. Natural daylight is ideal, but a bright daylight-spectrum lamp positioned directly over your work is a practical alternative for evening crafting sessions. When using dark-colored yarns, try placing a white or light-colored cloth over your lap so the stitches stand out in contrast and are easier to count and identify. Switching to a smooth, plied yarn rather than a single-ply or textured one also makes stitch identification much easier, particularly when you are learning a new pattern or technique.
Finally, developing the habit of reading your work as you crochet, which means pausing occasionally to look at the fabric and understand the structure you are creating, will help you catch anomalies before they accumulate. Experienced crocheters can often feel when something is off because the tension or rhythm of the work changes slightly. Training yourself to pay attention to these tactile cues, rather than crocheting on autopilot, is a skill that develops naturally with practice and makes you far less likely to need repair work in the future.

Finishing and Caring for Your Repaired Crochet Piece
Once you have completed your stitch repair, the finishing steps are just as important as the repair itself if you want the result to look seamless and professional. Begin by weaving in all yarn tails thoroughly, using your tapestry needle to work each tail into the fabric in at least two directions for a distance of at least two inches in each direction. Trim the tails close to the fabric but not so close that they risk working their way loose over time. A tiny dab of fabric glue applied to the very tip of each tail provides additional security for projects that will receive heavy use or frequent washing.
Blocking the repaired section, or the entire piece if practical, can make a tremendous difference in how well the repair blends in with the surrounding fabric. When you wet block a crochet piece by soaking it in cool water and then gently reshaping it on a flat surface with pins or blocking wires, the fibers relax and redistribute, which can make a repaired stitch nearly invisible even to a trained eye. Natural fibers like wool, cotton, and alpaca respond especially well to wet blocking, while acrylic yarns require steam or careful pressing under a damp cloth to achieve the same smoothing effect.
Once the piece is fully dry and the repair is complete, examine it from both the right side and the wrong side under good lighting. Gently stretch the fabric in all directions to ensure the repair stitch holds and that no loops are pulling or puckering. If everything looks good, your piece is ready to use, gift, or sell with confidence. Completing a successful repair is a genuinely satisfying accomplishment that builds your skills and your understanding of crochet structure in ways that straightforward construction work sometimes does not.
When to Frog Instead of Repair
There are situations where a repair, however well executed, is simply not the right solution, and the more honest approach is to frog, which means to rip out your work back to the point of the error and redo it. If the missing stitch occurred in the very first few rows of a project and has caused a cascade of misaligned stitches through every subsequent row, repairing the original error may fix the hole but leave behind rows of skewed or distorted fabric that will always look slightly off. In cases like this, frogging is not a defeat but a practical decision that leads to a better final result.
Similarly, if the missing stitch is in a highly visible area of a garment, such as the center front or along a prominent seam line, and your repair is detectable even after blocking and finishing, you may prefer the clean result of frogging over the slight imperfection of a visible repair. The decision depends entirely on the intended use of the piece and your personal standards. A kitchen dishcloth can tolerate a subtle repair without any loss of function or beauty, while a bridal shawl or a garment intended for sale may warrant the extra effort of redoing the affected section.
Learning when to repair and when to frog is part of developing mature judgment as a crafter. Neither choice is wrong; each is simply the appropriate response to a different set of circumstances. The good news is that every time you frog and redo a section, you reinforce the correct technique in your muscle memory, and every time you complete a successful repair, you expand your problem-solving skills. Both experiences make you a better, more resourceful crocheter, and both are worth embracing as natural parts of the creative process rather than sources of frustration or discouragement.








What do you think?
It is nice to know your opinion. Leave a comment.