










Houndstooth Darn: The Art of Visible Mending with Timeless Pattern
What Is Visible Mending and Why It Matters
Visible mending flips the whole idea of textile repair on its head. Instead of trying to hide a hole or worn patch, you lean into it — using decorative stitching to turn the damage into the most interesting thing about the piece. The houndstooth darn is one of the most striking ways to do this. It takes that iconic two-tone geometric pattern we know from tailored coats and suiting fabric and recreates it entirely with needle and thread, right over the spot that needs fixing.
This isn’t a new idea, either. Cultures around the world have long understood that a repaired garment tells a story worth keeping — think Japanese sashiko stitching or the ornate embellishment found on Norwegian bunad. Today, visible mending has found a new audience, largely as a pushback against fast fashion. When you’ve got a sweater you love that’s developed a hole at the elbow, throwing it away feels wrong. Mending it beautifully feels exactly right.
There’s also something quietly political about it. Fashion is one of the planet’s most polluting industries, and choosing to extend a garment’s life — even by a year or two — genuinely matters. A houndstooth darn makes that choice look effortless: the finished repair tends to be so visually compelling that it becomes the piece people notice first, turning what was once a flaw into the garment’s best detail.
Understanding the Houndstooth Pattern
Houndstooth is one of those patterns that’s been around forever and somehow never looks dated. Traditionally it’s created through a twill weave using two contrasting colors — black and white being the classic pairing, though it works in almost any high-contrast combination. What makes the pattern so distinctive is those four-pointed shapes that interlock across the cloth, creating a sense of diagonal movement that’s almost optical. It’s geometric but alive, which is probably why tailors and fashion designers keep coming back to it.
When you recreate houndstooth as a darn, you’re essentially simulating how a loom builds the pattern. The threads you lay down horizontally mimic the warp; the ones you weave through vertically act as the weft. And crucially, the color sequencing has to follow the same over-under logic as an actual twill weave. So before you pick up a needle, it helps to understand a little bit about how the pattern is structurally built — which threads sit on top at each intersection, and how the four-pointed tooth shape emerges from that logic.
One of the nicest things about this pattern is how well it scales. You can work it tiny and fine with delicate thread over a small hole in a lightweight fabric, or go bold with chunky yarn on a woolen coat or denim jacket. The thread weight and needle size you choose will dramatically shape the final look, and honestly, experimenting with those choices is a big part of the fun.
Tools and Materials for a Houndstooth Darn
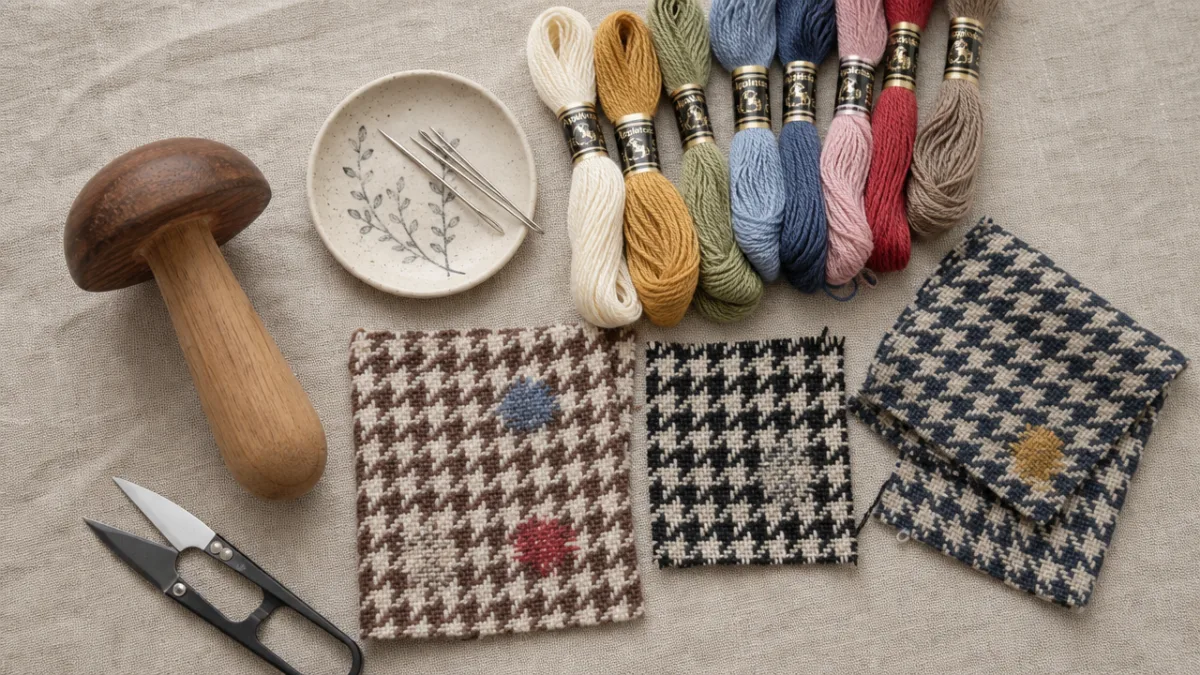
Having the right tools before you start makes a real difference — not just to the finished result, but to how enjoyable the process is. The most essential piece of kit is a darning mushroom or darning egg. This is a smooth, rounded form (usually wooden) that you slip inside the garment so it sits underneath the damaged area, holding the fabric taut while you work. Without it, you end up fighting the fabric the whole time, and repairs tend to pucker badly. Many modern darning mushrooms have an adjustable handle and a screw mechanism so you can dial in exactly the tension you want.
Choosing your thread is where things get genuinely exciting. For a traditional houndstooth you need two contrasting colors — black and white if you want to go classic, but navy and cream, rust and mustard, or forest green and pale gold all look stunning. Match the thread to the base fabric: wool thread or tapestry wool for a sweater or coat, embroidery floss or perle cotton for cotton fabrics. Sashiko thread is another lovely option, especially if you want a bit of sheen to make the repair stand out.
Beyond the thread and mushroom, you’ll need a tapestry or embroidery needle with an eye large enough for your thread, small sharp embroidery scissors, and a thimble if you’re working through anything dense. A fine-toothed comb or needle tool is handy for nudging threads into place without snagging. A small ruler or grid-marked stabilizer can help keep the pattern even, and good lighting is genuinely essential — don’t underestimate it.
- Darning mushroom or egg — holds fabric taut for even stitching without distortion
- Two contrasting thread colors — chosen to complement the base fabric’s weight and fiber content
- Tapestry or embroidery needle — sized appropriately for thread thickness
- Embroidery scissors — small and sharp for precise trimming
- Thimble — optional but helpful for dense fabrics
- Good light source — essential for following the pattern accurately
Preparing the Fabric Before You Begin
Preparation is what separates a darn that looks great and holds up for years from one that puckers or gives way at the edges after a few washes. Start by really looking at the damage — not just the hole itself, but the area around it. Worn and thinning fabric surrounds most holes, and if you only mend the hole without addressing those weakened edges, you’ll be back with a new tear within months. A good darn covers the whole vulnerable zone, reinforcing everything together.
Once you’ve mapped out the full area, trim any loose threads or frayed edges, being careful not to cut into healthy fabric. If the hole has a particularly ragged or irregular shape, you might decide to very slightly neaten it into something more geometric — a rough square or rectangle tends to work better for a grid-based pattern than a jagged, uneven opening. Some people use small scissors to clean up the edges; others prefer to just work with the existing shape, which is fine too if it’s not too wild.
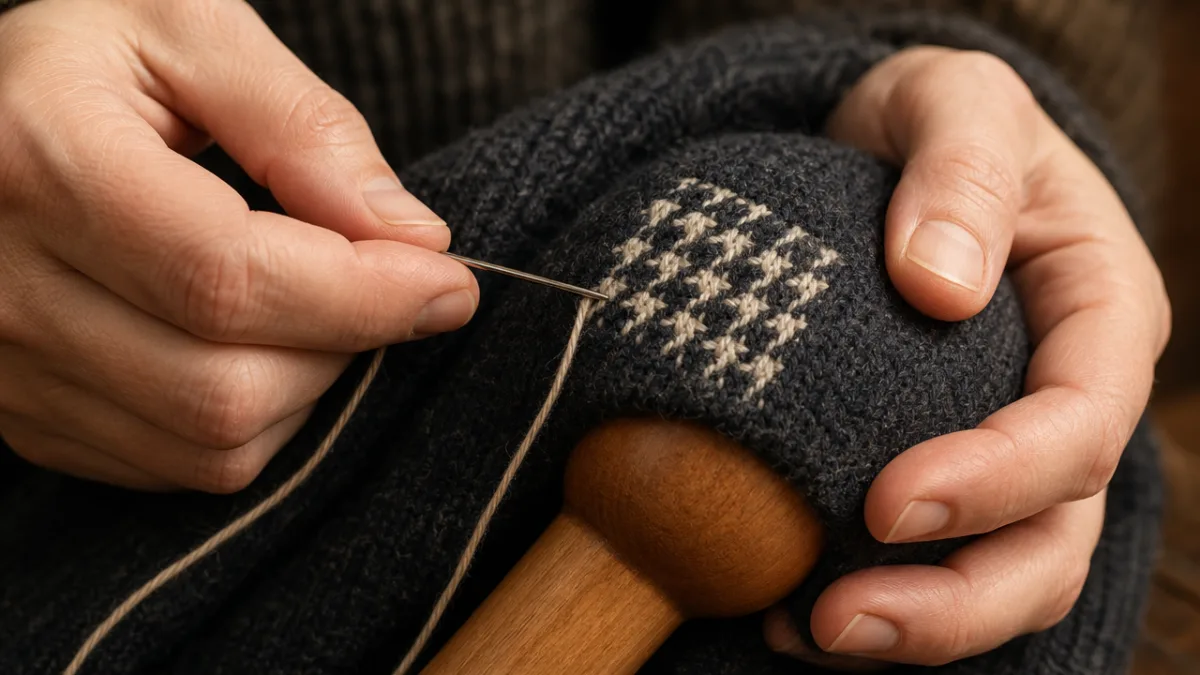
Slip your darning mushroom inside the garment so the damage sits centered over the dome, then adjust the tension. You want the fabric firm enough to work on comfortably, but not so stretched that it distorts — this is especially important with stretchy knits, where over-tensioning will mean the finished darn pulls the surrounding fabric when you actually wear it. If it helps, lightly mark the boundary of your repair area with a chalk pencil or a few basting threads before you begin.
Step-by-Step: Working the Houndstooth Darn
Start by laying your foundation threads — the ones that stand in for the warp on a loom. Thread your needle with the first color (usually the darker one) and anchor it at one edge of the repair area with a small knot or a few tiny running stitches tucked into the fabric. Then work horizontally across the hole, laying parallel threads in a consistent sequence. For houndstooth, the classic rhythm is two threads of color A, then two threads of color B, repeating across the row. Keep the spacing as even as you can — the regularity is what gives the finished pattern its crisp, clean geometry.
Once all your horizontal threads are laid, you move on to weaving the verticals, which act as the weft and are where the pattern really starts to take shape. Thread your needle with the second color and begin working vertically, weaving over and under the horizontal threads according to the houndstooth sequence. The characteristic tooth shapes emerge from how each vertical row offsets its over-under pattern relative to its neighbor — that shift is what creates the diagonal movement. If the logic isn’t immediately obvious, there are plenty of charts and diagrams out there that map the exact sequence, and consulting one for your first few rows is completely sensible. It becomes intuitive fairly quickly.
As you work, pause now and then to nudge threads into alignment with a needle tip. Tension is everything here: too loose and you’ll have gaps; too tight and the repair will be stiff and the surrounding fabric will pucker. Aim for consistent, moderate tension throughout. When you’ve woven all the vertical threads, the houndstooth pattern should be clearly visible across the repair. Finish by weaving your thread tails back through the darn itself or securing them with a few tiny stitches at the fabric edge, then trim them close.
Design Variations and Creative Possibilities
Classic black and white houndstooth is wonderful, but one of the real pleasures of visible mending is that you get to make it your own. Color is the most obvious place to start experimenting. Matching one thread to the garment’s base color and choosing a bright accent for the other creates a repair that catches the eye while still feeling harmonious with the whole piece. Earth tone pairings — terracotta and sand, olive and ivory, burgundy and blush — give the pattern a warmer, more organic character that’s particularly lovely on linen or naturally dyed fabrics.
Scale is another dimension worth playing with. Worked fine and small, a houndstooth darn reads almost like a woven textile from a distance — subtle and refined. Scale it up dramatically with thick yarn and you’ve got a bold graphic statement that isn’t trying to blend in at all; it’s just a feature now. Some menders will deliberately repeat the same houndstooth colorway across multiple repairs on a single garment, so the whole thing starts to look like it was designed that way from the beginning.
You can also combine the houndstooth darn with other visible mending techniques to build something richer. A border of running stitch or backstitch around the patch gives it a finished, framed look. Adding a few French knots, a small embroidered motif, or a line of sashiko stitching leading away from the repair softens the geometry and makes it feel distinctly personal. A lot of experienced menders treat a single garment as an ongoing canvas — coming back to it each time a new area needs attention, building up a layered record of the piece’s life over years of wearing and caring.
Caring for and Wearing Your Mended Garment
A well-done houndstooth darn is genuinely durable, but it will last longer if you treat it thoughtfully. The main principle is simple: wash the mended garment the way the base fabric wants to be washed. Wool needs hand-washing or a gentle cold cycle with wool-safe detergent, and should be laid flat to dry rather than hung — hanging can distort the repair over time. Cotton denim and similar robust fabrics can handle a gentle machine cycle, but turning the garment inside out before washing reduces friction on the darn and helps it hold up longer.
Try to avoid tumble-drying repaired pieces when you can. The heat and mechanical agitation are hard on both thread and fabric, and darned areas can pill, distort, or start to loosen with repeated drying cycles. Laying flat to air-dry is kinder to most mended textiles. If you need to iron, use a pressing cloth between the iron and the darn rather than pressing directly onto the woven surface — direct heat can flatten and weaken the interlaced thread structure.
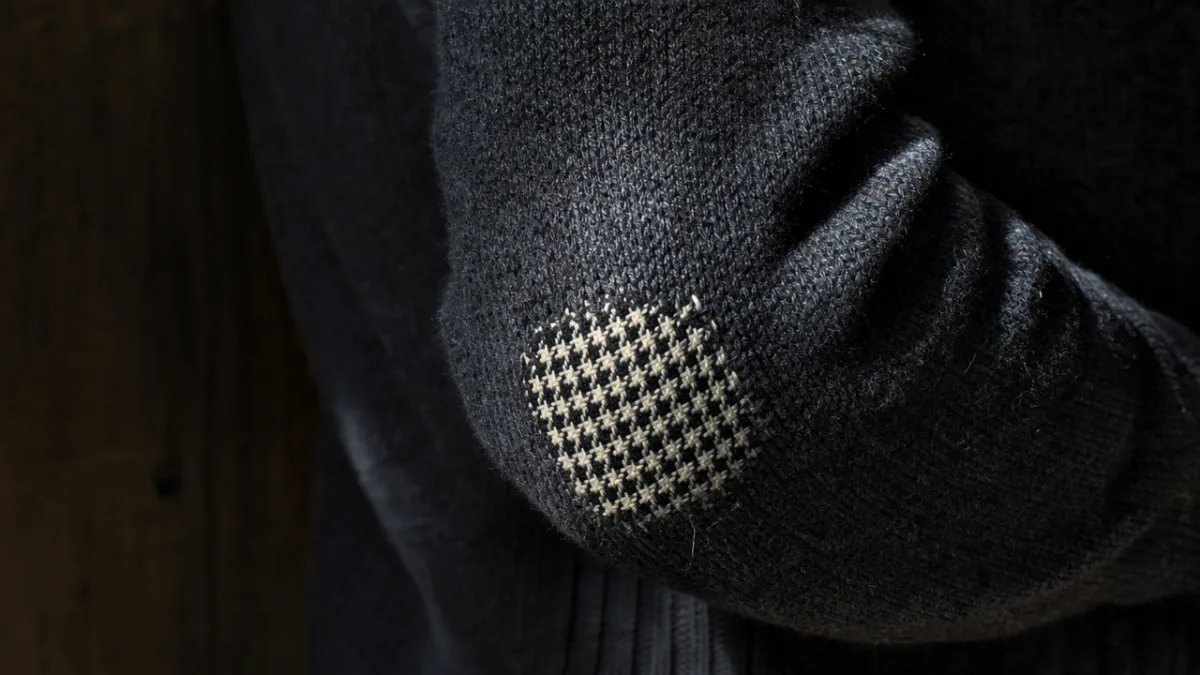
Over time you might notice a little loosening or shifting of the darn’s threads, especially in high-friction areas like elbows or cuffs. That’s completely normal, and it doesn’t mean the repair has failed. It just means a brief return visit with needle and thread to re-anchor any loose ends. Many experienced menders find their repairs only get better with age — the thread softens with washing, acquiring a patina that makes it look like it was always part of the original fabric. Wearing a visibly mended garment is an ongoing relationship between you and the piece, and one that genuinely rewards patience, creativity, and care.








What do you think?
It is nice to know your opinion. Leave a comment.