










How To Care For Chrysanthemums To Maximize Blooms Every Autumn
Understanding Chrysanthemums and Why They Thrive in Autumn
Chrysanthemums, affectionately known as “mums,” are among the most celebrated flowering plants in the world, prized for their stunning diversity of bloom shapes, sizes, and colors. These hardy perennials belong to the Asteraceae family and have been cultivated for over 2,500 years, originating in China before spreading across Asia and eventually captivating gardeners worldwide. Their natural blooming cycle is perfectly synchronized with the shortening days of autumn, making them an indispensable part of fall garden design and seasonal decorating traditions.
What makes chrysanthemums so uniquely suited to autumn is their classification as short-day plants, meaning they are triggered to bloom when the hours of daylight fall below a certain threshold — typically around 12 hours of light per day. As summer transitions into fall and nights grow longer, mums receive the biological signal they need to set buds and burst into color. This photoperiod sensitivity is the fundamental reason why chrysanthemums and autumn go together so naturally, and understanding it is the first step toward growing them successfully year after year.
There are dozens of cultivated varieties of chrysanthemums available to home gardeners, ranging from compact cushion mums ideal for container planting to tall, elegant exhibition varieties with elaborate, layered petals. Garden mums, which are the most commonly sold type at nurseries and garden centers each fall, are specifically bred for outdoor hardiness and prolific blooming. Florist mums, by contrast, are typically grown for indoor arrangements and may not survive outdoor winters. Knowing which type you are working with will help you make better decisions about planting, care, and overwintering strategies throughout the growing season.
Choosing the Right Location and Soil for Healthy Growth
Selecting the correct planting site is one of the most critical decisions you will make when growing chrysanthemums, and it can mean the difference between a lackluster display and a breathtaking autumn spectacle. Mums require a minimum of six hours of direct sunlight each day, and more is always better. A south-facing bed or border that receives full sun throughout the day will encourage the most robust growth and the highest number of blooms. Avoid placing mums in spots that receive afternoon shade from trees or structures, as insufficient light leads to leggy growth, reduced flowering, and increased susceptibility to disease.
Soil quality is equally important when it comes to chrysanthemum success. These plants thrive in well-draining, fertile loam with a slightly acidic to neutral pH, ideally between 6.0 and 7.0. Heavy clay soils that retain water are problematic because they promote root rot, one of the most common killers of chrysanthemums. If your garden soil is dense or compacted, amend it generously with compost, aged manure, or perlite to improve drainage and add organic matter. Raised beds are an excellent option for gardeners dealing with persistently poor soil conditions, as they allow complete control over the growing medium.
Air circulation is another factor that many gardeners overlook when siting their chrysanthemums. Plants that are crowded together or placed too close to walls and fences are more prone to fungal diseases such as powdery mildew and botrytis, which thrive in stagnant, humid conditions. Space your chrysanthemums at least 18 to 24 inches apart to allow air to flow freely around the foliage. This spacing also gives each plant room to spread and fill out naturally, resulting in a fuller, more attractive display when bloom time arrives in autumn. Good air circulation combined with appropriate sunlight creates the foundation for disease-resistant, productive plants.

Watering and Feeding Chrysanthemums for Maximum Bloom Production
Proper watering is essential to chrysanthemum health, and getting it right requires a balance between providing adequate moisture and avoiding the waterlogged conditions that lead to root problems. Chrysanthemums prefer consistently moist but never soggy soil. During the active growing season from spring through late summer, they typically require about one inch of water per week, either from rainfall or supplemental irrigation. During hot, dry spells, you may need to water more frequently to prevent stress, which can inhibit budding and reduce bloom quality come autumn.
When watering your chrysanthemums, always aim to deliver moisture directly to the root zone rather than overhead. Wetting the foliage unnecessarily increases the risk of fungal disease, particularly in humid climates or during cool, cloudy weather. Drip irrigation systems or soaker hoses are ideal for mums because they deliver water efficiently at ground level, keeping leaves dry while ensuring roots receive a thorough soaking. Water in the morning if hand-watering is your only option, as this gives foliage time to dry out during the day before cooler evening temperatures arrive.
Feeding chrysanthemums correctly is just as important as watering them properly. These are heavy feeders that benefit from regular fertilization throughout the growing season to support vigorous growth and abundant blooming. Begin fertilizing in early spring when new growth emerges, using a balanced granular fertilizer with an equal ratio of nitrogen, phosphorus, and potassium, such as a 10-10-10 formulation. As summer progresses and the plants begin to set buds, switch to a fertilizer with a higher phosphorus content, which supports root development and flower production. Stop fertilizing altogether by late summer to avoid promoting new, tender growth that will not harden off before winter.
Pinching, Pruning, and Deadheading for Bushier Plants and More Blooms
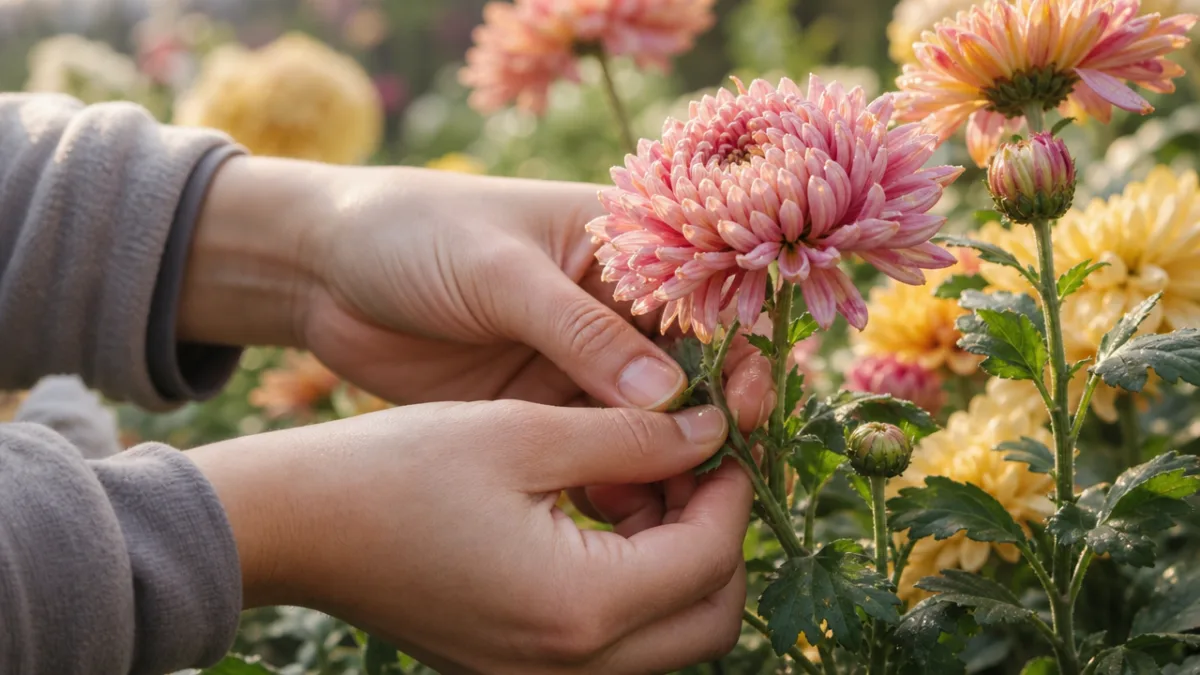
One of the most effective techniques for maximizing chrysanthemum blooms is a practice called pinching, and yet it remains one of the most underutilized by home gardeners. Pinching involves removing the growing tip of each stem to encourage the plant to branch laterally rather than growing straight up. When you pinch a chrysanthemum stem, the plant responds by sending out two or more new shoots from just below the cut, resulting in a much bushier, more compact plant that produces significantly more flower buds than an unpinched one. The difference in bloom quantity between pinched and unpinched plants can be dramatic and is well worth the small amount of effort involved.
Begin pinching your chrysanthemums when the new growth in spring reaches about six inches in height. Using your thumb and forefinger or a pair of clean, sharp scissors, remove the top one to two inches of each stem just above a set of healthy leaves. Repeat this process every two to three weeks as new growth continues to emerge, continuing until around mid-July in most climates. Stopping pinching by mid-summer is important because the plant needs sufficient time to develop and mature its flower buds before the shorter days of autumn trigger it to bloom. Pinching too late in the season will delay or prevent blooming entirely.
Deadheading, or removing spent blooms as they fade, is another practice that contributes to prolonged and more abundant flowering. When a chrysanthemum flower begins to wilt and turn brown, the plant naturally redirects its energy toward producing seeds rather than generating new buds. By removing these fading flowers promptly, you interrupt that process and encourage the plant to continue producing fresh blooms for as long as possible. Use clean, sharp pruners or scissors to cut the spent flower stem back to just above the nearest healthy leaf or emerging bud. Regular deadheading, combined with consistent pinching earlier in the season, can meaningfully extend your autumn chrysanthemum display by several additional weeks.
- Begin pinching stems when they reach 6 inches in spring and continue through mid-July.
- Always use clean, sharp tools to avoid introducing disease when cutting.
- Deadhead spent blooms every few days during the flowering period to maintain plant energy and prolong display.
- After a hard frost kills the blooms, cut plants back to about 6 inches above the ground to prepare for winter.
Overwintering Chrysanthemums to Ensure Return Blooms the Following Year
Many gardeners treat chrysanthemums as annuals, discarding them after the first frost kills the blooms each autumn. This is a perfectly valid approach, but it also means missing out on one of the most rewarding aspects of growing mums: watching plants that you have nurtured through the year return bigger, stronger, and more floriferous than ever the following season. With a modest amount of preparation and care, garden chrysanthemums can survive winter in most climates and reward you with a repeat performance — and often a superior one — every autumn for many years to come.
The key to successfully overwintering chrysanthemums lies in providing adequate insulation to protect the root system from repeated freeze-thaw cycles, which are more damaging to plants than sustained cold temperatures alone. After the first hard frost has killed the foliage, cut the stems back to about six inches above ground level, leaving enough stem to mark the plant’s location and protect the crown. Apply a generous layer of mulch — three to four inches of straw, shredded leaves, or wood chips — over the entire planting area. This layer acts as an insulating blanket, moderating soil temperature and preventing the destructive expansion and contraction that damages roots during winter.
In climates with particularly harsh winters, additional protection may be necessary to ensure chrysanthemum survival. Consider covering mulched plants with a layer of burlap or frost cloth during extended cold snaps to provide an extra buffer against extreme temperatures. Container-grown mums can be moved to an unheated garage, basement, or cold frame where temperatures remain above freezing but cool enough to keep the plants dormant. Check overwintering containers periodically throughout winter to ensure the soil does not dry out completely, watering sparingly if needed. In spring, remove mulch gradually as temperatures warm and watch for the first signs of new growth emerging from the base of the plant — one of the most satisfying sights in the garden.
Managing Pests and Diseases to Protect Your Chrysanthemum Display
Chrysanthemums are relatively robust plants, but like all garden residents, they are susceptible to a range of pests and diseases that can undermine their health and diminish their blooming potential if left unaddressed. Being proactive about monitoring your plants and responding promptly to early signs of trouble is far more effective than trying to manage a full-blown infestation or disease outbreak later in the season. Regular inspection of your mums — ideally weekly — allows you to catch problems in their earliest stages, when they are easiest to control with the least intensive intervention.
Among the most common insect pests affecting chrysanthemums are aphids, spider mites, leafminers, and chrysanthemum gall midges. Aphids cluster on new growth and the undersides of leaves, sucking plant sap and excreting a sticky substance called honeydew that can promote the growth of sooty mold. A strong spray of water from a garden hose is often sufficient to dislodge aphid colonies, and insecticidal soap or neem oil provides effective control for persistent infestations. Spider mites thrive in hot, dry conditions and cause characteristic stippling on leaves; improving air circulation and maintaining adequate soil moisture helps prevent their establishment. Always examine both surfaces of leaves during your inspections, as many pests prefer to hide on the underside of foliage.
Fungal diseases, including powdery mildew, botrytis blight, and septoria leaf spot, are among the most prevalent disease challenges for chrysanthemum growers. These conditions are most commonly promoted by poor air circulation, excessive moisture on foliage, and cool, damp weather — all of which are increasingly common as autumn approaches and bloom season peaks. Preventative measures such as proper plant spacing, ground-level watering, and avoiding late-day irrigation are your best defenses against fungal disease. If infection occurs, remove and dispose of affected plant material promptly — never compost diseased tissue — and apply an appropriate fungicide according to label directions. Choosing disease-resistant chrysanthemum varieties, which are widely available at reputable nurseries, also significantly reduces the risk of fungal problems throughout the season.
- Inspect plants weekly throughout the growing season, examining both upper and lower leaf surfaces.
- Address pest infestations early using the least invasive method first, such as water sprays or insecticidal soap.
- Practice good sanitation by removing fallen leaves and spent plant material from around the base of plants regularly.
- Avoid overhead watering and improve air circulation to minimize fungal disease risk.
- Select disease-resistant varieties whenever possible to reduce the burden of pest and disease management.
Dividing and Propagating Chrysanthemums to Expand Your Collection
One of the most economical and satisfying aspects of growing chrysanthemums as perennials is the ease with which they can be divided and propagated to create new plants. Over time, chrysanthemum clumps tend to grow outward while the center of the plant becomes woody, less productive, and more vulnerable to disease. Dividing established clumps every two to three years not only revitalizes the original plant by removing this aged central growth but also provides you with numerous healthy new divisions that can be planted elsewhere in the garden, shared with friends and neighbors, or grown on to replace aging specimens throughout your landscape.
The best time to divide chrysanthemums is in spring, just as new growth begins to emerge from the base of the plant. Use a garden fork or spade to carefully lift the entire clump from the soil, taking care to minimize root disturbance as much as possible. Once the clump is out of the ground, you will notice that the outer edges of the plant consist of young, vigorous shoots with healthy white roots, while the center is typically woody, brown, and less vital. Separate the outer portions into individual rooted sections using your hands, a sharp knife, or two garden forks worked back to back. Discard the woody central portion and replant the healthy divisions promptly, watering them in well to help them establish in their new locations.
Chrysanthemums can also be propagated from stem cuttings taken in late spring or early summer, which is a particularly useful technique for preserving unusual or especially beautiful varieties. Take cuttings of three to four inches from the tips of vigorous, healthy stems, cutting just below a leaf node with a clean, sharp blade. Remove the lower leaves, dip the cut end in rooting hormone powder, and insert the cutting into a small pot of moist, well-draining propagation medium such as perlite and peat. Place the pot in a warm, brightly lit location out of direct sunlight and keep the medium consistently moist. Roots typically develop within two to four weeks, after which the new plant can be gradually acclimated to outdoor conditions and transplanted into the garden to grow on for its first flowering season.








What do you think?
It is nice to know your opinion. Leave a comment.