










40+ Bromeliad Landscaping Hacks Gardeners Can’t Stop Talking About
Why Bromeliads Are the Ultimate Landscaping Plant
If you’ve spent any time in online gardening communities lately, you’ve probably noticed bromeliads popping up everywhere — and honestly, it makes total sense. These tropical plants used to live mostly in greenhouses and on windowsills, but they’ve found their way into outdoor landscapes in a big way. It’s easy to see why: those bold rosette shapes, the vivid colors, and the fact that they don’t demand constant attention make them one of the most practical and striking plants you can add to your yard.
What really makes bromeliads stand out is how adaptable they are. Got a shaded courtyard? There’s a bromeliad for that. A sun-baked rock garden? Also yes. A humid, jungle-style border? Absolutely. With over 3,000 species in the Bromeliaceae family — ranging from the humble pineapple to air-growing tillandsias that need no soil whatsoever — there’s something here for every gardener, regardless of skill level or space.
Beyond the good looks, bromeliads bring some real practical advantages to the table. Many are drought-tolerant once they settle in, which is a big win if you’re trying to keep your water bill in check. Their cup-shaped centers, called tanks, collect rainwater and nutrients on their own, so the plants handle a lot of their own hydration without much help from you. Throw in their natural resistance to most common pests, and you’ve got a plant that earns its place in the garden without asking much in return.
Choosing the Right Bromeliad for Your Climate and Soil
Before you go filling your garden with bromeliads, it’s worth spending a few minutes figuring out which varieties will actually thrive where you live. The most popular landscaping types — Aechmea, Guzmania, Neoregelia, Vriesea, and the ground-dwelling Dyckia — all have their own preferences around light, humidity, and cold tolerance. Matching the plant to your conditions from the start saves you a lot of headaches later.
If you’re in USDA zones 9 through 12, you’re in luck — the selection is huge. Neoregelias are a favorite in warmer climates because they handle full sun really well and actually develop more intense leaf color the brighter the light gets. Aechmeas, with their long-lasting flower spikes and bold foliage, are another solid choice for subtropical and tropical yards. In cooler zones, a lot of gardeners grow bromeliads in containers that can come inside when frost threatens — you get the tropical vibe without gambling on the weather.
Soil is something people often skip over, but it really does matter, especially for terrestrial varieties. Most bromeliads hate sitting in wet soil and will rot quickly in heavy clay. A well-draining mix with coarse sand, perlite, or pine bark mixed in will serve them much better than standard garden soil. For epiphytic types like tillandsias and some aechmeas, you can skip the soil altogether and mount them on driftwood, cork bark, or tree branches — it looks incredibly natural and works beautifully in the landscape.

Creative Bromeliad Planting Hacks That Actually Work
One of the most talked-about bromeliad tricks in gardening circles is working with pups — the offsets that bromeliads naturally produce after they bloom. Since most bromeliads flower just once and then gradually die back, these pups are essentially free plants that keep the show going. Once a pup reaches about one-third the size of the mother plant, you can carefully remove it, pot it up, and start the whole cycle again. Do this consistently and your collection can grow dramatically without a single trip to the garden center.
Another hack that’s gotten a lot of attention involves using everyday household objects as unconventional planters. Old wooden ladders, weathered pallets, driftwood logs, terracotta pipes, and even vintage colanders have all been put to work as bromeliad display structures by creative gardeners. Because many bromeliads don’t need soil to survive, you just attach them with waterproof wire, fishing line, or a dab of construction adhesive, mist them regularly, and let them do their thing. Over time, you end up with a living sculpture that keeps changing and growing in a way no garden ornament ever could.
Layering bromeliads with the right companion plants is another trick that takes a planting from pretty good to genuinely impressive. Low-growing Neoregelias work wonderfully as a carpet beneath tall palms or tree ferns, their flat, colorful rosettes reflecting light like little jewels. Tall Vrieseas add vertical interest in the middle of a border. Mix in the feathery texture of ferns or the bold, round leaves of elephant ears and suddenly the whole thing looks like it was designed by someone who really knows what they’re doing.
Designing a Bromeliad Garden That Looks Like a Professional Did It
The line between a bromeliad garden that looks cluttered and one that looks curated usually comes down to a few simple principles. Color blocking is one of the most effective. Instead of scattering individual plants of different colors across a bed, group several of the same variety together to create bold sweeps of color. A mass of deep burgundy Neoregelias next to a cluster of bright green-and-pink striped ones makes a far stronger statement than one of each color dotted randomly around the garden.
Elevation matters just as much as color. The best bromeliad landscapes aren’t just about what’s happening at ground level — they work vertically too. Mounting epiphytes on a large piece of driftwood or a living tree trunk at different heights gives the eye somewhere interesting to travel. Terrestrial Dyckias at ground level, tank bromeliads on mounts at eye level, and a canopy of palms or tree ferns overhead — that kind of layered composition is exactly what professional tropical landscape designers use to create those lush, immersive spaces you see in magazines.
Repetition is another underrated tool. Repeating a single species or color at regular intervals along a pathway or border creates a sense of rhythm that makes even a densely planted space feel organized rather than chaotic. The eye follows the repeated element and reads the whole garden as intentional and cohesive rather than random. Even something as simple as placing a pot of red-centered Neoregelia at the start, middle, and end of a garden path can tie an entire planting scheme together.
Don’t overlook the garden after dark. Low-voltage LED uplights placed behind or beneath large specimens create dramatic shadows and show off the architectural quality of bromeliad foliage in a way daytime light simply can’t match. Solar-powered spotlights have gotten affordable and reliable enough that even a modest garden can pull this off. Many bromeliad leaves are slightly translucent, so backlighting them produces this gorgeous glowing effect — almost like stained glass — that tends to stop visitors in their tracks.

Bromeliad Care Hacks to Keep Your Plants Thriving
Fertilizing bromeliads is one of the most misunderstood parts of their care, and getting it right really does show in how vibrant and healthy your plants look. Because bromeliads absorb nutrients mostly through their leaves and central tank rather than their roots, dumping fertilizer into the soil around them doesn’t do much. What works is mixing a diluted, low-nitrogen liquid fertilizer — roughly a quarter of the recommended strength — and pouring it directly into the tank of tank-forming varieties, or misting it lightly onto air plants. The much more common mistake is over-feeding, not under-feeding, so less really is more here.
Water quality is something a lot of gardeners don’t think much about, but it can be the difference between a collection that thrives and one that just gets by. Chlorine and fluoride in tap water can cause tip burn and discoloration, particularly in more sensitive varieties like Guzmanias and Vrieseas. If tap water is all you have, letting it sit in an open container overnight lets most of the chlorine dissipate. Collected rainwater is even better, and it’s one of those small upgrades that experienced bromeliad enthusiasts swear by.
Get into the habit of refreshing the water in the central tank every week or two. Stagnant water sitting in the tank can become a mosquito breeding ground, which is something that understandably puts some people off growing tank bromeliads outdoors. The fix is simple — just tip the plant gently to empty out the old water before refilling. In areas where mosquitoes are a real concern, a small piece of mosquito dunk or a tiny amount of horticultural oil added to the tank water will deal with the problem without harming the plant at all.
Using Bromeliads to Solve Common Landscaping Challenges
One of the most practical things about bromeliads is that they tend to thrive in exactly the spots where other plants give up. Deep shade under established trees, dry slopes that drain too fast for most ornamentals, cramped gaps between hardscaping — these are all areas where bromeliads can step in and do something beautiful. Certain Neoregelia varieties, for instance, handle quite deep shade while still holding their rich leaf color, making them a great answer for that frustrating dry zone beneath a large tree where nothing else seems to want to grow.
Erosion control on sloped areas is another place where bromeliads are starting to earn real respect. Terrestrial varieties like Dyckia and Hechtia have sturdy root systems that bind soil well, and their compact rosette shapes mean you can plant them densely without them crowding each other out. Some landscape designers are now using these tougher bromeliad genera on slopes that previously would have been planted with unremarkable grasses or purely functional ground covers, getting both structural stability and genuine visual appeal from the same planting.
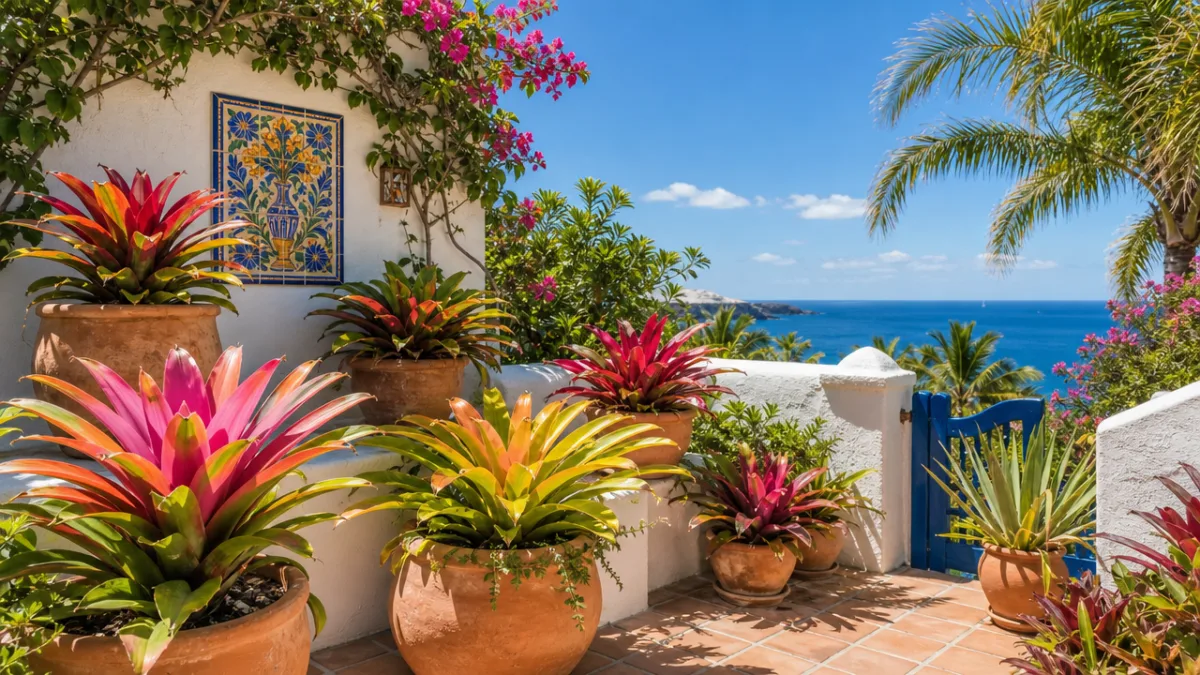
For renters, apartment dwellers, or anyone working with a paved outdoor space, container bromeliads are a genuine game-changer. A single large specimen in a ceramic or concrete pot can anchor a balcony or terrace with all the lush, tropical impact of a full garden bed but in a fraction of the footprint. Group a few containers at varying heights and you’ve got an instant garden vignette that needs nothing more than a hard surface and a few hours of indirect light per day. And since they’re portable, you can shuffle your display around whenever inspiration strikes.
Coastal gardeners dealing with salt spray and sandy soil will find certain bromeliads surprisingly tough. Aechmeas and Dyckias in particular hold up better than most ornamental plants in those conditions, making them genuinely useful in seaside gardens where the plant palette can feel frustratingly narrow. Their sculptural forms also suit the clean, modern aesthetic that tends to work well near the coast, pairing naturally with gravel mulches, bleached timber, and the crisp lines of contemporary outdoor furniture.
Propagating and Expanding Your Bromeliad Collection on a Budget
Building a serious bromeliad collection without spending a lot of money is very doable, and the gardening community has figured out plenty of clever ways to make it happen. Pup division is the foundation — but it goes further than most beginners expect. Every time a pup matures, blooms, and produces its own pups, your collection compounds. One original plant can realistically give you dozens of descendants over a few seasons. Fill an entire garden bed for the price of a few starter plants? It’s not just possible, it’s actually pretty common.
Plant swaps, both at local community events and in online bromeliad groups, are another incredible resource. The bromeliad community tends to be genuinely generous — experienced collectors frequently give away pups simply because they’ve run out of room. Plenty of gardeners have built entire landscapes almost entirely from plants received through swaps and sharing, with just a handful of purchased specimens as the original seed stock. Local bromeliad societies are especially worth seeking out, since members often have rare and unusual varieties you’ll never find at a regular garden center.
Growing from seed is slower, but it opens up the widest possible range of varieties, including species and hybrids that are genuinely hard to track down as established plants. Bromeliad seeds need warmth, humidity, and patience — germination can take several weeks, and the seedlings don’t rush. But for gardeners who find as much pleasure in the process as in the end result, it’s deeply satisfying, and it gives you a level of variety selection no nursery can match. A simple humidity dome, a heat mat, and bright indirect light is really all it takes to get started.
- Collect pups when they are at least one-third the size of the mother plant for best results
- Use a clean, sharp knife or pruning shears to detach pups and minimize damage to both plant and offset
- Allow cut surfaces to dry for several hours before potting to reduce the risk of rot
- Root new pups in a fast-draining mix of equal parts perlite and orchid bark
- Keep newly potted pups in bright indirect light until they show signs of active growth
- Join regional bromeliad societies and online communities to access rare varieties through swaps
- Label all specimens with variety name and origin date to track your collection’s history and lineage
What makes bromeliad landscaping so satisfying is how accessible it is at every level — whether you’re tucking a single dramatic specimen into a container by the front door or designing a full tropical garden room with dozens of varieties. These plants reward thoughtful care and creative placement with reliable, beautiful results. The enthusiasm gardeners have for bromeliads isn’t a fleeting trend. It’s a recognition that here is a plant genuinely rare in what it offers: beauty, toughness, and endless creative possibility, all wrapped up in one remarkable package.








What do you think?
It is nice to know your opinion. Leave a comment.