










Hanging Crochet Toys: Free Patterns, Tips, and Creative Ideas for Every Skill Level
What Are Hanging Crochet Toys and Why They’re So Popular
Hanging crochet toys have become one of the most beloved and versatile crafts in the handmade community. These charming creations combine the timeless art of crochet with functional or decorative purposes, resulting in whimsical pieces that can adorn nurseries, children’s rooms, car rear-view mirrors, bags, and even holiday trees. The appeal lies in their portability, affordability, and the joy they bring both to the maker and the recipient. Whether you’re a seasoned crocheter or just picking up a hook for the first time, hanging crochet toys offer an accessible and rewarding project to sink your creative energy into.
The rise of platforms like Pinterest has helped fuel the popularity of these tiny crocheted treasures. Crafters from around the world share their free patterns, finished objects, and creative variations, creating a vibrant community of enthusiasts who are constantly innovating and inspiring one another. A single viral pin of an adorable hanging bunny or a swinging crocheted sun can spark hundreds of makers to try their hand at the pattern, each adding their own personal spin through color choices, yarn weight, or embellishments. This collective creativity makes the craft feel alive and endlessly evolving.
One of the most appealing aspects of hanging crochet toys is how quickly they work up. Unlike a full-sized amigurumi doll or a blanket that might take weeks to complete, most hanging toy patterns can be finished in an afternoon or a weekend. This makes them ideal for last-minute gifts, craft fair inventory, or a satisfying creative break from larger projects. The compact nature of these toys also means they consume very little yarn, making them a fantastic way to use up leftover skeins from your stash and experiment with new color combinations without a significant investment.
Essential Supplies and Materials for Your First Hanging Crochet Toy
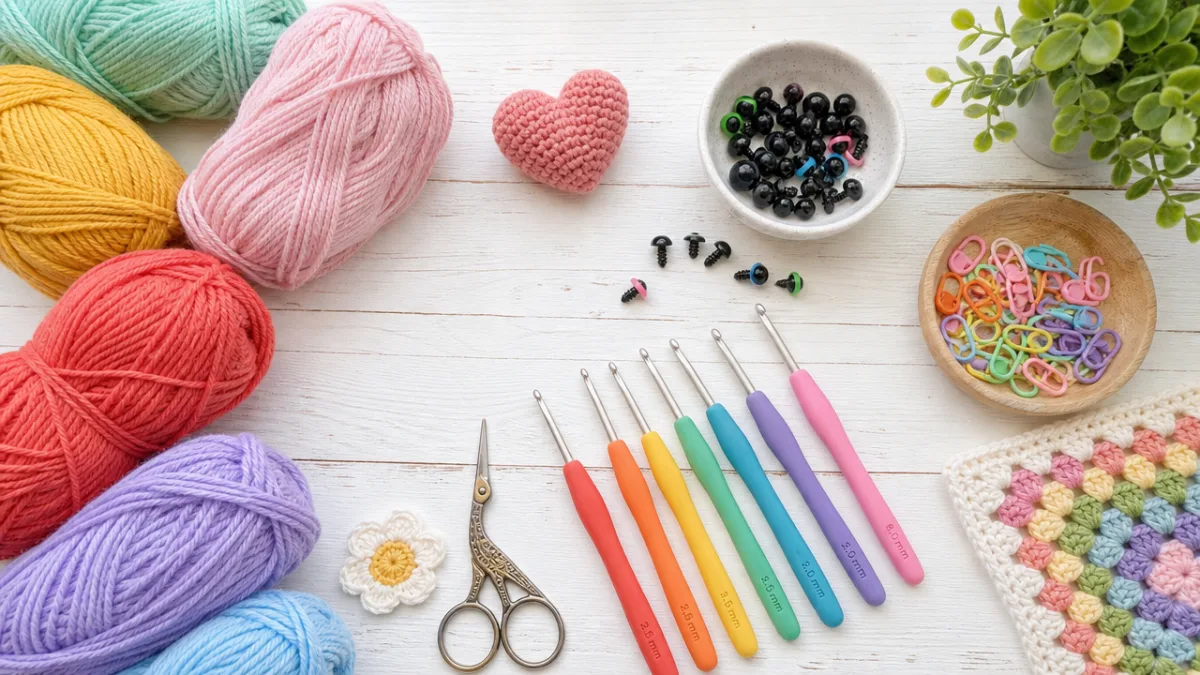
Before diving into your first hanging crochet toy pattern, it’s worth taking a few moments to gather the right materials. The beauty of this craft is that you truly don’t need much to get started. At minimum, you’ll want a crochet hook in an appropriate size for your chosen yarn, some yarn itself, a yarn needle for weaving in ends, polyfill stuffing if your pattern calls for it, and some cord or ribbon for the hanging element. Having these basics on hand will set you up for success and prevent frustrating mid-project supply runs.
When it comes to yarn selection, the choices you make will dramatically impact both the look and feel of your finished toy. For baby-safe hanging mobiles or toys intended for young children, it’s wise to choose soft, washable yarns that can withstand repeated handling and occasional cleanings. Cotton yarn is a popular choice for its durability and hypoallergenic properties, while acrylic blends offer a wider color range and machine-washable convenience. For purely decorative hanging pieces, you might explore novelty yarns, metallic threads, or even chunky textures that add visual interest and dimension to your creation.
Hook size matters more than many beginners initially realize. Most hanging crochet toy patterns recommend using a hook one or two sizes smaller than what the yarn label suggests. This tighter gauge creates a denser fabric that keeps stuffing from showing through and gives the toy a more polished, professional appearance. Standard hook sizes for these projects typically range from 2.5mm to 4mm, depending on the yarn weight used. Always crochet a small swatch and compare it to the pattern’s gauge recommendations before committing to a full project, especially if your finished toy needs to meet specific size requirements.
- Crochet hooks in sizes 2.5mm to 4.0mm for most hanging toy patterns
- Worsted weight or DK weight yarn in your chosen colors — cotton or acrylic blends work best
- Polyfill stuffing or wool batting for dimensional pieces
- Safety eyes in various sizes (6mm to 12mm are most common for small toys)
- A blunt-tipped yarn needle for sewing pieces together and weaving in ends
- Stitch markers to keep track of rounds in continuous amigurumi-style work
- Ribbon, twine, or macramé cord for the hanging component
Beginner-Friendly Free Patterns to Start With
The internet is an abundant resource for free hanging crochet toy patterns, and Pinterest is arguably the best starting point for discovering them. For true beginners, it’s advisable to start with simple shapes that require only basic stitches such as the magic ring, single crochet, increases, and decreases. A classic starting point is the crocheted hanging star, which uses just a handful of stitches arranged in a flat medallion that gets stuffed lightly and finished with a loop. These stars work up in under an hour and look absolutely beautiful strung together as a garland or hung individually as a nursery decoration.
Another extremely popular beginner pattern is the crocheted hanging cloud, often paired with dangling raindrops or tiny suns. This type of mobile-style piece typically involves crocheting a simple oval or rounded shape in white or light grey, adding a few hanging chains or cords beneath it, and attaching smaller crocheted shapes to each cord. The result is a whimsical, three-dimensional mobile that looks far more complex than it actually is to make. Many free versions of this pattern are available across craft blogs, Ravelry, and Etsy’s free download section, and most include photo tutorials that make the process even more approachable for newcomers.
Hanging crocheted animals are another wildly popular category that beginners can tackle with the right pattern selection. Flat or lightly stuffed animal shapes — think foxes, owls, elephants, or bears — can be made using primarily single crochet stitches worked in continuous rounds. The key difference between a hanging toy and a traditional amigurumi is that hanging toys are often designed to be flatter or more two-dimensional, reducing the need for complex shaping and assembly. This simplification makes them ideal for those still building their confidence with in-the-round construction and color changes.
Intermediate and Advanced Hanging Toy Patterns Worth Exploring
Once you’ve mastered the basics and completed a few beginner projects, the world of intermediate and advanced hanging crochet toys opens up with breathtaking complexity and creativity. At this level, patterns begin incorporating techniques such as tapestry crochet, intricate colorwork, three-dimensional structural elements, and complex joining methods. A gorgeous example is the hanging crochet dreamcatcher, which combines traditional macramé-inspired elements with crocheted motifs, beads, and feather accents to create a stunning bohemian wall hanging with real visual impact and artistic depth.
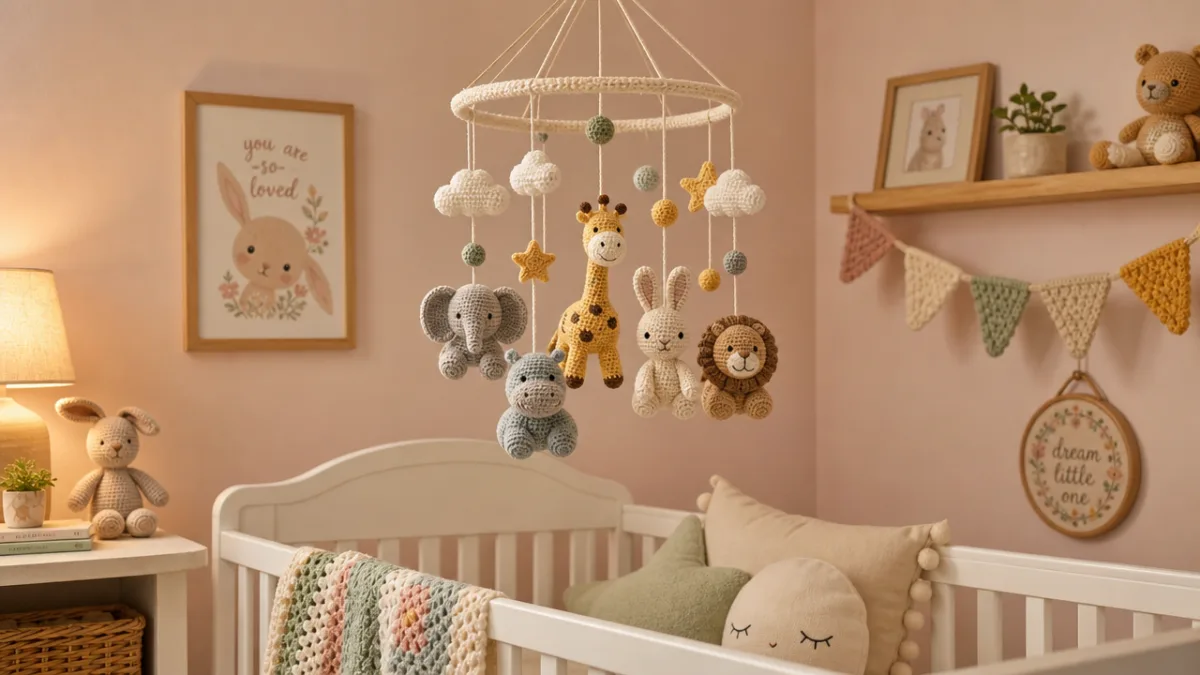
Intermediate patterns often feature multiple separate pieces that must be assembled carefully to create a cohesive finished object. A crocheted hanging mobile for a baby nursery, for instance, might require you to crochet five or six separate animals or geometric shapes, each requiring their own individual shaping, stuffing, and finishing, before being arranged and balanced on a dowel rod or hoop. Getting the balance right so the mobile hangs correctly is itself a skill worth developing, and many advanced pattern designers include detailed notes on assembly and weighting to help makers achieve that perfect, gently swinging effect.
Color theory becomes increasingly important at the intermediate and advanced levels. Knowing which colors complement each other, how variegated or self-striping yarns will behave in small-scale projects, and how to create visual harmony across a multi-piece mobile are all considerations that separate a good hanging toy from a truly stunning one. Many experienced crocheters keep a color wheel nearby while planning projects and take time to sketch or digitally mock up their color choices before committing yarn to hook. This planning phase is where much of the creative magic happens, and it’s a skill that develops beautifully over time with practice.
- Start by choosing a pattern rated at your current skill level — honest self-assessment here will save frustration later.
- Read the entire pattern through before starting, noting any techniques or stitches you’ll need to practice or look up.
- Gather all your materials in advance, including the correct hook size and any embellishments like beads or ribbons.
- Work up a gauge swatch to confirm your tension matches the pattern designer’s specifications.
- Crochet each component piece fully before beginning assembly, keeping pieces organized and labeled if necessary.
- Block or lightly steam your finished pieces before assembly to open up the stitches and even out tension.
- Take photos throughout the process — these become invaluable references if you want to recreate the project later.
Where to Find the Best Free Hanging Crochet Toy Patterns Online
The online crochet community is remarkably generous when it comes to sharing free patterns, and knowing where to look can save you hours of searching. Pinterest is an excellent visual discovery tool, but it often links out to external sources rather than hosting patterns itself. Some of the best destinations for free hanging crochet toy patterns include Ravelry, which has a searchable database of hundreds of thousands of free and paid patterns organized by technique, difficulty level, and yarn weight. Simply searching “hanging toy” or “crochet mobile” in their database will yield an impressive array of options to explore.
Craft blogs remain one of the richest sources of free, high-quality crochet patterns on the internet. Independent designers like Amigurumi Today, Repeat Crafter Me, and Little Yarn Friends regularly publish detailed free patterns with step-by-step photos, video tutorials, and helpful tips for achieving the best results. These blogs are often run by passionate crocheters who genuinely love sharing their craft, and the comment sections are treasure troves of community modifications, helpful hints, and finished object photos that can inspire your own creative variations and color choices for each pattern.
YouTube deserves special mention as an invaluable resource for visual learners who want to follow along with a hanging crochet toy project in real time. Countless talented crocheters post complete video tutorials covering everything from the very first magic ring to the final finishing knot, often accompanied by written pattern notes in the video description. For techniques that are difficult to grasp from written instructions alone — such as invisible decreases, color joins, or assembly sequencing — a well-made video tutorial can be the difference between a frustrating experience and a triumphant finished project you’re proud to display or gift.
Tips for Gifting, Displaying, and Selling Your Hanging Crochet Toys
Hanging crochet toys make extraordinarily thoughtful and personal gifts for a wide range of occasions. For baby showers, a handmade nursery mobile or a set of soft hanging animals carries a warmth and intentionality that store-bought gifts simply cannot replicate. When gifting to families with young children, always prioritize safety by using non-toxic, machine-washable yarns, securing all embellishments firmly so they cannot be pulled off and swallowed, and ensuring that any hanging elements are designed to be out of reach of small hands. Including a handwritten care card with washing instructions adds a lovely professional touch to your handmade gift.
When it comes to displaying your hanging crochet toys in your own home, the possibilities are delightfully varied. A collection of crocheted hanging stars in graduating sizes makes a stunning window decoration that catches the light beautifully, especially when made in translucent or shimmery thread. Hanging toys can be grouped on decorative branches, wooden hoops, or driftwood pieces to create striking wall installations that function as genuine artwork. Seasonal collections — pumpkins and ghosts for autumn, snowflakes and stars for winter — allow you to rotate your displays throughout the year and keep your space feeling fresh and festive.
For those interested in selling their handmade hanging crochet toys, platforms like Etsy, local craft fairs, and artisan markets offer welcoming venues for showcasing your work. When pricing handmade items, it’s important to account for the full cost of materials, your time at a fair hourly rate, platform fees, and packaging expenses. Many makers undervalue their work, so research comparable items in your market and price accordingly and confidently. Beautiful product photography is essential for online selling — natural light, clean backgrounds, and lifestyle shots showing your toys in context (hanging in a nursery, swaying in a gentle breeze near a window) will dramatically increase the appeal of your listings and attract buyers who appreciate handmade craftsmanship.
- Always photograph your finished pieces in natural daylight for the most accurate and appealing color representation.
- Include multiple angles in product listings — front, back, detail shots of the face or embellishments, and scale reference shots.
- Offer customization options such as color choices or name personalization to increase perceived value and buyer engagement.
- Package your items thoughtfully with tissue paper, twine, and a handwritten note to elevate the unboxing experience.
- Collect and display customer reviews prominently — social proof is one of the most powerful selling tools available to independent makers.
Caring for and Preserving Your Handmade Hanging Crochet Toys
Proper care ensures that your hanging crochet toys remain beautiful and vibrant for years or even decades to come. The care requirements will vary based on the fiber content of your yarn, so always refer back to the yarn label before washing a finished piece. Most acrylic and acrylic-blend yarns are machine washable on a gentle cycle in cool water, which makes them practical choices for toys that will be handled frequently by children. Natural fibers like cotton or wool may require more delicate hand washing and careful reshaping while damp to prevent stretching or felting that could distort the toy’s original shape and proportions.
Dust and sunlight are the two greatest threats to the long-term preservation of hanging crochet toys used as decorative pieces. Yarns exposed to direct sunlight over extended periods will inevitably fade, particularly darker or more vibrant colors that contain more dye pigment. If you’re displaying hanging toys near a window, consider rotating them periodically or using UV-filtering window film to slow the fading process. Dust accumulation on hanging pieces can be gently addressed with a soft-bristled brush or a low-heat pass with a hairdryer on the cool setting, which dislodges particulates without disturbing the fiber structure or embellishments.
If you’ve invested significant time and skill into a particularly elaborate hanging crochet creation — a complex mobile or an intricately detailed wall hanging — it may be worth documenting it thoroughly with photographs before it leaves your hands or before years of display take their inevitable toll. These photos serve multiple purposes: they become part of your personal portfolio, they can inspire future projects or colorway variations, and they preserve a record of your growth and development as a crocheter. The craft of crochet is ultimately about creating connections — between maker and recipient, between tradition and innovation, between humble yarn and extraordinary beauty — and that spirit of connection is what makes every hanging toy, however simple or complex, genuinely worth making.








What do you think?
It is nice to know your opinion. Leave a comment.