










Why the Space Above Your Bed Matters More Than You Think
The wall above your bed is one of the most visually prominent surfaces in your entire home. When you walk into a bedroom, the eye is naturally drawn upward toward the headboard wall, and whatever occupies that space — or fails to — sets the emotional tone for the entire room. An empty wall can make even a beautifully furnished bedroom feel unfinished, impersonal, and lacking the warmth that transforms a sleeping space into a true sanctuary. Interior designers consistently identify this zone as the single most impactful decorating opportunity in a bedroom, yet it remains one of the most commonly neglected.
Beyond pure aesthetics, the art and objects you place above your bed communicate something deeply personal about who you are. Unlike a living room gallery wall that performs for guests, bedroom art exists primarily for you — it is the last thing you see before sleeping and the first thing that greets your eyes each morning. This makes the choice surprisingly intimate. Selecting or creating something that genuinely resonates with your personal sense of beauty can have a measurable effect on your mood, your sense of calm, and even the quality of your sleep, because the space around us shapes how we feel within it.
The good news is that filling this space does not require a large budget or a degree in interior design. In fact, some of the most striking bedroom focal points are entirely handmade, created by homeowners who decided to take matters into their own hands rather than settle for mass-produced prints that feel generic. DIY art above the bed has surged in popularity precisely because it offers something store-bought pieces cannot: total customization, a personal story, and the quiet satisfaction of knowing you made something beautiful yourself. The options range from simple and beginner-friendly to elaborate and technically impressive, but all of them start with the same decision — to stop ignoring that empty wall.
Choosing the Right Style and Scale for Your Bedroom
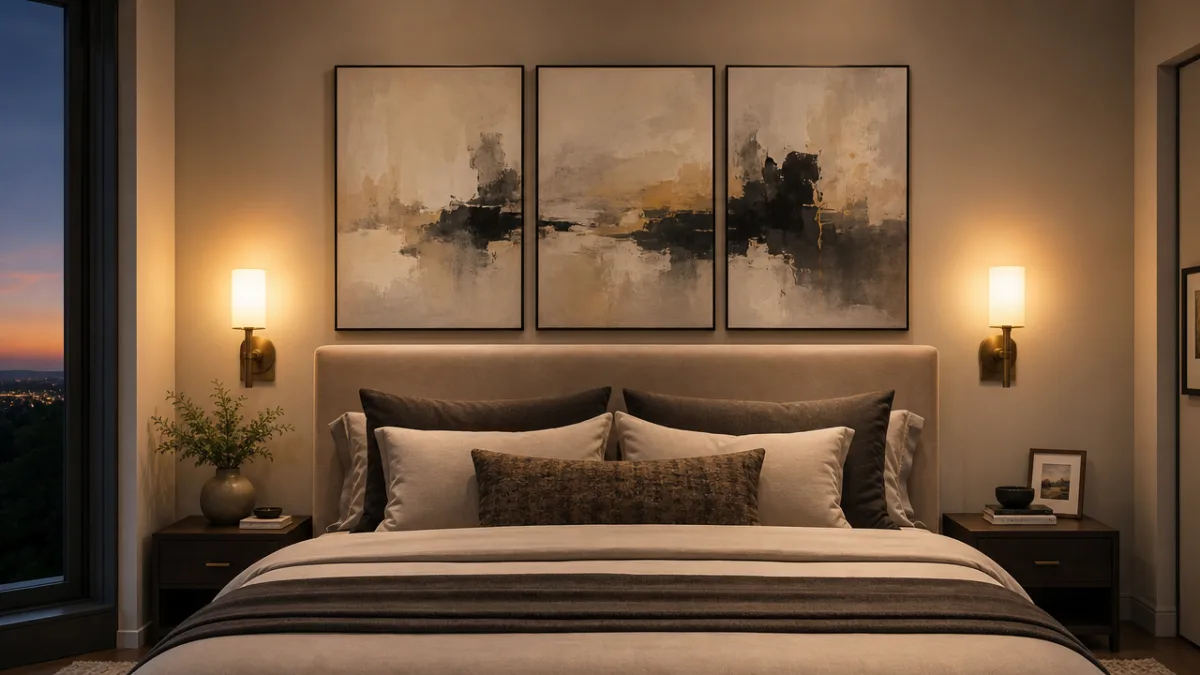
Before you pick up a paintbrush or head to the craft store, you need to spend some time thinking critically about scale. A piece of art that is too small for the wall above a king-size bed will look timid and lost, doing more harm than good by drawing attention to the emptiness around it. As a general rule of thumb, your artwork or art arrangement should span roughly two-thirds to three-quarters of the width of your bed or headboard. This creates visual balance and gives the wall a sense of intentionality. For a queen bed, that typically means artwork in the range of 40 to 50 inches wide; for a king, you may need something closer to 60 inches or a multi-panel arrangement.
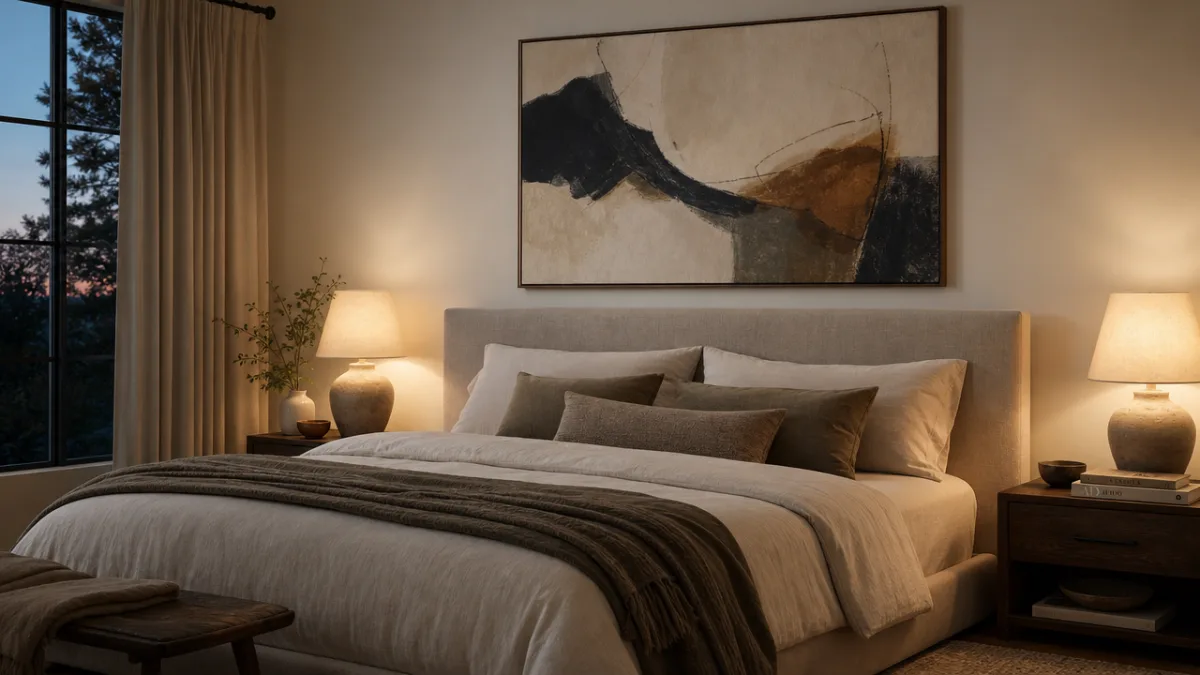
Style cohesion is equally important. The art you create should feel like a natural extension of the design language already present in your bedroom rather than a jarring departure from it. If your room leans toward Scandinavian minimalism with clean lines, pale woods, and muted textiles, then an abstract piece in black, white, and warm beige will feel harmonious. If you have a more eclectic, bohemian bedroom with layered textures and rich jewel tones, a macramé fiber art piece or a collection of mixed-media panels might be exactly right. Taking a photo of your bedroom and studying it carefully before committing to a direction will save you significant time and frustration.
Color is perhaps the most powerful tool in this decision. The art above your bed has the ability to either anchor the existing color palette of the room or introduce a meaningful accent that elevates the entire scheme. Many interior designers recommend pulling one or two colors directly from your existing textiles — your duvet, throw pillows, or curtains — and incorporating them into your DIY artwork. This creates a sense of visual continuity that makes the room feel thoughtfully curated rather than assembled from unrelated pieces. When your art echoes the colors already in the room, everything feels like it belongs together.
Popular Style Directions to Consider
- Abstract Expressionism: Loose, gestural brushwork in a carefully chosen palette creates high-impact art that looks expensive and is surprisingly forgiving for beginners. Mistakes become part of the texture.
- Minimalist Line Art: Simple continuous-line drawings on large canvas or paper are endlessly adaptable, deeply modern, and require no artistic training beyond a steady hand and a willingness to experiment.
- Botanical and Nature-Inspired: Oversized botanical prints, pressed plant arrangements under glass, or painted leaf studies bring organic calm to a bedroom and work beautifully in both modern and traditional spaces.
- Fiber and Textile Art: Macramé wall hangings, woven tapestries, and fabric panels add warmth and dimension that flat canvas cannot achieve, making them especially effective in rooms that need tactile richness.
- Gallery Wall Arrangements: A curated collection of smaller frames, mixed sizes and orientations, allows you to build a personalized story above the bed using photos, prints, and small original works together.
Materials and Tools You Will Need
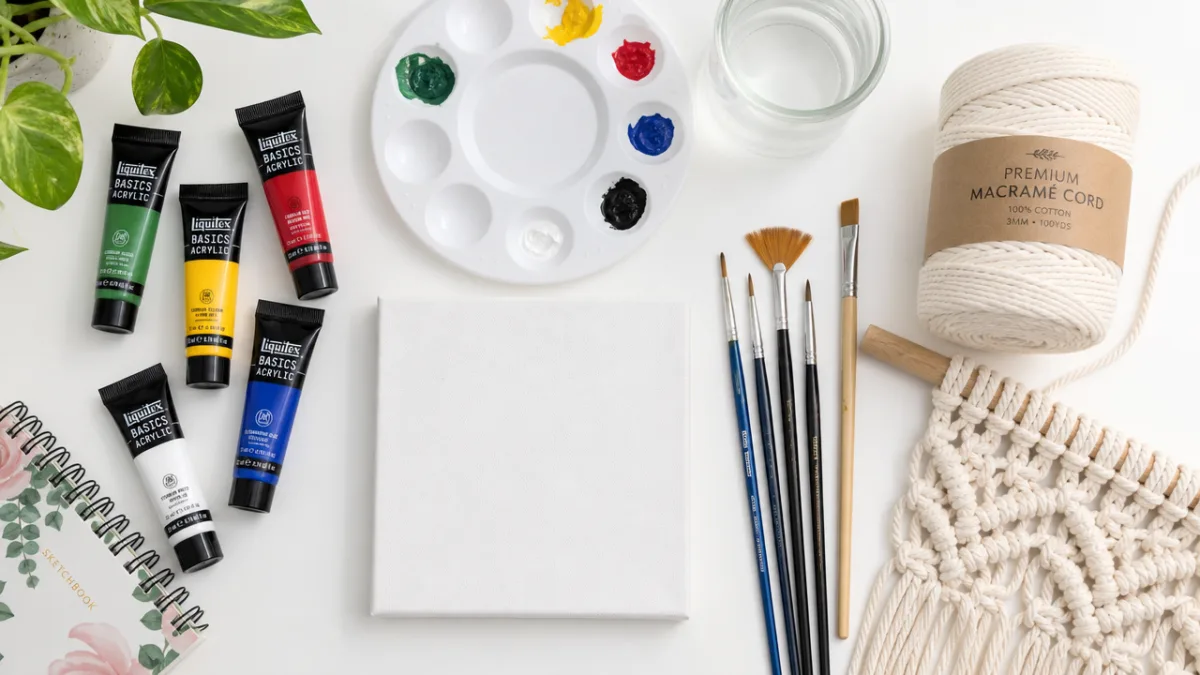
One of the great appeals of DIY bedroom art is that the materials are widely available, relatively affordable, and require no specialized equipment for most projects. For canvas-based artwork, you will want to start with a pre-stretched canvas or canvas panel in the appropriate size for your wall. Pre-stretched canvases are available at craft stores and online in a vast range of sizes, and buying in multi-packs can reduce the cost significantly if you are planning a triptych or multi-panel installation. For a large-scale single piece, stretcher bars allow you to construct a custom-sized frame and stretch raw canvas over it yourself, which is more economical for oversized work.
Acrylic paints are the most beginner-friendly medium for DIY wall art. They dry quickly, clean up with water, mix easily, and are available in every imaginable color. A basic palette of six to eight tubes — including a warm white, an off-white or cream, a warm and cool version of your chosen accent colors, raw umber, and black — will cover the vast majority of projects. Invest in a few quality brushes in different sizes: a large flat brush for blocking in background color, a medium filbert for blending, and a small round brush for any detail work. A palette knife is also enormously useful for creating textured effects and mixing colors without contaminating your brush bristles.
For fiber art projects, the materials list is somewhat different but equally accessible. A wooden dowel rod or a piece of driftwood serves as the mounting bar. Natural cotton rope or jute cord in varying thicknesses is the primary medium, and macramé is far easier to learn than it appears — the vast majority of pieces rely on just two or three basic knots repeated in different combinations and densities. Scissors, a comb for fringing, and a tape measure to keep your spacing consistent are really all you need to get started. Many crafters find that fiber art projects are actually more forgiving than painting because irregularities add charm rather than looking like errors.
Essential Supplies Checklist
- Pre-stretched canvas or canvas panels in your desired size and quantity
- Acrylic paints in a curated palette that complements your room
- A selection of flat, filbert, and round brushes in varied sizes
- Palette knife for mixing and texture work
- Painter’s tape for clean edges and geometric designs
- A large piece of craft paper or a drop cloth for protecting your workspace
- Hanging hardware appropriate for your wall type — picture wire, D-rings, or French cleats for heavier pieces
- A level and measuring tape for precise, balanced installation
Step-by-Step: Creating a Modern Abstract Canvas
Abstract painting is the perfect entry point for DIY bedroom art because it is genuinely forgiving — there is no “wrong” in the traditional sense, only choices that work better or worse together. Begin by preparing your canvas with a base coat of gesso if it is not already primed, or simply start with a coat of your lightest color thinned slightly with water to create a smooth, even ground. Allow this to dry completely before proceeding. Choosing a limited palette of three to four colors that you already know work well together in your room will prevent the finished piece from feeling chaotic or disconnected from its environment.
Once your base is dry, begin building up layers with your largest brush. Abstract work is most effective when it suggests depth, which means layering colors so that earlier applications peek through later ones. Work in broad, confident strokes rather than timid, small marks — hesitation often shows in the finished work as muddiness or overworked areas. Try applying paint with a palette knife in certain sections to create raised texture that catches light differently at different times of day. Drag a dry brush lightly over wet paint to create soft, feathered transitions between colors. Step back frequently to evaluate the composition from a distance, because close-up assessment is misleading at this scale.
The finishing touches are what elevate a good abstract painting to a great one. Consider adding a few marks in a contrasting color or with a fine brush to create focal points that draw the eye through the composition. A wash of very diluted paint over the whole piece can unify disparate elements and create atmospheric depth. Once you are satisfied and the paint is fully dry, apply a coat of matte or satin varnish to protect the surface and give the piece a finished, gallery-quality appearance. Varnish also makes the colors appear richer and more saturated, which is particularly noticeable on larger work viewed from across the room.
Tips for Getting the Best Results
- Work larger than feels comfortable. Most beginners instinctively make marks that are too small for the canvas size. Trust the scale and use your whole arm rather than just your wrist.
- Let layers dry between applications. Acrylic dries surprisingly fast, and applying wet paint over wet paint usually results in muddy, gray mixtures rather than the vibrant layering you intend.
- Photograph your work in progress. A photo on your phone will show you the composition with fresh eyes and often reveals imbalances or areas that need attention that you stop seeing when you are standing close to the canvas.
- Embrace happy accidents. Some of the most interesting marks in abstract work happen by mistake — a drip, a smear, an accidental blend. Before you reach for a rag to fix it, consider whether it actually improves the piece.
Hanging and Displaying Your Finished Work
Even the most beautifully executed piece of DIY art can be undermined by poor installation. The height at which you hang artwork above a bed is one of the most commonly misunderstood aspects of bedroom decorating. The bottom edge of a single large canvas or the lowest piece in a gallery arrangement should sit approximately eight to ten inches above the top of your headboard, or about eight to ten inches above the pillow level if you have no headboard. This spacing keeps the art visually connected to the bed rather than floating disconnectedly near the ceiling, while still leaving enough breathing room to avoid a cramped feeling.
For heavier pieces — large canvases, multi-panel arrangements, or fiber art with significant weight — using the appropriate hanging hardware is not just an aesthetic consideration but a safety one. Heavy picture hooks rated for the weight of your piece, wall anchors if you are not hitting a stud, or a French cleat system for very large work will ensure that your artwork stays securely on the wall. A French cleat — two interlocking beveled strips of wood, one attached to the wall and one to the back of the artwork — is particularly elegant because it allows you to make fine horizontal adjustments without rehanging, and it distributes weight evenly across a wide span of wall.
Lighting your finished art is a consideration that many people overlook entirely but that makes an enormous difference to how the work is perceived, especially in the evening. A small picture light mounted to the top of the frame, or a pair of adjustable wall sconces flanking the bed positioned to cast light upward toward the art, will make your DIY creation look as intentional and considered as anything you might see in a boutique hotel. Warm-toned bulbs in the 2700K to 3000K range will flatter most artwork and create the cozy, intimate atmosphere that a bedroom should have. The interplay of light and shadow across a textured painting or a macramé piece is genuinely beautiful and entirely worth the small additional investment.
Personalizing and Evolving Your Bedroom Art Over Time
One of the greatest advantages of DIY art over purchased pieces is that your relationship with it can evolve as you do. Unlike an expensive print that you feel obligated to keep on the wall indefinitely because of what you paid for it, a piece you made yourself can be refreshed, painted over, or replaced whenever the mood or your circumstances change. Many artists and interior designers actually recommend treating large canvases as reusable surfaces — gessoing over old work and starting fresh is completely acceptable and is, in fact, a practice with a long history in fine art. This freedom to experiment without financial pressure is liberating and encourages a more playful, authentic relationship with your space.
Seasonal changes offer a natural opportunity to refresh your bedroom’s focal point without committing to a permanent overhaul. Lighter, airier pieces in pale blues, creams, and soft greens might suit the warmer months, while richer, deeper tones in terracotta, burnt orange, and forest green create a cozier feeling through autumn and winter. If you have created several pieces over time, rotating them between the bedroom, a home office, or a hallway keeps the work feeling fresh in each location. Art that you made yourself carries particular meaning in this context because every time it moves to a new wall, you are reminded of the day you made it, the headspace you were in, and how you have changed since.
Encouraging creativity within your household is another wonderful dimension of DIY bedroom art. Involving a partner, a family member, or even children in the creation of a piece that will hang in a shared bedroom space creates a genuinely collaborative memory and produces art that carries emotional weight no purchased piece ever could. The slightly imperfect quality of a collaborative painting — where you can see different mark-making styles in the same composition — is part of its charm and its story. In a world saturated with identical mass-produced home goods, an imperfect, handmade thing on your wall is quietly radical. It says that this space belongs to a real person, with real hands and real taste, and that is exactly the feeling a bedroom should give you.








What do you think?
It is nice to know your opinion. Leave a comment.