










Free Open Wave Stitch Crochet Tutorial: Master This Stunning Technique
The open wave stitch is one of those crochet techniques that looks deceptively complex but rewards patient beginners and experienced crafters alike with breathtaking results. Characterized by its flowing, undulating texture and the beautiful open lacework it creates, this stitch produces fabric that feels both airy and substantial at the same time. Whether you are planning a lightweight summer shawl, a decorative throw blanket, or a fashionable market bag, the open wave stitch delivers elegance that turns heads and inspires compliments from everyone who sees your finished work.
Learning this stitch opens up a world of creative possibility that extends far beyond any single project. Once you understand the fundamental rhythm of the wave pattern, you will find that it adapts beautifully to different yarn weights, hook sizes, and color combinations. A chunky yarn version creates bold, sculptural waves with an almost architectural quality, while a fine lace-weight yarn transforms the same stitch into something gossamer and delicate, like fabric you might imagine draping across a fairy tale heroine’s shoulders. The versatility of this stitch is genuinely remarkable and part of why so many crafters return to it again and again throughout their crochet journey.
This comprehensive tutorial will walk you through everything you need to know to execute the open wave stitch with confidence, from gathering the right materials to finishing your project with a polished edge. We will cover foundational concepts, row-by-row instructions, helpful tips for avoiding common mistakes, and inspiring ideas for applying this beautiful stitch in your own creative projects. By the time you finish reading, you will have all the knowledge you need to sit down with your hook and yarn and begin creating something truly beautiful.
Understanding the Open Wave Stitch: History and Structure
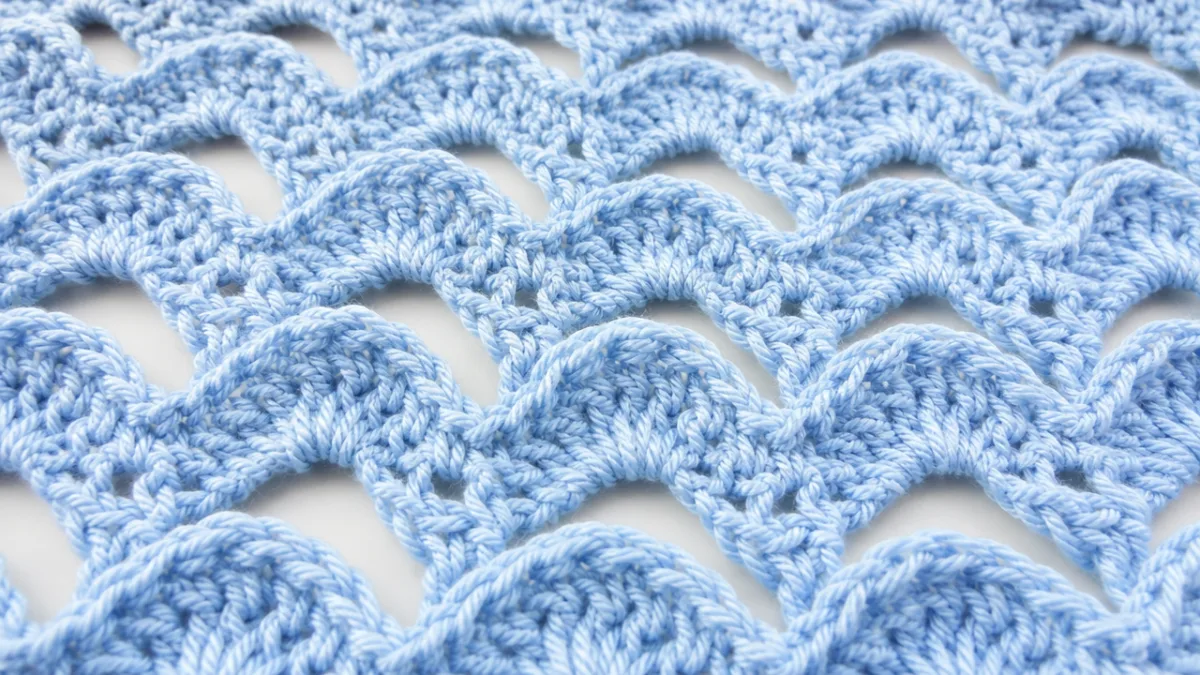
The wave stitch family has deep roots in traditional crochet, appearing in pattern books and handed-down instructions across many cultures for well over a century. The open variation specifically gained widespread popularity as crafters began experimenting with ways to add visual movement and lightness to their work without sacrificing structural integrity. Unlike dense stitches that create solid fabric, the open wave stitch deliberately incorporates chain spaces and strategically placed increases and decreases that allow light to pass through the work, creating that signature rippling effect that makes it so visually captivating. It belongs to the same broad family as the ripple stitch and the chevron, though its character is distinctly its own.
Structurally, the open wave stitch works by alternating clusters of taller stitches, typically double crochets or treble crochets, with chain spaces and slip stitches or single crochets at the valleys and peaks of the wave. This creates the rhythmic up-and-down motion that mimics ocean waves rolling across the surface of the sea. The openwork quality comes from those deliberate chain spaces, which are not merely decorative but are actually structural elements that give the stitch its characteristic drape and flow. Understanding this underlying logic helps you troubleshoot when something looks off and allows you to make intentional modifications when you want to customize the stitch for a specific project.
It is worth noting that the open wave stitch works up differently depending on whether you work it flat in rows or in the round. Working flat produces those classic side-to-side waves, which are ideal for scarves, blankets, and shawls where you want horizontal movement across the width of the fabric. Working in the round creates concentric circular waves that are absolutely stunning for items like hats, baskets, and decorative bowls. Both approaches use the same core technique, and once you have mastered the flat version introduced in this tutorial, you will find the round variation an exciting and natural next step in your crochet exploration.
Materials You Will Need for the Open Wave Stitch
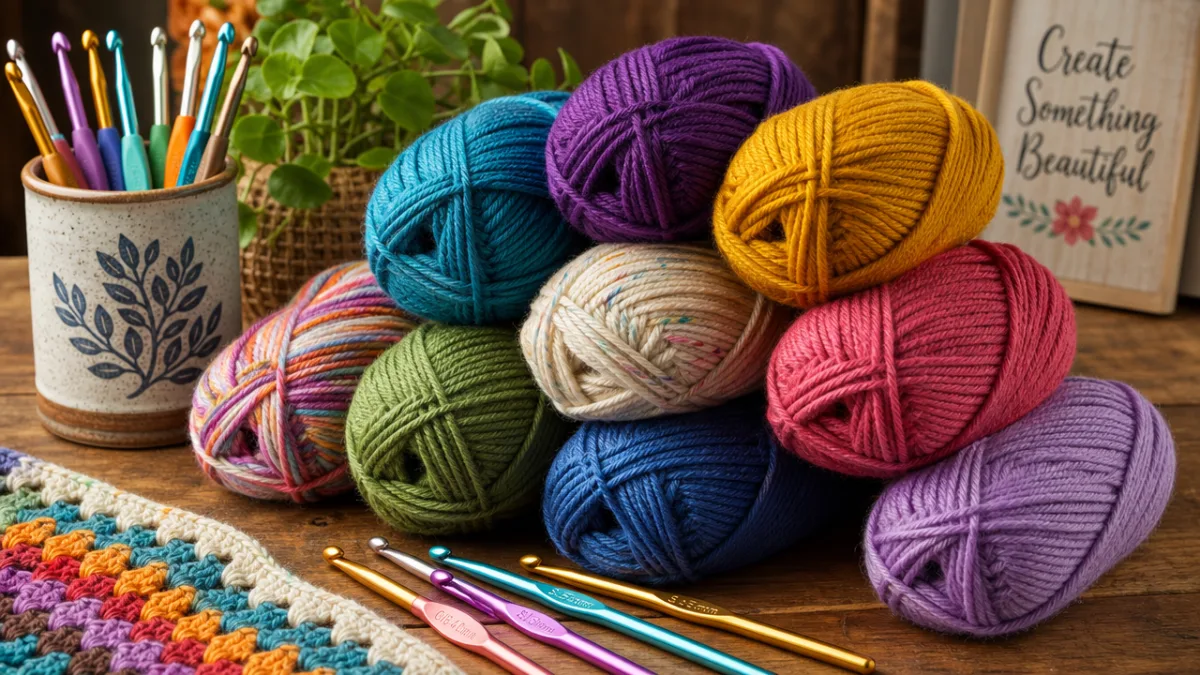
Choosing the right materials makes an enormous difference in how satisfying the crocheting experience is and how beautiful your finished project turns out. For your first attempt at the open wave stitch, a smooth, light-colored yarn in a worsted or aran weight is strongly recommended. The smoothness allows you to see your stitch structure clearly, which is invaluable while you are learning, and the light color ensures you can count your stitches without straining your eyes. Avoid fuzzy or novelty yarns for your practice piece, as these can obscure the stitch definition that makes the wave pattern so visually striking and can make it genuinely difficult to identify and correct mistakes as they happen.
Your hook size should correspond to your yarn weight according to the yarn label’s recommendation, though many crocheters prefer to go up one hook size when working open lace-style stitches to give the work a bit more drape and looseness. A 5mm or 5.5mm hook paired with a standard worsted weight cotton or acrylic yarn is an excellent starting point for most people learning this stitch. Cotton yarn is particularly lovely for this stitch because it has excellent stitch definition, holds its shape well, and creates a fabric with beautiful structure. Acrylic is equally valid, especially if you prefer machine-washable projects or are working within a tighter budget.
Beyond yarn and hook, having a few essential tools nearby will make your crocheting session much smoother and more enjoyable. A set of stitch markers is practically indispensable for marking the peaks and valleys of your wave pattern, especially when you are first learning and building muscle memory for the stitch sequence. Scissors, a tapestry needle for weaving in ends, and a measuring tape round out your basic toolkit. If you are working on a larger project like a blanket, a row counter, whether a physical clicker-style counter or an app on your phone, will help you keep track of your progress and maintain consistent tension throughout the work.
- Worsted or aran weight yarn in a smooth, light-colored fiber such as cotton or acrylic, approximately 200 yards for a practice swatch or small project
- Crochet hook sized 5mm to 5.5mm, or one size larger than your yarn label recommends for a slightly drapier result
- Stitch markers, at least six to eight, for tracking wave peaks and valleys across your row
- Sharp scissors and a blunt tapestry needle for finishing ends cleanly and professionally
- Measuring tape to check gauge before beginning any sized garment or accessory project
- Row counter or a simple tally system to track your progress across long projects
Step-by-Step Instructions: Working the Open Wave Stitch
Before diving into the stitch pattern itself, you need to establish your foundation chain, and getting this right sets the tone for everything that follows. The open wave stitch typically works over a multiple of stitches plus a turning chain, and the exact multiple depends on the specific variation you are following. A very common setup uses a multiple of fourteen stitches plus one or two extra for balance. For a practice swatch, chain forty-three and then add your turning chain, which for this stitch is usually three chains counting as your first double crochet. Take a moment to count your foundation chain carefully before proceeding, because an incorrect stitch count at this stage will create waves of uneven size and the pattern simply will not work as intended.
Row one establishes the basic rhythm of the wave. Working from left to right after your turning chain, you will work double crochets into the specified stitches, then create your chain spaces at the designated points, and then work your decreasing stitches to form the valleys of the wave. The specific instruction sequence typically looks something like this: work three double crochets into the next stitch, chain one, skip one stitch, work three double crochets, chain one, skip one stitch, then work a two-stitch double crochet decrease over the next two stitches, and continue this rhythm across the row. The peaks are formed by the clusters of three stitches worked into a single point, and the valleys are formed by the decreases and the chain spaces between them.
Row two is where the real magic of the open wave stitch becomes visible, because this row echoes and reinforces the wave structure established in row one while also building on it. You will turn your work, make your turning chain, and then work into the chain spaces and stitch clusters from the previous row, following the same peak-and-valley logic. As you progress through row two, the undulating shape of your work will become increasingly clear, and you may find yourself smiling at the sight of those first beautiful waves forming beneath your hook. Subsequent rows simply repeat this two-row sequence, and the pattern builds rhythmically and satisfyingly as your fabric grows. Most crafters find that by row four or five, the stitch sequence has become intuitive enough that they no longer need to consult the written instructions for every step.
A crucial technical point that many beginners overlook is the importance of working into the correct part of each stitch consistently throughout the project. For the open wave stitch, you will frequently be working into chain spaces rather than into the tops of stitches, and the distinction matters enormously for the visual outcome. When the pattern instructs you to work into a chain space, insert your hook under the entire chain rather than into any individual chain stitch, which creates a neater, more polished result. Similarly, when working your cluster stitches at the peaks, making sure all three stitches of each cluster go into the same stitch or space is what creates those beautifully defined, rounded wave peaks that characterize a well-executed open wave stitch.
- Create your foundation chain in a multiple of fourteen stitches plus any balance stitches, then add your turning chain of three.
- Work your first row following the peak-valley-peak sequence: three double crochets, chain one, skip one, three double crochets, chain one, double crochet decrease, repeat across.
- Turn your work at the end of each row and make the turning chain, counting it as your first double crochet of the new row.
- On subsequent rows, work into chain spaces and stitch clusters from the previous row, maintaining the wave alignment throughout.
- Use stitch markers to flag the center of each wave peak and valley until the pattern becomes second nature to you.
- Check your stitch count at the end of every row for the first several rows to catch any errors before they compound into larger problems.
Tips, Troubleshooting, and Common Mistakes to Avoid
Tension is the single most common source of frustration for crocheters learning the open wave stitch, and it deserves careful attention from the very beginning of your practice. Many people crochet with inconsistent tension without being aware of it, pulling some stitches too tight while leaving others looser, and in a stitch pattern that depends so heavily on precise proportions between its peaks and valleys, this inconsistency shows up quite dramatically in the finished fabric. The best way to develop consistent tension is deliberate practice: slow down, breathe evenly, and try to replicate the exact same amount of pressure on your yarn and hook with every single stitch. If your work looks puckered at the peaks, your tension is likely too tight; if the valleys seem to collapse or stretch sideways, the tension may be too loose.
Another frequent stumbling block involves the stitch count drift that happens when crafters accidentally add or lose stitches during the decrease and increase sections of the wave. A single miscounted stitch at a peak or valley will throw off the alignment of every subsequent row, causing your waves to gradually tilt or shift until the pattern becomes recognizable as waves but looks decidedly lopsided. The solution is straightforward though it requires discipline: count your stitches at the end of every single row for at least the first ten rows, and do not proceed to the next row until the count is correct. This habit feels tedious when you are eager to see your project grow, but it saves enormous amounts of frustration and the heartbreaking experience of having to frog, meaning unravel, many hours of work.
Color changes are a wonderful way to enhance the visual impact of the open wave stitch, and many crocheters experiment with gradient yarns, color-block sequences, or striped patterns that interact beautifully with the wave shape. When changing colors in this stitch, the cleanest results come from making the color change on the last yarn-over of the final stitch in a row, so the new color appears cleanly at the beginning of the following row. Carrying unused yarn along the edge rather than cutting it at every color change saves time and reduces the number of ends you need to weave in, though this technique works best when colors alternate every two rows or less. For longer color sections, cutting and weaving is the tidier approach.
Blocking is a finishing step that many crocheters skip but that makes a dramatic and visible difference, particularly with lace-style open stitches like the wave. Blocking involves wetting your finished piece, pinning it to shape on a blocking board or foam mat, and allowing it to dry completely in the pinned position. This process relaxes the fibers, opens up the chain spaces beautifully, and sets the wave shape in a way that is simply not possible without this step. For cotton and natural fiber yarns, wet blocking works wonderfully. For acrylic, steam blocking with a hovering iron can achieve similar results without risking melting the fibers. The difference between an unblocked and a blocked open wave stitch piece is genuinely striking, and the extra thirty minutes it takes is always worth it.
Creative Project Ideas Using the Open Wave Stitch
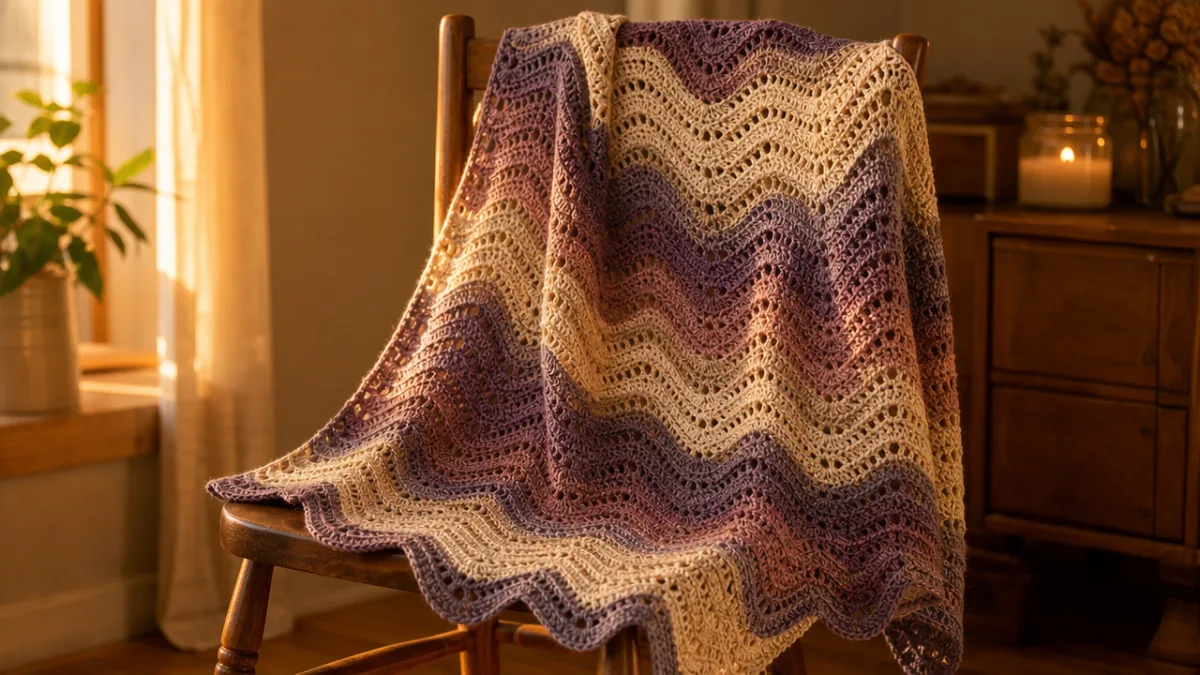
One of the most popular applications for the open wave stitch is the classic beach or summer shawl, and for excellent reason. The lightweight, airy quality of the open lacework makes it ideal for a wrap that provides just enough coverage on a breezy evening without causing overheating in warm temperatures. A shawl worked in a plant-based fiber like cotton, bamboo, or linen will have beautiful drape and a silky hand feel that is luxurious against the skin. To make a simple rectangular shawl, simply work the open wave stitch in rows until your piece reaches your desired dimensions, then add a simple shell stitch or picot border along all four edges for a finished, polished look that elevates the entire piece from lovely to truly professional.
Baby blankets are another application where the open wave stitch really shines, though for infant projects it is important to use a tighter gauge than you might for an adult accessory to ensure the blanket remains safe and does not have openings large enough to pose any risk. Worked in a soft, certified baby-safe acrylic or organic cotton in soft pastels or gentle neutrals, an open wave stitch baby blanket is a genuinely heirloom-quality gift that new parents receive with tremendous gratitude. The wave pattern has a soothing, rhythmic visual quality that complements the nursery aesthetic perfectly, and the finished blanket will be sturdy enough to survive many years of washing while remaining beautiful enough to keep as a keepsake long after the child has outgrown it.
Home decor is a rich and underexplored territory for the open wave stitch, and crafters with a design eye will find endless opportunity here. A table runner worked in a neutral linen-look yarn brings texture and visual interest to a dining table without competing with table settings or centerpieces. A set of matching dishcloths in absorbent cotton creates a coordinated kitchen look with handmade charm. Perhaps most impressively, a large open wave stitch wall hanging worked in chunky yarn and mounted on a wooden dowel creates a statement piece of fiber art that anchors a room and draws immediate admiring attention. The possibilities really are as broad as your imagination, and the stitch’s versatility ensures it will find a natural home in virtually any creative project you can envision.
Garment construction with the open wave stitch is an exciting frontier for crocheters ready to move beyond accessories and home goods into wearable fashion. A cropped summer top worked in the round with the open wave stitch creates a piece with a distinctly boho, artisanal aesthetic that looks right at home at a festival or beach destination. Worked sideways in rows and then seamed, the stitch creates a vest or cardigan with a relaxed, flowy silhouette that flatters a wide range of body types. Even simple additions like working an open wave stitch cuff onto the hem of a basic garment or adding it as a yoke panel can transform an otherwise straightforward project into something genuinely special and distinctive. The stitch rewards creative experimentation, and every new application you discover will inspire the next.
Caring for Your Open Wave Stitch Projects
Proper care is essential for keeping your finished open wave stitch pieces looking beautiful wash after wash, and the right approach depends almost entirely on the fiber content of the yarn you chose. Cotton and plant-based fibers are generally the most forgiving and can typically be machine washed on a gentle cycle in cool or warm water without losing their shape or color. However, even with machine-washable fibers, placing your project in a mesh laundry bag before washing is a worthwhile precaution that protects the delicate chain spaces of the open lacework from snagging on the agitator or on zippers and fastenings from other items in the wash. Air drying flat is always preferable to machine drying, as heat can cause even heat-stable fibers to shrink or distort over time.
Wool and animal fiber projects require significantly more careful handling, as these fibers are prone to felting when exposed to heat and agitation simultaneously. If you made the beautiful choice to work your open wave stitch piece in a luxury wool, cashmere, or alpaca yarn, hand washing in cool water with a dedicated wool wash or gentle shampoo is the safe and strongly recommended approach. Submerge the piece gently, squeeze it softly to work the water through the fibers, then rinse in water of the same temperature to avoid thermal shock that can cause felting or distortion. Press the water out by rolling the piece in a clean towel rather than wringing, then lay it flat to dry, gently reshaping the waves as you go so they set beautifully as the piece dries.
Storage is a care consideration that many crafters overlook until they pull out a project after several months and find it has developed creases, moth damage, or musty odors that are difficult to remove. Finished crochet pieces should ideally be stored folded loosely rather than tightly compressed, in breathable fabric bags or pillowcases rather than plastic bags, which can trap moisture and encourage mildew. Adding cedar blocks or lavender sachets to your storage area provides natural moth deterrence without the harsh chemical smell of mothballs, making it a popular choice among crafters who store seasonal items for extended periods. Taking a few minutes to store your open wave stitch pieces thoughtfully will ensure they remain as beautiful and vibrant as the day you finished them, ready to be worn, gifted, or displayed with pride whenever the occasion arises.








What do you think?
It is nice to know your opinion. Leave a comment.