










Beer Gel & Wax Candle: The Ultimate Guide to Crafting Your Own Brew-Inspired Candles
Introduction to Beer-Themed Candles
Beer gel and wax candles represent one of the most creative and visually stunning trends in the world of DIY candle making. These unique creations combine the artistry of traditional candle crafting with the playful aesthetic of a cold, frothy beer, resulting in a novelty item that makes for a perfect gift, home decoration, or conversation starter. Whether displayed on a mantel, gifted to a craft beer lover, or used as a centerpiece at a gathering, these candles never fail to impress those who encounter them for the first time.
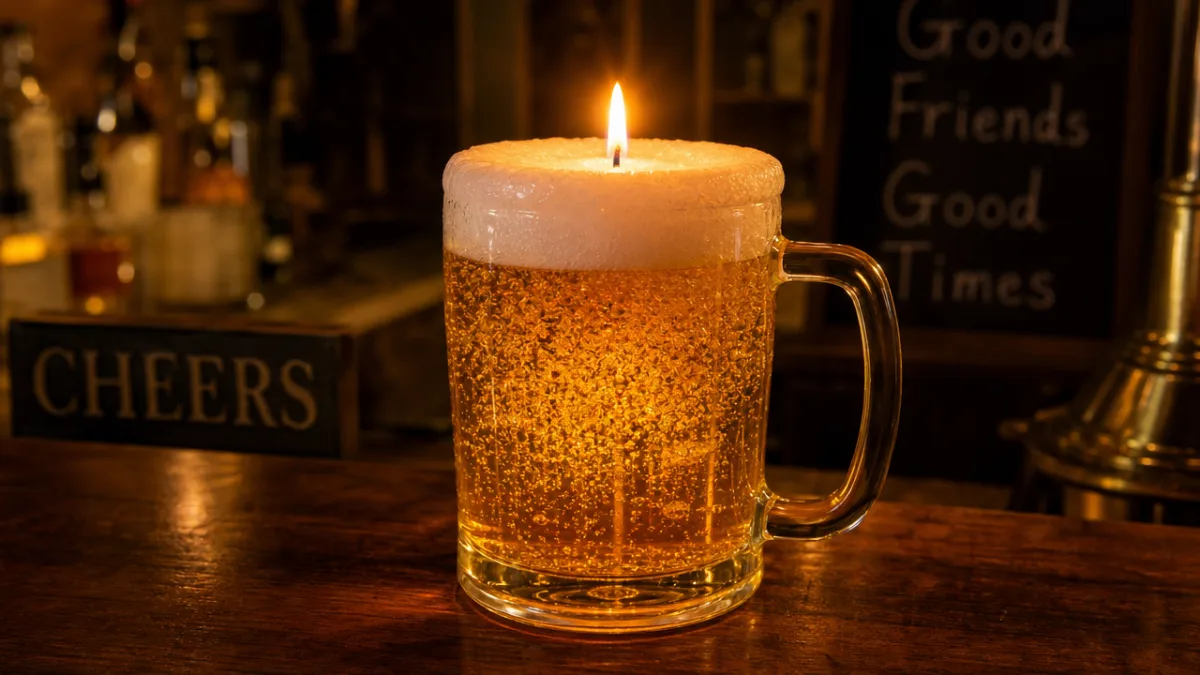
The beauty of beer candles lies in their remarkable realism. When crafted with care, a beer gel candle can look almost indistinguishable from an actual pint of your favorite brew. The amber tones of the gel wax mimic the color of lager or ale, while a carefully poured layer of white wax on top creates the illusion of a thick, creamy head of foam. The result is a candle that captures the essence of a perfectly poured beer, complete with realistic visual texture and warm, glowing light when lit.
What makes this craft particularly appealing is its accessibility. You do not need to be a professional candle maker or artist to create a convincing beer candle. With the right materials, a little patience, and some basic knowledge of working with gel wax, anyone can produce a stunning finished product. This guide will walk you through everything you need to know, from understanding the materials involved to troubleshooting common issues and adding finishing touches that elevate your creation from craft project to genuine work of art.
Understanding the Materials: Gel Wax and Paraffin
The secret behind the convincing liquid appearance of a beer candle is gel wax, a unique candle-making medium made from mineral oil and a polymer resin. Unlike traditional paraffin or soy wax, gel wax is transparent and has a jelly-like consistency when set. This transparency is precisely what allows it to mimic the look of a liquid — in this case, beer. Gel wax is available in different densities, typically labeled as low, medium, or high density, and each has specific applications. For beer candles, a high-density gel is generally preferred because it holds fragrance better and creates a cleaner, more stable finished product.
Paraffin wax plays an equally important role in the beer candle illusion, specifically in creating the foam head that sits atop the “beer.” When melted paraffin is whipped or poured in a certain way and allowed to cool slightly before application, it takes on a fluffy, textured appearance that is remarkably similar to real beer foam. The key is working with paraffin at just the right temperature — too hot and it will simply pour flat, too cool and it becomes difficult to manipulate. Many crafters use a hand mixer or fork to whip the paraffin as it begins to cool, creating tiny air bubbles that give it that characteristic foam-like texture.
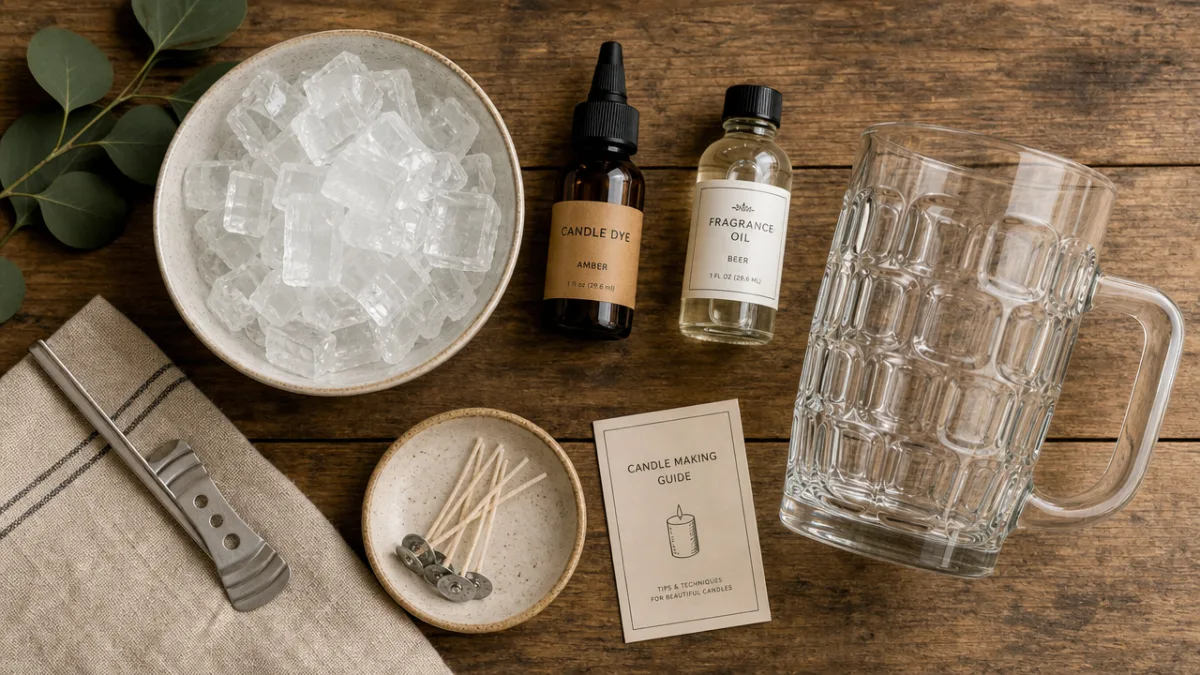
Beyond these two primary materials, there are several other supplies you will need to complete a beer candle project successfully. These include a suitable container — a beer mug, pint glass, or even a repurposed beer stein works wonderfully — as well as candle wicks, wick holders or centering devices, candle-safe fragrance oils, and colorants formulated specifically for use with gel wax. It is important to use only candle-safe fragrance oils and dyes, as non-approved additives can affect the gel’s clarity, create cloudiness, or in some cases pose safety risks when the candle is burned.
- High-density gel wax for the transparent “beer” body
- White paraffin wax for the whipped foam head
- Amber or yellow candle dye to achieve a realistic beer color
- Beer-scented or hops-infused fragrance oil for an authentic sensory experience
- A glass beer mug, pint glass, or stein as the candle vessel
- Pre-tabbed candle wicks sized appropriately for your container
- A thermometer for monitoring wax temperatures accurately
- A double boiler or dedicated wax melting pot
Step-by-Step Guide to Making Your Beer Gel Candle
The process of making a beer gel candle begins with preparation. Before you melt a single drop of wax, take the time to set up your workspace properly. Lay down parchment paper or a silicone mat to protect your work surface, gather all your tools within easy reach, and pre-warm your glass container slightly to reduce the chance of air bubbles forming when the hot gel wax is poured. Securing your wick is the next step — attach the metal wick tab to the bottom center of your glass using a small amount of adhesive or a hot glue gun, and use a wick bar or pencil laid across the rim of the glass to hold the wick upright and centered.
With your container prepped, it is time to melt the gel wax. Place it in a double boiler over medium heat, monitoring the temperature carefully with a thermometer. High-density gel wax should be heated to approximately 220 to 230 degrees Fahrenheit before adding your color and fragrance. Stir gently and consistently to avoid introducing air bubbles. Once the gel reaches the correct temperature and your colorant and fragrance have been blended in, pour it slowly and steadily into your prepared container, holding the wick in place as you do so. Pour from a low height to minimize bubble formation, and allow the candle to cool undisturbed.
Once your gel layer has fully set — which can take several hours depending on the amount poured — it is time to create the foam head using whipped paraffin. Melt your white paraffin wax and allow it to cool to around 150 to 160 degrees Fahrenheit. At this point, use a fork or hand mixer to whip air into the wax, creating a fluffy, textured consistency. Working quickly before the paraffin sets completely, spoon or spread it over the top of the hardened gel layer, shaping it to resemble the natural mounding and bubbling of real beer foam. Allow this layer to cool and harden completely before trimming your wick to approximately a quarter inch above the surface.
- Secure your wick to the bottom of the glass and center it using a wick bar.
- Melt high-density gel wax in a double boiler to 220–230°F.
- Add amber candle dye and beer-scented fragrance oil, stirring gently.
- Pour the gel slowly into the container, minimizing air bubbles.
- Allow the gel to cool and set completely, which may take 4–6 hours.
- Melt white paraffin, cool it to 150–160°F, then whip it to a fluffy consistency.
- Apply the whipped paraffin over the gel layer to form the foam head.
- Allow everything to cool fully, then trim the wick before use or display.
Creative Variations and Customization Ideas
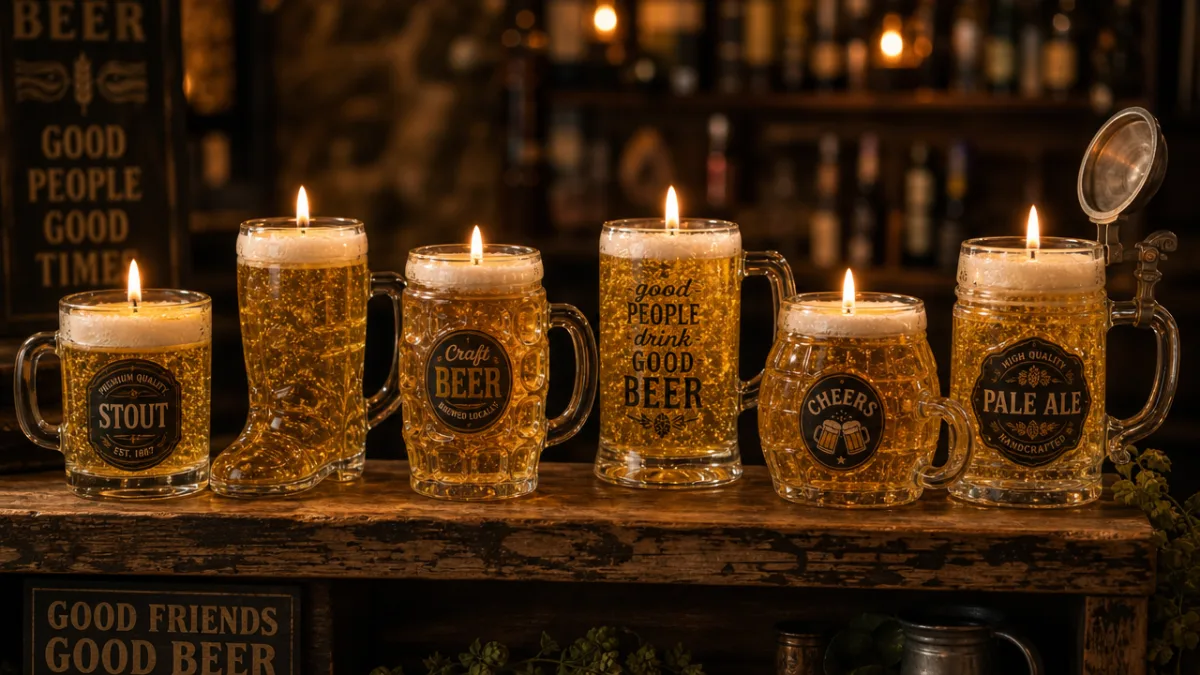
One of the greatest joys of making beer candles is the sheer range of creative variations available to the dedicated crafter. While the classic amber lager look is the most immediately recognizable, you can replicate virtually any style of beer simply by adjusting your dye choice and fragrance profile. Dark stout candles use a deep brown or near-black colorant in the gel layer, while the foam head remains bright white for striking contrast. A hefeweizen-style candle might use a cloudy, slightly opaque gel achieved by adding a tiny amount of white colorant to the mix, mimicking the characteristic haze of an unfiltered wheat beer.
Beyond color variations, you can also customize your beer candles through scent. While a classic hops or beer fragrance oil creates the most thematically consistent result, there is no rule that your candle must smell like actual beer. Many crafters opt for complementary scents like caramel, vanilla, toasted grain, or even citrus for a craft IPA-inspired creation. Layering fragrances can produce complex, interesting scent profiles that evolve as the candle burns. For those who enjoy gifting handmade items, pairing a beer candle with a matching fragrance theme — such as a chocolate stout candle accompanied by a note card describing its chocolate and coffee scent notes — adds a thoughtful, personalized touch.
The choice of container also opens up considerable room for creativity and personalization. Traditional beer mugs with handles are a popular choice because they are immediately recognizable and easy to work with, but the craft is not limited to standard glassware. Vintage beer steins, novelty mugs shaped like boots or barrels, or even repurposed branded glassware from a person’s favorite brewery can all serve as excellent candle vessels. For special occasions, you might consider adding custom labels or tags that replicate the design of a real beer brand, turning your candle into a parody product that doubles as both a functional candle and a humorous decorative piece.
Safety Tips and Best Practices for Working with Gel Wax
Working with gel wax is generally safe when proper precautions are observed, but it does require more care than working with standard paraffin or soy wax due to its higher melting temperature and the fact that it is essentially a petroleum-based product. The most important safety rule is never to overheat gel wax. Heating it beyond its recommended temperature range not only degrades the material but can also present a fire hazard. Always use a dedicated thermometer and never leave your melting pot unattended on the stove. A double boiler setup is strongly recommended over direct heat, as it provides a more controlled and consistent temperature throughout the melting process.
Fragrance loading is another area where caution is essential when working with gel wax. Because of its unique composition, gel wax can only safely hold a limited amount of fragrance oil — typically no more than three to five percent of the total gel weight for high-density varieties. Exceeding this limit can cause the fragrance oil to pool at the bottom of the candle, create cloudiness in the gel, or in worst-case scenarios, become a flammability concern when the candle is burned. Always weigh your fragrance oil precisely using a kitchen scale rather than estimating by volume, and only use fragrance oils that are specifically rated as safe for use in gel wax.
When it comes to burning your finished beer candle, there are a few additional best practices to keep in mind. Always trim the wick to a quarter inch before each burn to prevent excessive flame height and sooting. Never burn a candle for more than four hours at a time, and always keep burning candles in sight and away from flammable materials, drafts, and curious children or pets. Because gel candles are housed in glass containers, the exterior of the vessel will become hot during burning — always place your candle on a heat-resistant surface and never handle it while lit. Following these basic safety guidelines ensures that your beautiful creation can be enjoyed safely for many hours of ambient, glowing light.
Displaying and Gifting Your Beer Candles
A well-crafted beer gel candle is as much a display piece as it is a functional candle, and thinking carefully about presentation can significantly elevate the impact of your creation. For home display, a collection of beer candles in varying styles — a pale lager alongside a rich stout and a hazy IPA — makes for a visually striking grouping on a bar cart, kitchen shelf, or man cave display. The flickering candlelight passing through the amber gel creates a warm, inviting glow that enhances any room’s atmosphere, particularly in the evenings when softer lighting is most appreciated.
Beer candles make exceptional gifts for a wide variety of occasions. They are particularly popular as birthday gifts for craft beer enthusiasts, as groomsmen gifts, as Father’s Day presents, or as housewarming offerings for anyone who appreciates a good pint and a beautifully made handcraft. To gift a beer candle with maximum impact, consider packaging it thoughtfully — nestling the mug in a small wooden crate filled with kraft paper shred, adding a personalized label or tag, and including a small packet of beer nuts or a bottle opener creates a cohesive, themed gift set that feels genuinely special and considered.
For those interested in turning their candle-making hobby into a small business or side income, beer candles are an excellent product to sell at craft fairs, farmers markets, Etsy shops, or local gift stores. Their novelty appeal means they attract attention immediately on a display table, and the combination of a visually striking appearance and a practical use makes them an easy sell to a broad range of customers. Developing a consistent process, sourcing quality materials in bulk, and building a small but varied product line — perhaps offering different beer styles, container types, and fragrance options — can turn this enjoyable hobby into a genuinely rewarding creative enterprise that brings both artistic satisfaction and financial return.
Troubleshooting Common Issues in Beer Candle Making
Even experienced candle makers encounter problems from time to time, and beer gel candles come with their own set of specific challenges that are worth understanding before you begin. The most common issue is air bubbles in the gel layer, which can detract from the realistic, liquid appearance that makes these candles so convincing. Bubbles typically form when the gel is poured too quickly, from too great a height, or when the container is cold. To minimize bubbles, warm your container slightly before pouring, pour slowly and from as low a height as possible, and use a heat gun or kitchen torch very briefly over the surface of poured gel to pop any surface bubbles before they set.
Cloudiness in the finished gel is another frequent frustration for newcomers to the craft. Gel wax is valued precisely for its clarity, so a cloudy result is particularly disappointing. Cloudiness can result from several causes: using the wrong type of fragrance oil (not all fragrance oils are gel-compatible), adding too much fragrance, using colorants not formulated for gel wax, or allowing the gel to cool too slowly in certain conditions. Always purchase fragrance oils and dyes that are explicitly marketed as gel-wax compatible, and stick within the recommended usage rates provided by the manufacturer. If cloudiness persists, experimenting with a different fragrance supplier can sometimes resolve the issue entirely.
Problems with the whipped paraffin foam head can also arise, particularly for those attempting this technique for the first time. If the paraffin is too hot when whipped, it will not hold the airy texture and will flatten out as it cools. If it is too cool, it becomes stiff and difficult to apply convincingly to the surface of the gel. The ideal working temperature tends to fall in a relatively narrow range, so having a reliable thermometer and working quickly once the wax reaches the right consistency are both critical. Practice on a small test batch before attempting your finished piece, and do not be discouraged if the first few attempts do not look quite right — like any craft skill, it improves significantly with repetition and familiarity with the materials.








What do you think?
It is nice to know your opinion. Leave a comment.