










Free Crochet Dragon Christmas Ornament Pattern: A Complete Guide to Crafting Your Magical Holiday Decoration
Introduction to Crochet Dragon Ornaments
If you’re looking to add a little magic to your Christmas tree this year, a handcrafted crochet dragon ornament might be exactly what you didn’t know you needed. These tiny, whimsical creatures have won over crafters everywhere, blending the cozy tradition of crochet with something a little more fantastical. Whether you’ve been crocheting for years or just recently picked up a hook, making your own dragon ornament is one of those projects that feels genuinely satisfying — and the result is something you won’t find in any store.
Crochet ornaments have been a holiday staple for generations — a way to put something personal and handmade on the tree instead of just reaching for another box of generic glass balls. What makes a dragon ornament stand out, though, is that it’s a real departure from the usual bells and snowflakes. Picture a tiny crocheted dragon tucked among the branches, its tail curled around a limb, its little wings catching the light. It becomes a conversation piece, and honestly, a decoration people look forward to spotting every year.
The best part? This pattern is completely free, which means anyone can give it a try. You don’t need expensive materials or a fancy setup — just a few basic supplies, a bit of patience, and a willingness to follow along step by step. The finished ornament looks far more impressive than the time and money it actually takes, which is one of those lovely little secrets the crochet world has always known.
Materials and Tools You Will Need
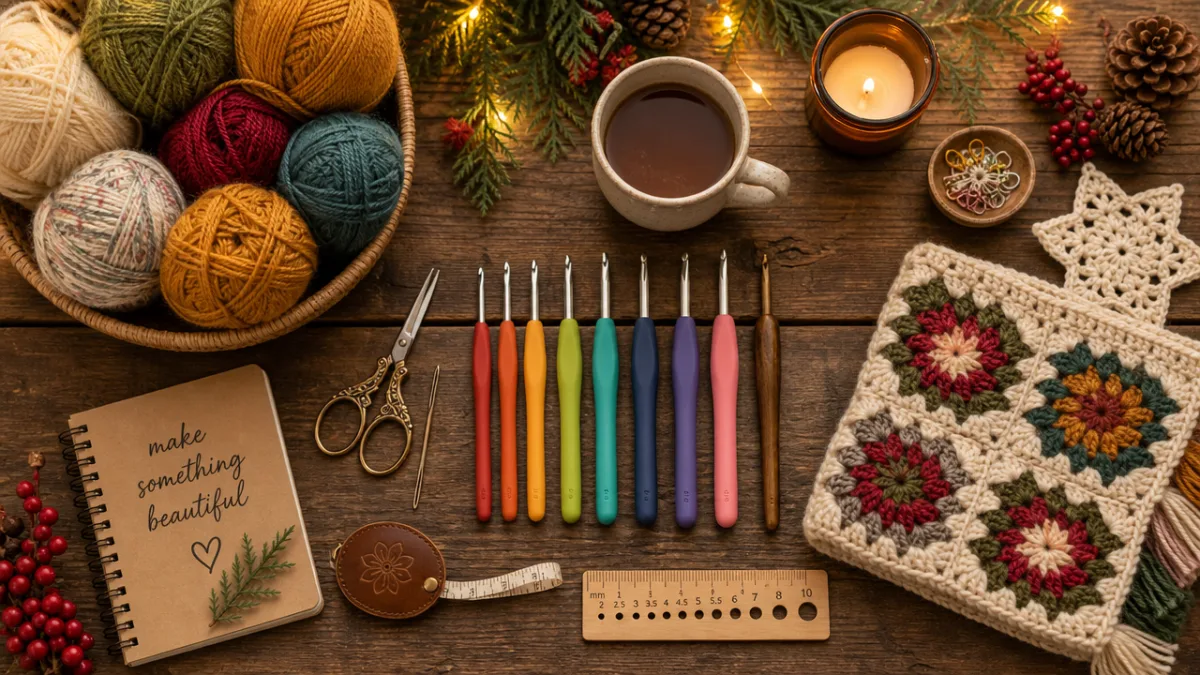
Before you cast on a single stitch, take a few minutes to gather everything you’ll need. It sounds like a small thing, but there’s nothing more annoying than getting halfway through your dragon’s body only to realize you’re out of stuffing or can’t find your yarn needle. A little prep goes a long way toward making the whole experience actually enjoyable rather than a scramble.
For yarn, you’ll want fingering weight or sport weight in your main color — think deep emerald, royal purple, or a rich red if you want that classic jewel-toned dragon look, though honestly any color you love will work beautifully. You’ll also need a smaller amount of a contrasting yarn for the belly, wings, and any accent details. If you want your dragon to really sparkle on the tree, a metallic or glitter yarn is a wonderful choice for those accent areas.
Here’s everything you’ll need to pull this project together:
- Fingering or sport weight yarn in your main color (approximately 50 yards)
- Contrasting yarn for the belly and wings (approximately 20 yards)
- Crochet hook sized 2.5mm to 3.5mm, depending on your yarn weight
- Polyester fiberfill stuffing for the body and head
- Two small black safety eyes or seed beads for the eyes
- Yarn needle for seaming and weaving in ends
- Stitch markers to keep track of rounds
- Small amount of wire or pipe cleaner for the wings (optional but recommended)
- Ribbon or ornament hook for hanging
- Scissors
When it comes to fiber choice, acrylic yarn is honestly a great pick for ornaments. It’s durable, holds its shape well over time, survives a wash if needed, and won’t strain your budget — especially handy if you’re planning to make a whole flock of dragons. Wool or wool-blend yarns are also lovely and give a slightly more textured, rustic feel, but keep in mind they’re generally more delicate and usually need to be hand washed, so factor that in depending on who’ll be handling the finished ornament.
Understanding the Basic Crochet Stitches
If you’re new to crochet — or just haven’t picked up a hook in a while — this section is worth reading through before you dive in. Even seasoned crafters sometimes find it helpful to review the basics when switching to a finer yarn or a smaller hook, both of which require a bit more precision than larger projects. The good news is that this dragon pattern only uses a handful of standard stitches, so once you’ve got those down, the whole thing feels very manageable.
The starting point for almost every amigurumi-style project, including this one, is the magic ring (also called a magic circle or adjustable ring). It lets you begin crocheting in the round without leaving a hole at the center of your work, which matters a lot when you’re making something like a dragon’s head or body. To make one, you loop the yarn around your fingers, insert your hook through the loop, draw up a working loop, chain one to anchor it, then work your first round of single crochets into the ring before pulling the tail tight to close up the center.
The main stitches you’ll use throughout this pattern are:
- Chain (ch): The most basic crochet stitch, used for turning chains and some decorative elements like the dragon’s horns or spines.
- Single Crochet (sc): The workhorse stitch of amigurumi, used to create the main body, head, limbs, and tail of the dragon.
- Increase (inc): Two single crochet stitches worked into the same stitch to increase the width of your work and create rounded shapes.
- Decrease (dec): Two stitches worked together as one to reduce width and create tapered shapes at the ends of the tail or limbs.
- Slip Stitch (sl st): Used primarily to join rounds or to move your working yarn to a different position without adding height.
One thing that makes a real difference with small amigurumi work is keeping your tension consistent. Too loose, and you’ll start seeing gaps in the fabric where the stuffing peeks through — not a great look. Too tight, and the yarn fights you the whole way and the finished piece ends up stiff instead of soft and charmingly plump. If you’re unsure where your tension lands, it’s worth crocheting a small swatch first to get a feel for what works best with your yarn and hook combination before committing to the actual project.
Step-by-Step Dragon Ornament Pattern
Alright, supplies gathered, stitches refreshed — now it’s time to actually make a dragon. This pattern is worked in continuous rounds unless the instructions say otherwise, meaning you won’t join at the end of each round with a slip stitch. Instead, just use a stitch marker to flag the beginning of each round and move it up as you go. This gives you a smoother, more seamless fabric that really suits the soft, rounded shapes of the dragon’s body parts.
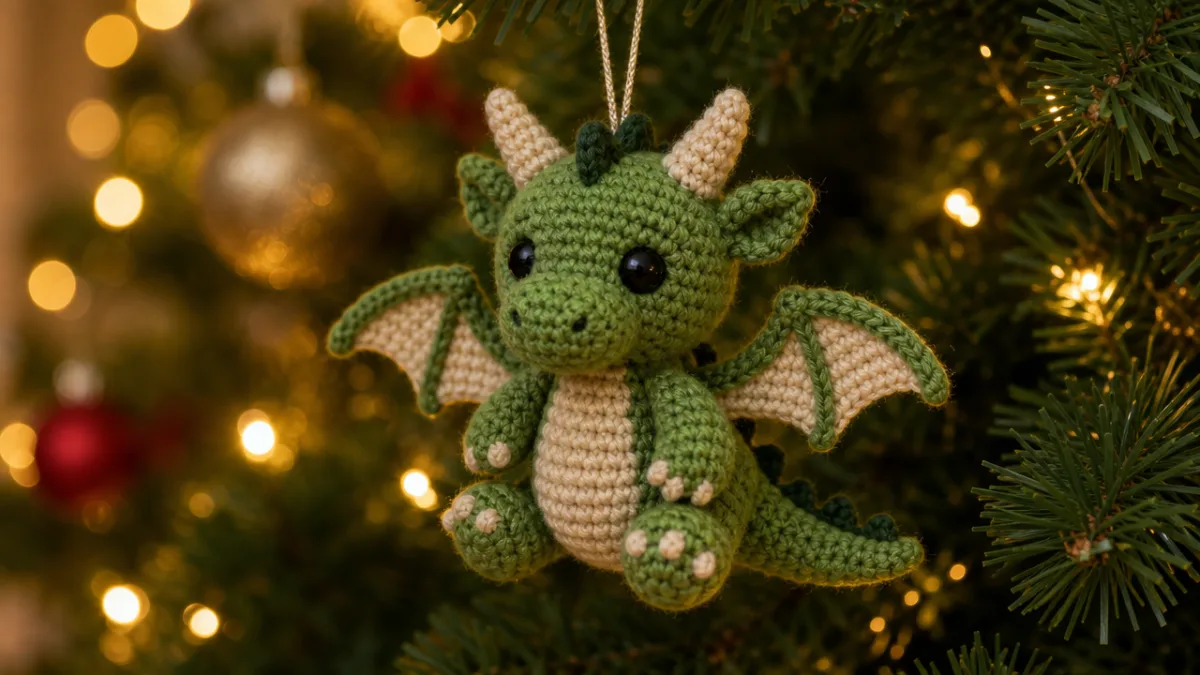
Start with the head, which is the most involved piece and also the most visible. Make a magic ring and work six single crochets into it, then pull the tail closed. Round two is all increases — work two stitches into every stitch to bring your total up to twelve. Keep increasing at regular intervals over the next few rounds until you have a round, apple-shaped head about two centimeters across. Before you go any further, insert your safety eyes between rounds three and four, spacing them roughly six stitches apart for a face that looks balanced and expressive.
The body is built the same way — magic ring, gradual increases, then straight rounds to get that barrel-shaped torso. It should end up a touch larger than the head, which gives you those classic amigurumi proportions where the oversized head is part of the charm. Before you close everything up, stuff both the head and body firmly with fiberfill, coaxing them into nice round shapes with your fingers as you go. Then use your yarn needle to sew the head onto the body at the neck, making several passes with your yarn to keep the join nice and secure.
The legs, tail, and wings are each made separately and then attached once the main body is assembled. The legs are little stubby cylinders that give the dragon a wonderfully squat, cute silhouette. The tail is a tapered tube — if you curl it gently while the yarn is still slightly damp, it’ll hold that curved shape permanently once it dries. The wings are the most interesting part to make because they’re worked flat in rows rather than in the round, producing leaf-shaped pieces you can thread with wire or pipe cleaners along the edges to give them structure and a bit of three-dimensional lift.
Finishing Techniques and Embellishment Ideas
Once all the pieces are assembled, you’re in the home stretch — but don’t rush this part. The finishing touches are honestly what take a crochet project from “okay, that’s a yarn thing” to “oh wow, I need to know where you got that.” A little extra attention here makes a big difference, turning a collection of connected yarn pieces into a dragon with actual personality.
Start by embroidering the nostrils — a couple of French knots in black or dark gray yarn at the tip of the snout does the job nicely. A small embroidered smile or hint of teeth in white yarn adds a ton of character to the face. Some people like to add tiny eyelashes above the safety eyes using short loops of black yarn; others prefer to dot a tiny spot of white fabric paint or correction fluid onto the eye for a sparkling, lifelike highlight. Both look great, so go with whatever feels right to you.
From there, the embellishment options are really only limited by your imagination. Here are a few ideas to get you started:
- Attach tiny metallic star or snowflake buttons along the dragon’s back for a festive, holiday-appropriate touch
- Use dimensional fabric paint to add scales or other texture details to the body after assembly
- Sew a tiny Santa hat from red and white felt scraps onto the dragon’s head for a seasonal character
- Add a personalized tag with the year and recipient’s name to make the ornament a meaningful gift
- Incorporate beads or sequins into the wing design for extra sparkle and visual interest
- Use glow-in-the-dark yarn for the fire the dragon is “breathing” using a small length of orange and yellow yarn
When you’re happy with everything, it’s time to add the hanging loop. A simple ribbon threaded through the top of the dragon’s head with your yarn needle is clean and elegant. If you prefer a more traditional look, a small metal ornament hook clipped onto a short chain-stitch loop works just as well. Either way, make sure whatever you use is attached securely enough to hold the weight of the ornament without slipping or stretching over time.
Caring for and Displaying Your Dragon Ornament
You’ve put real time and care into making this little dragon, so it’s worth thinking about how to keep it looking great for years to come. Unlike a plastic ornament you can chuck into a storage bin without a second thought, a crocheted piece deserves a little more consideration when the season wraps up.
When you’re taking down the tree, wrap your dragon gently in acid-free tissue paper rather than just tossing it in with everything else. That tissue paper protects the fibers from dust, moisture, and getting rubbed against harder ornaments during storage. Tuck the wrapped dragon into a small cardboard box or a dedicated ornament storage container where it won’t get squashed under heavier decorations. Keep it somewhere cool and dry, away from direct sunlight, and the colors and fibers should stay in great shape season after season.
On the tree itself, pick a branch sturdy enough to hold the ornament without drooping — the inner branches, where they’re thicker, are usually a safer bet for heavier pieces. And give your dragon a spot where it can actually be seen. Since it’s one of a kind, it deserves a place of honor where people can appreciate the work that went into it, not a spot buried in the back where it goes unnoticed.
Sharing Your Craft and Building Community
One of the best things about the crochet world is how freely people share their enthusiasm, their patterns, and their encouragement with each other. When your dragon is finished, consider sharing some photos on Instagram, Pinterest, or Facebook — the crochet communities on those platforms are genuinely warm and excited to see what people are making. Throw in a few relevant hashtags and you might end up inspiring someone who’s never tried crochet before to give it a shot.
If you prefer something a bit more in-person, look around for a local knit or crochet group — they meet in libraries, coffee shops, and community centers more often than you might expect. Showing up with your finished dragon is a great conversation starter, and the ripple effect of one person sharing a pattern they love can be pretty wonderful to watch. There’s something special about a room full of people trading tips and getting excited about each other’s projects.
You might also think about making a few extra dragons as handmade gifts. A store-bought ornament is fine, but a handmade one says something different entirely — it tells the person you cared enough to spend actual time on them. You can tailor each one with colors and details that suit the recipient, making every dragon its own little personalized treasure. In a world full of mass-produced everything, that kind of thoughtfulness really does stand out, and a crochet dragon ornament is about as memorable a holiday gift as it gets.








What do you think?
It is nice to know your opinion. Leave a comment.